World Peace Cookies

wpcwrapped.jpg Lots of thank yous in this post! First, thanks to Sarina for pointing out that today is National Don't Cry Over Spilled Milk Day. I know, it's apropos of absolutely nothing, but it had to be said. Second, thanks to everyone for the birthday wishes! Now that I've got a quarter century worth of silliness behind me, my little bro loves to call me an old fart, and I guess I am. 25, baby!

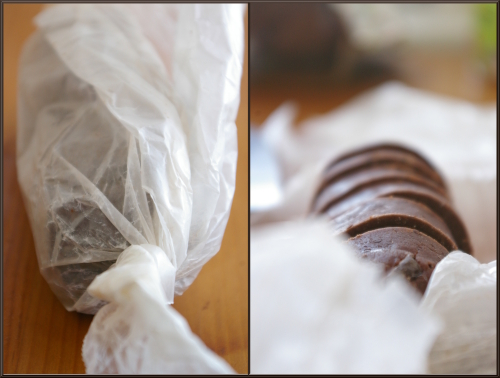
Now, onto the more relevant thanks: Thank heavens for Pierre Herme and Dorie Greenspan. If you're scratching your head and wondering, "who?" then you'd better catch yourself up to speed. Pierre Herme: world-famous pastry chef and dessert god. Dorie Greenspan: baker, cookbook author, and chronicler of both Pierre's unforgettable creations and her own. Exhibit A: Dorie Greenspan's fantastic book, Paris Sweets, in which she includes Pierre Herme's best-ever chocolate cookies (there called Korova Cookies). Exhibit B: Dorie's latest book, Baking: From My Home to Yours, in which the same recipe appears under a new name: "world peace cookies." The new nomenclature implies that enemies would find it tough to argue with a plate of these cookies in front of them; however, fight me for one of these cookies, and I guarantee, YOU WILL LOSE. wpcstack.jpg
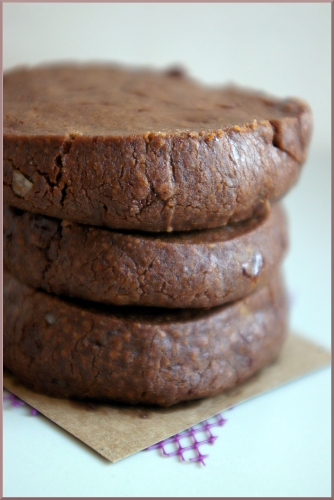
What's to love? Let me count the things. 1. World peace cookies are intensely chocolate-y. I mean, there's a whole lot of cocoa and chocolate in 'em. 2. They're specked not with chocolate chips, but with chopped chocolate. This makes eating them far more exciting; when your lips hit chocolate, you never know whether it'll be just a speck or a big 'ol hunk. 3. They're peppered with salt (as it were) -- enough to taste markedly, fantastically, salty. The salt bounces around on your tongue, making the chocolate notes even more pronounced. 4. With no eggs in the dough, the cookies are rather delicate, yielding to the slightest pressure and melting in your mouth. 5. What, you need another reason? Make them already!

wcfunwrapped.jpg

World Peace Cookies Excerpted from Baking: From My House to Yours by Dorie Greenspan (Houghton Mifflin, 2006). Copyright 2006 by Dorie Greenspan.

Makes about 36 cookies

Here's what Dorie had to say about the cookies: "I once said I thought these cookies, the brainchild of the Parisian pastry chef Pierre Hermé, were as important a culinary breakthrough as Toll House cookies, and I've never thought better of the statement. These butter-rich, sandy-textured slice-and-bake cookies are members of the sablé family. But, unlike classic sablés, they are midnight dark — there's cocoa in the dough — and packed with chunks of hand-chopped bittersweet chocolate. Perhaps most memorably, they're salty. Not just a little salty, but remarkably and sensationally salty. It's the salt — Pierre uses fleur de sel, a moist, off-white sea salt — that surprises, delights and makes the chocolate flavors in the cookies seem preternaturally profound.

When I included these in Paris Sweets, they were called Korova Cookies and they instantly won fans, among them my neighbor Richard Gold, who gave them their new name. Richard is convinced that a daily dose of Pierre's cookies is all that is needed to ensure planetary peace and happiness."

* 1 1/4 cups all-purpose flour * 1/3 cup unsweetened cocoa powder * 1/2 teaspoon baking soda * 1 stick plus 3 tablespoons (11 tablespoons) unsalted butter, at room temperature * 2/3 cup (packed) light brown sugar * 1/4 cup sugar * 1/2 teaspoon fleur de sel or 1/4 teaspoon fine sea salt * 1 teaspoon pure vanilla extract * 5 ounces bittersweet chocolate, chopped into chips, or a generous 3/4 cup store-bought mini chocolate chips

1. Sift the flour, cocoa and baking soda together.

2. Working with a stand mixer, preferably fitted with a paddle attachment, or with a hand mixer in a large bowl, beat the butter on medium speed until soft and creamy. Add both sugars, the salt and vanilla extract and beat for 2 minutes more.

3. Turn off the mixer. Pour in the dry ingredients, drape a kitchen towel over the stand mixer to protect yourself and your kitchen from flying flour and pulse the mixer at low speed about 5 times, a second or two each time. Take a peek — if there is still a lot of flour on the surface of the dough, pulse a couple of times more; if not, remove the towel. Continuing at low speed, mix for about 30 seconds more, just until the flour disappears into the dough — for the best texture, work the dough as little as possible once the flour is added, and don't be concerned if the dough looks a little crumbly. Toss in the chocolate pieces and mix only to incorporate.

4. Turn the dough out onto a work surface, gather it together and divide it in half. Working with one half at a time, shape the dough into logs that are 1 1/2 inches in diameter. Wrap the logs in plastic wrap and refrigerate them for at least 3 hours. (The dough can be refrigerated for up to 3 days or frozen for up to 2 months. If you've frozen the dough, you needn't defrost it before baking — just slice the logs into cookies and bake the cookies 1 minute longer.)

Getting Ready to Bake:

5. Center a rack in the oven and preheat the oven to 325 degrees F. Line two baking sheets with parchment or silicone mats.

6. Using a sharp thin knife, slice the logs into rounds that are 1/2 inch thick. (The rounds are likely to crack as you're cutting them — don't be concerned, just squeeze the bits back onto each cookie.) Arrange the rounds on the baking sheets, leaving about 1 inch between them.

7. Bake the cookies one sheet at a time for 12 minutes — they won't look done, nor will they be firm, but that's just the way they should be. Transfer the baking sheet to a cooling rack and let the cookies rest until they are only just warm, at which point you can serve them or let them reach room temperature.

wpcslice.jpg

Ginger Spice Cookies

ginger-cookie-2.JPG I'm going away for a few days this week, and wanted to leave D with an ample supply of goodies for while I'm gone, so yesterday was a non-stop baking marathon chez moi. I'll admit that I find myself constantly reverting to tried-and-true recipe favorites, like those cranberry cornmeal cookies and whole wheat sables. But these days, when making an old recipe means no blog post, I'm shockingly motivated to seek out new, potentially-delicious recipes. Save the occasional failure and the very infrequent disaster, my adventurousness has been paying off.

As it happens, the only new recipe I made this weekend involved eggplant and feta cheese, so no, it's not a cookie recipe. But that's another story for another day. The cookies I made yesterday are all old favorites that have somehow slipped to the bottom of my mental stack, and ginger spice cookies top this list of wonderful but forgotten cookies. No sooner had I sliced up the crystalized ginger than my ginger spice memories came flooding back. After taking a warm, moist, molasses-y bite, I doubted that I'd ever forget these cookies again.

Some prefer a ginger snap (so called for the sound its thin size and crispy texture allow), but I favor the soft yet dense cookies this recipe produces. If you make them small or bite-sized, as I did, reduce the cooking time by about 3 minutes. One more note: while it never occured to me until just now, I bet these cookies would really kiss you if you added some orange zest to them -- maybe a tsp or so for the whole batch. If you try it, leave a comment and let me know how they came out!

ginger-cookie-stack.JPG

Ginger Spice Cookies from Epicurious; makes about 30.

  • 2 cups all purpose flour
  • 2 1/2 teaspoons ground ginger
  • 2 teaspoons baking soda
  • 1 teaspoon ground cinnamon
  • 1 teaspoon ground cloves
  • 3/4 teaspoon salt
  • 3/4 cup chopped crystallized ginger
  • 1 cup (packed) dark brown sugar
  • 1/2 cup vegetable shortening, room temperature
  • 1/4 cup (1/2 stick) unsalted butter, room temperature
  • 1 large egg
  • 1/4 cup mild-flavored (light) molasses
  • Sugar

ginger-dough.JPG

  1. Combine first 6 ingredients in medium bowl; whisk to blend. Mix in crystallized ginger. Using electric mixer, beat brown sugar, shortening and butter in large bowl until fluffy. Add egg and molasses and beat until blended. Add flour mixture and mix just until blended. Cover and refrigerate 1 hour.
  2. Preheat oven to 350°F. Lightly butter 2 baking sheets. Spoon sugar in thick layer onto small plate. Using wet hands, form dough into 1 1/4-inch balls; roll in sugar to coat completely. Place balls on prepared sheets, spacing 2 inches apart.
  3. Bake cookies until cracked on top but still soft to touch, about 12 minutes. Cool on sheets 1 minute. Carefully transfer to racks and cool. (Can be made 5 days ahead. Store airtight at room temperature.)

ginger-cookie.JPG

Cranberry Cornmeal Cookies

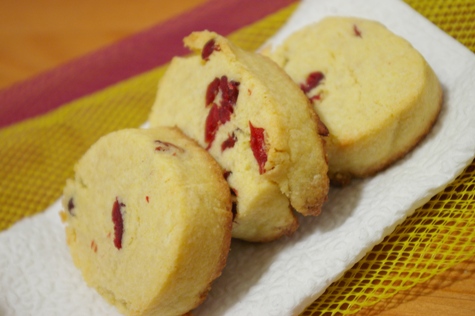
stackI am a total sucker for cornmeal. Perhaps it's a texture thing: cornmeal is both grainy (in a good way) and soft. It's responsible for creamy, buttery, polenta, and for crumbly, steaming-hot cornbread. Substitute 1/2 a cup of flour for an equal amount of cornmeal in your go-to pancake recipe, and I guarantee you'll be pleasantly surprised. If you like cornmeal, that is. D conveniently hates cornmeal. Isn't it funny how things work out?

on the sheet

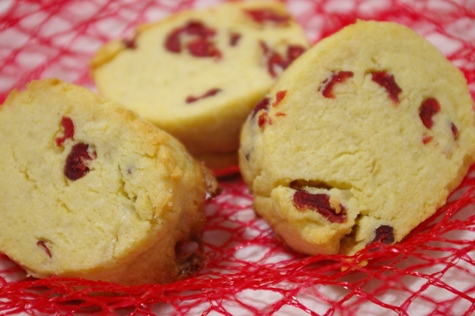
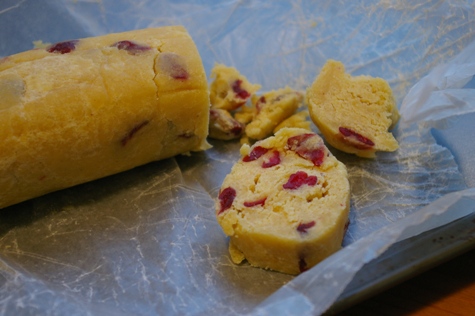
Even the confessed cornmeal hater didn't hate the cookies I made last night. In fact, D said "they're good, they're just not cookies." (Cookies=chocolate chip cookies, for those in need of some translation.) Admittedly, these aren't soft and chewy like tollhouse or the delightful blue chip variety that Deb made this week, but they're not meant to be. Cranberry cornmeal cookies have a texture more like shortbread: buttery and not overly sweet, with an irresistible melt-in-your-mouth quality. And cornmeal sets them apart from your average icebox cookie. For one thing, it turns the cookies a pleasing shade of yellow. It also gives each bite a coarseness that can't be achieved with regular or whole wheat flour. Finally, lemon zest and cranberries team up with cornmeal's flavor so harmoniously that the final product is a song in your mouth. Have cornmeal and I won you over yet? Don't think I can't hear the murmurs from the peanut gallery...Another cookie? But it was just the holidays, and I ate so many cookies, and now I've got cookie chub and I can't look at another sweet, so can't you post some salad recipes? The answer is yes, but not right now. People, you always have room for more cookies. I promise to post a healthful and delicious dinner idea this weekend, just as soon as I can take some better pictures of it. For now, find some room in your tummy because these are scrumptious. Take it from me -- or take notice of cornmeal cookies popping up all overtheplace. (That last link is where I discovered the recipe -- thanks, Carol!) They're really, really worth a try.

p.s. If you're really hankering for healthy recipes, try some hearty carrot soup, href="http://www.notderbypie.com/indian-round-1-potato-and-eggplant-curry/">potato and eggplant curry,asian cabbage slaw, or a simple recipe for delicata squash.

hi, pretty cookie!

Cranberry Cornmeal Cookies makes about 20 cookies -- some people got way more, I dunno how

  • 1 stick unsalted butter, softened
  • 1/2 cup sugar
  • 1 tsp lemon zest
  • 1/4 tsp salt
  • 2 large egg yolks
  • 1/2 cup cornmeal
  • 1 1/4 cups plain all purpose flour
  • 1/2 cup dried cranberries
  1. Add softened butter to sugar in a mixer and whizz until just combined.
  2. Add zest, yolks and salt, whizz again just for about 5-6 seconds.
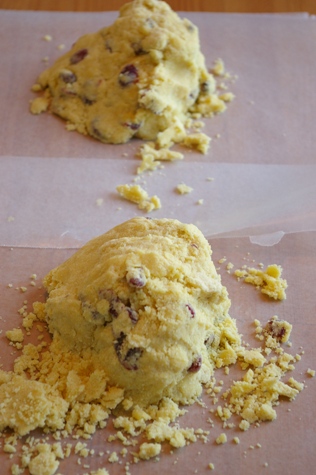
  3. Then add the flour, cornmeal, and cranberries. Whizz again until it all comes together, but only just. Make sure you do not over beat the dough!
  4. dough in the mix

  5. Knead the dough into 2 balls, then using some cling wrap (I used wax paper, but don't), cover and shape the balls into 2 mounds.
  6. cornmeal-lumps.JPG

  7. Use a rolling motion to smooth and neaten the cylinders. It helps to wrap the cylinders with 3-4 folds of the cling wrap.
  8. roll

  9. Chill in the freezer for about 45 minutes.
  10. Preheat the oven to 350 degrees.
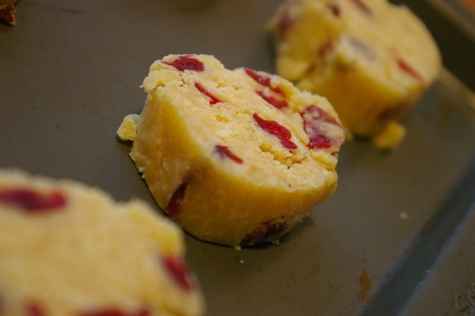
  11. Slice about 1/2 to 2/3-inch slices, and place 1 inch apart on an ungreased baking sheet.
  12. Bake for 15 minutes, until the edges are golden.
  13. Remove, and allow to cool completely before storing.
  14. Cookies will keep, packed and sealed, for upto 1 week (maybe more, if you can let them last that long.)The dough will keep in the freezer for at least 1 month...I've never had it around for longer.

Tip: resist the temptation of adding more than the recommended amount of cranberries, as this would undermine the quality of the texture.

Chocolate Pretzel Success

A while back, Deb of Smitten Kitchen fame blogged about the shortcomings of Martha Stewart's chocolate pretzel cookie recipe. "Dry, bland, and not chocolatey enough" and more colorful adjectives described a cocopretzel that just didn't cut it. She suggested trying to make pretzels out of Dorie Greenspan's very flavorful and buttery chocolate rollout cookies, which I had been planning to make later that day. I figured what the hell? Chocolate pretzels they would be.

Needless to say, nothing is ever that easy. Dorie's chocolate rollout cookies are awesome cookies, but they make lousy pretzels. In the oven, they flatten out and spread a bit, losing their pretzel shape, and once cooled, they've got the texture of great cookies, not crunchy, crispy pretzels. Pretzels: 1. Rivka: 0. With disappointment under my belt, I decided to give chocolate pretzels a second chance -- but not without a great deal of research. I googled several different phrasings of "chocolate pretzel cookie" and found total rubbish -- not even one decent recipe came up. I checked all my cookbooks with no luck. Left only to my own devices, I decided to develop a chocolate pretzel recipe.

My strategy was pretty simple (um, amateur?). I wrote out the ratio of butter:flour:cocoa:sugar:eggs in each recipe, noted the addition of baking powder and chocolate to Dorie's recipe and water and espresso to Martha's, and did my best to create a compromise between the two recipes that maintained the pretzely texture without sacrificing (much of) the flavor. And friends, you'll be thrilled to know that I succeeded! Yep, this super amateur method actually, to my total shock, worked!

Rivka's chocolate pretzel recipe (that's right, it's named after me!) yielded a chocolate pretzel that kept its round shape and its relatively toothsome crumb, but also packed a chocolatey punch from lots of cocoa and even a bit of chocolate. I'm pretty sure this is the first time I've developed a recipe from scratch -- so pat me on the back, will ya? And then run home and make these. They'll surely spread some holiday cheer (and maybe some chocolate onto your face, too).

Rivka's CocoPretzels makes 18 pretzels Ingredients:

  • 1 1/2 sticks butter
  • 1/2 cup sugar
  • 1/4 cup brown sugar
  • 1 egg
  • 1/4 tsp. vanilla extract
  • 1 or 2 oz. good quality chocolate (I used ghiradelli chips, and 1 oz is about 30 chips; the second time around, I used 2 oz and they were even better!)
  • 1/4 tsp. salt
  • 1/2 cup cocoa
  • 2 cups flour
  • 1/2 tsp. baking powder
  • (1 egg yolk, for brushing)
  1. In a stand mixer with the paddle attachment or with an electric mixer, whip butter until smooth, about 2 minutes.
  2. Add sugars and whip until incorporated, 2 minutes.
  3. Meanwhile, melt chocolate over double boiler.
  4. Add egg, vanilla and salt; mix until combined, about 20 seconds.
  5. Add chocolate; mix until combined, about 30 seconds, on low speed.
  6. Add cocoa, flour, and baking powder. Mix on low speed until completely blended, about two minutes or less.
  7. Wrap dough in plastic wrap and refrigerate at least 2 hours, or freeze for 45 minutes.
  8. Remove dough from fridge/freezer. Break off 1 1/2 Tbsp.-size chunks. (Alternatively, do as I did and slice the dough into relatively equal portions from the start.
  9. roll into 10-inch logs, about 1/3-1/2 an inch thick. DO NOT do as I did and roll them all out before shaping, because they'll get stiff and crack when you try to shape them. Shape as you go!
  10. Take the edges in your hand, bring them together, and twist them twice, leaving the tips dangling.
  11. Bring the twist down onto the rounded pretzel, stick the tips to the pretzel, and transfer to a non-stick or lined baking sheet.
  12. Brush with a very light coat of egg yolk mixed with water and sprinkle with rock sugar if you desire.
  13. Bake at 325 degrees for 15 minutes, until they've just begun to harden.
  14. Move delicately from baking sheet onto cooling rack, and allow to cool completely before serving. (Don't let that stop you from trying one...or two.)