A Brittle Perfect for Fall

When a blogger-hero of mine, Danielle from Habeas Brulee, posted a while back about pumpkin seed cocoa nib brittle, I knew I'd be making it sooner or later. For starters, the recipe is uber-simple. Just combine sugar and water with a bit of cream of tartar, heat 'em up, let them turn golden, add the rest of the ingredients, and pour out onto a sheet of silpat (or, in my case, parchment paper) in a thin layer. The hardest part of the recipe is waiting for the brittle to harden before digging in. Even if it weren't easy, this brittle would be worth making. The sheer fact that it contains cocoa nibs makes it absolutely to die for. Cocoa nibs are raw, unsweetened cocoa beans in little bits that are perfect for everything -- including noshing.

In my experience, brittles made of just water and sugar (without butter or milk) are a bit too sugary for me. That's why I decided to add some dried black currants, those perfectly tart berries with quite a bit of zing. In keeping with the other proportions, I added 1/4 cup. I really enjoyed their tartness, and they cut the sweetness exactly as I'd hoped.

I also happened to have some already-roasted squash seeds, which had some sugar, salt, cayenne and cinnamon on them. They were perfect for this brittle, and I actually added a pinch of salt as well. It's still super-sweet, and Danielle's right -- it would be perfect atop a cheesecake or some other less-sweet dessert. That said, this is one classic fall treat you'll be sorry to miss.

Squash Seed Cocoa Nib Black Currant Brittle originally at Habeas Brulee (adapted from Essence of Chocolate: Recipes for Baking and Cooking with Fine Chocolate</a> by Robert Steinberg and John Scharffenberger) 1/4 cup raw green pumpkin seeds 1/4 cup cocoa nibs 1/4 cup black currants (can sub other dried berries) 1/2 cup sugar 1/4 cup water a pinch of salt 1/8 tsp cream of tartar A pinch of cayenne

Toast the pumpkin seeds in a dry pan over medium heat, shaking very frequently, until they begin to pop. Set them aside to cool.

Set up a baking sheet covered with a Silpat or piece of parchment paper (something non-stick and flexible).

Bring the sugar, water, and cream of tartar to a simmer together in a small saucepan. Continue to simmer until it starts to develop a nice light caramel color that appeals best to you. Stir in the other ingredients, then quickly pour it all out onto the baking sheet and spread it thin as you can with a silicone spatula or wooden spoon.

Let it cool and harden before breaking off pieces to serve and devour.

Or you can just play with the sugar while you wait....
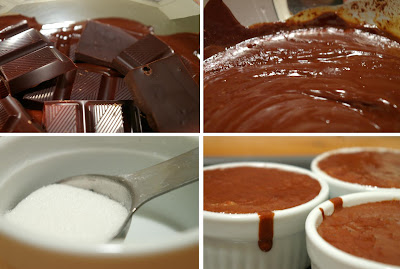
Chocolate Souffle, much improved!

Ghirardelli in the double boiler, egg whites in the mixer, and D asking for Duncan Hines yellow cake to no avail...it all can only mean one thing: chocolate soufflé. That's right folks, I'm at it again.

Major differences between my first attempt and this recipe were the amounts of egg whites, milk, cream, and chocolate. Specifically: for the same amounts of butter, sugar, and egg yolks, recipe 2 had half the cornstarch, double the egg whites, 3x the chocolate, no cream, and 5x the whole milk instead. Yes, obviously the more chocolate, the better; but I'd also guesstimate that less cornstarch means less cake-y; more egg whites means lighter; more whole milk and less cream, again, lighter. In short, this is the kind of soufflé I've been craving all along. And hey, it only took one mess-up to hit the jackpot!
I was a bit concerned that when I was ready to fold in the egg whites, the chocolate mixture was still warm. (If you add egg whites to a warm batter, the air that you've whipped into the whites can quickly escape, leaving you with flat, heavy batter.) However, my fears did not materialize, and the soufflé held its volume quite nicely. The result was light, fluffy, warm, and ever so sinfully chocolate-y. So to all those who think souffle is this uber-delicate little gem never to be tampered with, ha! It can handle the heat.
Truthfully, people. There's almost nothing like taking the first bite out of a chocolate soufflé and watching the rest "relax" in the ramekin. Try it yourself; it's not as hard and scary as you might think. And, if it's not clear from my enthusiasm, the results are worth one or two mess-ups.

Chocolate Souffle

from Epicurious
serves 6.
  • 1 tablespoon unsalted butter, softened
  • 10 1/2 ounces (10 squares) extra-bittersweet chocolate
  • 1 1/3 cups whole milk
  • 1 tablespoon cornstarch
  • 3 large egg yolks, room temperature, lightly beaten
  • 6 large egg whites, room temperature
  • 1/3 cup sugar; more for soufflé ramekins

1. Heat oven to 400 degrees. Butter and sugar six 6-ounce soufflé ramekins. Place on a rimmed baking sheet; set aside.

2. In a double boiler over medium heat, melt the chocolate until smooth. Remove from the heat and keep warm. (I found I had to stir it around with a fork every so often to keep it from getting chunky, but that will depend on your chocolate. The higher percentage of cocoa, the more you may need to stir.)

3. In a medium heavy-bottom saucepan combine milk and cornstarch. Stir well with a wooden spoon to combine. Bring the mixture to a boil over medium heat, stirring continuously, until thick.

4. Remove milk mixture from the heat, remove any skin that may have formed on top, and stir in warm melted chocolate. Let cool slightly. Add a bit of this mixture to the egg yolks to temper them, then add the lightly beaten egg yolks back into the milk mixture and stir until well combined.

5. In the bowl of a heavy-duty mixer, whip egg whites on medium speed until soft peaks form. Slowly add sugar and increase speed to high. Whip until shiny and stiff peaks form, about 3 minutes.

6. Using a whisk, lighten the chocolate mixture with about 1/3 of the beaten egg whites. Stir until well-combined. Using a large rubber spatula, fold in remaining egg whites until just incorporated.

7. Spoon mixture into prepared souffl
 ramekins; the mixture should come up to the top of the ramekin. Transfer filled soufflé ramekins on rimmed baking sheet to oven. Bake until risen, 12 to 15 minutes. Serve immediately.

My quest for the perfect chocolate souffle

Three months of blogging and I actually have managed to not write about chocolate. It's really an embarrassment. Rarely does a day go by when I don't eat the stuff; how have I not blogged about a chocolate recipe yet??

Time to solve that.

Chocolate Souffle may be light and fluffy, but it's one of the richest ways to have your chocolate. When done properly, a delicate crust gives way to light but shockingly-rich innards, which deflate and melt on your tongue. Even better is when it's cut with straight cream at the table...ok, drooling.

I'll sing the praises of chocolate souffle forever, but finding the perfect recipe is proving to be a challenge. That's why this is the first in a series of posts, in which I'll try various recipes for chocolate souffle, rate them, and (hopefully) find or develop a foolproof recipe.

Recipe 1 comes from one of my favorite bloggers, Bea at La Tartine Gourmande. Her version calls for infusing the milk with fresh cardamom pods, which I love but don't have around the house, so I left them out. Here's the rundown:

Pros

  • the batter had a nice, light texture that stood up to a bit of over-mixing
  • the 20-25 minute cooking time was exactly right
  • the recipe called for equal numbers of yolks and whites, which means no egg-parts sitting in the fridge and a very happy Rivka :)

Cons

  • mine didn't rise to the heights that Bea's did. Who wants pouting souffles?
  • I used more chocolate than Bea called for, and my souffles were simply not chocolate-y enough. More chocolate more chocolate!

The search continues...

Lemon curd raspberry tartlets

It is super-duper chilly this morning and fall is finally setting in. Crisp air in my face and the crunch of leaves beneath my feet give me a serious hankering for some pumpkin soup!

But this post is about tartlets.

Everyone makes muffins; nobody makes tartlets. Yes, they're not as quick and easy to make as muffins are, but they're so much cuter and (IMHO) more delicious. Can't compare muffins and tartlets? Yes, yes I can. I just did! Tartlets > Muffins. Make some tartlets!

Here's the good thing about the tartlets I make: they're delicious. Ok, just kidding -- they're also not as time-consuming because the steps overlap with each other, as follows:

make the dough (about 5 minutes in a food processor)
make the filling while you refrigerate the dough
make and bake the tartlet crusts while you refrigerate the filling
let the tartlet crusts cool while you get the filling ready to pipe
fill tartlets and serve

See? Not so bad.

And the lemon curd filling is really not too hard to make. It does involve some pot-watching and some vigorous whisking, but it's worth the effort; whatever extra filling you have after finishing the tartlets is wonderful eaten out of the bowl, just so.

Today's post is about the lemon tartlet in the background of the picture above; the tartlet in the front of the picture is a posting for another day.

Lemon Curd-raspberry tartlets
makes about 25 tartlets.

Tart Crust: taken from Tartelette
1 1/2 cups flour
1/2 cup powdered sugar
1 stick plus 1 Tbsp unsalted butter, chilled and cut into small pieces
1 egg yolk

Blend dry ingredients with a hand or stand mixer. Add butter and blend until mixture resembles coarse meal. Add egg yolk; blend until dough comes together. Wrap in plastic, and refrigerate while preparing ingredients for the tart.

While the dough refrigerates, prepare the curd:

zest of 2 lemons
1/2 cup lemon juice
1/2 cup sugar
2 eggs

1. Bring the zest, lemon juice and sugar to a simmer in a small saucepan.
2. Meanwhile, beat the 2 eggs until light.
3. When all the sugar has dissolved, add some of the hot lemon juice mixture to the eggs by the spoonful while beating the eggs, to temper them (in order to ensure that they don’t get scrambled.)
4. After you’ve added about 10-15 spoonfuls of the hot liquid and successfully incorporated it, pour the egg mixture into the saucepan with the rest of the lemon juice mixture, and bring to a simmer (not a boil) over medium heat until it thickens, about 5 minutes.
5. Transfer to a bowl and refrigerate until cooled completely, at least 1 – 1.5 hrs.

Back to the tarts…

After about half and hour, the tart dough should be just chilled enough that it can be worked with, but will not disintigrate. Take a walnut-sized piece of the dough in your hand, roll it gently into a ball, and, using your thumb, press it into a tartlet mold (in my case, I have a tartlet pan wth 24 molds). Try to ensure that the dough is spread evenly throughout the mold. This will make for even baking.
“Dock” the dough by spearing each tartlet a couple times with a fork – this ensures that they’ll keep their shape as they cook. Bake the empty tarts in a 350 degree oven for 10-15 minutes, until golden.

Assembly:

Scoop cooled lemon curd into a plastic bag, and cut off the very tip of the bag. Hold the bag just above the inside center of a tartlet, and squeeze, raising the bag as the tartlet fills. Repeat for each tartlet.

Top with either fresh raspberries or (as I did) frozen raspberries that I cooked down with a bit of sugar.

Enjoy!