Cranberry Cornmeal Cookies

stackI am a total sucker for cornmeal. Perhaps it's a texture thing: cornmeal is both grainy (in a good way) and soft. It's responsible for creamy, buttery, polenta, and for crumbly, steaming-hot cornbread. Substitute 1/2 a cup of flour for an equal amount of cornmeal in your go-to pancake recipe, and I guarantee you'll be pleasantly surprised. If you like cornmeal, that is. D conveniently hates cornmeal. Isn't it funny how things work out?

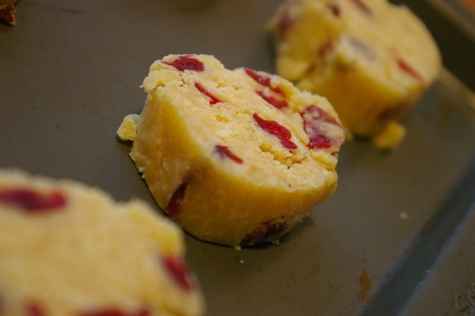
on the sheet

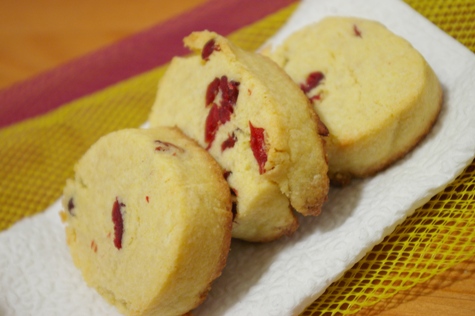
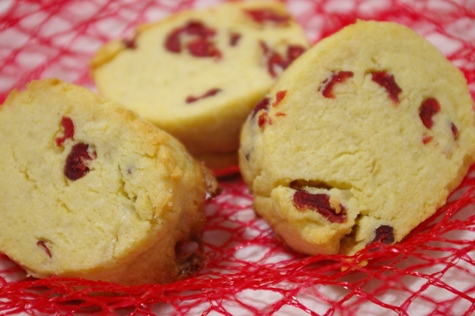
Even the confessed cornmeal hater didn't hate the cookies I made last night. In fact, D said "they're good, they're just not cookies." (Cookies=chocolate chip cookies, for those in need of some translation.) Admittedly, these aren't soft and chewy like tollhouse or the delightful blue chip variety that Deb made this week, but they're not meant to be. Cranberry cornmeal cookies have a texture more like shortbread: buttery and not overly sweet, with an irresistible melt-in-your-mouth quality. And cornmeal sets them apart from your average icebox cookie. For one thing, it turns the cookies a pleasing shade of yellow. It also gives each bite a coarseness that can't be achieved with regular or whole wheat flour. Finally, lemon zest and cranberries team up with cornmeal's flavor so harmoniously that the final product is a song in your mouth. Have cornmeal and I won you over yet? Don't think I can't hear the murmurs from the peanut gallery...Another cookie? But it was just the holidays, and I ate so many cookies, and now I've got cookie chub and I can't look at another sweet, so can't you post some salad recipes? The answer is yes, but not right now. People, you always have room for more cookies. I promise to post a healthful and delicious dinner idea this weekend, just as soon as I can take some better pictures of it. For now, find some room in your tummy because these are scrumptious. Take it from me -- or take notice of cornmeal cookies popping up all overtheplace. (That last link is where I discovered the recipe -- thanks, Carol!) They're really, really worth a try.

p.s. If you're really hankering for healthy recipes, try some hearty carrot soup, href="http://www.notderbypie.com/indian-round-1-potato-and-eggplant-curry/">potato and eggplant curry,asian cabbage slaw, or a simple recipe for delicata squash.

hi, pretty cookie!

Cranberry Cornmeal Cookies makes about 20 cookies -- some people got way more, I dunno how

  • 1 stick unsalted butter, softened
  • 1/2 cup sugar
  • 1 tsp lemon zest
  • 1/4 tsp salt
  • 2 large egg yolks
  • 1/2 cup cornmeal
  • 1 1/4 cups plain all purpose flour
  • 1/2 cup dried cranberries
  1. Add softened butter to sugar in a mixer and whizz until just combined.
  2. Add zest, yolks and salt, whizz again just for about 5-6 seconds.
  3. Then add the flour, cornmeal, and cranberries. Whizz again until it all comes together, but only just. Make sure you do not over beat the dough!
  4. dough in the mix

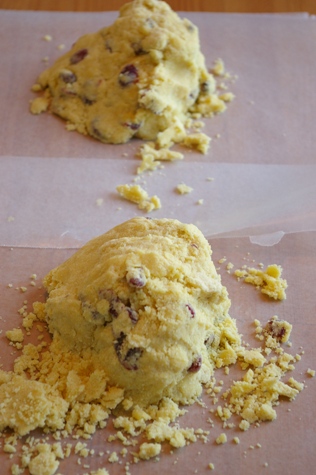
  5. Knead the dough into 2 balls, then using some cling wrap (I used wax paper, but don't), cover and shape the balls into 2 mounds.
  6. cornmeal-lumps.JPG

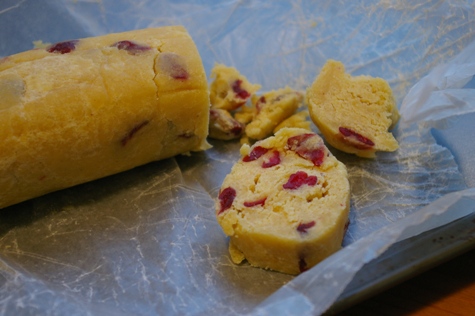
  7. Use a rolling motion to smooth and neaten the cylinders. It helps to wrap the cylinders with 3-4 folds of the cling wrap.
  8. roll

  9. Chill in the freezer for about 45 minutes.
  10. Preheat the oven to 350 degrees.
  11. Slice about 1/2 to 2/3-inch slices, and place 1 inch apart on an ungreased baking sheet.
  12. Bake for 15 minutes, until the edges are golden.
  13. Remove, and allow to cool completely before storing.
  14. Cookies will keep, packed and sealed, for upto 1 week (maybe more, if you can let them last that long.)The dough will keep in the freezer for at least 1 month...I've never had it around for longer.

Tip: resist the temptation of adding more than the recommended amount of cranberries, as this would undermine the quality of the texture.

Blackberry-Pear Clafoutis

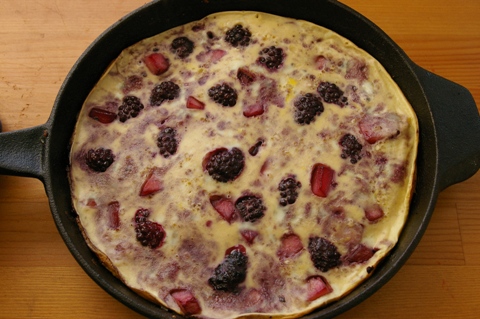
clafoutis Our apartment building overlooks a charming little street packed with bars and restos that's bustling both by day and by night. While it's wonderful to live where things happen, sometimes that means 3am powows and lots of "hoot....rah! hoot...rah!" from drunk frat-boy types. Last night's "visitors" were loud and rowdy, and I got precious little sleep. Needless to say, it was a slow, slow weekend morning chez nous. And slow weekend mornings call for some serious kitchen therapy.

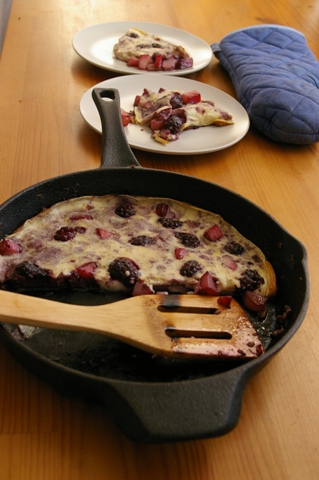
half clafoutis

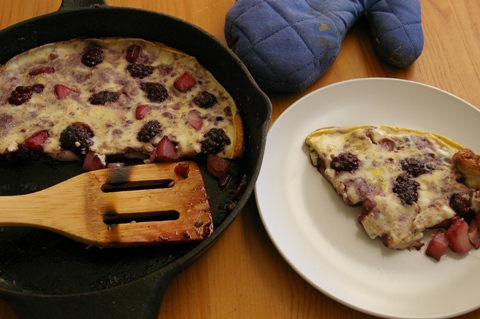
Enter the clafoutis (pronounced cla-FOO-tee), a cross between a pancake and a custard (or, as D. put it, "kind of like a crepe but a little more runny." Yum.) Simple to prepare, beautiful once cooked, and rather fun to eat, a clafouti is where comfort food and luxury meet. It's often served as dessert, but I love it for breakfast on those days when you need more than a spoonful of sugar to wash the previous night down.

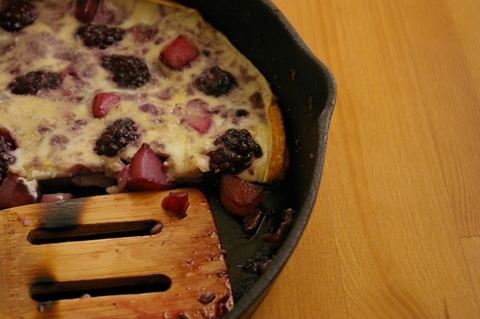
clafoutis in the pan

Clafoutis is traditionally made with cherries, but I love them with pears. And since I really can't just leave a recipe alone, I also mixed in some leftover blackberries, which, along with a little orange zest, made a delightful addition. Yes, clafoutis is just as "grandmotherly" (thanks to Clotide at C&Z for the apt metaphor!) as it sounds. But you know what? So am I a little. And when there's no leftover challah for french toast, when you just don't want to make like those jappy mothers and their egg-white omelets, when oatmeal was your breakfast everyday this week, clafoutis, humble clafoutis, is the perfect choice.

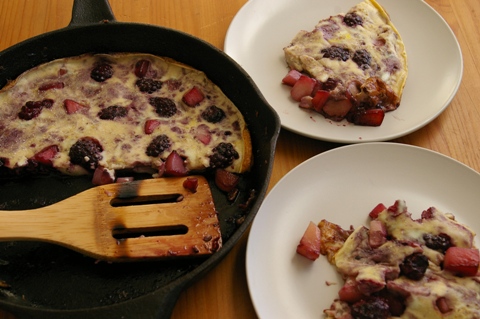
yummy clafoutis

To the drunken, belligerent frat boys who stood on my street corner last night shouting half-coherent obscenities and poorly constructed pick-up lines: if you're reading this, a) I'm impressed that you're already awake, considering your wee-hour ridiculousness and b) thanks to my breakfast this morning, I'm hating you a little less than I would have otherwise.

To the rest of you, my loyal and patient readers: clafoutis can make you just as delightful as I sound now. Don't believe me? Try it for yourself.

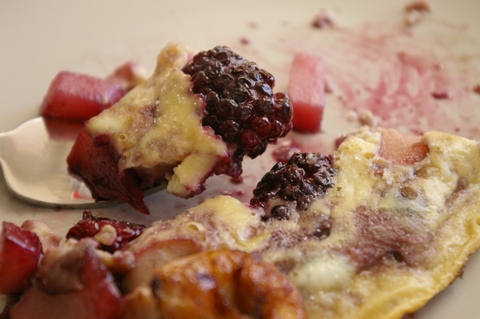
plated clafoutis

Blackberry-Pear Clafoutis adapted from Epicurious serves 2-4

  • 2 pears, not too ripe, diced
  • 1/2 cup blackberries
  • 1/8 cup maple syrup
  • 2 large eggs
  • 3/4 cup half and half or whole milk (if using 2% milk, add an extra Tbsp. flour)
  • 1/2 tsp. vanilla
  • 1/8 cup flour (add an extra Tbsp if using 2% milk)
  • 1/8 cup plus 1 Tbsp. brown sugar
  • 1 tsp. grated orange zest
  • 1 tsp. cinnamon
  • pinch of salt
  1. preheat the oven to 400 degrees.
  2. butter a castiron pan, and over medium heat, cook pears and blackberries until pears brown a bit, about 3 minutes.
  3. pour syrup over fruit, and move pan into the oven for 5 minutes.
  4. Put pan back on the stove and cook over medium-high heat until the syrup has mostly evaporated, about 5 minutes. Turn off stove.
  5. Reduce oven heat to 350 degrees.
  6. Beat eggs, half and half, and vanilla until well incorporated.
  7. Add all but 1 Tbsp sugar and all the flour and mix until there are no lumps. Add cinnamon and zest.
  8. Pour batter over pears. Bake in a 350-degree oven for 40 minutes, until the center is set.
  9. Remove from the oven, sprinkle remaining brown sugar over the top, and serve immediately.

eat up!

Chocolate Pretzel Success

A while back, Deb of Smitten Kitchen fame blogged about the shortcomings of Martha Stewart's chocolate pretzel cookie recipe. "Dry, bland, and not chocolatey enough" and more colorful adjectives described a cocopretzel that just didn't cut it. She suggested trying to make pretzels out of Dorie Greenspan's very flavorful and buttery chocolate rollout cookies, which I had been planning to make later that day. I figured what the hell? Chocolate pretzels they would be.

Needless to say, nothing is ever that easy. Dorie's chocolate rollout cookies are awesome cookies, but they make lousy pretzels. In the oven, they flatten out and spread a bit, losing their pretzel shape, and once cooled, they've got the texture of great cookies, not crunchy, crispy pretzels. Pretzels: 1. Rivka: 0. With disappointment under my belt, I decided to give chocolate pretzels a second chance -- but not without a great deal of research. I googled several different phrasings of "chocolate pretzel cookie" and found total rubbish -- not even one decent recipe came up. I checked all my cookbooks with no luck. Left only to my own devices, I decided to develop a chocolate pretzel recipe.

My strategy was pretty simple (um, amateur?). I wrote out the ratio of butter:flour:cocoa:sugar:eggs in each recipe, noted the addition of baking powder and chocolate to Dorie's recipe and water and espresso to Martha's, and did my best to create a compromise between the two recipes that maintained the pretzely texture without sacrificing (much of) the flavor. And friends, you'll be thrilled to know that I succeeded! Yep, this super amateur method actually, to my total shock, worked!

Rivka's chocolate pretzel recipe (that's right, it's named after me!) yielded a chocolate pretzel that kept its round shape and its relatively toothsome crumb, but also packed a chocolatey punch from lots of cocoa and even a bit of chocolate. I'm pretty sure this is the first time I've developed a recipe from scratch -- so pat me on the back, will ya? And then run home and make these. They'll surely spread some holiday cheer (and maybe some chocolate onto your face, too).

Rivka's CocoPretzels makes 18 pretzels Ingredients:

  • 1 1/2 sticks butter
  • 1/2 cup sugar
  • 1/4 cup brown sugar
  • 1 egg
  • 1/4 tsp. vanilla extract
  • 1 or 2 oz. good quality chocolate (I used ghiradelli chips, and 1 oz is about 30 chips; the second time around, I used 2 oz and they were even better!)
  • 1/4 tsp. salt
  • 1/2 cup cocoa
  • 2 cups flour
  • 1/2 tsp. baking powder
  • (1 egg yolk, for brushing)
  1. In a stand mixer with the paddle attachment or with an electric mixer, whip butter until smooth, about 2 minutes.
  2. Add sugars and whip until incorporated, 2 minutes.
  3. Meanwhile, melt chocolate over double boiler.
  4. Add egg, vanilla and salt; mix until combined, about 20 seconds.
  5. Add chocolate; mix until combined, about 30 seconds, on low speed.
  6. Add cocoa, flour, and baking powder. Mix on low speed until completely blended, about two minutes or less.
  7. Wrap dough in plastic wrap and refrigerate at least 2 hours, or freeze for 45 minutes.
  8. Remove dough from fridge/freezer. Break off 1 1/2 Tbsp.-size chunks. (Alternatively, do as I did and slice the dough into relatively equal portions from the start.
  9. roll into 10-inch logs, about 1/3-1/2 an inch thick. DO NOT do as I did and roll them all out before shaping, because they'll get stiff and crack when you try to shape them. Shape as you go!
  10. Take the edges in your hand, bring them together, and twist them twice, leaving the tips dangling.
  11. Bring the twist down onto the rounded pretzel, stick the tips to the pretzel, and transfer to a non-stick or lined baking sheet.
  12. Brush with a very light coat of egg yolk mixed with water and sprinkle with rock sugar if you desire.
  13. Bake at 325 degrees for 15 minutes, until they've just begun to harden.
  14. Move delicately from baking sheet onto cooling rack, and allow to cool completely before serving. (Don't let that stop you from trying one...or two.)

Daring Bakers bake Buche de Noel

In honor of the holiday season, Daring Bakers’ took on what may be the holy grail of daring recipes: Buche de Noel, or Yule Log. Until Lis and Ivonne charged DBers with making this, I didn’t even know it was a food. See, traditionally, the Yule Log was a large, thick piece of wood burned by Pagans just after winter solstice (which was on Friday), in order to thank their gods for making the days longer and the weather warmer in the months to come. Today, not many people burn Yule Logs, but apparently, loads of people eat them around Christmastime.

Now I'm not one to balk when the going gets tough -- but that doesn't mean I won't bring in reinforcements. Fortunately for me, my dear friend Dellie was visiting from Boston, so we devoted a few hours one night last week to this undertaking. Boy was I wise -- both to set aside lots of time and to enlist a cooking compatriot: Buche is quite the project!

A classically-constructed Buche consists of a soft “genoise” cake, layered with some type of filling, rolled into a jellyroll shape, and coated with a thick layer of buttercream frosting. Oh, yes – how could I forget? – it’s also shaped like a log. To do this, you lop off a diagonal slice from the front of the unfrosted cake, and place it about ¾ of the way down the log with the diagonal end jutting upwards, to resemble a broken branch from the log.

Sound weird and odd and energy-intensive? But we haven’t even finished explaining the insanity that is Buche: after you’ve mixed and folded and mixed and baked and rolled and cut and placed and rolled and blahblahblah, you make some meringue, shape some stems and caps, and build meringue mushrooms (yes, you heard me correctly). To do this, you poke a hole in the bottom of each cap, fill with some raw meringue (or frosting, if you’re like we are) and insert the stem.

When you’re finished with the hours of stove-hovering, you’ll see something like this:

Now, correct me if I’m wrong – maybe Dellie and I were being too judgmental – but is this not the most random dessert you’ve ever seen? Cake shaped like a log and scraped to look like bark with some mushrooms growing out the sides?

…Yea, I thought so.

Having said that, it sure was fun to make – especially with the company of such a dear friend! -- and if you have a hankering for some seriously weird dessert-making and a few odd hours to kill, then sure, try this at home, why don’t ya? For all the rest of you, just ooh and ahh at this one, and have yourselves some Happy Holidays!

Buche De Noel Sources: Perfect Cakes by Nick Malgieri and The Williams-Sonoma Collection: Dessert Serves 12 Cake should be stored in a cool, dry place. Leftovers should be refrigerated

Plain Genoise:

3 large eggs 3 large egg yolks pinch of salt ¾ cup of sugar ½ cup cake flour - spoon flour into dry-measure cup and level off (also known as cake & pastry flour) ¼ cup cornstarch

one 10 x 15 inch jelly-roll pan that has been buttered and lined with parchment paper and then buttered again

1.Set a rack in the middle of the oven and preheat to 400 degrees F.

2.Half-fill a medium saucepan with water and bring it to a boil over high heat. Lower the heat so the water is simmering.

3.Whisk the eggs, egg yolks, salt and sugar together in the bowl of a heavy-duty mixer. Place over the pan of simmering water and whisk gently until the mixture is just lukewarm, about 100 degrees if you have a thermometer (or test with your finger - it should be warm to the touch).

4.Attach the bowl to the mixer and, with the whisk attachment, whip on medium-high speed until the egg mixture is cooled (touch the outside of the bowl to tell) and tripled in volume. The egg foam will be thick and will form a slowly dissolving ribbon falling back onto the bowl of whipped eggs when the whisk is lifted.

5.While the eggs are whipping, stir together the flour and cornstarch.

6.Sift one-third of the flour mixture over the beaten eggs. Use a rubber spatula to fold in the flour mixture, making sure to scrape all the way to the bottom of the bowl on every pass through the batter to prevent the flour mixture from accumulating there and making lumps. Repeat with another third of the flour mixture and finally with the remainder.

7.Scrape the batter into the prepared pan and smooth the top.

8.Bake the genoise for about 10 to 12 minutes. Make sure the cake doesn’t overbake and become too dry or it will not roll properly.

9.While the cake is baking, begin making the buttercream.

10.Once the cake is done (a tester will come out clean and if you press the cake lightly it will spring back), remove it from the oven and let it cool on a rack.

Coffee Buttercream:

4 large egg whites 1 cup sugar 24 tablespoons (3 sticks or 1-1/2 cups) unsalted butter, softened 2 tablespoons instant espresso powder 2 tablespoons rum or brandy

1.Whisk the egg whites and sugar together in the bowl of an electric mixer. Set the bowl over simmering water and whisk gently until the sugar is dissolved and the egg whites are hot.

2.Attach the bowl to the mixer and whip with the whisk on medium speed until cooled. Switch to the paddle and beat in the softened butter and continue beating until the buttercream is smooth. Dissolve the instant coffee in the liquor and beat into the buttercream.

Filling and frosting the log:

1.Run a sharp knife around the edges of the genoise to loosen it from the pan.

2.Turn the genoise layer over (unmolding it from the sheet pan onto a flat surface) and peel away the paper.

3.Carefully invert your genoise onto a fresh piece of parchment paper.

4.Spread with half the coffee buttercream (or whatever filling you’re using).

5.Use the parchment paper to help you roll the cake into a tight cylinder.

6.Transfer back to the baking sheet and refrigerate for several hours.

7.Unwrap the cake. Trim the ends on the diagonal, starting the cuts about 2 inches away from each end.

8.Position the larger cut piece on each log about 2/3 across the top.

9.Cover the log with the reserved buttercream, making sure to curve around the protruding stump.

10.Streak the buttercream with a fork or decorating comb to resemble bark.

11.Transfer the log to a platter and decorate with your mushrooms and whatever other decorations you’ve chosen.

Meringue Mushrooms:

3 large egg whites, at room temperature ¼ teaspoon cream of tartar ½ cup (3-1/2 ounces/105 g.) granulated sugar 1/3 cup (1-1/3 ounces/40 g.) icing sugar Unsweetened cocoa powder for dusting

1.Preheat the oven to 225 degrees F. Line 2 baking sheets with parchment. Have ready a pastry bag fitted with a small (no. 6) plain tip. In a bowl, using a mixer on medium-low speed, beat together the egg whites and cream of tartar until very foamy. Slowly add the granulated sugar while beating. Increase the speed to high and beat until soft peaks form when the beaters are lifted. Continue until the whites hold stiff, shiny peaks. Sift the icing sugar over the whites and, using a rubber spatula, fold in until well blended.

2.Scoop the mixture into the bag. On one baking sheet, pipe 48 stems, each ½ inch (12 mm.) wide at the base and tapering off to a point at the top, ¾ inch (2 cm.) tall, and spaced about ½ inch (12 mm.) apart. On the other sheet, pipe 48 mounds for the tops, each about 1-1/4 inches (3 cm.) wide and ¾ inch (2 cm.) high, also spaced ½ inch (12 mm.) apart. With a damp fingertip, gently smooth any pointy tips. Dust with cocoa. Reserve the remaining meringue.

3.Bake until dry and firm enough to lift off the paper, 50-55 minutes. Set the pans on the counter and turn the mounds flat side up. With the tip of a knife, carefully make a small hole in the flat side of each mound. Pipe small dabs of the remaining meringue into the holes and insert the stems tip first. Return to the oven until completely dry, about 15 minutes longer. Let cool completely on the sheets.

4.Garnish your Yule Log with the mushrooms.