Katharine Hepburn Brownies, Macerated Raspberry Sauce

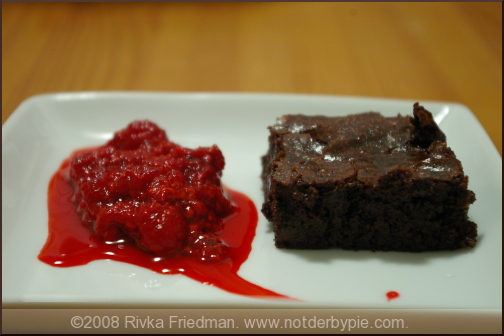
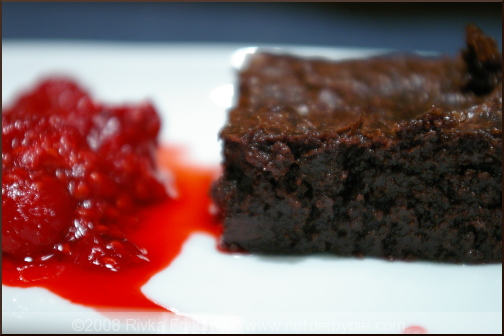
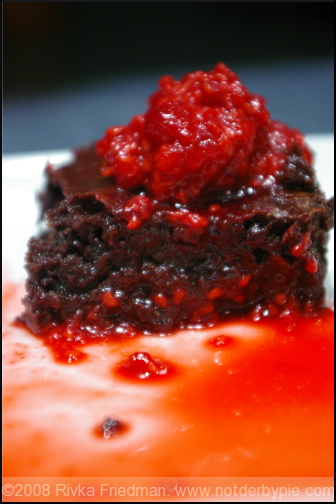
brownie1.jpg When it comes to brownies, everyone has his or her preference. Some prefer cakey (though god knows why), others prefer raw, yet others favor the fudgey dense sort -- there's a recipe for everyone. I even know someone who made a habit of mixing up two full batches each time she made brownies: one to bake, and one to eat raw, straight from the mixing bowl. If that's not enough to make your stomach turn, I don't know what is. Thank heavens that Dorie Greenspan understands how finicky folks can be with their brownies. For this reason exactly, she includes twelve different brownie recipes in Baking: from My Home to Yours, not including the blondie and white chocolate varieties. With so many options, one might think it tough to sort out exactly which will be to one's liking; however, after quickly discounting the cheesecake brownies (not in the mood), the brownie buttons (too small), the ginger-spiked (D wouldn't have liked 'em), the honey nut (again, too interesting) and several others, I was left to choose between "brrr-ownies" (spiked with peppermint!) and "Tribute to Katharine Hepburn" brownies. As if the namesake weren't enough to sell me, KH brownies seemed to have the perfect proportions: heaping quantities of both chocolate and cocoa, held together with a mere 1/4 cup flour and a couple of eggs, and spiked with vanilla and cinnamon, these brownies bake up to the perfect soft, fudgey consistency. They're rich, but not dense, flavorful but not overpowering. Ok, maybe the chocolate is a little overpowering, but that's how I like it. And they really benefit from just a hit of salt. Nothing makes a sweet tasty like salt does.

brownie21.jpg

The first time I made these brownies, I followed the recipe to a T -- but you know me, the second time I had to change things up a bit. I decided to use unsweetened high-quality chocolate, since that's what I had lying around; to compensate, I added just a Tbsp. of extra sugar, and the resulting product was just what I'd hoped for: the brownies themselves were sweet and rich, but the melted bits of unsweetened chocolate were both flavorful and a refreshing break from the sugar. I'd do it again in a flash.

Oh, yea, how could I forget the raspberries? This was a bit of an afterthought, as I had some lovely raspberries in the fridge and wanted to make more of them than a garnish. I tossed 1 small container of raspberries with 1+ Tbsp. of sugar onto the stove and let it cook for about 7 minutes, until the berries started to exude their liquid. Then I took a fork to them, macerating them a bit so that some stayed intact while others created a sort of rough sauce. Overtop rich, chocolatey brownies, the raspberries provided a necessary tartness and their flavor, fresh and bright, was fantastic.

brownie3.jpg

If you're the cakey type, sorry but I can't help ya. However, if you enjoy a light and not overly dense brownie that's also rich and chocolatey, read on.

Katherine Hepburn Brownies from Dorie Greenspan

  • 1/4 cup flour
  • 1/2 tsp cinnamon
  • 1/4 tsp. salt
  • 1 stick butter, cut into 8 pieces
  • 1/2 cup cocoa powder
  • 2 tsp. instant coffee
  • 2 large eggs, pref. room temp
  • 1 cup sugar
  • 1 tsp. vanilla
  • 1 cup broken walnuts or pecans (optional)
  • 4 oz. bittersweet chocolate, coarsely chopped
  1. Preheat oven to 325 and center a rack inside. Butter an 8-inch square pan and line the bottom with parchment or wax paper. Butter the paper and dust with flour; shake out the excess.
  2. Whisk together flour, cinnamon, and salt.
  3. Heat the butter over low heat. When the butter starts melting, add the cocoa and coffee; stir to blend. Remove from the heat and cool for 3 minutes.
  4. Beat the eggs into the saucepan one at a time. Stir in the sugar and vanilla, followed by dry ingredients, chopped chocolate, and walnuts.
  5. Scrape the batter into the pan.
  6. Bake for 30 minutes at which point brownies will be gooey but with a crisp top crust. Transfer to a rack and let cool at least 30 minutes.
  7. Turn the brownies onto the rack, peel away the paper, and invert onto cutting board. Cut into 2-inch squares.

Raspberry Sauce

  • One small container of raspberries
  • 2 Tbsp. sugar
  1. In small saucepan, combine ingredients over low heat.
  2. Stir at regular intervals until sugar starts to dissolve and raspberries emit juice.
  3. At this point, break up the raspberries with the back of a wooden spoon until most have formed a sauce, and some retain their shape.
  4. Let cool a bit off the heat, and serve warm with brownies.
Nibbly Buckwheat Butter Cookies

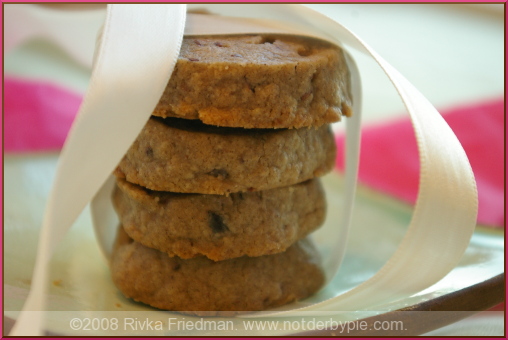
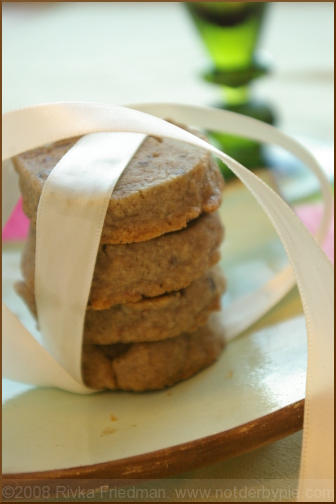
buckwheat1.jpg I know, you don't have to tell me -- these look just like those whole wheat sables I posted in January. What can I say? I've fallen for nibbly sables and I can't get up.

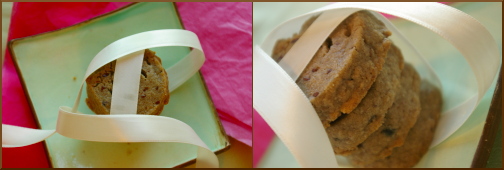
This is all Alice Medrich's fault. I recently acquired her book, Pure Dessert, and ever since, I've been baking goodies non-stop. Her recipes are dead simple, and the sweets are addictive. Did I mention it's called "Pure Dessert?" Yea, it's pretty hard to go wrong there. These are slightly different than those sables, and, in D's opinion, slightly better. While the buckwheat flour makes'em quite delicate, it also imparts a sandy, earthy quality that whole wheat flour alone doesn't quite have. Admittedly, the buckwheat also makes greyish cookies, which aren't the easiest to photograph, but remember people, they're for eating, and eat them we did. All of them. Whoa.

buckwheat2.jpg

I can think of a couple nice variations that would suit these cookies nicely:

  • substitute nuts (walnuts, pine nuts or pecans) for some or all of the cocoa nibs
  • add a bit of orange or lemon zest and finely shave some very dark chocolate bits into the dough
  • add some dried black currants instead of the nibs (this would also go very nicely with the zest)

...the possibilities are endless.

buckwheat3.jpg

Nibbly Buckwheat Butter Cookies recipe by Alice Medrich; makes 48 2.5-inch cookies

  • 1 1/4 cups all-purpose flour
  • 3/4 cup buckwheat flour
  • 1/2 pound (2 sticks) unsalted butter, softened
  • 2/3 cup sugar
  • 1/4 tsp. salt
  • 1/3 cup cacao nibs
  • 1 1/2 tsp. vanilla
  1. Whisk the two flours together in a medium bowl. Set aside.
  2. With a hand or stand mixer, beat the butter, sugar, and salt for about 1 minute, until smooth and creamy but not fluffy. Mix in nibs and vanilla.
  3. Add the flours and mix just until incorporated.
  4. Scrape the dough into a mass and, if necessary, knead it a few times by hand.
  5. Form the smooth dough into a 12x2 inch log. Wrap and refrigerate at least two hours, preferably overnight.
  6. Position racks in the upper and lower thirds of the oven and preheat the oven to 350 degrees. Line the baking sheets with parchment paper.
  7. Use a sharp knife to cut the cold log into 1/4-inch slices. (I sliced mine about 1/2 an inch thick, and I enjoyed them that way.)
  8. Place them on baking sheets, about 1 1/2 inches apart.
  9. Bake just until the cookies begin to color at the edges, 12-14 minutes, rotating the sheets from top to bottom and front to back half way through baking. Cool completely on racks.
  10. Cookies should keep, stored in an airtight container, for at least 1 month.

Chocolate Coffee Mascarpone Tart

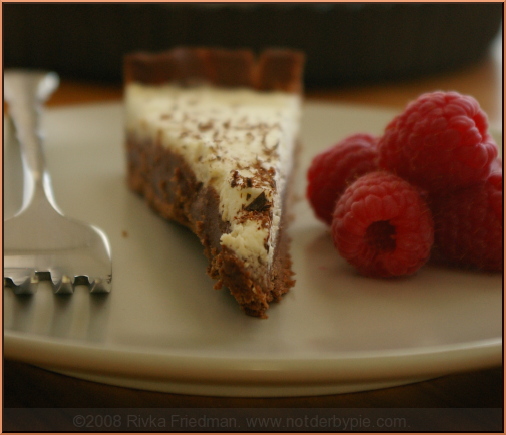
coffeetart1.jpg Mandy had a very big birthday a couple weeks back, and I made her this tart because every big birthday deserves a Sunday morning assault of chocolate, coffee, and mascarpone cheese. Did I hear you ask for a slice? Sorry folks, this one's not for sharing.

What this tart lacks in sweetness, it more than accounts for in richness. Put less subtly, this cake isn't overly sugary, but it packs a fatty punch, yes it does. And lest you think only two bites will be enough, I assure you that real tart fans will have no trouble at all finishing every last bite of one (cough two) slices. And they'll be licking the crumbs from their plates in between helpings. coffeetart2.jpg

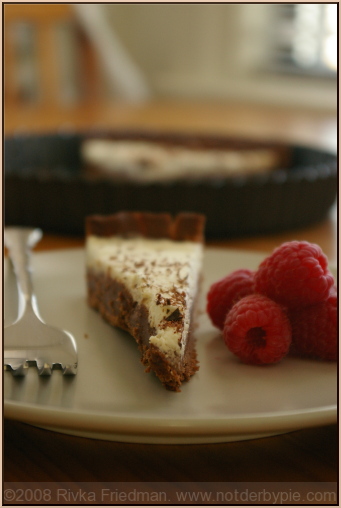
I originally made a chocolate crust for this tart, which was very popular with Mandy and her family. If you're more of a purist (though I don't even know what that means when we're talking coffee, chocolate, mascarpone) feel free to substitute a more traditional tart dough, or as the French call it, pâte sucrèe. That recipe can be found here, when I made a strawberry-rhubarb tart. But I digress.

coffeetart3.jpg

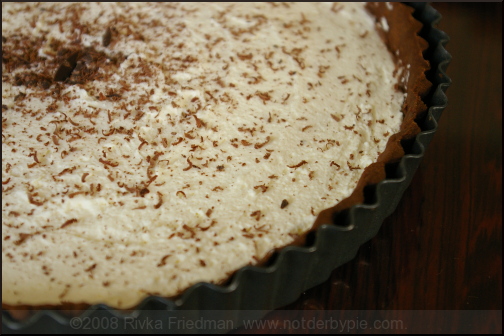
If you've got some serious chocoholics around or simply need to satisfy your own craving for what are obviously three of the world's great culinary discoveries, try this one on for size. As for decoration, I grated some bittersweet chocolate overtop; you could also shave chocolate with a peeler to create longer, more curly pieces, and if you happen to have some whole roasted coffee beans on hand, those, too, would make a delightful garnish. Come to think of it, why not have both?

coffeetartlast.jpg

Chocolate Coffee Mascarpone Tart serves 8.

Tart Dough:

  • 1 1/4 cups flour
  • 1/4 cup cocoa (substitute with an equal amount of flour if making pâte sucrèe)
  • 1/2 cup powdered sugar
  • 1 stick plus 1 Tbsp. butter, chilled and cut into small chunks
  • 1 egg yolk
  1. Blend dry ingredients with a hand or stand mixer, or better yet, a food processor. I find the processor allows dough to come together most easily.
  2. Add butter and blend until mixture resembles coarse meal, with little "pearls" of butter running throughout.
  3. Add egg yolk; blend until the dough comes together. Wrap in plastic, and refrigerate while preparing ingredients for the tart. After about half and hour, the tart dough should be just chilled enough that it rolls nicely. Place dough between two sheets of plastic wrap or parchment paper and roll out into a circle slightly larger than the size of your tart pan. (I use a round fluted tart pan with a removable bottom, but any shallow baking pan will do.)
  4. Peel off the top layer of plastic wrap. Hold the dough from the layer of plastic wrap beneath, and carefully turn onto your pan. Once your dough is on the pan, remove the top layer of plastic and start fitting your dough to your pan, pushing it delicately into the crevices and corners without changing the thickness of the dough too much. Trim the ends, and make a decorative outer lip if you desire.
  5. "Dock" your dough to the pan by spearing it with a fork in several spots, and bake for 20-ish minutes at 350, until crust is crisped. This will ensure that the crust holding the (liquidy) ingredients will still taste flaky, and not mushy. Do check to ensure that the crust doesn't burn, though.
  6. While the tart crust cools, make the mousse to go inside.

Chocolate Coffee Mascarpone Mousse (adapted from Tartelette):

  • 1 1/2 cups heavy cream
  • 600 grams bittersweet chocolate, chopped
  • 2 Tbsp. coffee
  • 1 egg
  • 1/2 cup mascarpone
  • 1 cup heavy or whipping cream
  • grated chocolate, coffee beans, or other garnish, optional
  1. Melt the chocolate in a makeshift double boiler (a metal bowl over a pot with a couple inches of boiling water in it).
  2. In a heavy saucepan, bring the heavy cream to a boil, add the coffee and let infuse for 5 minutes.
  3. Strain the cream through a fine sieve and pour it over the dark chocolate. Stir until completely incorporated.
  4. After allowing to cool for at least 5 minutes, add several spoonfuls to your beaten egg to temper the egg.
  5. Now, add the egg mixture to the chocolate. Reposition it on the pot of boiling water, and allow to thicken, stirring at regular intervals, about 5 minutes.
  6. Once the chocolate has thickened, move it from the heat to the fridge and let it cool for about 30 minutes. After it cools, mix in 1/2 cup mascarpone, and spread the mixture into the crust.
  7. Using a hand or stand mixer (or good old fashioned arm strength), whip up the remaining cup of cream until it holds soft peaks, and spread overtop the mousse. Top with garnishes of your choice, and serve immediately. Leftovers will keep, covered and refrigerated, for upto 1 week (if you can keep it around for that long.)

Poached Pear with Cajeta and Mascarpone

pear1.jpg Dulce de Leche has quickly become this blog's most popular post. The one-step recipe for caramel has generated more traffic, more comments, and more general excitement on this end of things than any other post. I was thrilled to read so many great comments offering alternative names for the treat, as well as several creative recipe ideas. I'm planning on trying the one with a graham cracker crust soon!

pear3.jpg

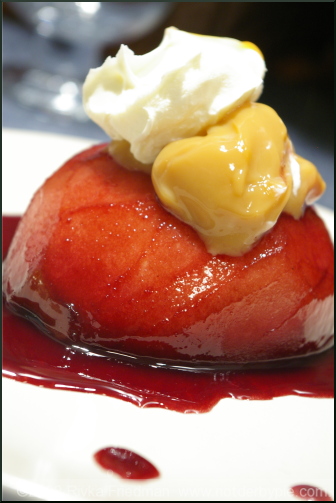
Here's one more way to use all that caramel sitting in all of our fridges: top poached pears with it.

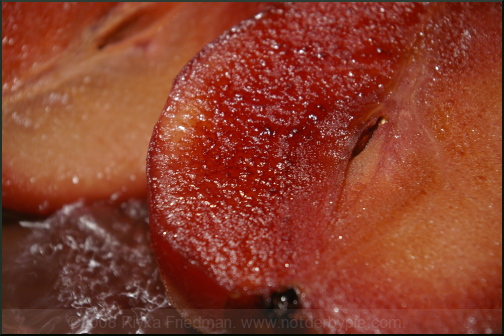
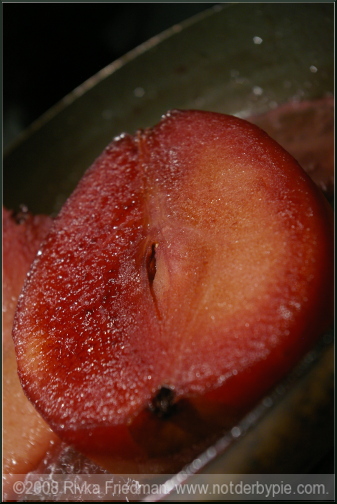
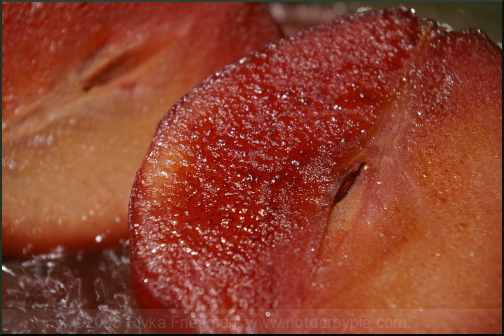
I generally poach pears in marsala or port. This time, I tried something different: someone brought a "young cabernet" to our house for dinner recently, and I had the rest of it in the fridge. Young cabernet is -- obviously -- not fully aged, so it's rather sweet, though not as sweet as traditional dessert wines. (Can you tell that I'm no wine expert?) Anyway, I thought it made the perfect poaching liquid for my relatively unripe but very flavorful bosc pears.

pear2.jpg

The method is pretty simple: Slice pears lengthwise, place in a saucepan in a single layer, and pour liquid overtop (about 1 1/2 cups per pear). Bring to a boil, reduce to a simmer, cover, and cook for approximately 30 minutes, until pears are easily pierced with a knife. Stir every so often and check to make sure the liquid doesn't stick to the bottom of the pan.

After pears are soft, transfer them to a serving platter, turn up the heat slightly, and cook the liquid uncovered until it reduces enough to coat the back of a wooden spoon. Drizzle (ok, pour) over pears. Top with a healthy spoonful of cajeta (the caramel) and, if you have some on hand, a bit of mascarpone. If you don't have mascarpone, try sour cream, whipped cream, or even yogurt.

pear4.jpg