Baklava

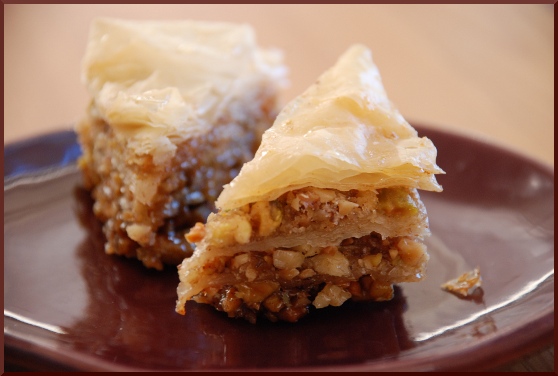
baklava1.JPG We're chock-full of special occasions here at NDP. Two weekends ago, we celebrated with D and E as they hosted their first Friday night dinner as a married couple. It so happens that D and I were the first people to host D and E as a [not-yet-married] couple about a year ago, so Friday night we came full circle. D and E really went all-out and made a brisket, which was totally delicious. Needless to say, there was a ridiculous amount of other food, also super tasty. I had been asked to bring dessert. Now you know that non-dairy desserts have given me ulcers in the past -- no, silly! Not eating them, just thinking and thinking about what to make til I'm blue in the face and dizzy and, well, ulcer-y -- but this time, I was determined to figure something out. I'd planned on the very appropriate Mexican wedding cookies, but they're either totally dairy or totally not kosher (from the use of lard), so that was out. But ever since getting back from the Middle East, where baklava is totally ubiquitous and consistently excellent, I've been meaning to try my hand at crafting my own.

baklava4.jpg

baklava5.jpg

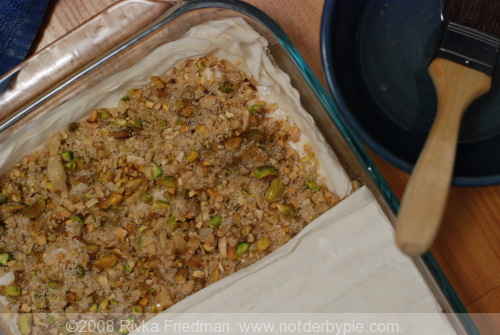
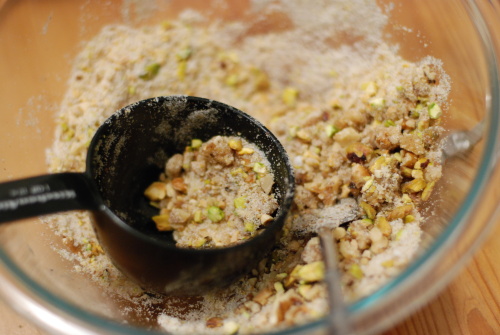
Truth be told, baklava is extremely time-consuming but not particularly difficult. The keys to success are loads of sugar and a great measure of patience. There are multiple steps: first, you make a thick, fragrant syrup to be poured over the hot pastries. Second step is to make the mixture of nuts, sugar and spices that will be sprinkled between each layer of phyllo dough. Finally, you (carefully and patiently!) assemble the baklava, layer by layer, slice into pretty diamonds, bake til browned, and drizzle thickened syrup in every nook and cranny. Difficult? Not so....but time consuming? Oh, yes.

baklava6.jpg

baklava3.JPG

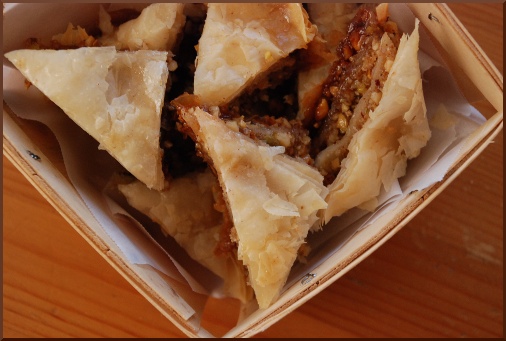
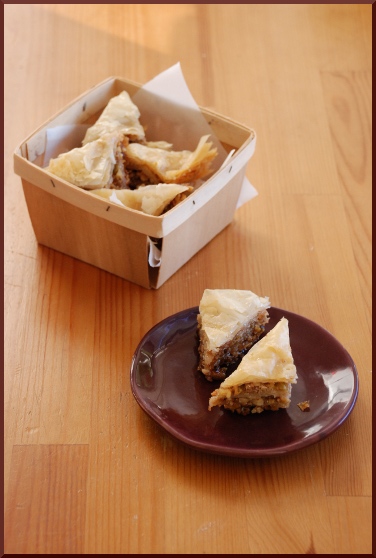
Time notwithstanding, this recipe has officially made the greatest hits list. The layers are flaky, crisp, and buttery-tasting. For the nuts, I used a mix of almonds for crunch, pistachios for fruitiness, and walnuts for bitterness and texture. The result was pretty close to perfection. It was been screamingly popular with all tasters, and I miss having little bits of it to nibble on. If you've got a free afternoon, here's a great way to pass the time.

baklava7.jpg

baklava2.JPG

Baklava adapted from Epicurious

2 cups sugar 2/3 cup water 1 lemon, halved 1 orange, halved 1 1/2 (3-inch) cinnamon sticks 2/3 cup honey 1 tsp orange flower water

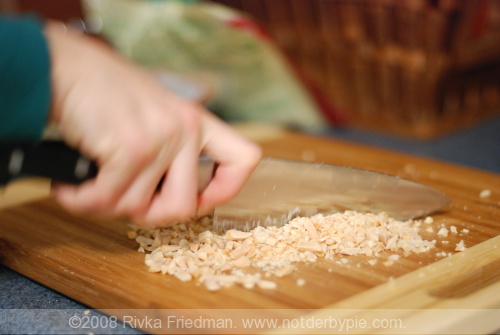
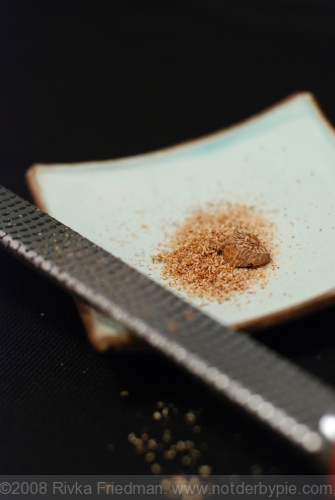
For baklava 2 1/2 cups whole almonds with skins (1 lb), finely chopped 2 cups walnuts (1/2 lb), finely chopped 1 cup pistachios, finely chopped 1 1/4 cups sugar 1 tablespoon cinnamon 2 teaspoons freshly grated nutmeg 1/4 teaspoon ground cloves 1/4 teaspoon salt 3 sticks (1 1/2 cups) unsalted butter, melted and cooled slightly (I used flavorless canola oil instead, and only needed about 1 cup) 1 (1-lb) package phyllo dough (17 by 12 inches; about 28 sheets), thawed if frozen

preparation

Make syrup: Combine sugar and water in a 2 1/2- to 3-quart saucepan. Squeeze juice from lemon and orange into sugar mixture. Add fruit halves and cinnamon sticks. Bring mixture to a boil over moderate heat, uncovered, stirring occasionally, until sugar is dissolved, then simmer 10 minutes. Stir in honey and return to a boil. Remove from heat and cool to room temperature. Pour through a sieve into a large measuring cup or bowl, pressing hard on, then discarding, solids. Chill, uncovered, until cold, about 1 hour.

Assemble and bake baklava: Put oven rack in middle position and preheat oven to 350°F.

Whisk together almonds, walnuts, sugar, cinnamon, nutmeg, cloves, and salt until combined well.

Generously brush a 13- by 9- by 2-inch glass baking dish with melted butter. Halve phyllo sheets crosswise and stack sheets. Keep stack covered with 2 overlapping sheets of plastic wrap and then a dampened clean kitchen towel. Lay 2 sheets of phyllo in bottom of baking dish and brush top sheet generously with butter. Continue to layer 2 sheets at a time, staggering sheets in each double layer slightly to cover bottom of dish, then brushing every second sheet generously with butter, until you have used 10 sheets of phyllo total. After brushing top layer of phyllo with butter, spread a rounded 1 1/2 cups of nut mixture over it. Drizzle with 2 tablespoons butter.

Repeat layering 3 more times. Top with 10 more sheets of phyllo. (You will use 50 sheets of phyllo total. I actually only repeated the layering 2 more times, resulting in 40 sheets of phyllo used.) Butter top and let baklava stand at room temperature to harden slightly (to facilitate cutting), 10 to 15 minutes.

Using a sharp knife, cut baklava into 16 equal rectangles, then cut each piece in half diagonally. (Be sure to cut all the way through.)

Bake baklava until golden, 50 minutes to 1 hour. Transfer dish to a rack to cool, then slowly pour cold syrup around edges of hot baklava, in between all cuts, and over top. Let stand at room temperature at least 8 hours. (Cover once baklava is at room temperature.) Do not chill.

Cooks' notes: • Syrup can be made up to 5 days ahead and chilled, covered. • Baklava keeps in an airtight container up to 1 week.
Cinnamon Palmiers (and cheat puff pastry)

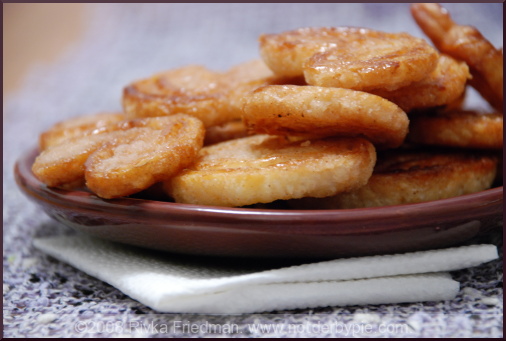
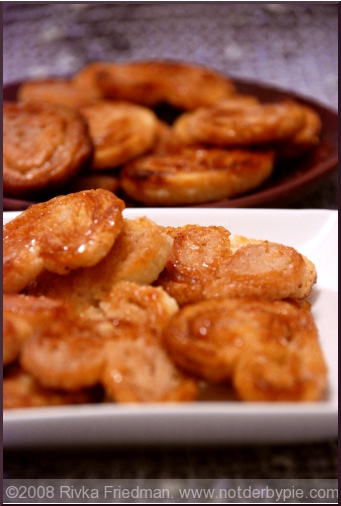
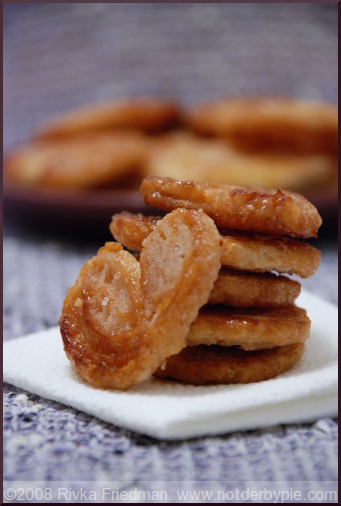
palmiers1.jpg File this under "things I've always wanted to make but thought I needed an excuse." Not that they're actually so hard, but let's face it -- nothing is easier than simple chocolate chip cookies, or my go-to dessert of late, chocolate pudding. It's just that the recipe is very specific, and one must strictly adhere to it, or else the resulting cookie will be dense and tough. But follow the instructions, and your afternoon tea date will thank you. These cookies are the height of elegance, with their flaky texture and caramelized-sugar crust. They're just the right amount sweet, and very crispy. They might be small and light, but I dare you to eat just one.

As you know, I'm always on the lookout for excuses to tackle culinary challenges. Bryce's PhD soiree gave me one such excuse, so thank you, Dr. J!

palmiers4.jpg

On another note, looking at the recipe just now, I realized that it essentially calls for an easy puff-pastry dough layered with cinnamon sugar. Now I've never made my own puff pastry, but I think this is a very user-friendly way to fake it -- so I'll be filing this under techniques; the next time I need puff pastry, I may just make this dough.

palmiers3.jpg

One word of caution: do NOT pull a Rivka and start an episode of Barefoot Contessa while your palmiers blacken in the oven, because they don't waste any time. The recipe says to bake for 7-9 minutes, flip, and bake 3-5 more minutes. I baked them for 7 and 4, and they came out black. The second roung, I did 7 and 3, and they were perfect: as you can see, there's a fine line between caramelized and burnt. Beware!

Last thing -- hope you all have a wonderful Thanksgiving! I'll be off until next week, as I'm traveling for the holiday, but I promise to post some healthy recipes to detox from T-day excess when I return.

palmiers2.jpg

Cinnamon Palmiers from Epicurious

* 1 1/4 cups all-purpose flour * 1 teaspoon salt * 1 1/2 sticks unsalted butter, frozen * 5 to 6 tablespoons ice water * 1 cup sugar * 2 teaspoons cinnamon

Stir together flour and salt in a chilled large metal bowl. Coarsely grate frozen butter into flour, gently tossing to coat butter.

Drizzle 5 tablespoons ice water evenly over flour mixture and gently stir with a fork until incorporated. Test mixture by gently squeezing a small handful: When dough has the proper texture, it will hold together without crumbling apart. If necessary, add another tablespoon water, stirring until just incorporated, and test again. (Do not overwork dough or add too much water, or pastry will be tough; dough will be lumpy and streaky.)

Form dough into a 5-inch square, then chill, wrapped in plastic wrap, until firm, at least 30 minutes.

Roll out dough on a floured surface with a floured rolling pin into a 15- by 8-inch rectangle (with a short side nearest you). Brush off excess flour and fold dough into thirds like a letter. Rewrap dough and chill until firm, at least 30 minutes.

Arrange dough with a short side nearest you on a floured surface and repeat rolling out, folding, and chilling 2 more times. Brush off any excess flour, then halve dough crosswise with a sharp knife and chill, wrapped separately in plastic wrap, at least 1 hour.

Stir together sugar and cinnamon, then generously sprinkle a clean work surface with some of cinnamon sugar and place 1 piece of chilled dough on top. Quickly roll out into a 16- by 12-inch rectangle (1/8 to 1/16 inch thick; if dough becomes too soft, chill on a baking sheet until firm). Trim edges with a sharp knife. Sprinkle top of dough evenly with some cinnamon sugar to cover completely, brushing off any excess. Fold 2 opposite long sides of pastry so they meet in center. Fold in same sides of pastry in same manner, then fold one half over the other (like a book) and press gently with a rolling pin to flatten slightly, forming a long rectangular log. Sprinkle with additional cinnamon sugar if dough is sticky.

Chill on a baking sheet, uncovered, until firm, at least 30 minutes and up to 2 hours. Meanwhile, repeat with remaining piece of dough and cinnamon sugar.

Preheat oven to 425°F with rack in middle. Line a large baking sheet with parchment paper.

Cut 1 log of dough crosswise into 1/4-inch-thick slices with a sharp knife and arrange slices, cut sides down, 1 1/2 inches apart on baking sheet. Bake until puffed and golden around edges, 7 to 9 minutes. Remove from oven and turn palmiers over with a spatula. (If palmiers begin to unroll, gently press to reshape when cooled slightly.) Continue baking until golden all over and sugar is caramelized, 3 to 5 minutes more. Transfer as done (palmiers may not bake evenly) to a rack and cool. Make more cookies on cooled baking sheet lined with fresh parchment.

Dough, without cinnamon sugar, can be chilled, wrapped well, up to 2 days or frozen up to 1 month (thaw in refrigerator).

Cookies keep in an airtight container at room temperature 4 days.

If desired, palmiers can be recrisped in a 300°F oven until heated through, about 5 minutes.

Sticky, Gooey Cinnamon Buns

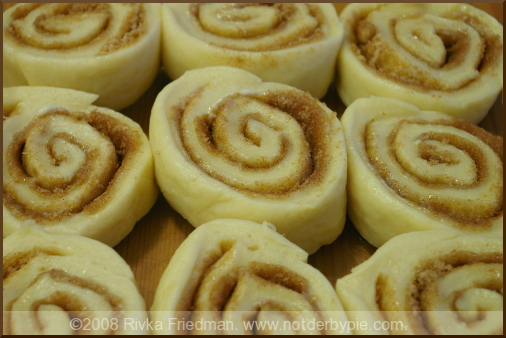
cinnabuns3.jpg If you've gone this long without making cinnamon buns (which, shockingly, I have), it's likely not because you're skeptical that they'll be worth it. What other foods smell ridiculously appetizing, even when what you smell is usually a corporate chain version loaded with high fructose corn syrup and other delicacies? No doubt they taste fantastic and are worth the effort, so that's not the cause of hesitation. More likely, you're just a bit daunted by the task. To me, cinnamon buns have always sounded like a very work-intensive, time-intensive project, possible only for those with half a day to devote to the task. I just figured that with a project as seemingly complex as cinnamon buns, I should hold off until I had an occasion to do them. Perhaps you did, too.

Such an occasion arrived last Sunday, when a bunch of us threw a bridal shower for our friend D, who's getting married in November. D's not so into the gush-gush-rip-the-wrapping-paper-ohh-ahh stuff, so when B suggested a book shower, D readily agreed. It's really right up her alley. We pitched the shower as a chance to get D a book that belongs on every shelf, a book you especially love, or a book that you thought D would love -- and, considering we got lots of oohs and ahhs and no doubles, I think it was a success! cinnabuns1.jpg

Anyway, B suggested that we make cinnamon buns for the shower (yes, she's full of good ideas, that B!) and I'd been meaning to make them for a while, so I jumped at the chance. We both just assumed they'd take a while, so I started them early at my house, the plan being that I'd bring the risen dough over to her place and we'd fill, roll, and bake them together.

Well, I started a little earlier than planned, and before I knew it, it was time to roll out the buns but it wasn't time to go over to B's. Sorry, B -- I owe you cinnamon-bun-round-two! Needless to say, I managed on my own. In fact, I more than managed -- I practically cranked out the buns with little to no effort, and they looked totally gorgeous, if I dare say so myself. Let my experience demystify this ostensibly massive undertaking. It's no biggie, small beans, piece-a-cake. Get my drift? Time does most of the work -- all you really need is enough patience to not jump out of your chair before they're ready.

cinnabuns2.jpg

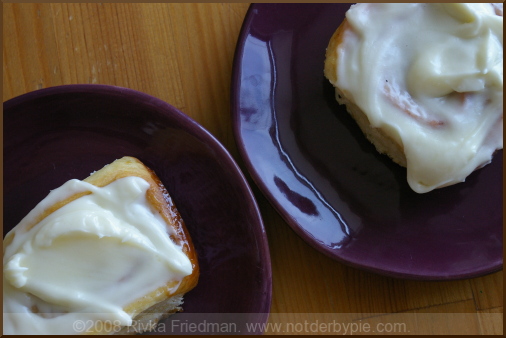
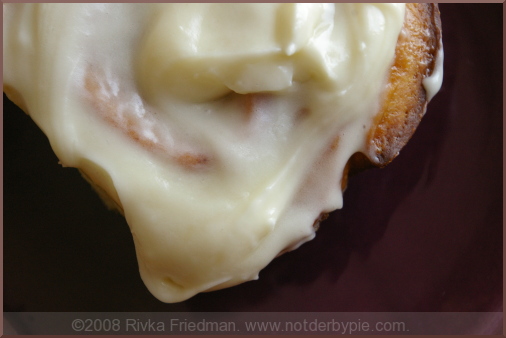
B made the cream cheese glaze. Her report: so easy, and it took only 2 minutes. What are you waiting for?? And in case it's not screamingly obvious: the cream cheese glaze is the best part. By far. If you're like me, always worried that you won't get enough of the goo on your cinnamon bun, don't fret: this recipe made enough for me to really slather it on and still have some left over to lick. mmmm.

cinnabun4.jpg

Cinnamon Rolls with Cream Cheese Glaze from Bon Appetit

Dough: 1 cup whole milk 3 tablespoons unsalted butter 3 1/2 cups (or more) unbleached all purpose flour, divided 1/2 cup sugar 1 large egg 2 1/4 teaspoons rapid-rise yeast (from 2 envelopes yeast) 1 teaspoon salt Nonstick vegetable oil spray

Filling: 3/4 cup (packed) golden brown sugar 2 tablespoons ground cinnamon 1/4 cup (1/2 stick) unsalted butter, room temperature Glaze: 4 ounces cream cheese, room temperature 1 cup powdered sugar 1/4 cup (1/2 stick) unsalted butter, room temperature 1/2 teaspoon vanilla extract

For dough: Combine milk and butter in glass measuring cup. Microwave on high until butter melts and mixture is just warmed to 120°F to 130°F, 30 to 45 seconds. Pour into bowl of stand mixer fitted with paddle attachment. Add 1 cup flour, sugar, egg, yeast, and salt. Beat on low speed 3 minutes, stopping occasionally to scrape down sides of bowl. Add 21/2 cups flour. Beat on low until flour is absorbed and dough is sticky, scraping down sides of bowl. If dough is very sticky, add more flour by tablespoonfuls until dough begins to form ball and pulls away from sides of bowl. Turn dough out onto lightly floured work surface. Knead until smooth and elastic, adding more flour if sticky, about 8 minutes. Form into ball.

Lightly oil large bowl with nonstick spray. Transfer dough to bowl, turning to coat. Cover bowl with plastic wrap, then kitchen towel. Let dough rise in warm draft-free area until doubled in volume, about 2 hours.

For filling: Mix brown sugar and cinnamon in medium bowl.

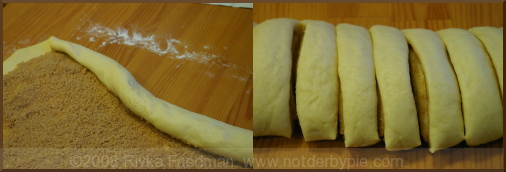
Punch down dough. Transfer to floured work surface. Roll out to 15x11-inch rectangle. Spread butter over dough, leaving 1/2-inch border. Sprinkle cinnamon sugar evenly over butter. Starting at 1 long side, roll dough into log, pinching gently to keep it rolled up. With seam side down, cut dough crosswise with thin sharp knife into 18 equal slices (each about 1/2 to 3/4 inch wide).

Spray two 9-inch square glass baking dishes with nonstick spray. Divide rolls between baking dishes, arranging cut side up (there will be almost no space between rolls). Cover baking dishes with plastic wrap, then kitchen towel. Let dough rise in warm draft-free area until almost doubled in volume, 40 to 45 minutes.

Position rack in center of oven and preheat to 375°F. Bake rolls until tops are golden, about 20 minutes. Remove from oven and invert immediately onto rack. Cool 10 minutes. Turn rolls right side up.

For glaze: Combine cream cheese, powdered sugar, butter, and vanilla in medium bowl. Using electric mixer, beat until smooth. Spread glaze on rolls. Serve warm or at room temperature.

Plum Ice Cream

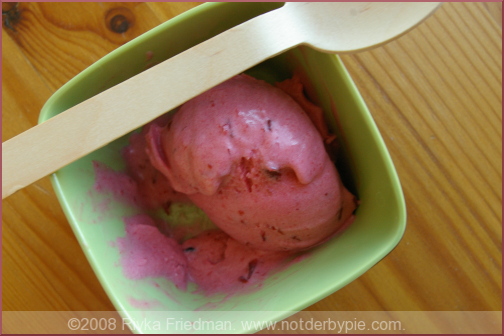
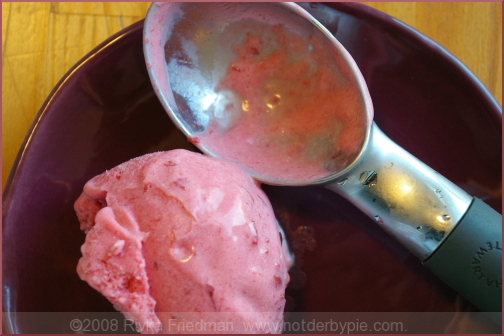
plum1.jpg This past December, D got me an ice cream maker for Hanukkah. "So that you'll have a way to make us ice cream when summer rolls around." That D's pretty smart: ice cream makers are much cheaper in the dead of winter, but summer inevitably returned, and now tubs of ice cream line our freezer. What flavors, you ask? Well, currently we have wild honey, raspberry sorbet, apricot sorbet, and this here plum that I'm getting ready to tell you about. I've had some lovely organic plums in my fridge for a couple weeks. Most of them I took for lunch, but something had to be done with the rest. I'd gone back and forth between stone fruit crisp and plum tart tatin, until I remembered that The Perfect Scoop was sitting on my bookshelf, gathering dust. Sure enough, David Lebovitz had included in it a recipe for plum ice cream; the fate of my plumlings was decided.

Here's the thing about fruit ice creams: they're not chocolate. Now don't you vanilla fans jump on me all at once -- I appreciate a good bowl of white. (Scratch that: off-white. If it's vanilla, it has to be custard-based, in my humble-o.) But people, chocolate and I are exclusive. We're in love. And that's just how it is. So you can understand why fruit ice cream has always seemed a little, well, not-quite-right to me -- that is, until I made some myself. Plum ice cream is stupendous! Wonderfully creamy, sweet and tart, with all the assets of stone fruit and of ice cream in one. I'm a little obsessed.

With plums at every farmers' market in town, now's the time to try this one out. plum2.jpg

Plum Ice Cream from David Lebovitz in The Perfect Scoop

  • 1 pound plums (about 8 )
  • 1/3 cup water
  • 3/4 cup plus 2 Tbsp sugar
  • 1 cup heavy cream
  • 1/2 tsp. kirsch

Slice the plums in half and remove the pits. Cut the plums into eighths and put them in a medium, nonreactive saucepan with the water. Cover and cook over medium heat, stirring occasionally, until tender, about 8 minutes. Remove from the heat and stir in the sugar until dissolved. Let cool to room temperature.

Once cool, puree in a blender or food processor with the cream and kirsch until smooth.

Chill the mixture thoroughly, then freeze it in your ice cream maker according to manufacturer's instructions.