Vanilla Ice Cream with Stracciatella

vanilla-stracciatella-1 Recently, I discovered something of an oddity in my ice cream-eating habits. When I buy ice cream, I'm pretty particular about how I like it: Ben and Jerry's coffee heath bar toffee crunch. It's really that easy. I've never been one to order vanilla, chocolate, or any other flavor that's that simple. When I order chocolate, it almost always has some swirl, ribbon, or maybe even some of those little chocolate-filled bits. Cheesy, I know, but I like my ice cream with lots of stuff in it, what can I say?

That affinity for add-ins rapidly fades when I'm making ice cream. When I'm making the stuff from scratch, I'm a total purist. Vanilla is my most frequent concoction, and in my mind, it's pretty hard to beat. If hard pressed, I think I'd probably pick my homemade vanilla over a pint of B&J's Coffee Heath. Though not without some serious deliberation.

Why is that, you'd like to know? I think it has something to do with the sheer quantity of egg yolks and cream and not-so-cheap vanilla beans that go into a good quart of frozen. (That's six egg yolks, 1 cup of whole milk, and 2 cups of heavy cream, thank you very much.) It's also got everything to do with fear of failure -- or, better put, fear that the cherry pit ice cream you were so curious to try is actually a total flop. When you're working with farmers' market eggs and organic cream, you're spending a pretty penny; I guess I want to make sure I get my money's worth. Call me a pincher, but you know what? Vanilla comes out just perfect, every single time. It also tastes so pure, so much like the ingredients that are used to make it, that I find it difficult to veer far from it.
vanilla-stracciatella-2

That's thanks in no small part to David Lebovitz, king of lots of things, including ice cream. His book, The Perfect Scoop, is my go-to resource for drooling over ice creams that I never have the courage to make. (My most recent 11th-hour-back-out flavors were maple-walnut, saffron, and ginger.)

By the time this Thursday rolled around and I saw the weekend weather forecast, I new ice cream was in the cards. And having made frozen nonfat and frozen yogurt in the past couple weeks, it was time for the full-fat stuff. Armed with David's book, I decided to venture beyond my safety blanket of vanilla and try something new, something radical: Vanilla with Stracciatella.

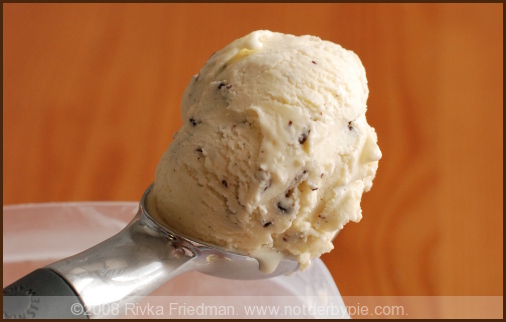
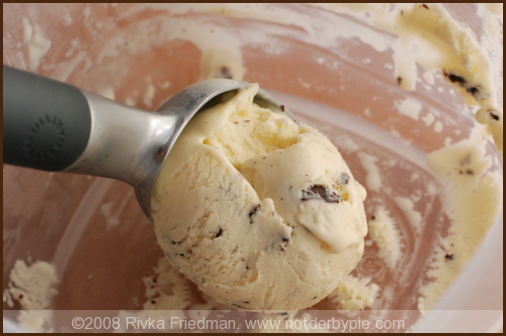
Lest you get too excited, what sounds super fancy and exotic is really just the Italian version of chocolate chip (baby steps, people, baby steps!), only worlds better. Stracciatella, literally "torn apart" in Italian, refers to thin shards of chocolate that are hidden between the layers of ice cream or gelato. They're made by drizzling melted chocolate into the ice cream maker at the last possible moment of churning. The chocolate freezes on contact, forming these thin and crunchy bits that melt in your mouth when you eat the ice cream. In a word, awesome.

Having made really good vanilla ice cream many times, I was a bit concerned about spoiling the pure stuff with chocolate, but after eating it Friday night, I can reassure you that there's nothing to worry about. If anything, the shards of chocolate complement that smooth, rich, vanilla flavor. And to those of my family members who dislike chunky things in their ice cream (yes, you!), fear not: while you do get a bit of crunch at the beginning, the chocolate really does melt in your mouth, giving the whole ice cream a smooth sensation.

Next up on the ice cream docket: maple walnut? saffron? Maybe even cherry pit ice cream. Wish me luck.

About 1 quart

Everyone should gave a great recipe for Vanilla Ice Cream in their repertoire. Here's mine, which you'll want to serve with anything from a freshly-baked pie or just covered with dark, bittersweet chocolate shop and toasted nuts.

1 cup milk A pinch of salt 3/4 cups sugar 1 vanilla bean 6 egg yolks 2 cup heavy cream 3/4 tsp. vanilla

Heat the milk, salt, sugar, and one cup of the cream in a saucepan. Split the vanilla bean lengthwise and scrape the seeds into the milk with the tip of a paring knife. Add the bean pod to the milk. Pour the remaining cup of the cream into a large bowl and set a mesh strainer overtop.

whisk together the egg yolks in a separate bowl and gradually add some of the warmed milk into the yolks, stirring constantly as you pour. Pour the warmed yolks back into the saucepan.

3. Cook over low heat, stirring constantly and scraping the bottom with a heat-proof spatula (I used a wooden spoon), until the custard thickens enough to coat the back of the spatula. Strain the custard into the heavy cream and mix to cool. Rinse the vanilla bean and put it back into the custard and cream to continue steeping. Chill thoroughly, then remove the vanilla bean and freeze in your ice cream maker according to the manufacturers instructions.
The Best Tea Cookies on the Planet

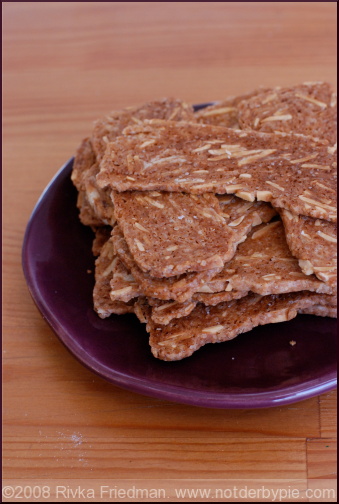
paindamande1 I've always loved the idea of having a local baker -- someone whose shop was within a short walk of my apartment, where I could drop by in the morning for a baguette or a scone, pick up a loaf or two of fresh bread, and pop in on a lazy Sunday afternoon for tea and cookies. Sadly, I don't live in Paris. I do, however, read an excellent blog of someone who does -- that's David Lebovitz, my friends -- and his many posts about local bakers regularly elicit pavlovian responses from my growling tummy. The one that most recently got my attention was about Flo Braker, one of his all-time favorite bakers. (Don't you just love that she's Flo Braker, the Baker? Hardy har.) Among the many recipes in her arsenal is one for thin,, crispy, buttery almond cookies called "pain d'amande" (almond bread). While I'd never heard of Braker before reading David's post, after tasting these cookies, I can assure you that now she's one of my favorite bakers, too.
paindamande3

These aren't just any almond cookies; they benefit from having become an obsession of Braker's -- she's literally made the recipe countless times, each time adjusting the proportions of raw sugar and flour by slight amounts until she achieved the perfect ratio of each. As I said, we benefit from her rigor and perfectionism: these cookies are absolutely flawless, and I wouldn't change a darn thing.

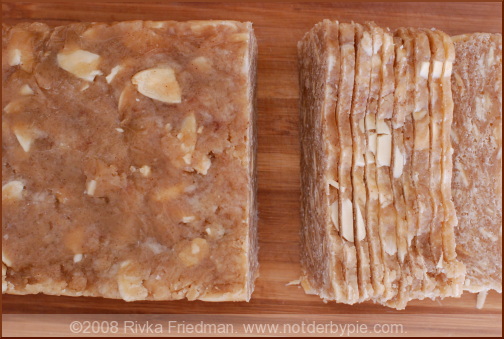
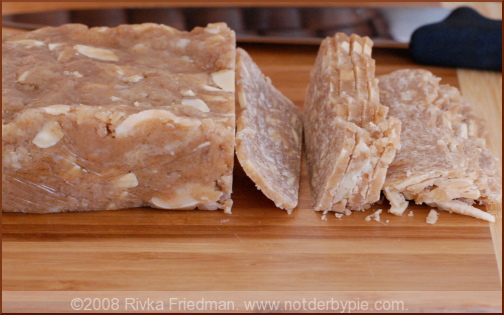
As if the perfect flavor isn't enough to get you running kitchenward, these cookies are among the most practical ones I've made. You form the dough into a loaf, chill it, and slice slivers off the loaf to bake. The loaf of dough keeps its shape wonderfully once formed and can be stored in the fridge for a couple of weeks, allowing you to slice and bake just a few of these whenever you get the craving. I err on the side of caution and bake up about 10 at a time -- you know, just in case.

paindamande2

Flo Braker's Pain D'amande

Pain d'amande 80-90 cookies

Adapted from Sweet Miniatures by Flo Braker

David recommends to use parchment instead of silpat, because otherwise they won't get as crispy. He also suggests that you not let the sugar melt all the way, because the raw crystals add serious crunch to the cookies. I dutifully obeyed his orders and can attest to this: love the raw sugar, it really adds.

8 tablespoons (115g) butter, salted or unsalted, cubed 1 1/3 cups (300g) coarse crystal golden sugar (see Note) 1/2 teaspoon ground cinnamon 1/3 cup (80ml) water 2 1/3 cups (325g) flour 1/4 teaspoon baking soda 1 cup (85g) sliced almonds, blanched or unblanched

1. Melt the butter in a small saucepan over low heat with the sugar, cinnamon, and water. Stir until the butter just melts but don't allow to boil: most of the sugar should not be dissolved.

2. Remove from heat and stir in the flour, baking soda, and almonds until well mixed.

3. Line a 9-inch (23cm) loaf pan with plastic wrap and press the dough into the pan so the top is smooth. Chill until firm.

4. To bake the cookies, preheat the oven to 325º (160ºC.)

5. Using a very sharp chef's knife, slice the dough crosswise, as thin as possible, into rectangles. If you can get them as thin as a coin, all the better. The thinner they are, the more delicate and crisp they'll be.

6. Space the cookies on parchment lined baking sheets and bake for 10-15 minutes, or until the cookies feel slightly firm and the undersides are golden brown. Flip the cookies over and bake an additional 10-15 minutes, until the cookies are crisp and deep golden-brown on top. The baking times depend on how thin you cut the cookies.

Cool completely, then store in an airtight bin until ready to serve.

Storage: Once baked, the cookies will keep in an airtight container for up to three days. The dough can be stored in the refrigerator for up to four days, or frozen for up to two months, if well-wrapped.

Note: Large-crystal golden sugar, as shown, is available in specialty food stores, natural food stores, or online.

Depending on where you live, Hawaiian Washed Sugar from C & H, is available in grocery stores.

Bouchon-Inspired Lemon Tart

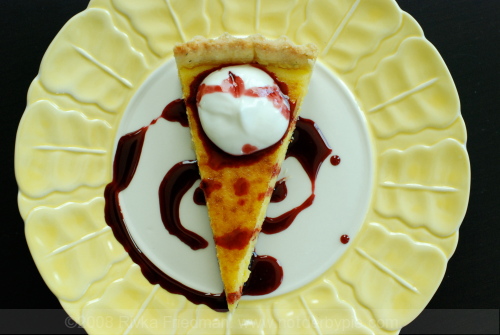
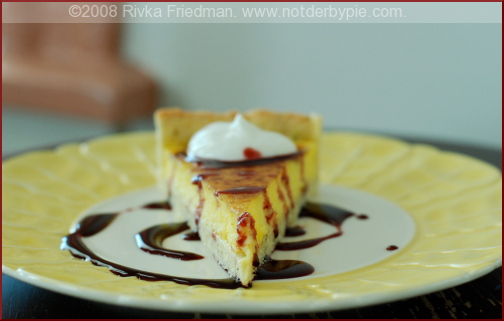
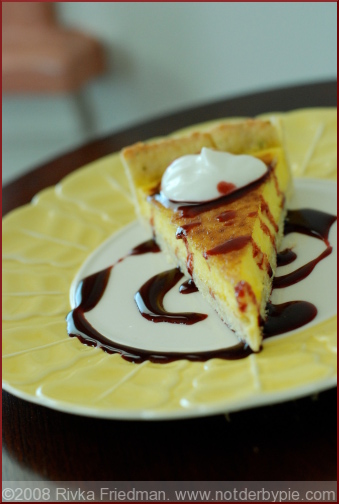
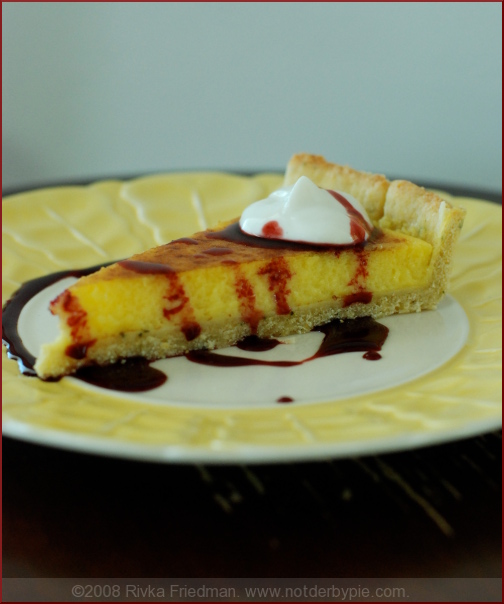
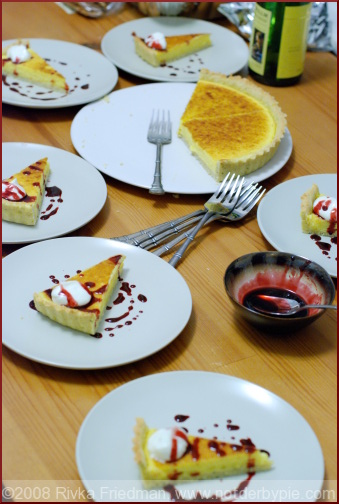
lemontart1 On my last trip to New York, I stood on the third floor of the Time Warner Center for about an hour just waiting to get into Bouchon Bakery. It didn't work out -- the person we were meeting was on a tight schedule -- so we ended up eating salads at Whole Foods. Ever since, I've been dreaming of Bouchon. Have you tried their chocolate bouchons? Oh, man. Delish.
lemontart5

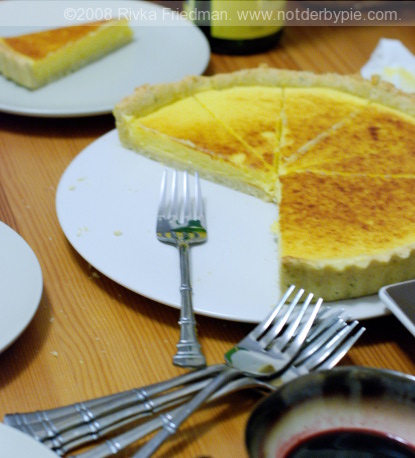
In full stalker mode this Friday, I started googling Bouchon recipes and came across this little treasure, via Epicurious. It's a pretty traditional lemon tart, with two exceptions: one, the crust is a pine nut crust. Two, the lemon curd is actually a sabayon. That means that instead of warming the lemon juice and sugar, adding the eggs, and heating until thickened, the eggs and sugar are whisked vigorously while being warmed over a double boiler, and lemon juice is added in stages as the custard thickens. lemontart3

The result is something less pudding-like, more creamy, and just sweet enough. My arm may have been ready to fall off by the time the sabayon was done, but if I'm one step closer to Michelle Obama's fantastic biceps, I'm certainly not complaining.

lemontart4

As for the crust, I knew for a fact that a few of my diners (read: D) didn't like pine nuts, so I opted instead for a cornmeal-sage crust. If you like that sort of thing, it's a great crust recipe: again, not too sweet, with the distinct texture and fruitiness of cornmeal and faint herbal flavor from the chopped fresh sage. I imagine the pine nut crust is delicious -- and pine nuts and lemon are truly a winning combination -- but the cornmeal crust is a great alternative. I've included both recipes below.

lemontart6

Next up: maybe a salmon recipe (the sauce is so good I ate the leftovers straight, with a spoon), maybe an easy olive appetizer. We'll see.

lemontart7

Bouchon-Inspired Lemon Tart from Bouchon, by Thomas Keller, via Epicurious

Lemon Sabayon: 2 large eggs, cold 2 large egg yolks, cold 3/4 cup sugar 1/2 cup fresh lemon juice 6 tablespoons (3 ounces) cold unsalted butter, cut into 6 pieces

For the sabayon: Bring about 1 1/2 inches of water to a boil in a pot that is slightly smaller than the diameter of the bowl you will be using for the sabayon. Meanwhile, in a large metal bowl, whisk the eggs, yolks, and sugar for about 1 minute, or until the mixture is smooth.

Set the bowl over the pot and, using a large whisk, whip the mixture while you turn the bowl (for even heating). After about 2 minutes, when the eggs are foamy and have thickened, add one-third of the lemon juice. Continue to whisk vigorously and, when the mixture thickens again, add another one-third of the lemon juice. Whisk until the mixture thickens again, then add the remaining lemon juice. Continue whisking vigorously, still turning the bowl, until the mixture is thickened and light in color and the whisk leaves a trail in the bottom of the bowl. The total cooking time should be 8 to 10 minutes.

Turn off the heat and leave the bowl over the water. Whisk in the butter a piece at a time. The sabayon may loosen slightly, but it will thicken and set as it cools. Pour the warm sabayon into the tart crust (recipes below) and place the pan on a baking sheet.

Preheat the broiler. While the sabayon is still warm, place the tart under the broiler. Leaving the door open, brown the top of the sabayon, rotating the tart if necessary for even color; this will take only a few seconds, so do not leave the oven. Remove the tart from the broiler and let it sit for at least 1 hour before serving. Serve at room temperature or cold.

Pine Nut Crust: 10 ounces (2 cups) pine nuts 1/3 cup sugar 1 pound (3 cups) all-purpose flour 8 ounces unsalted butter, at room temperature 1 large egg 1 teaspoon pure vanilla extract

Place the pine nuts in a food processor and pulse a few times. Add the sugar and flour and continue to pulse until the nuts are finely ground. Transfer the mixture to a large bowl.

Add the butter, egg, and vanilla extract and mix to incorporate all the ingredients (the dough can be mixed by hand or in a mixer fitted with the paddle attachment). Divide the dough into three equal parts. Wrap each piece in plastic wrap and refrigerate for at least 10 minutes before using. (The extra dough can be frozen, wrapped well, for up to 1 month.)

Preheat the oven to 350°F. Generously butter and flour a 9-inch fluted tart pan with a removable bottom and refrigerate it while the oven preheats.

Remove the tart pan from the refrigerator. Use your fingertips to press the chilled pine nut dough evenly over the bottom and up the sides of the pan. Trim off any excess dough.

Bake the crust for 10 to 15 minutes, then rotate it and bake for another 10 to 15 minutes, or until it is golden brown. Remove the crust from the oven and let it cool while you make the filling. (There may be some cracks in the crust; they will not affect the finished tart.)

Sage Cornmeal Crust from Martha Stewart

2 1/4 cups all-purpose flour, plus more for work surface 3/4 cup coarse yellow cornmeal 3 tablespoons sugar 1 tablespoon plus 1 teaspoon finely chopped fresh sage 1 1/2 teaspoons salt 1/2 teaspoon finely grated lemon zest 3/4 cup (1 1/2 sticks) cold unsalted butter, cut into small pieces 3 large egg yolks 5 tablespoons ice water

Pulse flour, cornmeal, sugar, sage, salt, and lemon zest in a food processor until combined. Add butter; pulse until mixture resembles coarse meal. Whisk egg yolks and ice water in a small bowl. With machine running, add to flour mixture through feed tube; process until dough just holds together.

Turn out dough onto a work surface. Divide in half, and shape each portion into a disk. Wrap in plastic, and refrigerate 30 minutes (or up to 2 days).

On a lightly floured work surface, roll out 1 disk to a 10-inch round. Fit into a 9-inch tart pan with a removable bottom; trim edges flush with rim. Refrigerate until firm, at least 1 hour (or up to 1 day). Reserve remaining dough for another use (it can be frozen up to 3 months). Preheat oven to 375 degrees. Prick bottom of tart shell with a fork. Bake until golden brown, about 25 minutes. Let cool.

Perfect Pound Cake

olive-oil-pound-cake-4 The spring season is upon us, and we've got the rainfall to prove it! I wanted to go with something clean and fresh-looking for the spring blog design, with bright colors and lots of white space. So clear that cache and check out NDP's new layout -- I hope you like it!
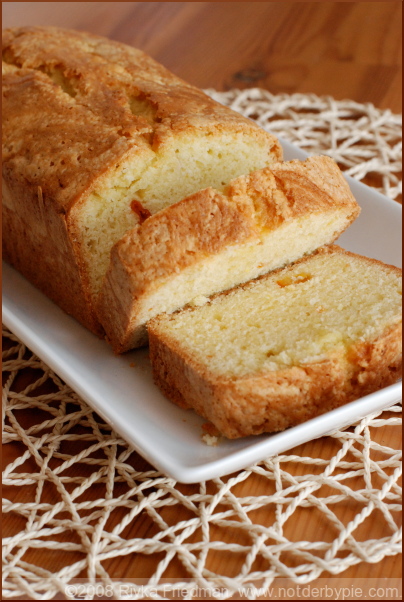
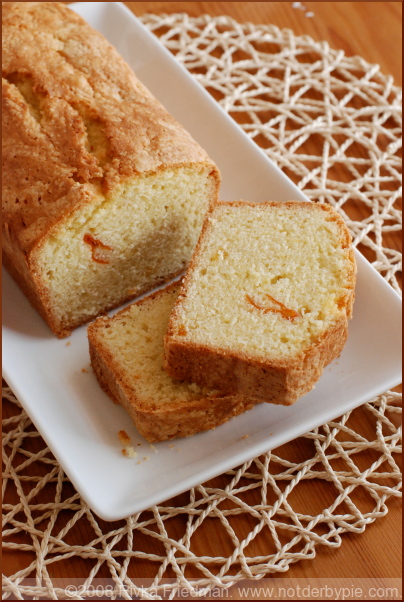
We went to synagogue every week when I was a kid. After services, the congregation would flood into the social hall for "kiddush" -- meaning the prayer over the wine, but also the term used to describe the nibble-and-schmoozefest that occurs after prayers. The "kiddush ladies" would have set up long tables lined with silver trays full of herring (for the old men) and sweets (for the rest of us), and people would just go nuts. All the kids (including me) would wriggle our way in between the long lines of adults to score goodies before they were all snatched up, and like good children we'd compare plates to see who had accumulated the largest stash of junk food.

At a certain age, the game got old, as I realized that the goodies served at kiddush were actually really gross. The cookies were soft and crumbly, the chocolate was all non-dairy and really yuck, and the pound cake -- don't even get me started on the pound cake -- was truly terrible. Soft and mushy, but somehow still totally dry and bland-tasting, it was an affront to everything a pound cake should be. It's fair to say that kiddush ruined my appetite for pound cake, and even now, I struggle to get excited about it.

olive-oil-pound-cake-3

That is, I struggled to get excited about it, until I encountered Alice Medrich. As you might know from past posts, I've never made a recipe from Alice Medrich that wasn't absolutely, positively perfect. Her Pure Dessert is by far my favorite dessert cookbook, and I'm on my way to making every recipe contained therein. A while back, I noticed a pound cake recipe in Pure Dessert. The recipe is for olive oil pound cake, and calls for no butter at all. Seeing as Medrich is not shy with the butter -- not shy at all -- I assumed she must know something about olive oil in pound cake that I had yet to discover.

olive-oil-pound-cake-2

Oh, how right I was -- and by that, I mean how right she was -- about the olive oil. It lends the pound cake a moist, slightly dense but even crumb that's really just perfect. Its lower smoking point makes a super crispy crust. And its flavor, especially if you use a high-quality olive oil, is a lovely contrast to the cake's sweetness. I never thought I'd say this, but I loved this pound cake. Like, a lot. Like, so much that I made it twice in one week.

Well, almost. The first round was exactly as the recipe dictated. But the second time I made it slightly differently. (Backstory alert...) See, a couple weeks ago, when I catered that surprise birthday party for Mandy, I went out on a very skinny, brittle limb and made these candied-kumquat-and-olive appetizers that I read about on Alinea at Home that were totally wild-sounding and, oh my goodness, utterly delicious (who knew I even liked kumquats, for serious?). Inspired by the success of something so off-the-beaten-path and unassuming, I made another batch of candied kumquats, you know, just to have. The moment I stuck them in the fridge, it dawned on me that I'd no idea how or where to use them. I could envision a meat dish with them as a condiment or complementary ingredient, but I rarely make meat. I thing they're too strong to just serve over cake or ice cream (though the syrup over vanilla ice cream would be totally divine, come to think of it). So I turned to my new favorite source of advice -- twitter. (Are you on twitter? If so, you can follow my kitchen adventures and, um, other fun things.) Sure enough, that did it. The wonderfulPim chimed in with instructions that were under my nose the whole time: stick some into my favorite pound cake recipe (see where I'm going?) and brush the syrup over the top while the cake is still warm. Bingo.

I did just that, using Alice Medrich's tried-and-truly-wonderful pound cake recipe as a base. Except that my sherry ran out while making the first go-round, so this time I used cointreau (I'd have used triple sec but didn't have any on hand), which, with the kumquats and syrup, made an excellent pair. I tell you, this pound cake is a cinch to make (no butter=no creaming necessary), relatively good for you (I said relatively, didn't I?) and simply perfect in its simplicity. I actually served round two last Sunday morning with cowgirl creamery butter, pear-pecorino salad, and frittata, and as D said, it made for a somewhat unconventional but plenty delicious brunch.

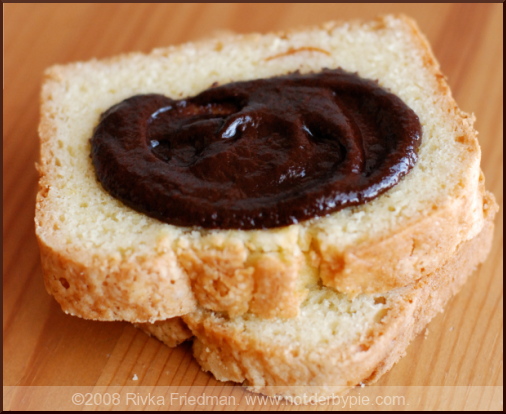
What of the first picture in this post, the slice of cake with a dollop of chocolate ganache? Well, the lovely Lara of Cook and Eat and Still Life With... has launched a Flickr photography group (check Lara's websites for details), and in an attempt to kick it up a notch, I've joined. First challenge? Bread and chocolate. Easy said as done -- and by the way, kumquats and chocolate are a match made in heaven.

Olive Oil Pound Cake from Alice Medrich's Pure Dessert

3 cups (13.5 oz) all-purpose flour 2 tsp baking powder ¼ tsp salt 2 cups sugar 1 cup flavorful extra virgin olive oil 2 tsp grated orange zest (from 1 medium orange) 5 large cold eggs 1 cup medium (amontillado) sherry

Position a rack in the lower third of the oven and preheat the oven tot 350 °F. Grease and flour the pans. (Or, if you prefer, line the bottom and sides of the loaf pans with parchment.) Mix the flour, baking powder, and salt thoroughly in a large bowl and sift together. Set aside. In the bowl of a stand mixer (with the whisk attachment if you have one), beat the sugar, oil, and orange zest on high speed until well blended. Add the eggs one at a time, beating well after each addition; continue to beat until the mixture is thick and pale, 3 to 5 minutes. Stop the mixer and add half of the sherry. Beat just until blended. Repeat with another third of the flour, followed by the remaining sherry, and then the remaining flour. (If desired, now would be the time to incorporate any add-ins, including, if you're feeling adventurous, candied kumquats.) Scrape the batter into the pan(s). Bake until the cake tester comes out clean, 50 to 60 minutes for either the tube pan or the loaves. Cool the cake in the pan(s) on a rack for about 15 minutes before unmolding. Smaller pans, 30-35 minutes. If using a tube pan, slide a skewer around the tube. If the sides of the pan are straight, slide a thin knife or spatula around the sides to release the cake (unless lined with paper). If using a Bundt or other decorative pan, tap one side of the pan against the counter to release the cake, then tap the other side. Invert the cake onto a rack. Turn the preferred side up before cooling the cake completely. Wrapped airtight, the cake keeps well at room temperature for up to 3 days, or freeze for up to 3 months.