Chocolate Babka

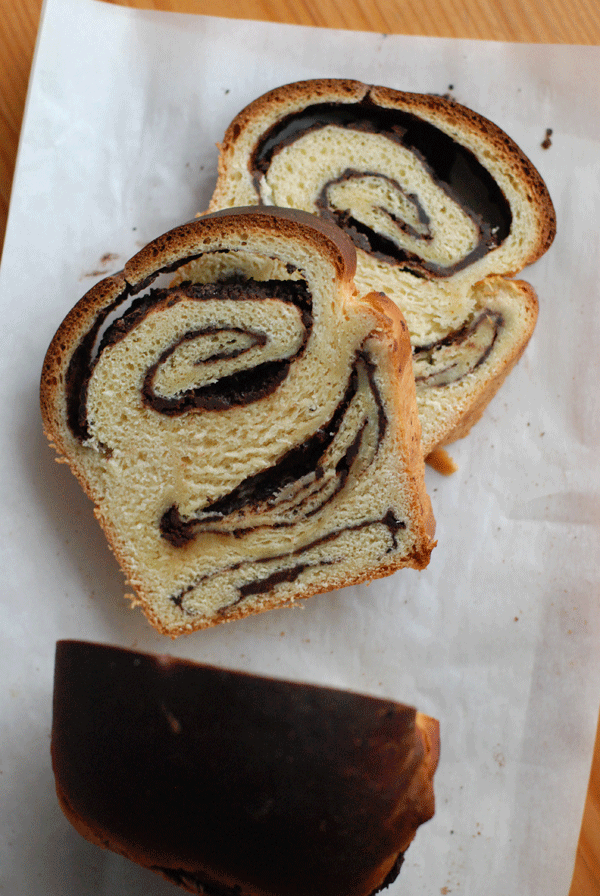
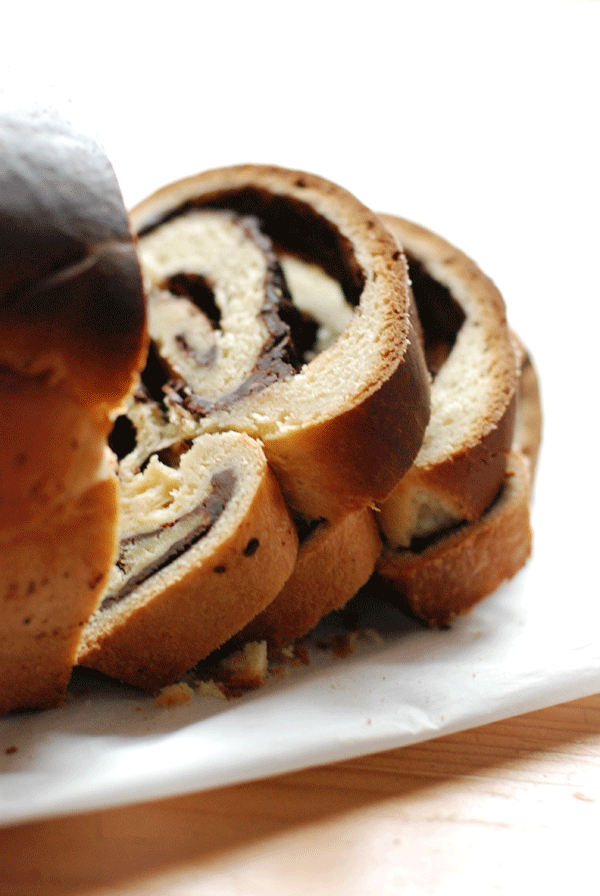
When I was a kid, I couldn't wait for Saturday to come. I'd like to say I loved the break from homework and the chance to spend time outdoors, but really, it was just the Babka. Green's Babka, specifically. The chocolate came in the blue wrapper; if you wanted cinnamon, you went for the green. Inside were many countless sheets of paper-thin dough, folded accordion style as densely as could be, and protectively encasing layers of chocolate. A cross-section had the complex structure of brisket, with all those layers to cut through. I ate mine from the outside in, peeling the layers apart slowly and seeing how thin I could rip each piece. It was quite the treat.

The complex structure of the dessert was etched in my mind. So many layers! And so impossibly thin! However did they do it? For years, I (stupidly) assumed that homemade babka was out of reach. But after a brush with the old-school Green's a couple months back, I was jolted from the romance reminded that Green's is made with wow, so much margarine. And no butter at all. I was convinced that by using the real stuff, I could make an even better version of the childhood classic.

I was right. The babka I made last week, while not really anything like Green's, was delicious. It was less like a croissant and more like a not-so-delicate brioche: soft and buttery, with occasional folds of chocolate and plenty of richness. And seeing as I'm in the middle of a toasting trend, I'll just say it: slices of babka older than a day should be toasted.

This babka comes from Peter Reinhart. Since his pizza dough was such a success, I couldn't resist giving one of his more complex recipes a try. Admittedly, there are a couple rises involved in making this babka, so it's a bit time-consuming and not as hands-off as some of the other baked goods I've been making. That said, the results are sure to elicit oohs and ahhs from your brunch companions. Babka also makes a splendid rustic dessert.

Chocolate Babka adapted from Peter Reinhart

Note: Reinhart suggests a crumb toping that, while traditional, isn't altogether necessary. I omitted it.

2 tablespoons yeast 3/4 cup lukewarm milk 6 tablespoons butter, melted or at room temperature 6 tablespoons sugar 1 teaspoon vanila 4 egg yolks, broken up slightly 3 1/3 cups unbleached all-purpose flour 1 teaspoon salt 1 egg and 1 tablespoon water for egg wash, if using crumb topping

Filling:

1 1/2 cups frozen semisweet chocolate chips or chunks 1 teaspoon cinnamon 1/4 cup cold butter

Streusel Topping:

1/4 cup cold butter 1/2 cup flour 1/2 cup brown sugar pinch salt 1/4 teaspoon cinnamon

In a small bowl, whisk yeast into milk until dissolved and let proof for 5 minutes.

In a large bowl or the bowl of a stand mixer, cream butter and sugar on medium until combined, about 1-2 minutes. Add vanilla to egg yolks, and add to dough in four portions, mixing until combined each time. Once mixed, turn mixer to medium high and continue mixing until uniform and fluffy, scraping down as you go. If using a hand mixer or a spoon, mix as powerfully as possible.

Stop mixing, add flour and salt, and pour in milk mixture. Continue mixing on low until well-incorporated, about 2-3 minutes, until dough is soft and somewhat sticky. If mixer struggles, switch to dough hook or mix by hand.

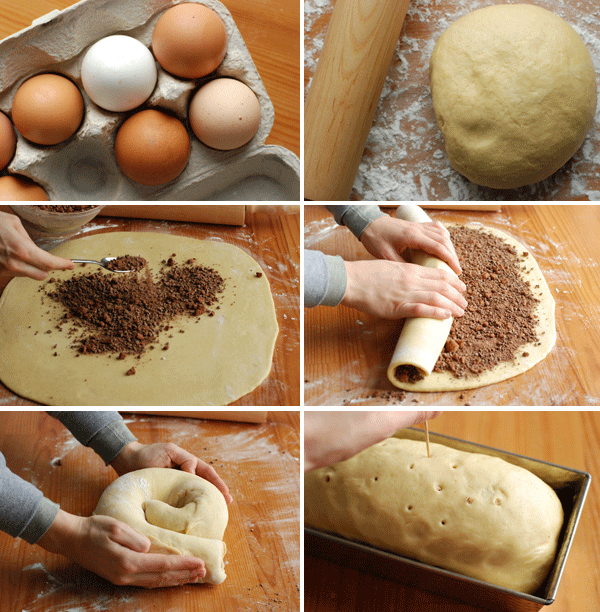
Transfer dough to floured work surface and continue kneading by hand another 2 minutes, until dough is no longer sticky, but still soft and pliable. Form dough into a ball. Place in lightly oiled bowl, cover tightly with plastic wrap, and let rise at room temperature about 2.5 hours. Dough will rise some, but not double in size.

Meanwhile, prepare filling: grind chocolate in food processor, then add cinnamon. Cut butter into small pieces and add to food processor, mixing until butter is evenly dispersed into the chocolate.

Roll risen dough into 15x15 inch square on lightly floured work surface. Dough should be between 1/4 and 1/8 inch thick. Be sure to lift the dough regularly in between rolls and add flour as necessary to prevent sticking.

Sprinkle filling evenly over dough, leaving 1/4-inch border. Roll up dough and place it seam-side down on work surface. Rock dough back and forth gently to extend roll to about 20 inches long.

Wrap dough around itself to form coil shape. Stand coil on its side, compress lightly to form a loaf shape, and transfer to greased loaf pan. Cover loosely with plastic and let rise at room temperature for 2-3 hours until babka fills out the pan. At this point, either bake babka immediately or refrigerate overnight. BE SURE TO BRING TO ROOM TEMPERATURE BEFORE BAKING!

Preheat oven to 350 degrees. Poke a few holes in top of babka.

If using streusel, combine all ingredients in processor or mix in bowl with pastry blender until it is in small bits. Brush top of babka with egg wash, then sprinkle streusel over top. Bake 25 minutes, then rotate pan and bake until top and sides are dark brown and loaf sounds hollow when thumped, about 25 minutes more. Dough will quickly turn brown, but won't burn; don't panic if it's dark, just check the hollowness and the sides for doneness. Total baking time shouldn't be more than 60 minutes (though depending on your oven, I suppose it may be; trust the dough -- if it sounds hollow and looks deep deep brown, it's probably done).

Let cool at least 90 minutes before serving.
Syllabub

To Amanda Hesser's list of foods whose names alone command that you make them, I add this quirky dessert. Syllabub! Every time in the past two weeks I've called it by name, it's been met with total crack-up laughter. Don't you want to make it too, just to be able to say you whipped something up and it's called Syllabub? Ha.

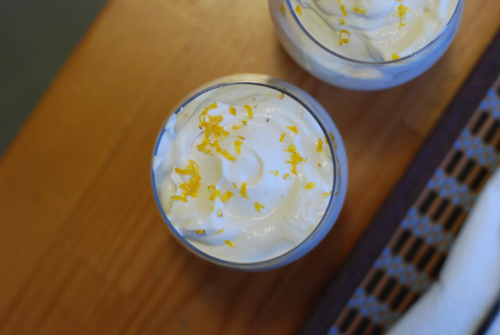
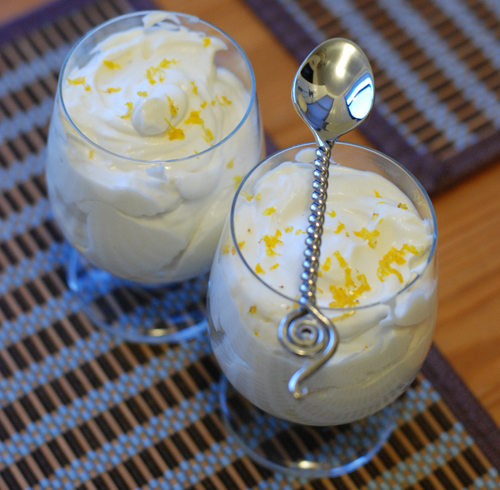
Now that I've made it, I can tell you the name shouldn't be your only motivation for giving Syllabub a whirl. I came across the recipe in an old issue of Saveur (1996, maybe?) that I was reading last weekend at a friend's lake house in Wisconsin. The picture caught my eye: a big, heavy-bottomed glass was filled to the brim with what looked like vanilla custard, topped with a bit of lemon zest and a sprig of rosemary. Intrigued, I read the piece: turns out, syllabub is basically whipping cream combined with sherry and some flavorings. Something about the alcohol or the acid of the lemon juice (or maybe both) thicken the cream without much whipping -- it's very bizarre! -- so very little, if any, work is necessary.

There's a great little anecdote in the Saveur piece about how people used to milk their cows into a bowl with some wine in it, which had the fascinating effect of thickening the cream on top while letting the whey sink to the bottom. I don't have any cows to milk, but I knew instantly that I had to make this dessert -- if only to see cream whip itself.

The result is both fascinating, and quite tasty. The sherry is joined by lemon zest, sugar, a bit of cognac, and a whisper of vanilla; they mingle overnight (or for five minutes, if you're me), and cream is added. Et voila, the perfect end to your meal. I could see layering some berries or berry sauce in between layers of the syllabub, as the cream on its own is quite rich. In terms of alcohol, don't feel bound to use sherry; I also used brandy (not just the 2 tablespoons called for, but in place of the sherry as well) and, while the final product is definitely different, it's equally tasty.

Syllabub adapted from Saveur

1⁄3 cup superfine sugar 1⁄4 cup oloroso or other sherry 2 tbsp. cognac or other brandy 2 tbsp. fresh lemon juice Zest of 1 lemon, reserve a small amount for garnish 1 3⁄4 cups plus 2 tbsp. cold heavy cream (preferably unhomogenized) Pinch of freshly grated nutmeg 4 sprigs of rosemary 1. Put sugar, sherry, cognac, lemon juice, and zest into a large bowl. Stir well, then cover and let sit out at room temperature overnight to allow the flavors to meld. 2. Add heavy cream and a pinch of nutmeg (just "a suspicion", says Day-Lewis) to the sherry mixture and whip with a whisk until soft peaks form. Spoon into 4 glasses and garnish each with a bit of lemon zest and a sprig of rosemary.

Goat Cheese Caramel Cheesecake

cheesecake5 The last several times I saw cheesecake on a restaurant menu, it always listed some cheese other than cream cheese as its defining ingredient: ricotta, farmers cheese, and goat cheese seem to make regular appearances.
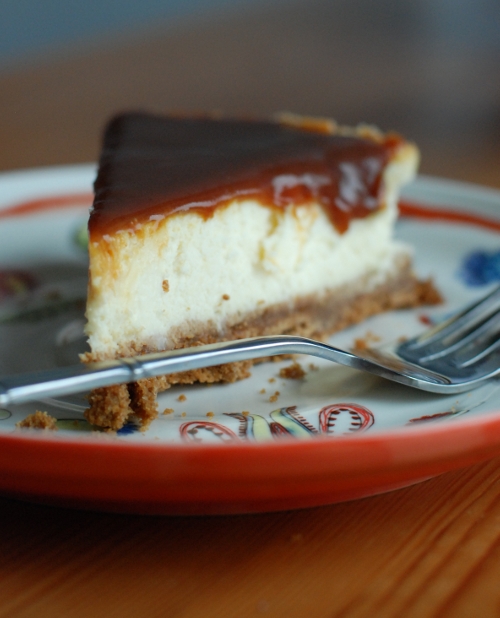
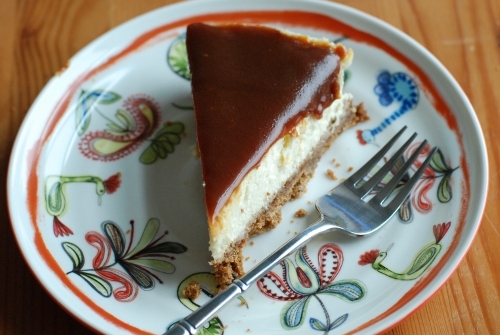
This is with good reason: traditional cheesecake is overly sweet and very dense. It feels to me like a 1980's-era dessert, something that no one really serves anymore. I can eat only a couple bites of it before needing a break from the sugar shock, and while the texture is initially nice, it wears me out after a while. I suppose this is why I've made it only once or twice, ever. Inexperience notwithstanding, something about being a food blogger makes me foolish enough to believe that I'll master a recipe immediately, and so when I got a hankering for cheesecake this weekend, I was determined to make the perfect version.

cheesecake4

As often as my culinary hubris has backfired, this time, I've gotta say, I think I pretty much hit the nail on the head. I auditioned several recipes beforehand -- everything from toffee crunch to chocolate-coffee to key lime -- just to make sure I considered all the possibilities. Ultimately, I settled on something akin to New York cheesecake, with lemon juice and zest to offset the sugar. I also drew inspiration from all those restaurant menus, using goat cheese in lieu of much of the cream cheese called for in classic recipes. I like goat cheese's tanginess, and I also find it lighter and thus more bearable than cream cheese.

cheesecake3

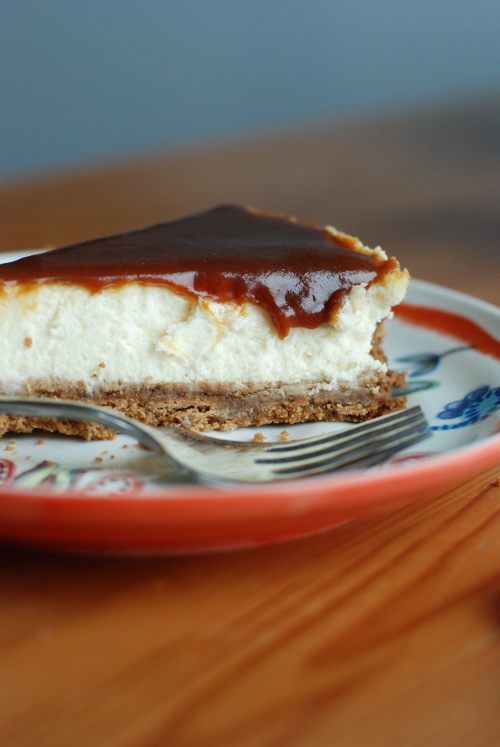
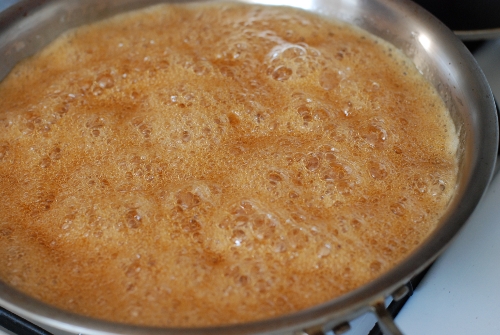
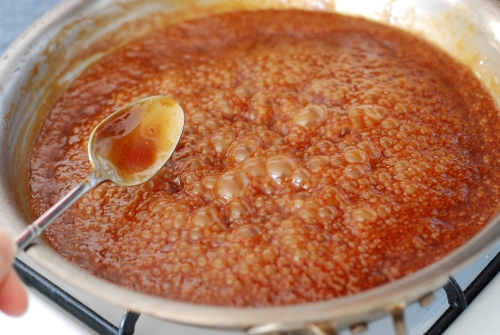
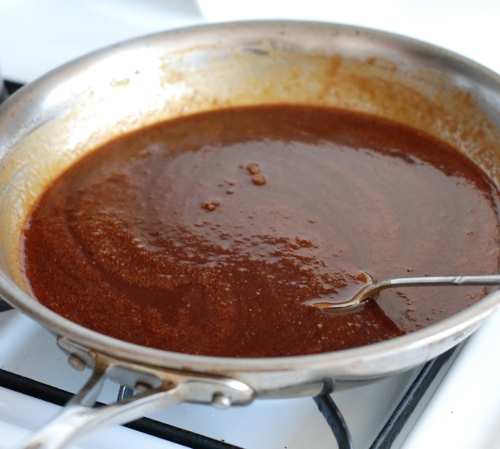
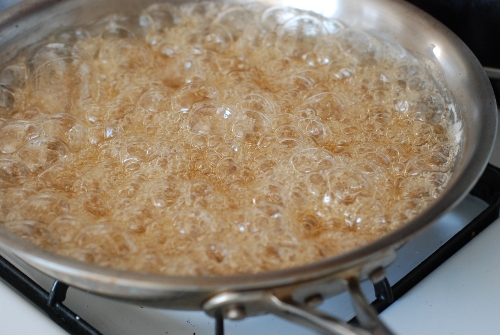
I decided to top off my goat cheese cake with a coat of dark, smokey caramel. I added a bit of lemon juice to the caramel topping to echo the lemon in the cake and cut the sweetness, and included a generous amount of salt because I find caramel is no good unless it's equal measures sweet and salty.

caramela

caramelb

caramel1.jpg

caramel2

The finished result was excellent. It was still creamy enough to please cheesecake lovers, but it certainly wasn't as dense or cloying as its classic sibling. The caramel was every bit as ooh-ahh tasty as I'd hoped, and the gingersnap crust I had chosen gave the final product a nice hint of spice. I may not make cheesecake very often, but next time I do, I won't need to think twice in choosing a recipe.

Goat Cheese Caramel Cheesecake inspired by Bon Appetit and Rose Levy Berenbaum's excellent book, The Cake Bible

Crust:

1 1/2 cups/ 7.25 oz. gingersnap cookies (I used TJ's brand "cat cookies") 5 tablespoons butter, melted 2 tablespoons light brown sugar

Cake:

1 8-oz. package cream cheese 16 oz. goat cheese or fresh chevre 1 cup minus one tablespoon light brown sugar 2 tablespoons butter, melted 1/4 cup heavy cream 3 eggs 1 teaspoon vanilla extract zest of one lemon 1 tablespoon fresh lemon juice

Caramel topping:

1 1/2 cups cane sugar 1/4 cup water 1/2 teaspoon fresh lemon juice 1 cup heavy cream 1 1/4 teaspoons good flaky salt

For gingersnap crust: Preheat oven to 350°F. Butter or spray bottom of 9-inch springform pan with 2 1/2-inch-high sides with nonstick spray. Stir ground cookies, butter, and sugar in medium bowl until moist clumps form. Press cookie mixture firmly onto bottom of prepared pan. Wrap outside of pan with 3 layers of foil. Bake crust until firm and beginning to darken, about 14 minutes. Leave oven on, and set crust aside to cool.

For cheesecake: Beat cream cheese, goat cheese, and sugar in large bowl (using a hand mixer) or food processor until smooth. Beat in butter, then cream, then eggs, 1 at a time, until just blended. Beat in vanilla, lemon juice, and lemon zest. Pour batter over crust in pan. Place springform pan in large roasting pan. Add enough hot water to come halfway up sides of springform pan. Bake cake uncovered about 45 minutes. Do not open oven; turn off heat and allow cheesecake to cool in oven 1 hour without opening oven door. After 1 hour, remove cheesecake and cool uncovered in refrigerator at least 2 hours, preferably overnight.

For caramel topping: Stir sugar, water, salt, and lemon juice in large saucepan over medium heat until sugar dissolves. Increase heat; boil without stirring until mixture turns deep amber, occasionally swirling pan and brushing down sides with wet pastry brush, about 9 minutes. Add cream (mixture will bubble). Reduce heat to medium-low. Simmer until reduced to 1 1/4 cups, stirring occasionally, about 8 minutes. Chill until thickened but still pourable, about 15 minutes.

Spoon caramel over top of cake just to edges (do not allow caramel to drip down sides). Chill at least 2 hours before serving.

Run knife around pan sides to loosen cake; release pan sides.

Serving tip: wet knife slightly before and in between slicing; this will help prevent the blade from sticking to the caramel, which is very sticky.

Chocolate-Dipped Hazelnut Shortbread

chocolate dunked shortbread 6 If it wasn't obvious from my cookie page, I've got something of a permanent craving for bite-sized crunchy/chewy treats. Hanukkah isn't really a cookie-focused holiday -- it's more a celebration of your deep fryer. But Christmas is just around the corner, and every year, I get swept up in the holiday spirit. This year is no exception, and I'm more than happy to bake off a few batches in honor of the holiday cookie season. Just doing my duty, people.

Tonight's first batch was my favorite chocolate chip cookies. Everyone's got a favorite recipe: mine are pretty close to the NYT recipe, only I don't mess around with the two different types of flour, I use natural sugar instead of bleached white stuff, and I use a mix of ghiradelli chocolate chips and chopped bittersweet chocolate for textural contrast.

chocolate dunked shortbread 2

After a few of those were in the oven -- for D, of course, just wanted to please my lady -- I moved onto batch number two: hazelnut shortbread. Less sweet but just as buttery and full of toasted nuts, these shortbread are chocolate chip cookies' sophisticated sibling. They come together in a flash, and can be baked in any number of ways. If you're in a rush, roll the whole pile of dough into a log and stick them in the freezer for slice-and-bake action later. If you have more time, form them into little individual log cookies. Either way, dunk the finished shortbread into shiny melted chocolate (or just drizzle the chocolate on top using a fork), and roll in toasted nuts on top for some truly elegant December desserts. Oh, and by the way: they make a lovely holiday present.

Speaking of holiday presents, if buying toys isn't your thing, why not make something homemade? Fudge, sea-salt caramels, cookies, truffles, and even home-assembled cake mixes (dry ingredients layered decoratively in a jar, with instructions included) all make great gifts.

chocolate dunked shortbread1

Chocolate-Dipped Hazelnut Shortbread adapted from Bon Appetit

1 cup all purpose flour 1/2 teaspoon baking powder 1/4 teaspoon salt 1/2 cup (1 stick) unsalted butter, room temperature 1/3 cup sugar 1/2 cup finely ground husked toasted hazelnuts (about 2 ounces) 1 teaspoon vanilla extract

4 ounces high-quality milk chocolate (such as Lindt or Perugina), chopped 1/3 cup coarsely chopped husked toasted hazelnuts or shelled, unsalted pistachios

Position rack in center of oven and preheat to 325°F. Line large baking sheet with parchment paper. Whisk flour, baking powder, and salt in medium bowl to blend. Using electric mixer, beat butter and sugar in large bowl until smooth. Beat in 1/2 cup finely ground hazelnuts and vanilla. Beat in flour mixture until just combined.

Shape dough by tablespoonfuls into 3-inch-long logs. Place on prepared baking sheet, spacing 1 inch apart. Bake cookies until light golden brown around edges, about 20 minutes. Cool on baking sheet 5 minutes. Transfer to rack; cool cookies completely.

Stir milk chocolate in top of double boiler over barely simmering water until melted and smooth. Remove from over water. Place 1/3 cup coarsely chopped hazelnuts in small bowl. Dip 1 end of cookie into melted chocolate, then into coarsely chopped hazelnuts (or pistachios, which I love for their green color). Return to rack. Repeat with remaining cookies. Let stand until chocolate is set, about 1 hour. (Cookies can be made 2 days ahead. Store in airtight container at room temperature.)