Linzertorte

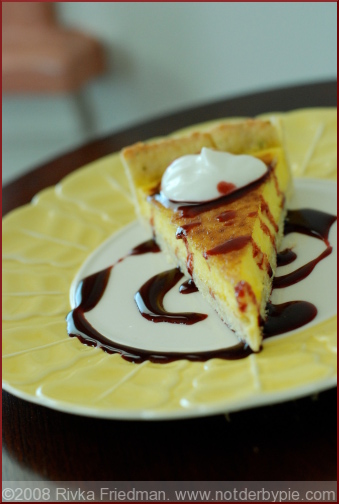
If you've eaten your vegetables -- in this salad and this delightfully spring-y side dish and oh, this is quite nice, too, I forgot about it! -- I've got some dessert for you. It's Linzer Torte, and it's such a steadfast ritual in this house, I'm practically embarrassed to have not shared it before now.

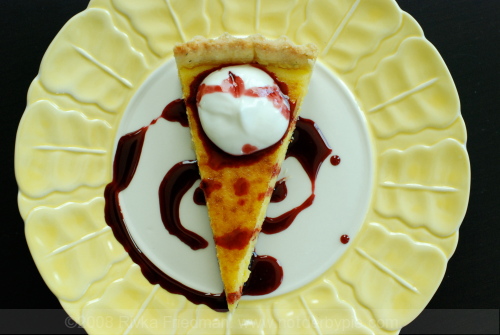
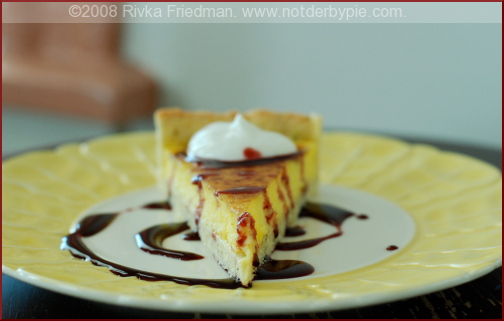
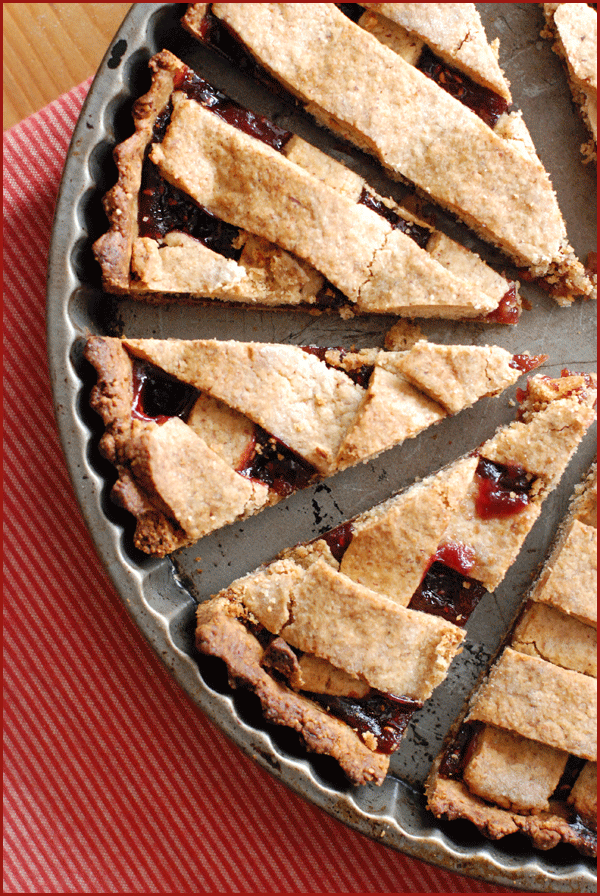
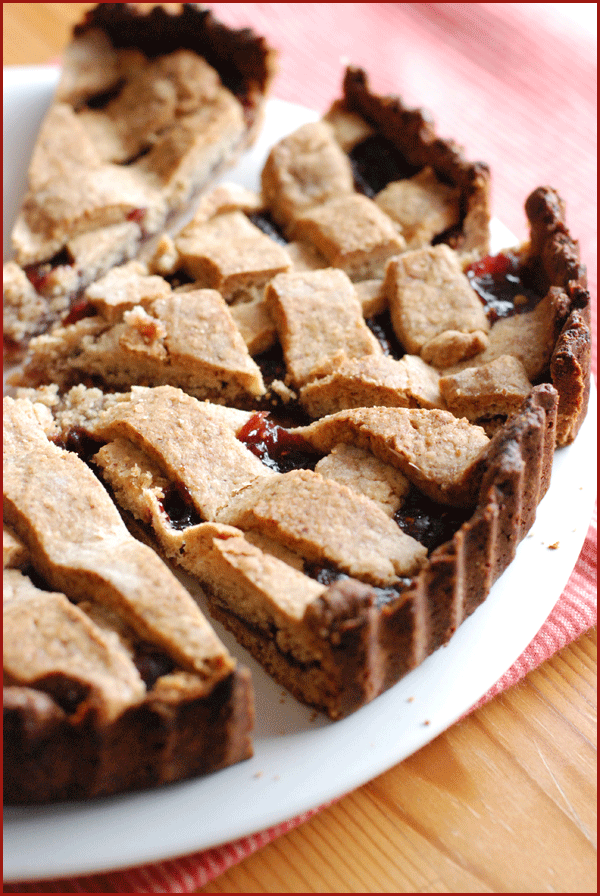
In a world where desserts are froufrou and frosted and altogether cupcaketastic, Linzer is a refreshing aberration. It's dark, dense, and jammy, with not a dab of frosting in sight. Granted, it's a bit on the fussy side. But between you and me, if you want to skip the whole lattice crust situation and just plop clumps of the dough on top of the jam, it'll taste just as good. The almond flour dough is spiked with cinnamon, cloves, and lemon zest. There are egg yolks. There is raspberry jam. I'm pretty sure I've done my job -- you want some, right?

No problem. We'll get right to it. First things first: go forth and get ye some very good raspberry jam. You're meant to use black raspberry, but red works just fine (it's what I usually use). None of the crappy junk -- there's a whole layer of this cake that's nothing but jam, so you may as well invest in the good stuff. I like St. Dalfour brand; if you live in DC, the raspberry preserves from Star Hollow Farm are wonderful. You can get them at the AdMo market. Of course, you could always make them yourself.

Next, get some almonds. Here's a secret: While the recipe has you toast and then blend almonds into a fine powder, you can also buy almond flour, and toast it. I've provided instructions below, just in case you want to be fabulously lazy.

Fear not, there's plenty of fuss to make later on. If you opt to go all the way with the lattice crust, there are a couple ways to shortcut. Naturally, I've listed all the tricks I know. Just do me a favor: don't let the project-y nature of the torte get in the way of making it. Few things are worth the trouble like Linzer Torte.

Linzer Torte adapted from The New Best Recipe

1 1/2 cups sliced almonds with skins (6 oz) or equal weight almond flour 1 1/2 cups all-purpose flour 2 teaspoon finely grated fresh lemon zest 1/4 teaspoon salt 1/2 teaspoon cinnamon 1/8 teaspoon ground cloves 1/2 cup sugar 10 tablespoons unsalted butter, softened 2 egg yolks (1 egg will work in a pinch, I've tried it) 1 teaspoon vanilla 1 cup red-raspberry jam

Preheat oven to 350. If using whole almonds, spread on baking sheet in a single layer and toast about 8 minutes, until golden brown. If using almond flour, spread on baking sheet just the same, but toast about 5 minutes, checking frequently, until golden. Process whole almonds until very fine. Mix with flour, cinnamon, cloves, salt, and lemon zest in a medium bowl.

In the bowl of a stand mixer fitted with the paddle attachment, beat butter and sugar on medium-high until light, fluffy, and well-combined. Scrape down the sides of the bowl. Add egg yolks and vanilla and mix on medium until combined; batter will look somewhat clumpy, and that's okay. Add flour mixture and mix on low just until combined. Form dough into a ball, wrap in plastic, and chill at least 30 minutes.

Turn oven up to 400. Divide dough in half. Shape one half into a flat disk and return to the fridge; take the other half and press into a 9-inch tart pan with false bottom. You can try using a flat measuring cup or ramekin to even out the dough layer, but I find the dough too sticky for this to work, so I use my palm, and it works just fine. Be sure to press it up the sides as well. Chill 15 minutes.

Prick dough a couple times with a fork, line it with foil, fill with pie weights or beans or rice, and bake 20 minutes. Remove weights, and bake until barely golden, about 5 minutes longer. Lower heat to 350.

Spread the raspberry jam over the partially-cooled bottom crust in an even layer, all the way to the edges.

Here's the fussy part: take the remaining dough out of the fridge, and roll to 1/8-inch thick between two layers of lightly floured parchment or wax paper. Peel off the top layer of paper, and use a very sharp knife or blade to slice dough and parchment together into about 10 even strips, trimming and reserving scraps. Be sure to slice all the way through to the parchment, so that your strips are easily handled.

At this point, you're going to lay strips of dough into a lattice (or lattice-like) crust). To lay a strip down, pick it up at either end by the parchment, hold it parchment-side down over the spot you want it to go, and flip it over. The strip will start to peel away from the parchment. Set the strip correctly in place, and peel back the parchment.

There are two options for how to do this:

1. Lay down two strips, in the same direction, one about 75% of the way to the left side of the tart and one 75% of the way to the right side. Turn the tart 90 degrees. Repeat: lay down two strips, in different spots, perpendicular to the first two you laid down. Turn tart again, and continue laying strips and turning tart until all strips have been used. This will give the illusion of a lattice, without all the fuss.

2. Say to hell with the lattice: lay half the strips in one direction, rotate the tart, and lay the other half down in the perpendicular to the first half.

The tart will look beautiful either way; but do us all a favor, and don't try to actually weave these strips, because it won't work.

When your top is arranged as you want it, bake about 1 hour. When jam is bubbling and top crust is browned, remove from the oven and set on a rack to cool, which will take 2-3 hours. Serve at room temperature. You might dust the top with powdered sugar before serving. Store in the fridge; tart is actually quite delicious after a night in the cold.
Blueberry Cornmeal Tart

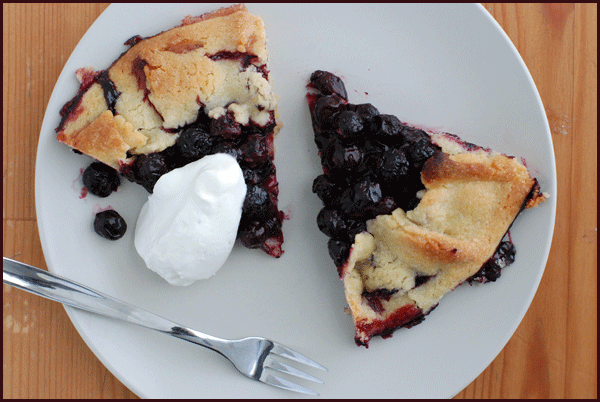
The only thing better than discovering in your fridge the ingredients for a fantastic winter salad is discovering in your freezer the ingredients for a fantastic summer tart in the middle of March. I was looking for the wheat bran I use to make my weekly bread, when I jackpot and happened upon a bag of frozen blueberries in the very back of my freezer. I thought I'd run out of summer berries long ago, but no! I still had some blueberries left (along with a litle bit of sweet corn and a couple precious strawberries -- stay tuned.)

When frozen blueberries present themselves, you make something crusty and flaky and oozy with fruit juices: a tart or a pie, either will do. In this case, I'd been eyeing the blueberry tart in cornmeal crust from a new addition to my cookbook shelf: Karen DeMasco and Mindy Fox's The Craft of Baking, and this seemed like a golden opportunity to try it.

What first intrigued me about the recipe was the ingredient list for the cornmeal crust. Specifically, it didn't call for an egg or egg yolk, which most tart crust recipes I've used do. Instead, TCOB calls for buttermilk. I need not have been skeptical: this cornmeal crust is, by far, the best I've ever had. It's perfectly sweet, a wee bit salty, and gets extremely crunchy and crusty in the oven.

DeMasco and Fox also do quite well by way of the blueberries, which are treated with sugar, flour, and a bit of lemon juice (I also added zest), then brought to room temperature so the juices thicken up. While the juice definitely leached out of the crust in the oven, it didn't prevent the crust from crisping, and the juices were well-thickened, certainly not runny. The tart was such a welcome break from apples, I can't even tell you. And a generous dollop of unsweetened whipped cream certainly didn't hurt. If you've got leftover berries lying around, this is just the recipe to hold you over until summer.

Blueberry Cornmeal Tart adapted from The Craft of Baking by Karen DeMasco and Mindy Fox

Note: you only need half a recipe of tart crust for this recipe. Freeze the other half for later use.

For the cornmeal crust:

10 tablespons butter, room temp 3/4 cup sugar 1/4 cup buttermilk or milk 3/4 teaspoon vanilla 1/2 cup cornmeal 1 1/2 cups unbleached flour 1 teaspoon kosher salt

Beat butter and sugar in an electric mixer or a stand mixer fitted with the paddle attachment until well combined. Add milk and vanilla, scrape down the sides of the bowl, and beat to combine.

In a separate bowl, whisk together remaining ingredients. Add to the butter mixture and beat just to combine.

Turn dough onto lightly floured surface, making sure to include any bits stuck to the bowl. Using a gentle hand, bring together to form a mass. Divide in half, form into disks, and refrigerate at least 1 hour or overnight. Dough can be frozen for upto 1 month; bring to room temperature before using.

For the tart:

3 cups blueberries; frozen is fine 1/3 cup sugar 1 tablespoon flour, plus extra for rolling; 2 tablespoons flour if using frozen berries 1 tablespoon lemon juice 1 teaspoon lemon zest 2 tablespoons Demerara sugar

On a piece of parchment paper sprinkled with flour, roll out dough into an 11-inch circle. Transfer dough, on parchment, to refrigerator and chill about 5 minutes.

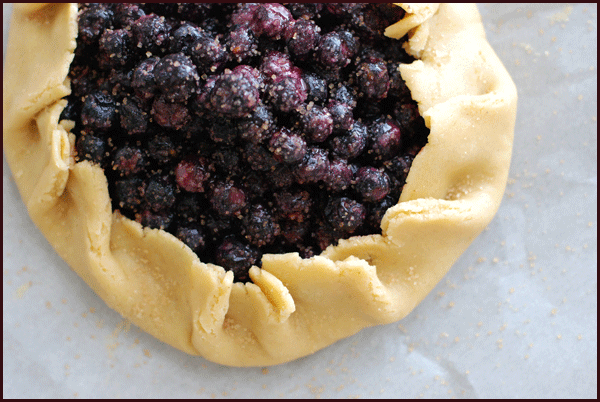
In a medium bowl, toss blueberries with sugar, flour, lemon juice, and lemon zest. If frozen, bring berries to room temperature so juices can mingle with flour and thicken. When berries have thawed, set crust on countertop and mound berries in middle, leaving large (about 4-inch) border around. Fold crust edges up over berries; you can tuck and fold the dough to make a nice pleated pattern, or just fold casually for a rustic look. Sprinkle with Demerara sugar and refrigerate 20 mintues.

Preheat oven to 375. Bake tart 40 minutes, rotating half way through baking. Transfer carefully to wire rack to let cool. Serve warm or room temperature with a dollop of unsweetened whipped cream or creme fraiche.

Feta Phyllo Torte

feta-phyllo-1a Feta Phyllo Torte

Of all the incredibly culinary feats out there (and there are plenty), one of which I'm truly in awe is the ability to consistently serve vegetarian food that fees like a main dish. As I've written before, one of the challenges to purely vegetarian cooking is that often, everything on the table looks like a side dish, and there's no one thing that, when brought to the table, elicits the oohs and ahhs of, say, a whole roast chicken. There are a few people who are particularly excellent at this. One is Deborah Madison, author of Vegetarian Cooking for Everyone (one of my favorite cookbooks to read; I often find myself leafing through it while killing time at Barnes and Noble). Madison understands the challenge of creating a "wow factor" when serving vegetarian entrees, and she conquers that challenge seemingly effortlessly. Her books are endless sources of inspiration for meatless entertaining.

feta-phyllo-1

Another, though she may not intend to be (given her well-publicized love of meat) is Melissa Clark, a food columnist for NYT and recipe writer extraordinaire. Reading Melissa's column, I not-infrequently stumble upon a really new idea for a vegetarian entree. One excellent example is her cornbread and broccoli rabe strata, a vegetarian Thanksgiving main that doubles as a side for the turkey eaters. Another, for a phyllo feta torte, was published just a couple weeks ago, and after reading her recipe, I had an undeniable urge to rush into the kitchen and make it, immediately.

feta-phyllo-2

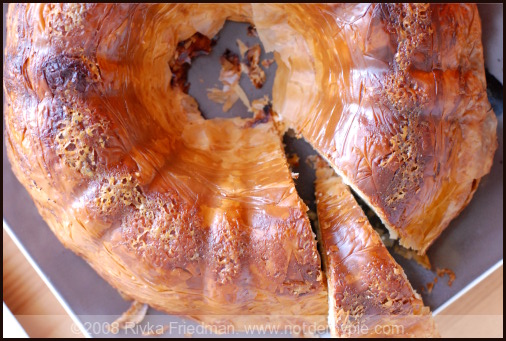
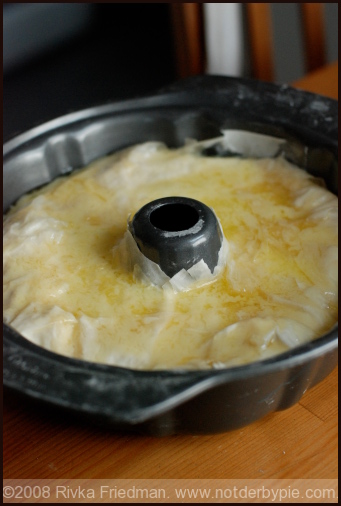
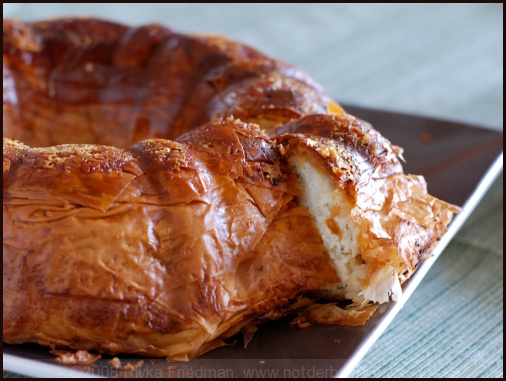
Originally called "No-fear Phyllo Torte," Clark's recipe originates in a dinner party hosted by a lauded French literature professor and his Greek wife, for whom phyllo is second-nature. Clark claims intimidation, but her recipe proves her an equal master of this domain. In the torte, made in a bundt pan for a particularly impressive presentation, thin, crisp layers of butter-soaked phyllo cloak a tender filling of feta, cottage cheese, dill and nutmeg. Sound like a spinachless spanikopita? Think again: the finished product is drizzled with honey before serving, for an irresistible hit of sweet to balance the rich, salty torte. Stop me from drooling.

feta-phyllo-3

Clark was intimidated when she first saw the torte emerge from the oven, and wondered whether she needed to be Greek in order to make it successfully; I had an all-out panic attack when, just before serving the torte, I realized that I had used salted butter in place of the unsalted butter called for in the recipe. It didn't matter; I had used less salty Greek feta in the filling, which offset the extra salt in the crust. Other changes I made to Clark's original recipe include swapping out some of the cottage cheese for extra feta (since cottage cheese generally gives me the creeps, and 3 cups sounded like a lot), upping the level of dill and nutmeg for added kick, and cutting the butter from 3 sticks to 1 (because who needs 3 sticks of butter in anything? and 1 was more than enough to coat the whole torte and make the insides crispy). Other than those changes, I found this recipe absolutely to die for and would make it again in a flash. I actually served it with some homemade rhubarb chutney, which I'll blog in a future post, and I was really pleased with the combination. The tanginess of the rhubarb brought out the acidity in the feta and the chutney provided a nice textural contrast to the torte. An all-out thumbs up from this happy eater -- I recommend you give this a go; your guests will be thankful -- and maybe even intimidated.

feta-phyllo-4

Sonia's Phyllo and Feta Torte with Dill and Nutmeg Time: An hour and a half, plus cooling adapted from Melissa Clark, inspired by her husband's friend's wife Sonya, via The New York Times

Time: An hour and a half, plus cooling

1 1/2 pounds Greek feta cheese, crumbled (I used feta from a local Mediterranean market, but TJ's carries Greek feta that's pretty good) 2 cups cottage cheese 3 large eggs 1/3 cup chopped fresh dill 1/4 cup grated Romano cheese (I used Parmesan, which was what I had on hand) 1 teaspoon freshly grated nutmeg 1/2 teaspoon freshly ground black pepper 1 1-pound box phyllo dough, thawed overnight in refrigerator if possible 1/2 cup (1 stick) unsalted butter, melted

Greek honey, for serving (Clark says this is optional but I say it's a must).

1. Heat oven to 375 degrees. combine feta, cottage cheese, eggs, dill, 2 tablespoons Romano, the nutmeg and pepper in a food processor and pulse just to combine (Clark says you can also use a large bowl and a fork). Clark also says the mixture should be chunky, but I made mine smoother.

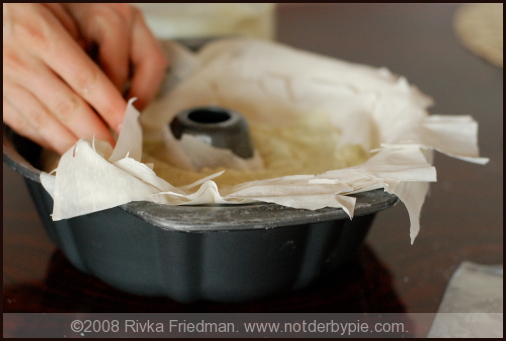
2. Sprinkle remaining 2 tablespoons Romano into a Bundt pan. Drape a sheet of phyllo on top of Bundt pan, poke a hole into phyllo with your finger where center tube is and push phyllo into pan to line it. Do this with another phyllo sheet, but place it perpendicular to first sheet. The first couple of sheets will seem disorderly and may collapse some, but as you start layering them, the process will get easier and the sheets will keep their shape. Continue adding phyllo sheets in alternating directions until all sheets are used. Edges of phyllo should hang over edges of bundt.

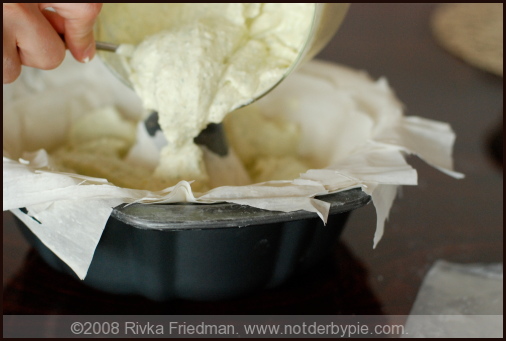
3. Scrape cheese filling into pan, and fold edges of phyllo over filling. Using a sharp knife, poke many holes (at least 20) in dough that reach all the way to bottom of pan. Then pour melted butter over the torte; some will seep into holes, but a fair amount will pool on top of torte, which is fine. I actually poured the butter before poking the holes, and my torte tasted perfectly delicious, so fret not.

4. Place Bundt pan on a baking sheet and bake for about 1 hour 15 minutes, or until torte is puffy and golden brown. Allow torte to cool in pan for 1 to 2 hours before inverting onto a plate and slicing. Serve warm or at room temperature, with honey and/or sweet chutney.

Yield: 10 to 12 servings.

Bouchon-Inspired Lemon Tart

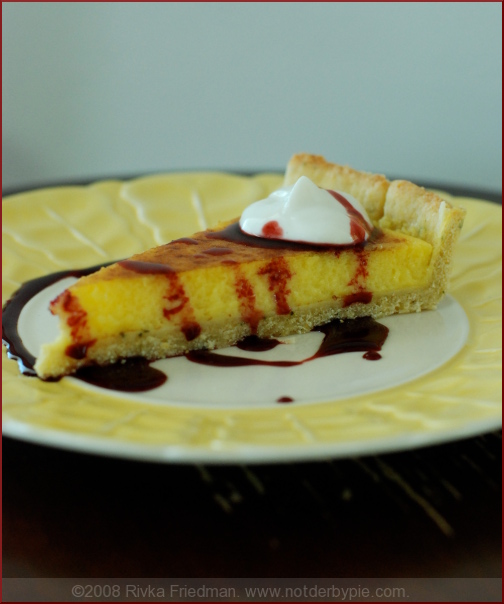
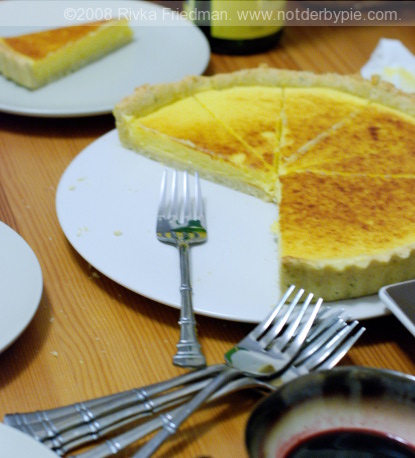
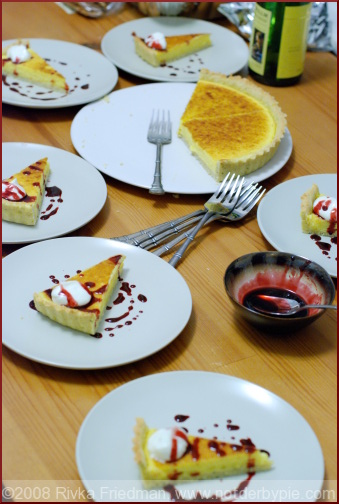
lemontart1 On my last trip to New York, I stood on the third floor of the Time Warner Center for about an hour just waiting to get into Bouchon Bakery. It didn't work out -- the person we were meeting was on a tight schedule -- so we ended up eating salads at Whole Foods. Ever since, I've been dreaming of Bouchon. Have you tried their chocolate bouchons? Oh, man. Delish.
lemontart5

In full stalker mode this Friday, I started googling Bouchon recipes and came across this little treasure, via Epicurious. It's a pretty traditional lemon tart, with two exceptions: one, the crust is a pine nut crust. Two, the lemon curd is actually a sabayon. That means that instead of warming the lemon juice and sugar, adding the eggs, and heating until thickened, the eggs and sugar are whisked vigorously while being warmed over a double boiler, and lemon juice is added in stages as the custard thickens. lemontart3

The result is something less pudding-like, more creamy, and just sweet enough. My arm may have been ready to fall off by the time the sabayon was done, but if I'm one step closer to Michelle Obama's fantastic biceps, I'm certainly not complaining.

lemontart4

As for the crust, I knew for a fact that a few of my diners (read: D) didn't like pine nuts, so I opted instead for a cornmeal-sage crust. If you like that sort of thing, it's a great crust recipe: again, not too sweet, with the distinct texture and fruitiness of cornmeal and faint herbal flavor from the chopped fresh sage. I imagine the pine nut crust is delicious -- and pine nuts and lemon are truly a winning combination -- but the cornmeal crust is a great alternative. I've included both recipes below.

lemontart6

Next up: maybe a salmon recipe (the sauce is so good I ate the leftovers straight, with a spoon), maybe an easy olive appetizer. We'll see.

lemontart7

Bouchon-Inspired Lemon Tart from Bouchon, by Thomas Keller, via Epicurious

Lemon Sabayon: 2 large eggs, cold 2 large egg yolks, cold 3/4 cup sugar 1/2 cup fresh lemon juice 6 tablespoons (3 ounces) cold unsalted butter, cut into 6 pieces

For the sabayon: Bring about 1 1/2 inches of water to a boil in a pot that is slightly smaller than the diameter of the bowl you will be using for the sabayon. Meanwhile, in a large metal bowl, whisk the eggs, yolks, and sugar for about 1 minute, or until the mixture is smooth.

Set the bowl over the pot and, using a large whisk, whip the mixture while you turn the bowl (for even heating). After about 2 minutes, when the eggs are foamy and have thickened, add one-third of the lemon juice. Continue to whisk vigorously and, when the mixture thickens again, add another one-third of the lemon juice. Whisk until the mixture thickens again, then add the remaining lemon juice. Continue whisking vigorously, still turning the bowl, until the mixture is thickened and light in color and the whisk leaves a trail in the bottom of the bowl. The total cooking time should be 8 to 10 minutes.

Turn off the heat and leave the bowl over the water. Whisk in the butter a piece at a time. The sabayon may loosen slightly, but it will thicken and set as it cools. Pour the warm sabayon into the tart crust (recipes below) and place the pan on a baking sheet.

Preheat the broiler. While the sabayon is still warm, place the tart under the broiler. Leaving the door open, brown the top of the sabayon, rotating the tart if necessary for even color; this will take only a few seconds, so do not leave the oven. Remove the tart from the broiler and let it sit for at least 1 hour before serving. Serve at room temperature or cold.

Pine Nut Crust: 10 ounces (2 cups) pine nuts 1/3 cup sugar 1 pound (3 cups) all-purpose flour 8 ounces unsalted butter, at room temperature 1 large egg 1 teaspoon pure vanilla extract

Place the pine nuts in a food processor and pulse a few times. Add the sugar and flour and continue to pulse until the nuts are finely ground. Transfer the mixture to a large bowl.

Add the butter, egg, and vanilla extract and mix to incorporate all the ingredients (the dough can be mixed by hand or in a mixer fitted with the paddle attachment). Divide the dough into three equal parts. Wrap each piece in plastic wrap and refrigerate for at least 10 minutes before using. (The extra dough can be frozen, wrapped well, for up to 1 month.)

Preheat the oven to 350°F. Generously butter and flour a 9-inch fluted tart pan with a removable bottom and refrigerate it while the oven preheats.

Remove the tart pan from the refrigerator. Use your fingertips to press the chilled pine nut dough evenly over the bottom and up the sides of the pan. Trim off any excess dough.

Bake the crust for 10 to 15 minutes, then rotate it and bake for another 10 to 15 minutes, or until it is golden brown. Remove the crust from the oven and let it cool while you make the filling. (There may be some cracks in the crust; they will not affect the finished tart.)

Sage Cornmeal Crust from Martha Stewart

2 1/4 cups all-purpose flour, plus more for work surface 3/4 cup coarse yellow cornmeal 3 tablespoons sugar 1 tablespoon plus 1 teaspoon finely chopped fresh sage 1 1/2 teaspoons salt 1/2 teaspoon finely grated lemon zest 3/4 cup (1 1/2 sticks) cold unsalted butter, cut into small pieces 3 large egg yolks 5 tablespoons ice water

Pulse flour, cornmeal, sugar, sage, salt, and lemon zest in a food processor until combined. Add butter; pulse until mixture resembles coarse meal. Whisk egg yolks and ice water in a small bowl. With machine running, add to flour mixture through feed tube; process until dough just holds together.

Turn out dough onto a work surface. Divide in half, and shape each portion into a disk. Wrap in plastic, and refrigerate 30 minutes (or up to 2 days).

On a lightly floured work surface, roll out 1 disk to a 10-inch round. Fit into a 9-inch tart pan with a removable bottom; trim edges flush with rim. Refrigerate until firm, at least 1 hour (or up to 1 day). Reserve remaining dough for another use (it can be frozen up to 3 months). Preheat oven to 375 degrees. Prick bottom of tart shell with a fork. Bake until golden brown, about 25 minutes. Let cool.