Brussels Sprouts (Yes, Brussels Sprouts!)

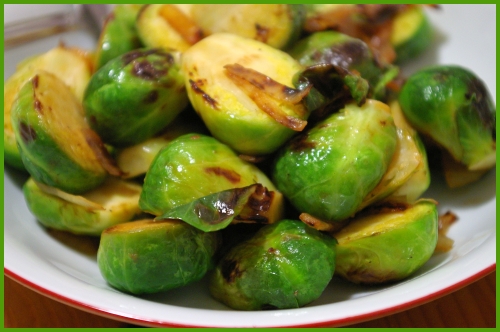
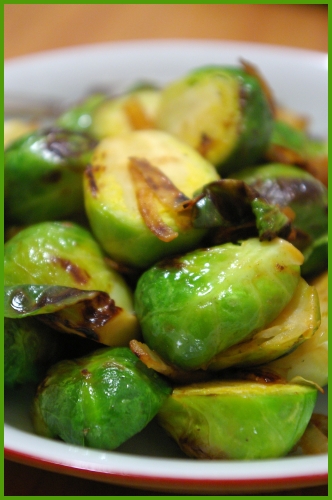
sprouts1.JPG Here's a lesson in spousal communication. If you suspect that your significant other doesn't like a particular food, do yourself a huge favor: just ask. If you don't, you mind wind up like me. In the almost three years that D and I have been together, I never once have made brussels sprouts. I just assumed that D would hate those mini green balls of healthful deliciousness. People, how wrong I was.

A couple weeks back, D and I went to an absolutely fantastic dinner at Bryce and Matt's. Bryce is a vegetarian, and a great cook, so dinner was an all-out vegetable and fake meat fest. Having grown up in a vegetarian house, I was in a form of heaven much reminiscent of my childhood. I was, however, slightly concerned about D, who favors meat. But to my surprise, D asked me to get Bryce's fake meat pie recipe. I asked if I should make it with real meat, and D said, "Just make it exactly the way Bryce makes it. Don't do any of your little alterations or substitutions or anything." Ok then.

But that's neither here nor there...the point is, after that dinner, D asked for brussels sprouts. Yep! That's right. I mean, twist my arm why don't you. I guess I'll make 'em. sprouts2.jpg
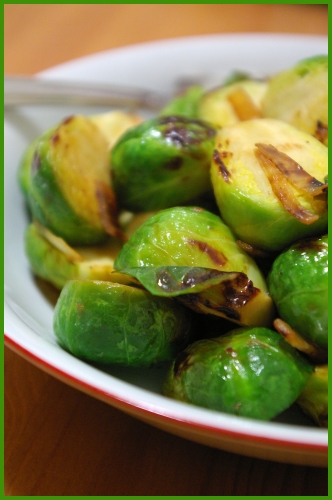
Have you never had brussels sprouts? (Deprived!!) They look like mini green cabbages. When we say "mini," I'm talking smaller than the size of a golf ball. They are easily and simply prepared and packed full of nutrients. They're also cute. That's why these days, they're my go-to vegetable.

I'd be hard-pressed to call this preparation a recipe, as it consists in only a few ingredients besides the sprouts themselves. But for all you recipe followers out there, I've made these few ingredients into a list and written some instructions beneath them. Call it a recipe, if you must. Recipe or not, you can have this dish on the table in five minutes, and I guarantee it'll be consumed in half that. Unless, of course, you hate brussels sprouts, in which case, grow up and learn to love your veggies. Just kidding. But not really. :)

sprouts3.jpg

Brussels Sprouts

  • About 1 lb brussels sprouts
  • 2 Tbsp. olive oil or butter (if using butter, use 1 Tbsp butter and 1 Tbsp olive oil so that butter doesn't burn)
  • 1/4 cup onion, diced
  • 2 cloves garlic, chopped
  • dash red pepper flakes
  • salt and pepper
  • 1/2 cup vegetable broth or water
  • a few dashes of lemon juice
  1. Rinse, drain, and halve sprouts.
  2. In a frying pan, heat oil/butter over medium heat.
  3. Add garlic, onion, salt, pepper, and chili flakes. Toss to coat. Cook until onion and garlic have begun to brown, about 2-3 minutes.
  4. Add brussels sprouts, toss to coat with onion mixture, and saute, tossing frequently, for 3-4 minutes, until sprouts have started to brown.
  5. Add broth; it should sizzle and pop, then immediately start to boil.
  6. Cook, uncovered, until liquid reduces almost completely, about 7 minutes.
  7. Add a few dashes of lemon juice, toss to coat, and serve immediately.

**note: I prefer my sprouts crunchy. If you want them soft or cooked through, add a bit of extra liquid, cover the pot/pan, and cook for at least 5 minutes longer, up to 20 minutes. Uncover the pan and reduce the liquid only when sprouts are nearly cooked to your preferred softness.
Make-your-own Mexican Dinner

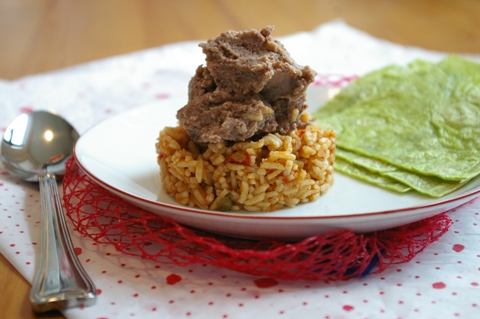
mexican-dinner.JPG D and I were both very excited at the thought of turkey burgers, but you can't make turkey burgers when the grocery store is out of turkey. hmm.

After a few moments' hesitation about what to make my very hungry and over-studied cohabiter, I settled on mexican. Now, before you get too excited, this isn't Diana Kennedy, from-under-the-adobe-flap Mexican (though I love Kennedy's cookbooks, especially this one, and need to make some of her recipes soon!). This is Americanized Mexican food with just a few twists to make it more authentic. And you know what? It's pretty damn good. Because we're kosher, we do either the meat inside or the cheese on top. But please, don't hold back. A little cotija cheese and sour cream never hurt anyone.

mexican.JPG

Whether you're cooking for an army of hungry people or just a few grumbling stomachs, make a mexican buffet, and you'll be sure to please the folks around your table.

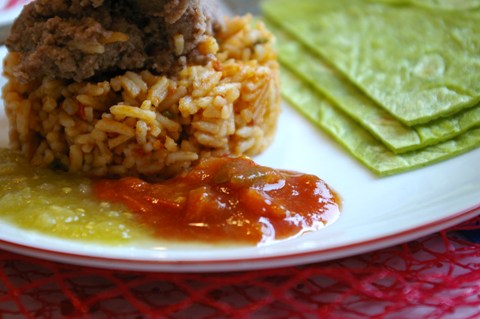
**I'm sorry that my pictures only show some of the featured items (no chicken or guac); I wasn't much in a chicken mood (especially since they were boneless breasts, which I don't so love), and didn't want to make D wait to eat while I photographed. I like to think I'm at least considerate enough to not stand between D and food.

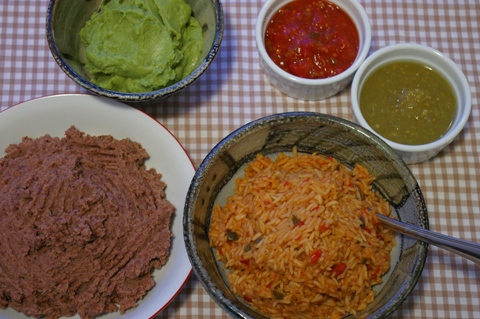
Here's my spread -- and feel more than free to vary these dishes according to your eaters' picky habits.

Flour tortillas (I like spinach flavor) Hot, Tangy Chicken Spanish Rice Smoky Refried Beans Guacamole Salsa Salsa Verde

mexican-birdseye.JPG

Hot, Tangy Chicken

  • 4 boneless chicken breasts, sliced into strips
  • salt and pepper
  • or 1 tsp. coriander (dried)
  • 1 Tbsp. chopped cilantro
  • 2 Tbsp. lime juice
  • 2 Tbsp. hot sauce
  1. marinate all ingredients for at least 45 minutes.
  2. Preheat the oven to 200 degrees.
  3. Put 1 Tbsp. olive oil in a heavy-bottomed pan and turn the heat on medium-high.
  4. Scoop marinated chicken into pan, reserving liquid.
  5. Saute for 3 minutes on each side, until cooked through and browned.
  6. Add liquid to the pan and cook until reduced to 1/3, about 5 minutes.
  7. Transfer to an oven-safe pan and leave, covered, in the oven, to keep warm.

Spanish Rice

    2 cups basmati rice (can be brown)
  • 2 3/4 cups water
  • 2 Tbsp. tomato paste
  • 1 jalapeno pepper, seeded and diced (be careful!)
  • 1/2 cup diced red bell pepper
  • 1/4 cup diced onion
  • 2 cloves garlic, diced
  • 1 tsp chili powder
  • 4 Tbsp. paprika
  • 1/2 tsp. oregano
  • 1/2 tsp. coriander
  • 1 tsp. salt
    Put 1 Tbsp. olive oil in a saucepan over medium heat.
  1. Add diced onions, jalapeno, and garlic, and sweat (until translucent), about 2 minutes.
  2. Add spices and bell pepper, and cook for 3 minutes.
  3. Add 2 1/2 cups water, turn the heat to high, cover pan, and bring to a boil.
  4. When water is boiling, add rice, and cook, uncovered, for 15 minutes.
  5. If after 15 minutes most of the liquid has evaporated, add an extra 1/4 cup and cook, stirring constantly.
  6. After most of the liquid has evaporated, cover pot, turn off the heat, and allow to steam for 5 minutes. Then fluff rice with a fork.

Refried Beans

Smoky Refried Beans

  • 2 cans black beans
  • 1/8 cup water
  • 1 Tbsp. olive oil
  • 1 1/2 tsp. pimenton, or smoked spanish paprika
  • 1 tsp. salt
  • cotija cheese, optional
    1. Drain beans and rinse through a few times.
    2. Blend beans and 1/8 cup water in food processor or blender until mostly smooth (though some little bits won't hurt).
    3. Add oil, pimenton, and salt; pulse a few more seconds til blended.
    4. Add more water if needed; you're looking for a smooth consistency that's not overly thick, but not runny either.
    5. Put bean mixture in an oven- or microwave-safe dish and cover.
    6. Bake in the oven at 350 until warmed through (about 15-20 minutes), or nuke in the microwave for ten-ish minutes until hot.
    7. Top with crumbled or grated cotija cheese and a bit of hot sauce, if you wish.

    Guacamole

    • 4 avocados, halved and scooped into a bowl.
    • 1 lime
    • 2 cloves garlic, mashed or chopped
    • 2 Tbsp. onion, chopped or mashed
    • 1/4 cup chopped tomatoes
    • 1/2 a jalapeno pepper, seeded and chopped (more or less to taste)
    • salt
    1. Are there really instructions to this "recipe?"
    2. Mash avocados, garlic, and onions in a big bowl (best to mash with a mortar and pestle, but I don't have one...).
    3. add tomatoes.
    4. add salt to taste.
    5. add lime to taste.
    6. add jalapeno....you get the drift.
    7. Mix it all up and EAT!

    I bought both salsa and salsa verde, but each is made relatively easily when you have the time: try this recipe from Simply Recipes, this one from Good Eats, or this salsa verde recipe, also from the much-abhored but also-very-useful Food Network.

    A couple tips on serving this feast:

    • Tortillas can be heated inside tin foil so that they stay soft and warm, then used as wraps to make burritos.
    • Alternatively, cut each into quarters, and toast them in a dry frying pan until they crisp up a bit, then use them as you would nan with indian food, to scoop up some rice, beans, chicken and sauce.
    • One last possibility is to fill them in advance, roll them, line them side by side in a pan, top with salsa and cheese, and bake, enchilada style. The possibilities are endless!

      mexican-closeup.JPG

Easy, Healthy Butter Bean Stew

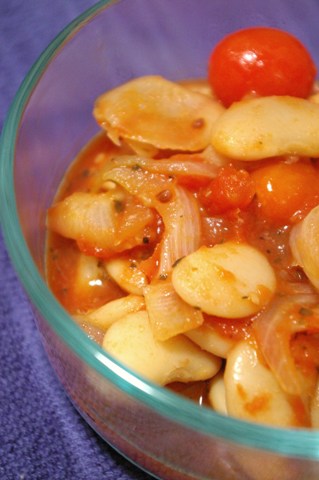
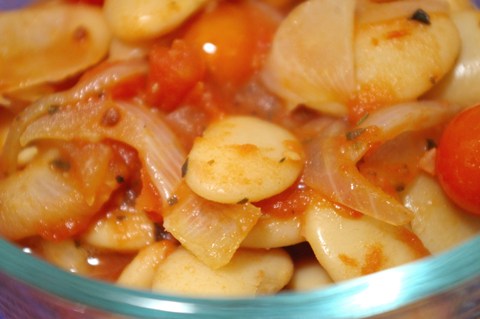
stew Bet you never thought you'd see "healthy" and "butter" next to each other in the same sentence!

Last night, after heating up some broth for a very sick D., I moseyed back to the kitchen to figure out dinner for myself. The fridge was pretty cleaned out, save some pretty blood oranges, 6 grape tomatoes, and a bit of leftover fennel. But fear not, dear readers! A few ingredients really do go a long way. I feel a little bit like Rachael Ray when I say this, but a delicious and healthy meal really is only 30 minutes away.

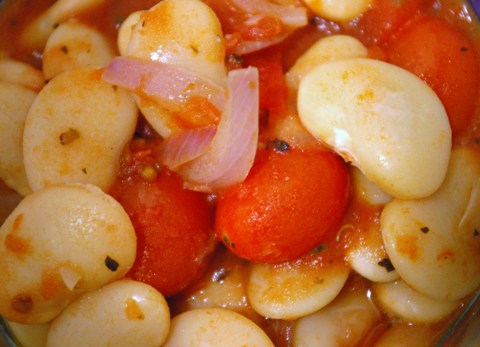
close-up Will you roll your eyes if I say this was not a recipe? Fine, you win. Here's the recipe, but please, pretty please, feel free to adapt this in any way you see fit. If you've got regular white beans, they'll do just fine (though I do love the starchy, buttery texture of butter beans, hence called). If you wish, add some feta cheese and parsley. This can go in any number of different directions, all equally easy and delicious.

Butter Bean Stew

  • 1 Tbsp. olive oil
  • 1 shallot, chopped
  • 2 cloves garlic, chopped
  • 1 tsp. each dried oregano and dried basil
  • 1 bay leaf
  • piece of a parmagiano reggiano rind, if available (feel free to substitute other cheese such as feta)
  • 1 cup crushed tomatoes
  • handful grape or cherry tomatoes
  • For this one-pot wonder, I tossed some chopped garlic and shallots in a Tbsp of olive oil, let them sweat for a couple minutes, added salt, pepper, a bay leaf, and a Tbsp. each of dried oregano and dried basil. Then I drained and added a can (yes, a can!) of butter beans, and tossed them around to coat. I added a piece of the rind from parmigiano reggiano cheese. Then I added a bit of leftover canned crushed tomatoes (I'd estimate about 1 cup or so) and the six cherry tomatoes I had. I don't need to tell you to add more if you have more...

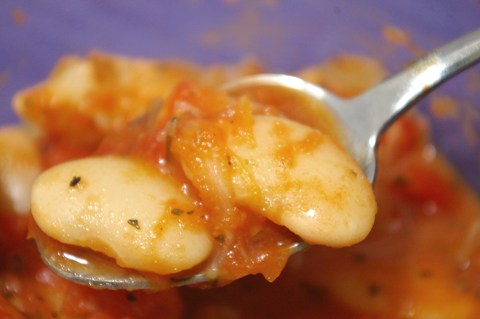
    From this point on, you basically just watch the whole thing simmer away until you can't stand it any longer. If desired, add some water to keep a thinner consistency. I lasted about 15 minutes -- plenty of time for all the flavors to come together. Ladel into a bowl atop a nice, crusty crouton or piece of toast, and enjoy just so. spoonful

Vegetable Galette

Few things showcase the rustic nature of fruits and vegetables better than a galette. Essentially a freeform tart, a galette has a hand-folded crust that is folded half way into the center, leaving some of its innards exposed. A galette is by definition slightly asymmetrical, but more beautiful for its imperfection, in my opinion.

I most like galettes with thinly-sliced fillings. If slices are more like chunks, it becomes quite unweildy and difficult to eat. However, packed with thin slivers of apples, spices, and brown sugar, or layered with red peppers, yellow squash, onions, and goat cheese, a galette is both easy to eat and oh-so-delicious.

The key to a good galette is to make sure that the exposed part stays moist in the oven. To do this, there are two tricks: first, add a little extra liquid or fat to the middle. Two, cook uncovered until the galette crust starts to turn golden, then cook covered for a bit so the inside has a chance to steam. I've covered both of these bases in the recipe below, but PLEASE, pretty please feel free to improvise. if you don't like onions or goat cheese, throwsome feta, greek olives and tomatoes in instead. Alternatively, use pears and gorgonzola. Wow, I just figured out what to make this weekend.

Vegetable Galette

Basic Flaky Pie Crust from The Pie and Pastry Bible (© 1998 Cordon Rose, Inc.)

  • 9 tablespoons unsalted butter, cold
  • 1 1/2 cups + 1 1/2 tablespoons pastry flour or 1 1/2 cups (dip and sweep method) bleached all-purpose flour
  • 1/4 teaspoon salt (for savory recipes, use 1 1/2 times the salt)
  • 3 1/2 to 4 1/2 tablespoons ice water
  • 1 1/2 teaspoons cider vinegar
  • (Optional)1/8 teaspoon baking powder (if not using, double the salt)
  1. Divide the butter into two parts, about two thirds to one third: 6 Tbsp. and 3 Tbsp.
  2. Cut the butter into 3/4-inch cubes. Wrap each portion of butter with plastic wrap, refrigerate the larger amount and freeze the smaller for at least 30 minutes.
  3. Place the flour, salt, and baking powder in a reclosable gallon-size freezer bag and freeze for at least 30 minutes.
  4. Add the larger amount of butter cubes to the flour mixture and process for about 20 seconds or until the mixture resembles coarse meal.
  5. Add the remaining frozen butter cubes and pulse until all of the frozen butter is the size of peas. (Toss with a fork to see it better.)
  6. Add the lowest amount of the ice water and the vinegar and pulse 6 times.
  7. Pinch a small amount of the mixture together between your fingers. If it does not hold together, add half the remaining water and pulse 3 times.
  8. Try pinching the mixture again. If necessary, add the remaining water, pulsing 3 times to incorporate it. The mixture will be in particles and will not hold together without being pinched.
  9. Spoon the mixture into the plastic bag.
  10. Holding both ends of the bag opening with you fingers, knead the mixture by alternately pressing it, from the outside of the bag, with the knuckles and heels of your hands until the mixture holds together in one piece and feels slightly stretchy when pulled.
  11. Wrap the dough with plastic wrap, flatten it into a disc, and refrigerate for at least 45 minutes, preferably overnight.
  12. If crust refrigerated overnight, set it out at least half an hour before rolling.

Galette

  • 1 red pepper, julienned
  • 1 onion, finely sliced into thin rings
  • 1 yellow squash or zucchini, sliced into thin slivers or using a mandoline
  • 1/3 cup sundried tomatoes
  • 1 log chevre or soft goat cheese
  1. Preheat the oven to 350 degrees.
  2. Flour rolling surface; roll out crust into a circle 14 inches in diameter.
  3. Spread a thin layer of goat cheese over the crust, using about half of the log..
  4. Layer julienned vegetables in a decorative pattern on the crust, leaving a 1 1/2-inch border.
  5. Fold border inward, pleating and tucking in when necessary.
  6. Dot the exposed filling area with chunks of goat cheese. (I actually ended up spreading goat cheese over the whole top after taking these pictures, and I like it better that way.)
  7. Bake galette uncovered for about 30 minutes, or until crust starts to turn golden. Cover loosely with tin foil and bake another 15 minutes, until innards are soft and cooked through.
  8. Serve warm or at room temperature.