Pickles!

pickles1 Folks, I'm finding it hard to contain my excitement about NDP's second-ever guest post. Guess who wrote it? MY MOM!

That's right: in the post below, NDP Ima tells you all about easy-to-make, hard-to-stop-eating pickles. You'll see from her intro paragraph where I got my taste buds. These pickles are salty, tangy, and really bright from the addition of fresh dill. So read up -- then go make some pickles!
pickles2

I am really not a salt lover. I don’t use much when I cook, and in restaurants great food that’s well-seasoned is often too salty for my taste. I don’t care for chips or french fries, and I prefer nuts spicy or au naturel. Nonetheless, I do love briny salty things – olives, capers, and sour pickles. So when I was leaving town for a long weekend and had a lot of small cucumbers that wouldn’t last until my return, I decided to try my hand at some pickles. I wanted spicy, garlicky, dill pickles that would make themselves in the refrigerator while I was gone. I remembered the ones a family friend used to make with cucumbers from his garden and my dad’s. He didn’t use shortcuts, though – he put his pickles in huge crocks of brine and alum in the basement for weeks.

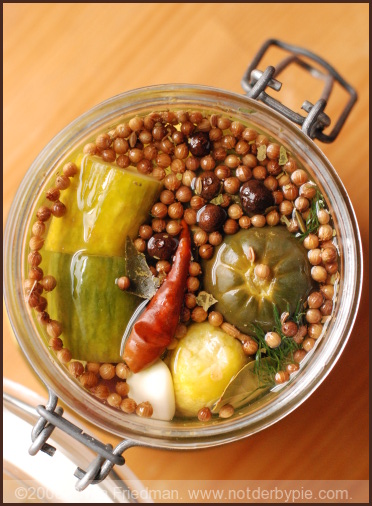
I cut the cukes into thick, chunky slices and placed them in a quart jar with pickling spices and garlic. I didn’t have any fresh dill, so my first batch just had dill seed from the pickling spice, but it still tasted authentic. I prepared the vinegar brine and filled the jar, leaving it upside down on the counter overnight. The next morning, before rushing to the airport, I put the jar in the frig. When I returned four nights later, the pickles were done to perfection! pickles3
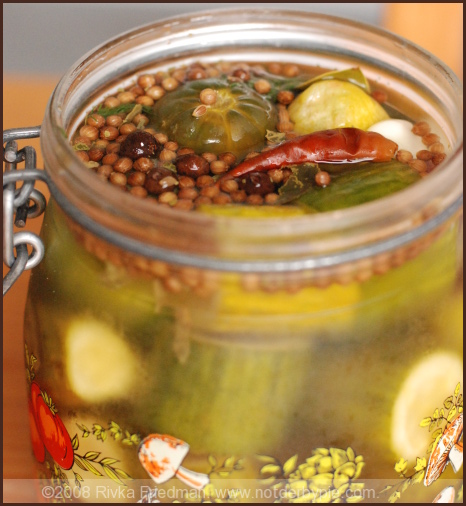
The recipe below is really more of a method – you can vary the ingredients, and the size of your jars and your cucumbers will determine your quantities. As long as you maintain the proportions of ¾ cup of vinegar and ¼ cup of kosher salt per quart of boiled and cooled water, your brine will work and you’ll have great pickles in a matter of days. Try this with green tomatoes if you have them in your garden, with blanched cauliflower, small sweet peppers, or blanched pearl onions. Add onions or hot peppers for extra kick. I used just one hot pepper to enhance the spicy flavor. I made a second batch with fresh dill sprigs, blanched carrots, and a few kalamata olives in addition to the cukes. They’re not quite finished as a I write this, but they look so good I can’t wait to sample them!

If you like sweet pickles instead of sour, substitute sweet pickling spices, cloves, and allspice, use cider vinegar instead of white vinegar, and add sugar (1/2 cup to ¾ cup) to your brine.

Your pickles will keep about four months in the refrigerator. If you seal your finished pickle jars with a canning process, they will keep on the shelf indefinitely. Open jars should be refrigerated.
pickles4

Refrigerator Dill Pickles

1 dozen or more pickling cucumbers or small English cucumbers

4-8 cloves garlic, peeled and cut in half

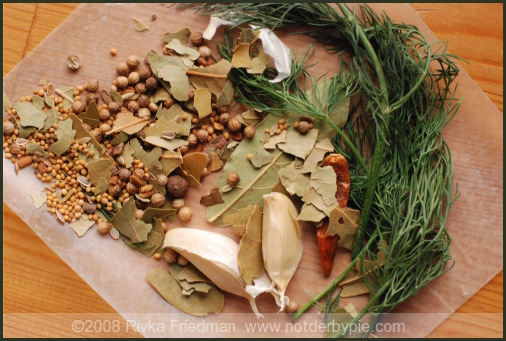
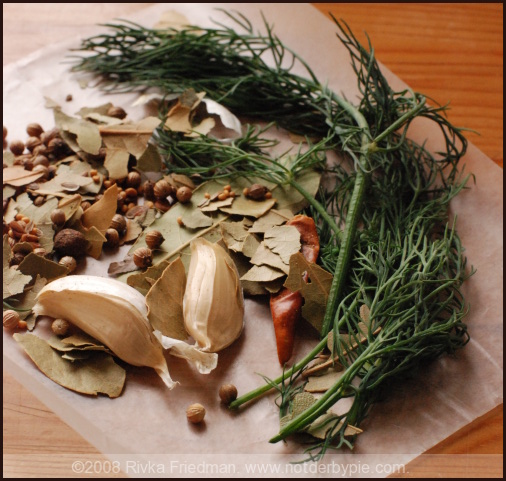
2-3 tablespoons pickling spice (the brand I used had dill seed, mustard seed, celery seed, coriander, ginger, black peppercorns, bay leaves, and red pepper)

A few sprigs of fresh dill

1 small dried hot pepper, or a fresh hot pepper cut in half and seeds removed (optional)

1 quart water boiled and cooled

¾ cup white vinegar

¼ cup salt (kosher salt works well, but sea salt or table salt are also fine)

A pinch of sugar (if desired – I omitted)

Use one or two quart jars or a gallon jar, depending on how your cucumbers fit into the jar. The amounts of spices are for one gallon jar or two quart jars, but you can modify this according to taste and the quantity of pickles you want to make. Place one tablespoon of pickling spice, half the dill and half the garlic in the bottom of the jar. If using slender or English cucumbers, you can cut them into thick chunks/slices and they will be ready in less time. If you use larger cucumbers, you can pickle them whole and cut them into lengthwise quarters when you serve them. Pack the cucumbers tightly into the jar(s). When you have added most of the cucumbers, add half of the remaining spices and garlic. When all the pickles are in the jar, add the last of the spices. If using the pepper, place it in the middle layer.

When the jar is full of cucumbers and spices, stir the salt into the vinegar. Pour the mixture into the boiled water and stir to finish dissolving the salt. The water does not have to reach room temperature, since it will continue to cool as you make the brine. Fill the jar to the brim with brine. Close the jar tightly with its lid. Invert the jar into a bowl and leave it outside the refrigerator. After one day, turn the jar upright. Check to see how pickled the cucumbers are. If you used the smaller, slender cukes, it is probably time to refrigerate the pickles. They will be completely done in another three or four days. If you used larger cucumbers, leave them out for another day or two. Check for doneness according to your preferences – if you prefer half-sour, they should be edible after just one-two days.

When the pickles are as done as you like them, you can pour out half the brine, leaving as many spices in the jar as possible. Replace the removed liquid with a mixture of plain boiled water and vinegar. For each cup of boiled, cooled water, add two tablespoons of white vinegar. Fill the jar to the top again and refrigerate. You can also remove the hot pepper if you don’t want the pickles to get spicier over time.

Salmon with Herb Butter and Various Roasted Vegetables

herbed-salmon-1 D and I had people over Friday night. As of Thursday, I not only had done no cooking, I hadn't even figured out my menu. Now, I'm not one to plan these things all too far in advance -- but 24 hours is not much time to plan, shop, and make food for a dinner party. Not impossible, but not ideal.

When I'm cutting it close to the wire, I tend to keep it as simple as possible. I picked up a bunch of salmon fillets and all the good-looking vegetables that TJs had to offer. Without much time to contemplate interesting recipes and a lingering fear of making the whole house smell like fish, I wrapped each piece of salmon individually in parchment paper and tucked a bit of herb butter inside. The herb butter infuses the salmon while it steams, and the end result is both healthy, flavorful, and much less potent. No fish smell whatsoever in the house as of Saturday morning.

I made a vinaigrette with the herb butter, some capers, and lots of lemon and lime, and served it alongside the fish. In retrospect, I should have just made the vinaigrette first and skipped the herb butter step entirely; that's the recipe I provide below. It's a simple presentation that almost always pleases.

roasted-veg-1

In terms of vegetables, I had a big variety -- eggplant, cauliflower, baby potatoes, grape tomatoes, zucchini -- but not enough of any one to feed 7 people. The solution: I roasted each separately, and then served them together on a big platter and let guests take some of each. Another success: the mix of vegetables gives the plate nice color contrast, and because I roasted them individually, I flavored each vegetable slightly differently to give the final dish even more appeal. Cauliflower got east-Asian treatment with galangal, tumeric, and a pinch of saffron; tomatoes got the sweet tangy complexity of red onions; potatoes were a nod to the season with the last of my summer savory; and zucchini were simple as can be, with just olive oil and salt. Given the slightly frantic menu planning and shopping for this dinner, I certainly can't complain about the end-product.

The only thing to end a meal like this is birthday cake - red velvet cake, in particular, to celebrate the lovely Rebecca's birthday. But that's another post for another time.

Salmon with Herb Butter and Various Roasted Vegetables Serves 8

8 fillets salmon, cleaned and patted dry 3 tbsp. butter, melted 2 tbsp. chopped herbs; I used a mix of mint, parsley, and chives, but any herbs will do 2 tbsp. capers, chopped 1/4 cup lemon or lime juice (I used half and half and needed 2 limes and 1 lemon) salt and pepper

Preheat oven to 350 degrees.

Add citrus juice and salt to blender. With motor running, pour in butter in steady stream. Mix until fully blended. Transfer to bowl.

Add herbs and capers; mix to combine. Set aside.

Meanwhile, rinse fillets and pat dry. Rip 8 pieces parchment paper; each should be at least 8x11. Set one salmon fillet on the center of each paper at a diagonal, and drizzle 3 tbsp. vinaigrette over each one. Rub into flesh to help absorb. After washing your hands, wrap paper around each fillet and twist ends as you would a piece of candy in a wrapper, until snug.

Put individually-wrapped fillets on baking sheet in single layer. Bake at 350 for between 15-25 minutes, or until cooked through. My oven runs a bit cold, and my almost 2-inch thick fillets took about 22 minutes. Definitely start checking them at 15 minutes; you're looking for orange flesh that's not translucent but also not tough to the touch. You can always open the one you plan to serve yourself and check for doneness.

Various Roasted Vegetables serves 8

2 heads cauliflower, de-stemmed and trimmed into florets 4 zucchini, sliced on sharp bias 2 lbs. grape tomatoes 1 red onion 2 lbs. baby potatoes

Here's the method: put vegetables in a clear plastic bag with plenty of olive oil, salt, pepper, and whatever spices you're using. Shake, mush, and toss to get those spices and seasonings spread evenly over the vegetables. Put on a roasting pan in a single layer and roast in a 325-degree oven until done. Details below:

Cauliflower: I used 1 tsp. galangal (a mild, floral, fruity relative of ginger), 2 tsp. tumeric (for color), a pinch of saffron threads, salt, and pepper. Baking time was about 15 minutes, maybe 17.

Tomatoes: I sliced a red onion into 1/2-inch rings and scattered them among the tomatoes. Come to think of it, I also used a sliced garlic clove. Other than that, just salt and pepper. I tossed them once at minute 15 and left them in there for about 30 minutes, at which point the onions had basically melted into deliciousness and the tomatoes were about ready to burst. Perfect.

Zucchini: real simple -- slice on bias, toss with salt, pepper, olive oil, bake 20 minutes turning once halfway through.

Potatoes: I halved them but you don't need to. I coated them with olive oil, salt, pepper, and summer savory (two sprigs was plenty). I roasted them for about an hour. I like'em tres crunchy.

Smoky Corn Salad

smokycorn So sorry that posts have been so few and far between (and so short) lately. I'm doing my best to offer some great summer suggestions between work and work -- bear with me; just two more weeks of this insanity, and I'll be back on track.

Meanwhile, hopefully you're taking advantage of the last of summer's produce more than I am. If you find yourself swimming in corn, this smoky number is a great variation on the corn salad theme. It combines raw corn that's charred in a smoking castiron pan, poblanos that are cooked over an open flame to remove the skins and intensify their flavor, a bit of red onion, and of course, some of those delightfully plump and round cherry tomatoes that are so good this time of year. The method is so simple it's a joke: just char everything in the castiron pan all together, and add the tomatoes just before serving. It's just the way to take advantage of summer's abundance. Have a plate in my honor, and once I crawl out from under this rock, I'll be back in the kitchen in no time.

Smoky Corn Salad

3 ears of corn, husks and fibers removed 1 cup cherry tomatoes, halved 1/4 of a red onion, diced 2 poblano peppers 1/2 a jalapeno, diced, optional 1/4 tsp. smoked spanish paprika olive oil salt pepper 1 lime

Roast poblanos over an open flame, turning to blister skin on all sides. When fully blistered, turn off heat and transfer peppers to a paper bag or roll inside tinfoil. let steam for 5 minutes, then run under water to remove skins. Chop roughly and set aside.

Heat castiron or heavy stainless steel pan over high heat. Remove corn from cob, and combine with chopped onions and jalapeno, if using. Add 1 tablespoon olive oil to pan and immediately add corn mixture. Toss to coat, then let sit for a 30 seconds at a time just to develop a real char on the kernels. Add smoked paprika, and add salt to taste. Keep tossing and charring, tossing and charring, until there are enough brown spots to give some serious smoky flavor. Remove from heat, add tomatoes, and toss to combine. Transfer to a plate, and squeeze 1 fresh lime overtop. Serve warm or at room temperature.

Marcella Hazan's Pesto

pesto1 Basil is aplenty at DC's farmers' markets. This week, my favorite farmer was selling massive bags of the stuff for just $3.99. I probably came home with a good 2 pounds of basil -- hard to imagine considering how light it is. There was only one thing to do: make pesto.

The last time I blogged about pesto, I largely focused on the method. Heidi at 101 Cookbooks had written about making pesto like an Italian grandmother, and I was inspired enough by her post to give the old fashioned knife-on-board method a try. The result was wonderful -- chunky and rustic, with plenty of the irregularity that's the hallmark of handmade things. But given how busy I've been at work lately, standing in the kitchen slaving over chopped basil just wasn't in the cards for today. Instead, I followed the sage advice of another Italian grandmother, Marcella Hazan. I pulled her Essentials of Classic Italian Cooking off the shelf and set about to make pesto using her (apparently sanctioned) food processor method.

Before you roll your eyes and call me a fraud, it's in her book: Pesto, food processor method. Apparently the Italian goddess is fine with it. Plus, if that's not enough evidence for you, I once heard Lynn Rosetto Casper, the formidable chef and host of APM's radio show The Splendid Table, say that if you go to the Liguria region of Italy, to Genoa, where pesto originated, and follow the tips from the locals to the actual neighborhood in Genoa where pesto was actually invented, the Italian grandmothers there use food processors! That was the last time I had a second thought about whizzing the stuff together.

I think Hazan's recipe is the best one I've ever made. The balance between basil, pine nuts, raw, pungent garlic, and Parmigiano Reggiano and Romano cheeses is just teetering in equilibrium. I also used a truly olive-y olive oil that I got on a twitter rec (Aria, available at Whole Foods), which may have made the difference. In any event, it's a recipe I wouldn't hesitate to make again. So hurry out to your market while basil's still available, and try this pesto. It'd even make Marcella proud.

Marcella Hazan's Pesto I doubled the recipe and got about a pint, so this makes about 1/2 a pint

2 cups tightly packed basil leaves 3 tablespoons pine nuts 1/2 cup olive oil 2 garlic cloves, chopped fine before being added to the processor 1/2 cup grated Parmigiano Reggiano cheese 2 tablespoons grated Romano cheese 3 tablespoons butter, softened

Blend all ingredients except cheese and butter until relatively smooth. Fold in cheese by hand to give that chunky, rustic texture. Fold in softened butter, incorporating it evenly into the pesto.

If freezing, do not add cheese and butter; add to thawed pesto just before serving. Top with a thin layer of olive oil, which will help keep pesto green.