 As you probably already know, I've had a pretty big food week. For one thing, I managed to roast a whole fish in a big pile of salt. I also made 2 loaves of bread, and 4 pizzas -- pizzas that actually tasted as good as something I could buy, which has never happened before. If that's not enough, I decided to take advantage of my already gutsy week and try a Thomas Keller recipe. People, the sky is falling.
Thomas Keller is the renowned chef of The French Laundry, Bouchon Bakery, and a handful of other spots. He's certainly one of the most famous chef in America. He's known for his particularity, his precision, and his meticulousness. Every recipe of his -- even the simplest, most elemental -- consist of countless steps, involve several pans, and have you running around the kitchen in a mental state that's pretty much the opposite of the low-key way I like to cook. See why I was nervous?

If you read Carol Blymire, you probably think TK recipes are no biggie. After all, she made a whole book of them. And now she's working her way through the only cookbook I can think of that seems more intimidating than Keller's: Alinea at Home, Grant Achatz's documenting of the molecular-gastronomy-heavy dishes at his Chicago restaurant Alinea. Not all of us are as adept at guestimating weights in grams, using products like methocel F50, and generally rocking out. But we've gotta start somewhere, now don't we.
This here recipe, which I found on epicurious, seemed a pretty comfortable place to start. It's something I might have made up myself (in a much less sophisticated manner with many fewer steps, of course). I had planned to serve it for a dinner party, but I made a little trial batch to make sure I had the method and flow down pat. That's what you see here.
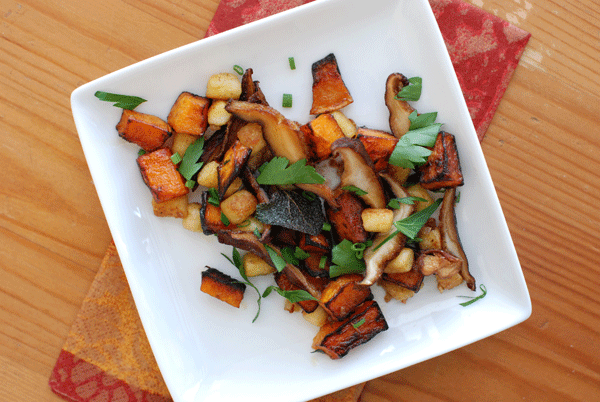
The gnocchi in this recipe are Parisian gnocchi, not Italian: instead of being made with potato, they're made from pate a choux, a versatile dough that's used for everything from gougeres to eclairs to dumplings and beyond. You'll be a bit awestruck the first time you make pate a choux. When the flour goes in, and it looks all messy and bumpy, you wonder if you've made a mistake; but then your eyes grow wide and you do a doubletake as the dough suddenly pulls away from the sides of the pan and becomes a smooth, perfect mass. It's very cool. After that, the gnocchi are pretty simple. The most time-consuming part is squeezing the little cushions through the piping bag. Worth it, though, I promise. I also used a very small tip (the largest I had) -- so if you use a normal size tip, you'll have an easier time.
One caveat: this dish is best eaten the moment it's made. If making this for a crowd as part of a dinner party, make the rest of the menu low-maintenance so that you can finish this dish immediately before serving.
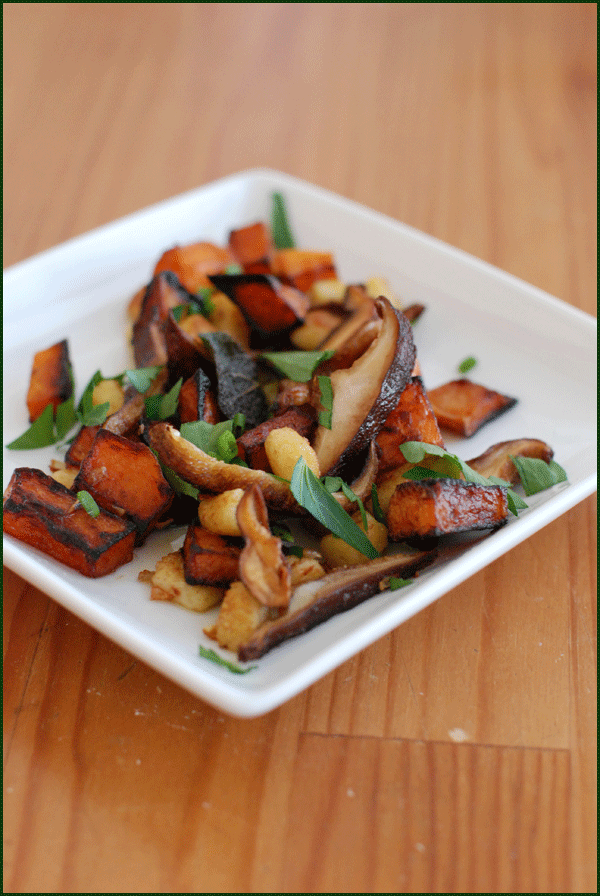
Lucky I snapped these pictures before tucking in: this was so absolutely delicious, I polished it off in ten seconds flat. The squash and mushrooms, browned in butter, are sweet and earthy. The gnocchi are crunchy outside and pillowy within, a real treat. Crispy herbs and their fresh counterparts give depth and contrast. And the lemon, combined with that extra brown butter, finish everything off with a pow. YES. Really, I can't bear to carry on writing this post when there's gnocchi to be made.
Gnocchi with Butternut Squash and Shiitake Mushrooms
from Thomas Keller's Bouchon
serves 6 as a side or 4 as a main
Squash
One 2 1/2- to 3-pound butternut squash (one with a long neck)
Canola oil
1 tablespoon unsalted butter
Kosher salt and freshly ground black pepper
12 small sage leaves
Mushrooms
12 ounces shiitake mushrooms, cleaned
Canola oil
1 1/2 teaspoons kosher salt
1 tablespoon unsalted butter
3 tablespoons minced shallots
1 tablespoon minced thyme
3/4 teaspoon freshly ground black pepper
Extra virgin olive oil
4 tablespoons (2 ounces) unsalted butter
1/2 recipe Herb Gnocchi , thawed if frozen (see recipe below)
Kosher salt and freshly ground black pepper
2 tablespoons minced chives
1 tablespoon chopped Italian parsley
1/2 lemon
print a shopping list for this recipe
preparation
For the squash:
It is easier to dice the neck of the butternut squash uniformly than the bulb, which is important for this recipe. We use the remaining bulb for soup. Cut off and discard the stem end of the squash, then cut off the neck. Use a paring knife or sharp vegetable peeler to slice away the peel deep enough to reach the bright orange flesh of the squash. Trim the neck to straighten the sides, then cut it lengthwise into 1/2-inch-thick slices. Cut the slices into 1/2-inch dice. (You need about 3 cups diced squash.) If you have less than 3 cups, peel the bulb of the squash, cut it in half, and scrape out the seeds. Trim and cut as much of the bulb as you need into 1/2-inch dice. Reserve the remaining squash for another use.
Line a baking sheet with paper towels.
Heat a thin film of canola oil over medium heat in a skillet large enough to hold the squash in a single layer (or cook the squash in two batches). When the oil is hot, add the butter and brown it lightly. Add the squash, salt and pepper to taste, and the sage leaves. Cook, stirring the pieces to brown them on all sides, for 4 to 6 minutes, or until tender throughout. Reduce the heat as necessary to cook the squash and brown it lightly, without burning; the best way to see if the squash is fully cooked is to eat a piece. Drain the squash on one end of the paper towel–lined baking sheet and set aside the sage leaves for the garnish. Wipe out the skillet with a paper towel and set aside.
For the mushrooms:
Trim away the tough stems and cut the caps into 1/4-inch-thick slices.
Heat a thin film of canola oil in the same skillet over high heat. When the oil begins to smoke, add the mushrooms and salt and sauté for about a minute. The mushrooms will absorb the oil and should not weep any liquid. Add the butter, shallots, thyme, and pepper, then toss and sauté until the mushrooms are thoroughly cooked, 3 to 4 minutes total. Drain the mushrooms on the paper towel–lined baking sheet. The gnocchi should be cooked in two skillets: Wipe out the mushroom skillet with paper towels and add a light coating of olive oil to it and to a second large skillet.
To complete:
Heat the oil over medium-high heat until hot. Add 1 tablespoon of the butter to each skillet. When the butter has browned, divide the gnocchi between the two skillets and season to taste with salt and pepper. Once the gnocchi have begun to brown, shake and rotate the skillets, tossing the gnocchi so that they brown and crisp on all sides, about 2 1/2 minutes.
Add the squash, mushrooms, and chives and heat just through. Spoon the gnocchi and vegetables onto serving plates and return one skillet to high heat. Add the remaining 2 tablespoons butter and cook until it is a rich brown, then quickly add the parsley to crackle for a few seconds. Standing back—the butter will spatter—add a squeeze of lemon half. Spoon the brown butter and herbs over the gnocchi and around the plates. Garnish with the reserved sage leaves.
Parisian Gnocchi:
1 1/2 cups water
12 tablespoons (6 ounces) unsalted butter
1 tablespoon plus 1 teaspoon kosher salt
2 cups all-purpose flour, sifted
2 tablespoons Dijon mustard
1 tablespoon chopped chervil
1 tablespoon chopped chives
1 tablespoon chopped parsley
1 tablespoon chopped tarragon
1 cup loosely packed shredded Comté or Emmentaler cheese
5 to 6 large eggs
Set up a heavy-duty mixer with the paddle attachment. Have all the ingredients ready before you begin cooking.
Combine the water, butter, and the 1 teaspoon salt in a medium saucepan and bring to a simmer over medium-high heat. Reduce the heat to medium, add the flour all at once, and stir rapidly with a stiff heatproof or wooden spoon until the dough pulls away from the sides of the pan and the bottom of the pan is clean, with no dough sticking to it. The dough should be glossy and smooth but still moist.
Enough moisture must evaporate from the dough to allow it to absorb more fat when the eggs are added: Continue to stir for about 5 minutes, adjusting the heat as necessary to prevent the dough from coloring. A thin coating will form on the bottom and sides of the pan. When enough moisture has evaporated, steam will rise from the dough and the aroma of cooked flour will be noticeable. Immediately transfer the dough to the mixer bowl. Add the mustard, herbs, and the 1 tablespoon salt. Mix for a few seconds to incorporate the ingredients and release some of the heat, then add the cheese. With the mixer on the lowest speed, add 3 eggs, one at a time, beating until each egg is completely incorporated before adding the next one. Increase the speed to medium and add another 2 eggs, one at a time, mixing well after each one. Turn off the machine. Lift some of the dough on a rubber spatula, then turn the spatula to let it run off: It should move down the spatula very slowly; if it doesn't move at all or is very dry and just falls off in a clump, beat in the additional egg.
Place the dough in a large pastry bag fitted with a 5/8-inch plain tip and let it rest for about 30 minutes at room temperature. (If you have only a small pastry bag, fill it with half the dough two times.) Bring a large pot of lightly salted water to a simmer. Line a baking sheet with paper towels. Line a second baking sheet with parchment paper.
Because this recipe makes such a large quantity of gnocchi, your arm may get tired: An easy way to pipe the gnocchi is to place a large inverted pot, canister, or other container that is slightly higher than the pot on the right side of the pot (left side if you are left-handed) and set the filled pastry bag on it so that the tip extends over the side and the container serves as a resting place for the bag. Twist the end of the pastry bag to push the dough into the tip. (From time to time, as the bag empties, you will need to twist the end again.) As you squeeze the back of the bag with your right hand, hold a small knife in your left hand and cut off 1-inch lengths of dough, allowing the gnocchi to drop into the pot. Pipe about 24 gnocchi per batch. First, the gnocchi will sink in the pot. Keep the water temperature hot, but do not boil. Once the gnocchi float to the top, poach them for another 1 to 2 minutes, then remove them with a slotted spoon or skimmer and drain on the paper towel–lined baking sheet. Taste one to test the timing; it may still seem slightly undercooked in the center, but it will be cooked again. Repeat with the remaining dough.
When all the gnocchi have drained, place them in a single layer on the parchment-lined baking sheet, cover with plastic wrap, and refrigerate for at least 30 minutes, or up to a day. Or, for longer storage, place the baking sheet in the freezer. Once the gnocchi have frozen solid, remove them from the baking sheet and place in a freezer bag in the freezer. Before using frozen gnocchi, spread them in a single layer on a baking sheet and defrost in the refrigerator for several hours.
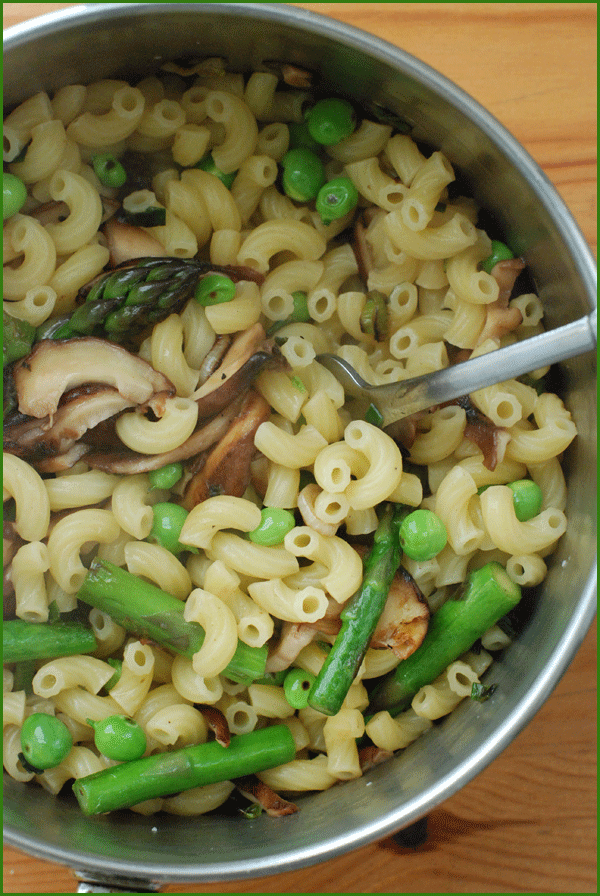 Forget that crap they serve in bad Italian restaurants. (All year round, mind you. Does anyone else see the irony in that?) This is the real thing. It's spring (did you hear?), and this is a pasta dish that shows off the season's finest. It's a dead-simple preparation that doesn't skimp on flavor, and it takes mere minutes to throw together.