Mushroom Conserva

This is part of a series on great side dishes for Thanksgiving and year-round. The first of the series can be found here.

To my mind, there are two foods whose flavor profiles are so diverse, they can taste like just about anything. One is cheese, which can taste sweet or salty, buttery or nutty or mild, grassy or spicy or altogether funky, like hot peppers or red wine, pure raw milk or bay leaves. The other? Mushrooms.

The buttons taste bland, but when you get into chanterelles that taste and smell of butter and honey, oyster mushrooms with briny undertones, and morels that sing of smoke and springtime, you're talking serious flavor diversity. My favorites are honeycap mushrooms, which smell and taste like honey with chocolate undertones. I could literally sit for days with my nose deep in a basket of honeycaps.

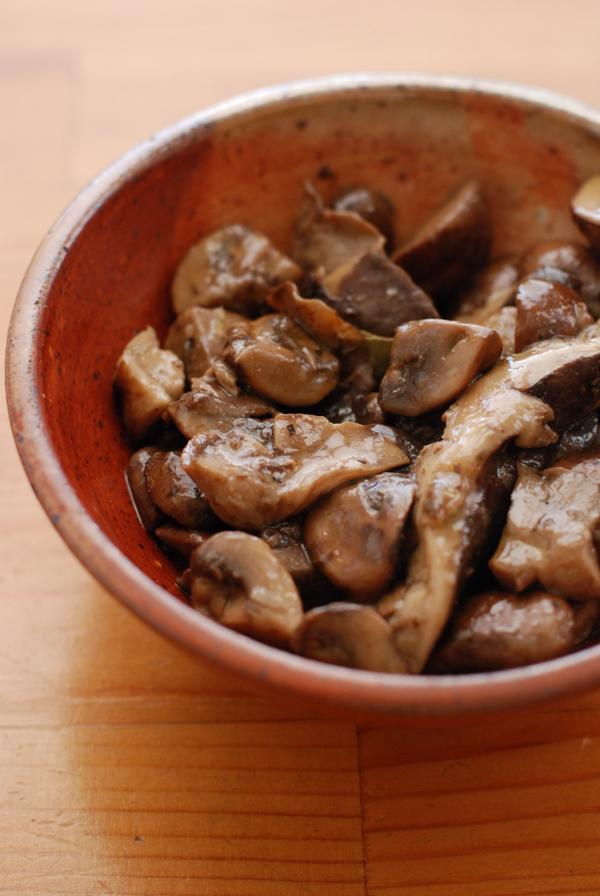
The sweet taste of honeycaps comes at a price: $15 a box, to be exact. With few exceptions, I steer clear, making a b-line for the criminis, shiitakes, and maybe some chanterelles. Criminis are pretty plain, shiitakes slightly less so; when I serve these to company, I'm looking to maximize their flavor and increase their shelf life in case there are leftovers. For this, I turn to mushroom conserva. It comes from one of my new favorite cookbooks, Thomas Keller's Ad Hoc at Home.

A recipe the likes of which only Thomas Keller could have invented, mushroom conserva is to mushrooms what jam is to fresh raspberries. Keller has you essentially poach the mushrooms in oil perfumed with herbs and spices, splash the mixture with vinegar, and then jar them. Submerged in the oil, the mushrooms keep for upto a month -- much longer than they would otherwise. While the recipe calls for wild mushrooms galore, I've found that peppering a mostly crimini/shiitake mix with smaller portions of wild mushrooms works quite nicely, and is easier on the wallet. As if these weren't enough to motivate, this recipe -- just like the green beans I wrote about earlier this week -- is actually meant to be made in advance. Just trying to make your life easier, folks. Thank me later.

Mushroom Conserva from Thomas Keller's Ad Hoc at Home

note: if you don't have piment d'espelette, feel free to use a different paprika. I used smoked paprika one time I made this, and thought it was lovely.

2 pounds assorted wild mushrooms such as small shiitakes, morels, chanterelles, small porcini, hen-of-the-woods, trumpet and oyster; if you can't get these or enough of them, feel free to substitute some criminis, 2 cups extra virgin olive oil 2 bay leaves 4 sprigs thyme 1 sprig rosemary (6 inches) 1 teaspoon piment d'espelette (if you don't have this, feel free to use a different paprika) 3 tablespoons sherry wine vinegar kosher salt fresh cracked black pepper

Just before cooking, rinse the mushrooms as necessary to remove any dirt. Remove any stems that are tough, such as the stems of shiitake mushrooms and discard or set aside for another use, such as a vegetable stock. Trim the end of other stems as well as any bruised areas.

Cut the mushrooms into pieces. The size and shape will vary with the variety of the mushroom. Small mushrooms can be left whole, larger mushrooms can be cut into chunks or into slices. Some mushrooms with meaty stems such as porcini or trumpet mushrooms, can be cut lengthwise in half.

Use the tip of a paring knife to score the inside of the stem in a crosshatch pattern. This will enable the marinade to penetrate the stem. The pieces of mushroom will shrink as they cook, but the finished pieces should not be larger than one bite. You should have about 1.5 pounds (10 cups) of trimmed mushrooms.

Place the olive oil, bay leaves, thyme sprigs, rosemary and Piment d'Espelette in a large, wide saucepan over medium to medium high heat.

Place a thermometer in the pot and heat until the oil reaches 170 degrees F, stirring the mushrooms in the oil from time to time. It may be necessary to tilt the pot and pool the oil to get a correct reading on the thermometer. Adjust the heat as necessary, to maintain this temperature for 5 minutes.

Add the mushrooms to the pot, and gently turn the mushrooms in the oil.

When the oil reaches 170 degrees F again, maintain the temperature for 5 minutes, gently turning the mushrooms from time to time. The mushrooms will not initially be submerged in the oil, but will wilt as they steep.

After 5 minutes, turn off the heat and stir in the vinegar and salt and pepper to taste. Let the mushrooms steep in the oil for 45 minutes. Place the mushrooms, oil and herbs in a covered storage container. Kept covered in oil the mushrooms will keep for up to 1 month in the refrigerator.

Reheat conserva before serving.
Green Beans with Horseradish-Mustard Vinaigrette

This is the first of a series of posts about great sides for Thanksgiving and year-round -- stay tuned for more as we approach the big day!

For my money, this is the quintessential side. Flavor-wise, it's totally in keeping with Thanksgiving tastes. The horseradish helps cut all that sweet, fatty Tday food, and the mustard reinforces for a one-two punch of spice. And at a meal where salad is the wallflower, green beans are more formidable company for that big turkey and the boat full of gravy occupying everyone's attention.

If that's not enough to lure you, other benefits include its ease and speed of preparation (it takes 10 minutes flat) and its willingness to hang out for a few days before serving. Really, what more can you ask for?

I make these green beans year round, but they're especially great on Tday. Go forth and eat.

Green Beans with Horseradish-Mustard Vinaigrette serves 4 as a side

1 pound green beans 1 tablespoon spicy whole-grain mustard 1 tablespoon prepared horseradish (I make mine by blending horseradish root with vinegar) 1 tablespoon red wine vinegar 1 tablespoon lemon juice 1/3 cup olive oil salt and pepper 1/2 cup sliced almonds

Preheat oven to 350º. Spread almonds in a single layer and toast until golden, about 10 minutes. Watch them carefully so they don't burn.

Bring a large pot of salted water to a boil. Fill a large bowl with ice cubes and water. Working in batches, cook beans in boiling water just until cooked but still crisp, about 2 minutes per batch. Transfer cooked beans to bowl of ice water to "shock" them and stop them from cooking further. Continue cooking and shocking process with remaining batches of beans. Transfer beans to separate bowl and chill. You'll be serving the beans at room temperature, so chill only enough that they're no longer hot.

Meanwhile, prepare vinaigrette. Mix horseradish, mustard, red wine vinegar, and lemon juice. Add oil in steady stream while whisking, until all oil has been added and vinaigrette is emulsified.

Transfer green beans to a serving platter. Drizzle vinaigrette over beans, top with toasted almonds, and serve at room temperature.

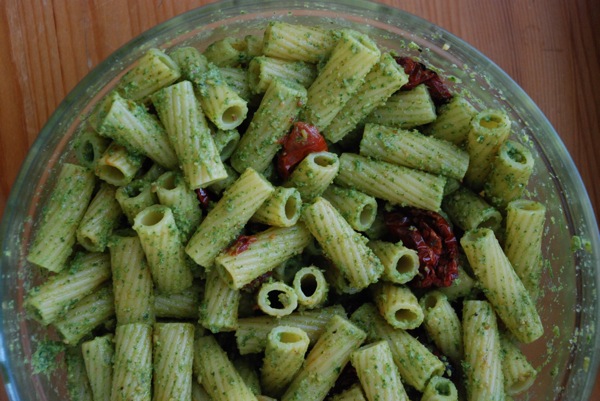
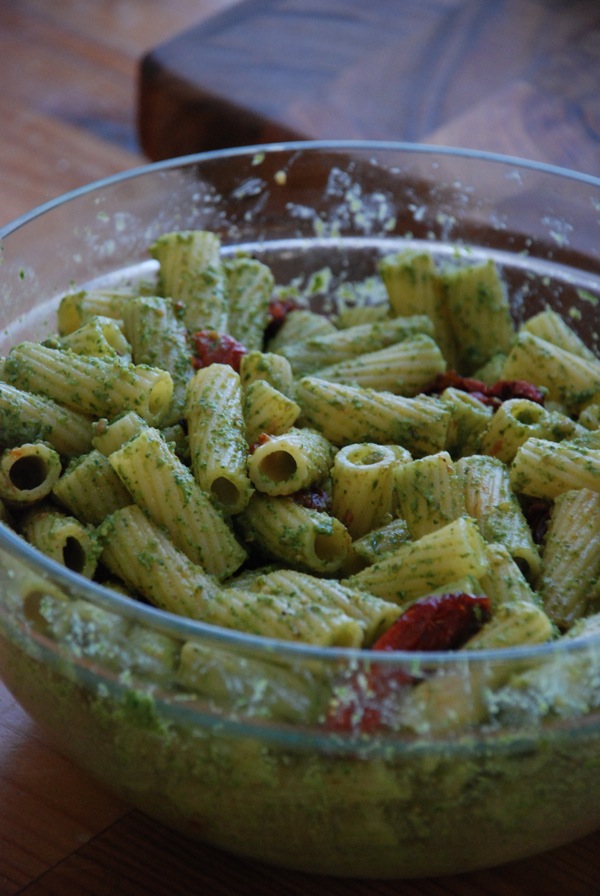
Rigatoni with Radish Pesto and Oven-Roasted Tomatoes

A couple weeks ago, my friend Jeremy told you using the last of the summer bumper crop to make oven-roasted tomatoes. Like the diligent readers you are, several of you went and made your own oven-roasted tomatoes. But then you emailed me later that week asking what to do with the oven-roasted tomatoes you had made. Recognizing that my first-impulse answer, "what can't you do with them?!" wasn't exactly so helpful, I started a list of ways to use these plump little suckers. Toss a couple on pizza; pile them in a heap on baked feta and serve with pita chips; add to roasted broccoli and drizzle vinaigrette over the whole mess; and so forth.

One suggestion I neglected to share, of course, was to toss them with pasta. Ironically, that's my most frequent use for them. I toss them with spaghetti and finish with parmesan, I add them to baked dishes like ziti and lasagna, and -- as you'll see -- I mix them with some rigatoni and coat it all with pesto. In this combination, the tomatoes brighten the pesto-coated pasta, punctuating with sweetness and acid. Once you've got the tomatoes, the dish takes about 25 minutes to make, though the results would suggest otherwise. An added plus: this doubles as weekday lunch. What more could you ask for?

The pesto is delicious -- though "radish pesto" is perhaps a misnomer, since the pesto is made not with the radishes themselves, but with their leaves. After years of buying radishes from the farmers' market and watching the forlorn greens wilt away in the fridge, I discovered this wonderful recipe on Food52 and haven't turned back since. The recipe is by "Oui, Chef," a regular contributor whose recipes are some of the most well-conceived on the site. I've always been one to add acid (lemon juice, lemon zest) to my pesto, and when Oui, Chef did so as well, I knew I had to read on. His pesto recipe combines traditional ingredients (basil, garlic, olive oil) with less traditional ones (feta, marcona almonds, chives -- stay tuned for more about them later this week), and the result is divine.

It's not only the tomatoes that have multiple uses, by the way. This pesto is exceedingly versatile. Shmear some on slices of bread or pieces of baguette, top with feta or ricotta, maybe some chopped tomatoes, and lettuce, and you have a lovely vegetarian lunch. Drop dollops onto pizza dough with a couple thin slices of radish, and some pecorino, and you have yourself a unique and delicious pizza. Add some to a vinaigrette and use it to dress beans (from a can is totally fine) for a nice variation on bean salad. You get the drift. One spread, many uses. Just the way I like it.

Rigatoni with Radish Pesto and Oven-Roasted Tomatoes

1 pound rigatoni or other large tube pasta 1/2 cup oven-dried tomatoes 3/4 cup radish and basil pesto (recipe by Oui,Chef on Food52 -- printed below with my adjustments) Parmigiano Reggiano Cheese

Cook pasta according to package directions. Drain and transfer to large bowl. Mix in pesto and tomatoes, and grate 1/4 cup cheese over top. Mix to incorporate; serve warm or at room temperature.

Radish and Basil Pesto via Food52

1 cup packed fresh radish greens, well washed and dried 1 cup packed basil leaves, well washed and dried 2 cloves garlic 1/4 cup marcona almonds 1/4 cup olive oil Juice of 1/2 lemon 1/4 cup feta cheese, cut or broken into chunks 1/4 cup grated parmesan cheese 3 radishes, finely minced 1 tablespoon finely minced fresh chives Kosher salt and black pepper to taste

Place garlic and almonds in the bowl of a small food processor with a pinch of salt and a few grindings of pepper, and pulse until finely minced.

Add the radish and basil leaves, and process while pouring the olive oil through the feed tube, stopping as needed to scrape down the sides of the bowl. Continue until oil has been incorporated and pesto is smooth.

Add feta and radishes, and pulse just until broken up into small bits -- this is where the pesto gets chunky. If you prefer a completely smooth pesto, process for longer at this stage.

Pour pesto into a medium sized bowl, and mix in the lemon juice, grated parmesan, and chives.

Test for seasoning, adding more salt, pepper or lemon juice as desired. Spoon into an air-tight container just big enough to hold all the pesto, pour a thin layer of olive oil to coat the top, and store in fridge. Pesto will keep for up to 1 week.

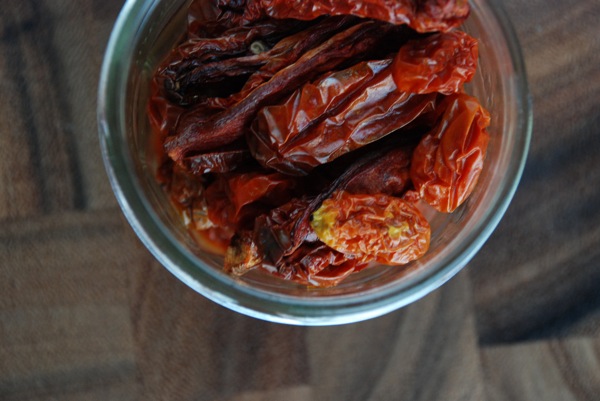
Oven-Dried Tomatoes

Hi friends! Long time no see. I'm taking some time to let marriage soak in, and that means less time to blog. While I'm away, my friend Jeremy Brosowsky is sharing his method for preserving the last of summer's bounty. And DC folks -- Jeremy has a fantastic new company called Compost Cab, the perfect solution for us urban folk who want to compost but don't have a garden. Check it out.

Gather ye rosebuds, my friends. And by rosebuds, I mean tomatoes. We'll likely get another head-fake day or two, when the warm air makes it feel like summer even though the quality of the light is glaringly fall. But make no mistake: summer's over. Last-gasp time, folks.

For the next week, maybe two, you're going to see sad, lonely crates of tomatoes looking out of place among the hardened bounty of early fall at your local farmers' market. No, they're not as good as their mid-summer cousins, the ones so vibrant you want to bite into them like they're apples. These fall tomatoes need to be coaxed out. But, oh, is it worth it.

For much of the past couple of weeks, I've been plowing through 100 pounds of tomatoes -- that's two bushels, if you're keeping score at home. Most got sauced. But some 25 lucky pounds got oven-dried. It's the apotheosis of the fall tomato. And it couldn't be much easier.

The ingredient list is mercifully short. Tomatoes. Olive oil. Salt.

Tomatoes shrivel as they dry, so don't get caught up in looks -- seconds work just fine. You can use any kind of tomato you want -- it's a free country! But you're looking for sugar here, and plum tomatoes are the classic for a reason. When the February doldrums roll around and I'm aching for a taste of summer, I pop one of these suckers in my mouth, grin a stupid grin, and mumble something about how f**king happy I am that I made these oven-dried tomatoes way back before Halloween.

(I also make oven-dried grape tomatoes, which are awesome, too. Same process as below, but I leave them whole with a little burst of juice left inside.)

Most people use a baking sheet, but I've discovered that the tomatoes dry more quickly and uniformly when I cook them on a cooling rack. Another benefit of the rack is that you avoid any pooling of oil. I line a baking sheet with foil, place the rack on the sheet, and brush or spray the rack with oil.

I sort the plums by size to maximize the chance of each batch drying consistently. I wash and dry them. Then, working along the length of the tomato, I quarter the larger ones, and cut the smaller ones in half or thirds. Use your judgment. Place them on the rack as close together as possible without touching.

You're going to use precious little olive oil, just enough for an ultra-thin coating -- almost a sheen -- on the tomatoes. Because we use so little, and because the taste of the finished product is so straightforward and pure, I break out the good stuff from McEvoy Ranch (http://www.mcevoyranch.com/html/oil_vars.html). But whatever you have on hand will work fine. Use a brush.

I like kosher salt, but if all you have is table salt, that's cool. Either way, sprinkle evenly and judiciously.

Some people tell you to set your oven at the lowest possible setting, usually 170F or so. Others say you can go as high as 200F. I split the difference, set my oven to 185F, and don't worry about it. Put your tomatoes in the oven, and leave them be for six hours. At that point, start checking in on them. I aim for just on this side of leathery, which usually takes 10-12 hours. Remove them from the heat when they're what your looking for. And please, please, please don't forget about them -- it's just so sad when a batch morphs from candy-sweet to metallic-burnt because you fell asleep on the couch.

Once these little beauties cool, put them in a jar in the fridge and they'll keep for months. Little bites of summer. Love it. You will, too.