Serious Barbeque Sauce

bbq-sauce-1 Missing your grill right about now? I sure am, and I never even had a grill. But nothing says "miss your grill" like cold, wet, winter nights.

Enter Ina Garten, my favorite Food Network dame and partner in butterlove. Her bbq sauce is the real thing, lemme tell you. By the looks of the recipe, you'd think she was joking: you'll need nearly 10 bottles of already-processed sauces and goops to make her sauce. But when it's done, you'll see that she was serious all along. Laced with onions, generously spicy and perfectly sweet-tart, this sauce is way, way tastier than the sum of its (very processed) parts. Trust me.

bbq-sauce-2

Serious BBQ Sauce From The Barefoot Contessa Cookbook Makes 1 ½ quarts

1 ½ cups chopped yellow onion (1 large onion) 1 T. minced garlic (3 cloves) ½ cup vegetable oil 1 cup tomato paste (10 ounces) 1 cup cider vinegar 1 cup honey ½ cup Worcestershire sauce 1 cup Dijon mustard ½ cup soy sauce 1 cup hoisin sauce 2 T. chili powder 1 T. ground cumin ½ T. crushed red pepper flakes

In a large saucepan on low heat, sauté the onions and garlic with the vegetable oil for 10 to 15 minutes, until the onions are translucent but not browned. Add the rest of the ingredients. Simmer uncovered on low heat for 30 minutes. Use immediately or store in the fridge.

menuforhope2

Have you bid yet? Go bid! Go! Now! :)

Menu for Hope V

menuforhope1 Among the many perks of being a food blogger is the opportunity to really make a difference. The formidable Pim of Chez Pim has developed a fantastic annual fundraising campaign that raises money for the UN World Food Programme. Here's what Pim has to say about Menu for Hope:

Menu for Hope is an annual fundraising campaign hosted by me and a revolving group of food bloggers around the world. Five years ago, the devastating tsunami in Southeast Asia inspired me to find a way to help, and the very first Menu for Hope was born. The campaign has since become a yearly affair, raising funds to support worthy causes worldwide. In 2007, Menu for Hope raised nearly $100K to help the UN World Food Programme feed the hungry.

Each December, food bloggers from all over the world join the campaign by offering a delectable array of food-related prizes for the Menu for Hope raffle. Anyone – and that means you too - can buy raffle tickets to bid on these prizes. For every $10 donated, you earn one virtual raffle ticket to bid on a prize of your choice. At the end of the two-week campaign, the raffle tickets are drawn and the results announced on Chez Pim.

Once again we've chosen to work with the UN World Food Programme. WFP is the world’s largest food aid agency, working with over 1,000 other organizations in over 75 countries. In addition to providing food, the World Food Program helps hungry people to become self-reliant so that they escape hunger for good.

With the success of last year's campaign to support the school lunch program in Lesotho, we are going to continue our support to the same program. During the duration of Menu for Hope V, we will be posting updates from the kids and the farmers we supported this past year.

If you weren't around last year for Menu for Hope 4, let me explain a bit about why we are supporting this particular program. We chose to support the school lunch program because providing food for the children not only keeps them alive, but keeps them in school so that they learn the skills to feed themselves in the future. We chose to support the program in Lesotho because it is a model program in local procurement - buying food locally to support local farmers and the local economy. Instead of shipping surplus corn across the ocean, the WFP is buying directly from local subsistent farmers who practice conservation farming methods in Lesotho to feed the children there.

We know our readers trust us, but we also want to be completely transparent in our fundraising. So, we use a very good online fundraising company called Firstgiving, who has worked with us since the first Menu for Hope years ago.

Donors can make an online donation with a credit card. Firstgiving collects and processes the payments and, at the end of the campaign, transfers the donations in one lump sum to the WFP. This is a win-win situation for all parties involved. The bloggers never touch the money. The WFP don't waste overheads on processing mini-donations, the majority of which were between $10-$50, that's a whole lot of tenners to make up $90K. Firstgiving does all the work and collects a small fee, which include the credit card processing charges. Last year, Firstgiving gave back 1% of the total amount raised in lieu of a discount on their processing fee. Thank you Firstgiving, we appreciated it very much!

linzer5

In the spirit of giving and of helping those less fortunate than us, I've decided to contribute something to the raffle this year! That's right -- this year, you can bid on a box of some of my favorite sweets, made by yours truly and shipped anywhere in the lower 48. I guarantee lots of chocolate, even some homemade caramel, and of course, a nod to this blog's namesake with some Not Derby Pie bars. The prize I'm offering is under prize code UE07. You can find more information, including a list of items to bid on, at Chez Pim: www.chezpim.com. For a list of prizes originating on the East Coast and surrounding areas, check Steamy Kitchen, the lovely Jaden's site. She's our regional host and has a complete list of East Coast prizes.

Here are detailed instructions on how to donate and enter the raffles: 1. Choose a prize or prizes of your choice from our Menu for Hope at http://chezpim.com 2. Go to the donation site at http://www.firstgiving.com/menuforhope5 and make a donation. 3. Each $10 you donate will give you one raffle ticket toward a prize of your choice. Please specify which prize you'd like in the 'Personal Message' section in the donation form when confirming your donation. You must write-in how many tickets per prize, and please use the prize code. For example, a donation of $50 can be 2 tickets for EU01 and 3 tickets for EU02. Please write 2xEU01, 3xEU02 4. If your company matches your charity donation, please check the box and fill in the information so we could claim the corporate match. 5. Please allow us to see your email address so that we could contact you in case you win. Your email address will not be shared with anyone.

One last little plug: we know that the last few months have been super rough for folks, and that many are pinching their pennies right now. But this campaign will raise money for those with much, much less than we have, that's a guarantee. And the chance to win some really freakin' cool things while giving charity ain't all that bad, either. So bid away, and best of luck to all of you!

Believe me when I say that the prizes offered are through-the-roof amazing: you won't want to miss out on the chance to win some truly unique packages, from handmade sweets to signed cookbooks to vacation packages to dining with food celebrities, and much more. To try your hand at winning one of these amazing prizes, visit the firstgiving page here. Bidding has begun...now's the time to enter!

Homemade Granola -- I've warned you.

granola1jpg.JPG Remember that time I catered a breakfast? For a starter, we served greek yogurt and granola parfaits with a drizzle of honey and some fresh berries. This course took some time to plate up -- what with all the layers, and making sure no smudges of yogurt got on any of the beautiful parfait glasses -- but the only baking, of the granola, was done in advance.

granola4jpg.JPG

My granola recipe has evolved over the years. I first started making it while on my fellowship in Israel: I was inspired by a couple friends, who brought large tubs of granola to every meeting and retreat we had. They swore it was dead easy, and I soon discovered they were right. They made several variations: one with berries, one with lots of peanut butter, even one with chocolate chips. Can you guess which one I like best, chocoholic that I am?

granola3jpg.JPG

The recipe I've settled on uses a minimum of ingredients: oats, flax seeds, raisins, dried cranberries, chopped walnuts, sliced almonds, almond butter, maple syrup, and cinnamon. That's it. I've seen recipes that call for brown sugar, but I find that it's harder to incorporate with the other ingredients; many recipes also call for peanut butter, including the recipe from my friends in Israel, but I don't like PB (please don't hate me, PB lovers...) so I use almond butter instead; I find it gives the granola a more subtle flavor.

granola2.JPG

The great thing about this recipe is that while I've found a happy medium of flavors that I like, you're not bound by that mix at all. Feel free to add anything you like: sunflower seeds, dried shredded coconut, sesame seeds, pistachios, etc. There's really no end to the possibilities. This last time, I even added the crumbs from a bag of ginger snaps, and let me just say....Amazing.

Mind you, you've been warned. This granola recipe is totally and utterly addictive. You will NOT be able to eat just one handful, so don't even try. I usually try hiding the container after taking a portion out, but for some reason that doesn't seem to work.

granola5.JPG

Homemade Granola

2 1/4 cups oats 1/2 cup maple syrup 1/2-2/3 cup almond butter, depending on viscosity (may microwave it for 30 seconds if too stiff) 2/3 cup pepitas (pumpkin seeds), either salted or unsalted, depending on preference 2/3 cup sliced almonds 2/3 cup chopped walnuts 2/3 cup raisins, cranberries, or other dried berry (I like half raisins, half cranberries) 1/2 tsp salt 1 teaspoon cinnamon

1. Preheat oven to 325 degrees.

2. Mix all ingredients in large bowl; toss to incorporate, until all oats have been coated and small clusters start to form.

3. Pour granola onto a large rimmed cookie sheet and spread so it sits in a single layer.

4. Bake, stirring at 10-minute intervals, for approximately 25-30 minutes, or until granola is evenly browned. When you take it out of the oven, it will feel soft; as it cools, it will harden. I usually take small pinch out at around 23 minutes, and let it sit on the counter for 2 minutes. If at 25 minutes, the pinch is sufficiently crunchy, I take the whole thing out at 25. If not, I leave it in for two minutes and repeat the check test.

Baklava

baklava1.JPG We're chock-full of special occasions here at NDP. Two weekends ago, we celebrated with D and E as they hosted their first Friday night dinner as a married couple. It so happens that D and I were the first people to host D and E as a [not-yet-married] couple about a year ago, so Friday night we came full circle. D and E really went all-out and made a brisket, which was totally delicious. Needless to say, there was a ridiculous amount of other food, also super tasty. I had been asked to bring dessert. Now you know that non-dairy desserts have given me ulcers in the past -- no, silly! Not eating them, just thinking and thinking about what to make til I'm blue in the face and dizzy and, well, ulcer-y -- but this time, I was determined to figure something out. I'd planned on the very appropriate Mexican wedding cookies, but they're either totally dairy or totally not kosher (from the use of lard), so that was out. But ever since getting back from the Middle East, where baklava is totally ubiquitous and consistently excellent, I've been meaning to try my hand at crafting my own.

baklava4.jpg

baklava5.jpg

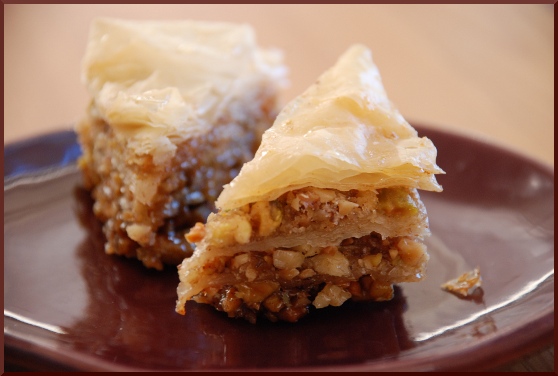
Truth be told, baklava is extremely time-consuming but not particularly difficult. The keys to success are loads of sugar and a great measure of patience. There are multiple steps: first, you make a thick, fragrant syrup to be poured over the hot pastries. Second step is to make the mixture of nuts, sugar and spices that will be sprinkled between each layer of phyllo dough. Finally, you (carefully and patiently!) assemble the baklava, layer by layer, slice into pretty diamonds, bake til browned, and drizzle thickened syrup in every nook and cranny. Difficult? Not so....but time consuming? Oh, yes.

baklava6.jpg

baklava3.JPG

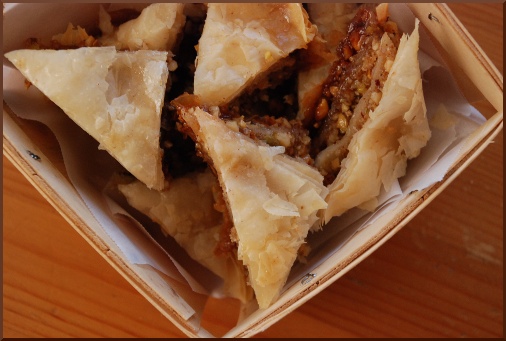
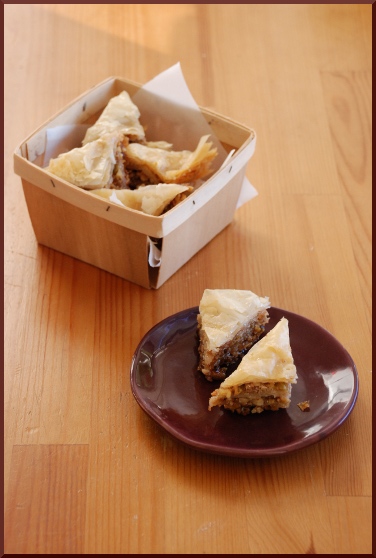
Time notwithstanding, this recipe has officially made the greatest hits list. The layers are flaky, crisp, and buttery-tasting. For the nuts, I used a mix of almonds for crunch, pistachios for fruitiness, and walnuts for bitterness and texture. The result was pretty close to perfection. It was been screamingly popular with all tasters, and I miss having little bits of it to nibble on. If you've got a free afternoon, here's a great way to pass the time.

baklava7.jpg

baklava2.JPG

Baklava adapted from Epicurious

2 cups sugar 2/3 cup water 1 lemon, halved 1 orange, halved 1 1/2 (3-inch) cinnamon sticks 2/3 cup honey 1 tsp orange flower water

For baklava 
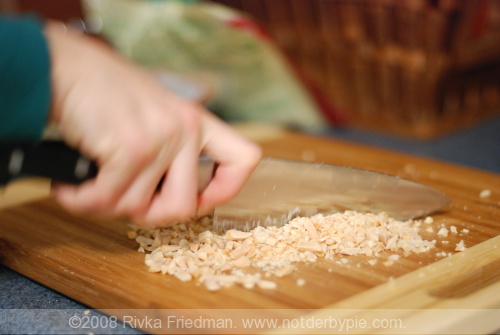
2 1/2 cups whole almonds with skins (1 lb), finely chopped 2 cups walnuts (1/2 lb), finely chopped 1 cup pistachios, finely chopped 1 1/4 cups sugar 1 tablespoon cinnamon 
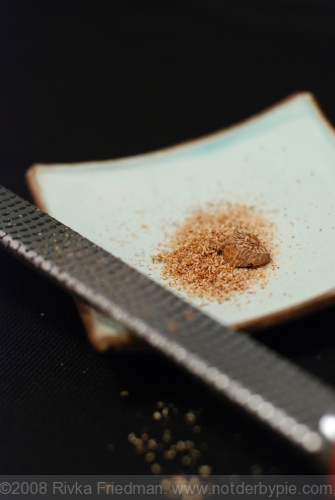
2 teaspoons freshly grated nutmeg 1/4 teaspoon ground cloves 1/4 teaspoon salt 3 sticks (1 1/2 cups) unsalted butter, melted and cooled slightly (I used flavorless canola oil instead, and only needed about 1 cup) 1 (1-lb) package phyllo dough (17 by 12 inches; about 28 sheets), thawed if frozen

preparation

Make syrup: Combine sugar and water in a 2 1/2- to 3-quart saucepan. Squeeze juice from lemon and orange into sugar mixture. Add fruit halves and cinnamon sticks. Bring mixture to a boil over moderate heat, uncovered, stirring occasionally, until sugar is dissolved, then simmer 10 minutes. Stir in honey and return to a boil. Remove from heat and cool to room temperature. Pour through a sieve into a large measuring cup or bowl, pressing hard on, then discarding, solids. Chill, uncovered, until cold, about 1 hour.

Assemble and bake baklava: Put oven rack in middle position and preheat oven to 350°F.

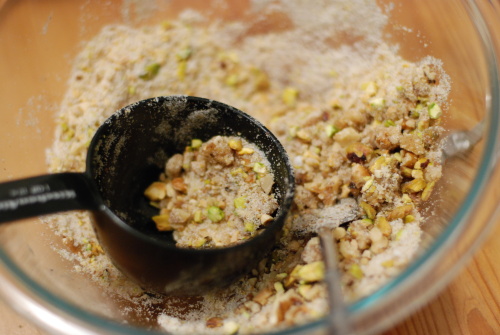
Whisk together almonds, walnuts, sugar, cinnamon, nutmeg, cloves, and salt until combined well.

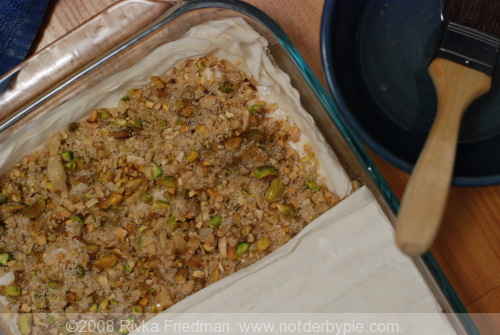
Generously brush a 13- by 9- by 2-inch glass baking dish with melted butter. Halve phyllo sheets crosswise and stack sheets. Keep stack covered with 2 overlapping sheets of plastic wrap and then a dampened clean kitchen towel. Lay 2 sheets of phyllo in bottom of baking dish and brush top sheet generously with butter. Continue to layer 2 sheets at a time, staggering sheets in each double layer slightly to cover bottom of dish, then brushing every second sheet generously with butter, until you have used 10 sheets of phyllo total. After brushing top layer of phyllo with butter, spread a rounded 1 1/2 cups of nut mixture over it. Drizzle with 2 tablespoons butter.

Repeat layering 3 more times. Top with 10 more sheets of phyllo. (You will use 50 sheets of phyllo total. I actually only repeated the layering 2 more times, resulting in 40 sheets of phyllo used.) Butter top and let baklava stand at room temperature to harden slightly (to facilitate cutting), 10 to 15 minutes.

Using a sharp knife, cut baklava into 16 equal rectangles, then cut each piece in half diagonally. (Be sure to cut all the way through.)

Bake baklava until golden, 50 minutes to 1 hour. Transfer dish to a rack to cool, then slowly pour cold syrup around edges of hot baklava, in between all cuts, and over top. Let stand at room temperature at least 8 hours. (Cover once baklava is at room temperature.) Do not chill.

Cooks' notes: • Syrup can be made up to 5 days ahead and chilled, covered. • Baklava keeps in an airtight container up to 1 week.