• Home
  • About
  • Recipe Index
  • Contact
Menu

Rivka Friedman

Street Address
City, State, Zip
Phone Number

Your Custom Text Here

Rivka Friedman

  • Home
  • About
  • Recipe Index
  • Contact

Mushroom Turnovers

July 25, 2011 Rivka
DSC_0014-1
DSC_0014-1

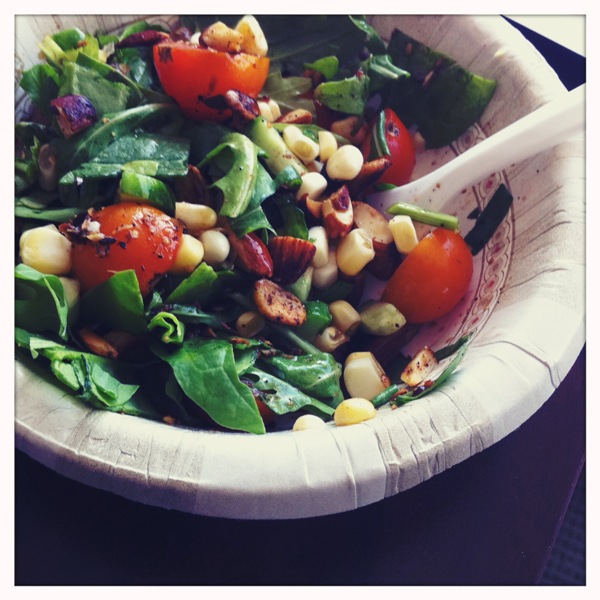
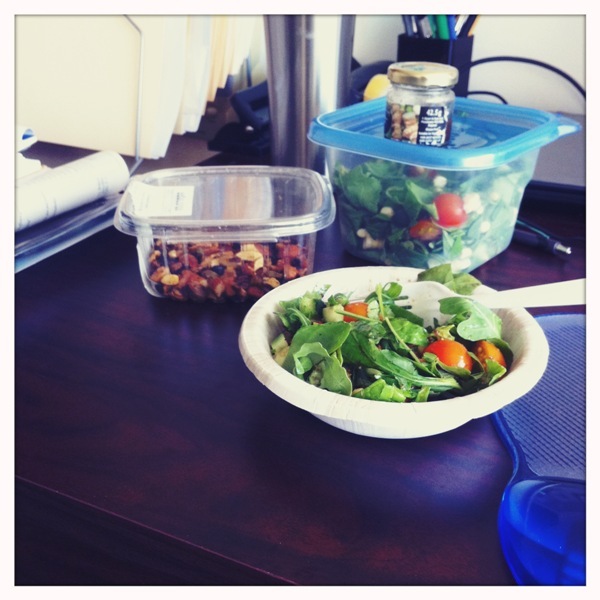
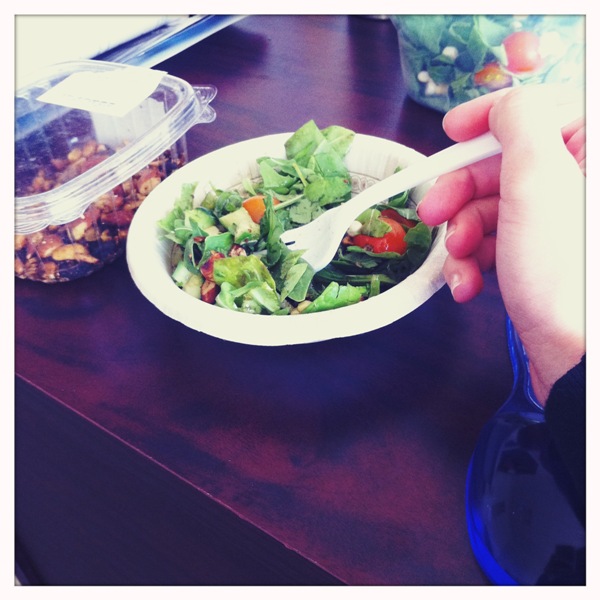
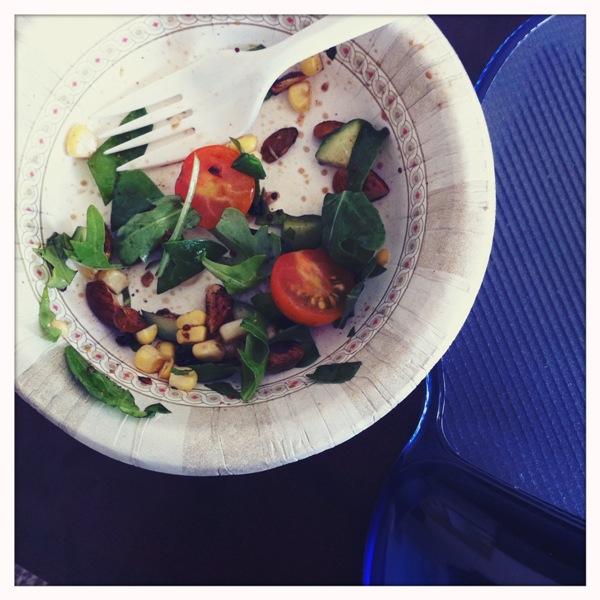
Most of you regulars probably know that in the summer months, D and I operate under a cold-oven policy. Our apartment, see, it loves the heat. It clings to every last morsel of July humidity like there's some shortage (which, having spent the past week in town clinging to my vent, I can say with certainty there is not). Living in this hot, sticky mess, I'm so tired I can barely cook. We've been eating lots of salads these past few weeks, and in our near future, there's no shortage of those, either.

DSC_0013-1
DSC_0013-1

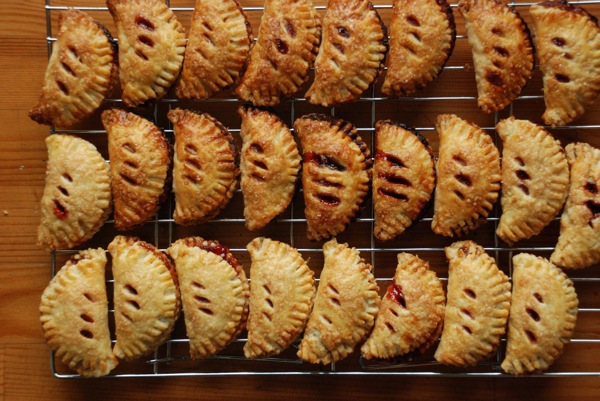
On the rare occasions that I do turn on the oven (for, say, this peach blackberry wonder), I try to maximize its utility. That's what had me making these mushroom turnovers a couple weeks back. The oven was already on, so I figured I should get as much stuff inside as I possibly could. The beauty of these triangles is that you can cook the whole batch at once, freeze them, and then pop a couple into a container any which day and call 'em lunch.

I've been making spanikopita for years, both with puff pastry and with phyllo dough, and apple turnovers are a beloved winter brunch staple. But mushroom turnovers are the newest addition to my turnover repertoire. They're easy, delicious, and appropriate for all seasons. Also, they're pretty easy to make.

DSC_0017-1
DSC_0017-1

I modeled the recipe on my stuffed mushrooms, which are inspired by the delicious stuffed mushrooms my mom makes. They're purist's mushrooms, made using the chopped up fungi, cheese, and little else. For my turnovers, I sauteed chopped mushrooms with shallots and garlic till soft and flavorful, deglazed with white wine, and cooked the whole mixture until the liquid had evaporated. Into each turnover goes a scoop of the mushrooms and a sprinkle of cheese. That's it.

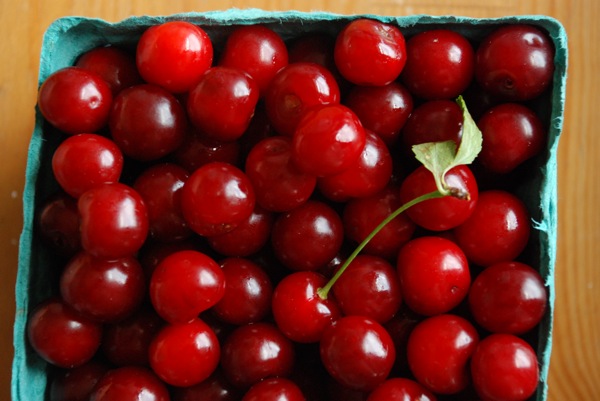
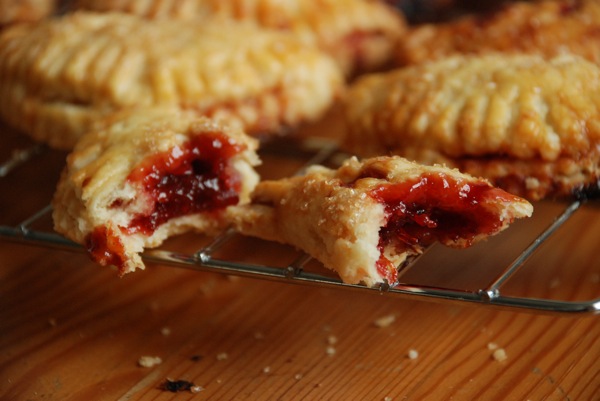
If you don't make these until fall, I won't judge. It's pretty darn hot. But if you're already making that cherry pie, why toss a batch of these into the oven at the same time? That way, you can be as lazy as the heat requires for the rest of the week, and still not go hungry. A good deal, if you ask me.

Mushroom Turnovers makes 12 turnovers

1 package (24 sheets) phyllo dough (most boxes contain two packages) 3 tablespoons olive oil 6 tablespoons butter, divided 4 small to medium shallots, diced 4 garlic cloves, peeled and minced 2 lbs. mushrooms, wiped clean, trimmed and diced (including stems) salt and pepper 1/2 cup white wine 1/2 cup grated parmesan or pecorino romano cheese

Leave phyllo dough out on the counter, still wrapped, for at least 1 hour to thaw.

Meanwhile, add olive oil and 3 tablespoons butter to a large saute pan set over medium heat. When butter has melted, add shallots, garlic, and a pinch of salt. Sweat for two minutes. Add chopped mushrooms, another pinch of salt, and several gratings of pepper. Cook mushrooms, stirring every so often, until soft, fragrant, and slightly shriveled, about 15 minutes. Add white wine to the pan, and use a wooden spoon to scrape up all the caramelized bits of mushroom and shallot from the bottom of the pan. Cook about 5 minutes more, until wine has totally evaporated and mixture no longer looks moist. Remove from heat and allow to cool at least 10 minutes.

Melt remaining 3 tablespoons butter in a small bowl.

Preheat the oven to 350. Unwrap phyllo dough so that the stack of sheets lies completely flat. Cover with a kitchen towel, and keep phyllo covered with towel while making the turnovers. Line a large baking sheet with parchment paper or silpat, and take a second baking sheet to use as your workspace.

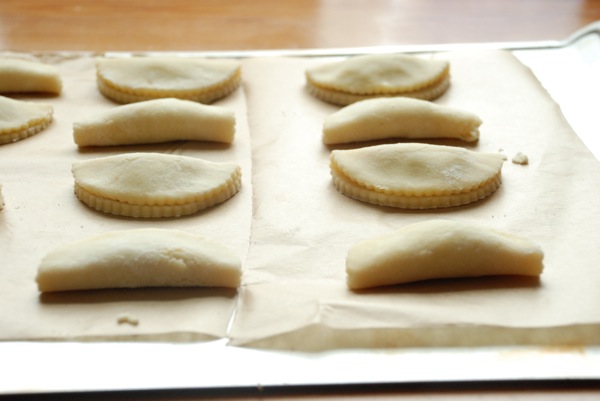
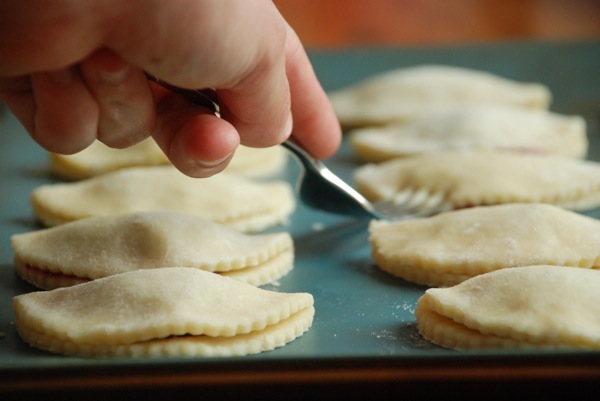
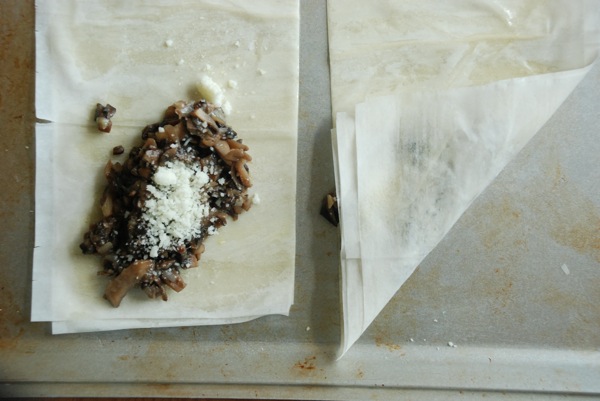
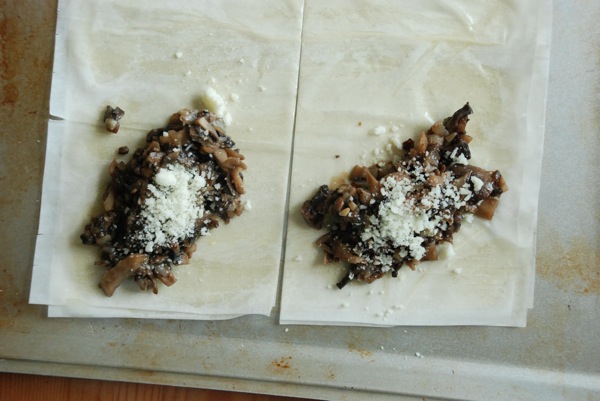
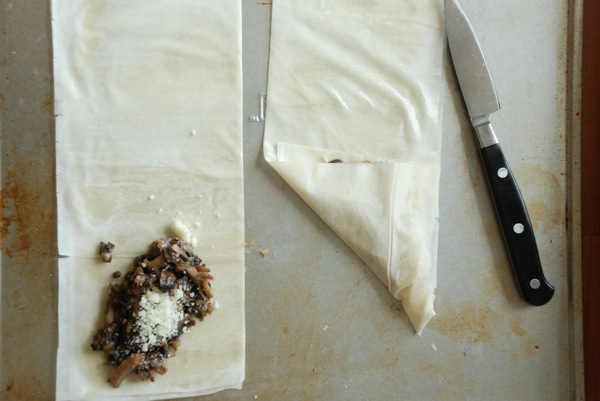
Now you have your workstation - phyllo on one side, mushroom mixture and butter next to you, lined baking sheet right nearby. Take one sheet of phyllo dough and gently place it onto the unlined baking sheet (your workspace). Brush lightly with melted butter - a 3 strokes per sheet, maximum. Place another sheet of phyllo over the first, and brush butter again. Repeat two more times, for a total of four phyllo sheets stacked one on the next. Then use a paring knife to slice this stack in two lengthwise, so you have two long strips (as in the first picture). Put 1 1/2 tablespoons of the mushroom mixture at one edge of each strip, and sprinkle about 1/2 tablespoon cheese (more, if desired) over the mushroom mixture. Then fold as you would a paper football (again, see top picture) until the mixture is completely wrapped in phyllo. Place onto lined baking sheet so the end of each strip of dough is tucked under the turnover. Repeat with remaining sheets of phyllo, until you've done these steps 6 times and made a total of 12 turnovers. Place turnovers on lined baking sheet with a bit of space between each.

Bake turnovers for 30 minutes, until golden brown. Serve immediately, or cool completely on a rack, then transfer to the freezer. Turnovers will keep frozen for several months.

In main dishes, vegetarian, weekday lunch
7 Comments

Corned Beef

July 19, 2011 Rivka
DSC_0276-1
DSC_0276-1

Corned beef is one of those foods I always assumed I couldn't make. Even by the looks of it - mysteriously pink inside, despite the brining process, perfectly I'm happy to try my hands at kimchi, sour cherry preserves, even babka, but deli sandwiches are best made by the pros. Or so I thought.

DSC_0267-1
DSC_0267-1

But Mrs. Wheelbarrow knows better than to let nice, well-meaning home cooks like me get intimidated by something as easy (yes, you heard me, easy!) as corned beef. In fact, she's created a yearlong project devoted to dispelling just such a notion. And while these days, the Charcutepaloozans are conquering fancy things like homemade bratwurst and chicken liver terrine, corned beef is so very easy to make, that it was their very first challenge. If corned beef is just a warm-up for Cathy, I knew it wouldn't be too hard for me to make, either. And I was right.

DSC_0256-1
DSC_0256-1
DSC_0259-1
DSC_0259-1

I can see the eye-rolls through the interwebs. Let's back up. Corned beef is nothing more than pickled, boiled brisket. That's why it's so easy to make: first you pickle it, then you boil it. The key, of course, is to use the best pickling spice there is, which, at least in this case, is a homemade concoction. I used the pickling spice recipe from Ruhlman, the king of charcuterie (no really, he's the author of the book Charcuterie and the godfather of Charcutepalooza). I'm really excited that his recipe made extra spice, because I'll be using it for green beans and cabbage later this week.

DSC_0251-1
DSC_0251-1

So that's the rub with corned beef. Marinate in salt water with spices, rinse, boil with more spices. Poof. The real question is what to do once you've got a beautiful piece of corned beef. The possibilities! We've eaten quite a few sandwiches so far, and I'm planning for some very traditional corned beef and cabbage, with some egg noodles to wash it all down. I only wish I'd made more. Stuff's delish.

DSC_0255-1
DSC_0255-1

Corned Beefadapted from Ruhlman

A note about pink salt: if you've got it, use it, and your brisket will stay pink. If you don't have it, don't sweat it.

for the brisket:

1 (2.5-lb) first-cut brisket 3/4 cup kosher salt 1/4 cup sugar 2 teaspoons pink salt (sodium nitrite), optional 2 cloves garlic, minced 2 tablespoons pickling spice

for the pickling spice:

1 tablespoon black peppercorns 1 tablespoon mustard seeds 1 tablespoon coriander seeds 1 tablespoon hot red pepper flakes 1 tablespoon allspice berries 1/2 tablespoon ground mace 1 small cinnamon stick, crushed or broken into pieces 2 bay leaves, crumbled 1 tablespoon whole cloves 1/2 tablespoon ground ginger

First, make the pickling spice: combine pepper, mustard, and coriander seeds in a dry saute pan and toast over medium heat, being careful not to burn. Let your nose guide you; I found everything fragrant and adequately toasted by the time the mustard seeds had just started to pop. When seeds are toasted, transfer to a heatsafe bowl. Combine with other spices. Let cool completely, then transfer to sealable jar.

Now, brine the brisket: in a pot large enough to hold the brisket, combine half a gallon of water, salt, sugar, pink salt (if using), garlic, and 1 tablespoon of the pickling spice mix. Bring to a simmer, letting salt and sugar dissolve. Cool liquid completely, then transfer to a storage container. Add brisket, weighing meat down with a plate if necessary to keep it submerged, and brine for 5 days.

After 5 days, remove brisket from brine and rinse thoroughly. Transfer to a large pot, add the remaining tablespoon of spices and enough water to cover the brisket, and bring to a slow simmer. Partially cover the pot, and cook brisket in the spiced water for about 2 1/2 hours. If water boils down to the point where the brisket is no longer covered, add enough water to cover the meat.

When brisket is fork-tender, remove it from the cooking water. If you're planning to serve the corned beef with vegetables reserve the cooking water and use it to cook the vegetables.

Once corned beef has cooled for about 10 minutes, use a sharp knife to slice against the grain into slices. Either serve immediately, or wrap tightly and store in the refrigerator for up to 1 week.

In main dishes
7 Comments

Brown-Bag Salad with Crunchies

July 13, 2011 Rivka
iphone 327
iphone 327

The newest in my Weekday Lunch series, where I tell the tale of eating one meal a day on the job, and actually enjoying it. For all you weekday lunch enthusiasts, the wonderful ladies at BGSK have launched Brown Bag Week on their Small Kitchen College site. You can learn about great bag lunch ideas, and win some pretty awesome stuff from BuiltNY. Go check it out!

See that photo up there? I shot that with my iphone, at work. It's a picture of yesterday's lunch, but it easily could have been a picture from any day this week. For the past little while, I've been bringing some version of this very easy salad for work every day, and it's pretty much made my summer.

iphone 316
iphone 316

I think people assume that a brown bag lunch must be either a one-pot dish like pasta salad, or a wrap/sandwich. I'm of the opinion that almost anything can be brought to work for lunch (need proof? Check out my Weekday Lunch series), and salads are no exception. The key is to pack them smartly. Let's discuss.

iphone 321
iphone 321

But first, what's in the dixie bowl? Well, we've got some of my favorite salad greens - a mix of spinach, arugula, and sorrel that I get at the market on Sundays - chopped; raw, bi-color corn kernels; halved cherry tomatoes; chopped cucumbers; and finally, the crowning ingredient, the thing that really makes this salad sing: crunchies.

iphone 320
iphone 320

Every salad needs some crunch. Yes? Yes. It really can be anything: croutons, crisped up bits of cheese, nuts, you name it. For this salad, I used a mix of almonds, walnuts, pistachios, grated unsweetened coconut, and black currants for sweetness, but feel free to use whatever nuts, seeds, or bits suit your fancy (bonus points for already being in the larder, am I right?) I've used sunflower seeds, pumpkin seeds, and even bread crumbs in the past. The goal is just to have something to crunch down on, something to give the salad textural contrast and an added layer of flavor. I've been toasting the crunchies in a non-stick pan with just a couple teaspoons of olive oil, some salt and pepper, and a bit of smoked paprika. (If you don't have smoked, regular will do.) Once they're nice and brown, I spread them on a sheet of foil to cool, then add the currants to the mix. Usually, I do this the night before. That way, I can grab my salad and the bag of crunchies and head off to work in no time.

Back to the beginning for a moment: bringing salad for lunch is all about the packing method. I'm a stickler for tomatoes living outside the fridge, since chilling them really kills their flavor. If I'm bringing a salad without cheese, I'll store the whole thing outside the fridge until lunch, which, given the AC in my building, is totally 100% fine. If we've got cheese in there, I'll refrigerate it. But I never refrigerate the tomatoes. I bring them in a separate bag or container, which both prevents them from getting chilled with everything else, and prevents them from sogging up the rest of my salad. Crucial detail.

Crunchies, of course, are also stored separately. At lunchtime, I add in the tomatoes, the crunchies, and some of the dressing (which I bring in a little recycled jam jar), toss, and eat. It's that simple. I get that some people find dressing to be a pain, so here's a tip: buy a bottle of olive oil and a salt shaker and store them at work. Bring half a lemon every day. There, you've got yourself easy vinaigrette.

If you've got a totally different spread of vegetables at home, by all means, make this anyway. Swap cucs for zucs, arugula for romaine, carrots for tomatoes. Whatever works, whatever you like. Salad is a great brown-bag lunch: that's my story, and I'm stickin' to it.

iphone 324
iphone 324

Brown-Bag Salad with Crunchies

For the salad:

1 cup lightly packed salad greens 6 cherry tomatoes 1 persian (small seedless) cucumber half an ear of corn, raw 1/4 cup chopped mixed herbs (I've been using chives and mint, but any herbs are fine - you can also skip them entirely if they seem too fussy)

For the crunchies:

1/2 cup mixed nuts, seeds, and bits (almonds, pine nuts, pistachios, walnuts, grated unsweetened coconut, bread crumbs, sunflower seeds, pumpkin seeds, you name it) 1-2 tablespoons dried black currants or raisins, optional 2 teaspoons olive oil salt and pepper (I use a pinch and a smidge of salt, and about 3 grinds of pepper 1/2 teaspoon paprika or smoked paprika

For the dressing:

Either use the lemon-olive oil-salt trick I discussed above, or make the dressing I make:

2 teaspoons red wine vinegar 1 teaspoon grainy mustard 3 teaspoons olive oil salt and pepper

Make the crunchies:

In a small nonstick pan, heat olive oil over medium heat. Add nuts, seeds, and bits, and toss to coat. Season with salt, pepper, and paprika. Cook, tossing or stirring occasionally, until nuts are evenly browned and smell fragrant, about 10 minutes. Remove from heat and let cool completely. If using currants, add to cooled mixture. Transfer to a storage container.

Now, make the salad: Roughly chop salad greens. Dice cucumber. Remove kernels from corn cob. Halve cherry tomatoes.

Combine greens, cucs, corn, and herbs in a large reusable container. Put tomatoes in a separate container or bag. Stick both in your lunch tote. Add those crunchies to your tote, too. If you're making dressing, pour that into a jar and bring it along. The eating part is probably self-explanatory.

In weekday lunch
3 Comments

Sour Cherry Hand Pies, and the Perfect Pie Crust

July 9, 2011 Rivka
DSC_0425
DSC_0425

I hope by now you've become as hooked on sour cherries as I am. I've been preaching some gospel about the fleeting summer fruit, pushing you all to make this sour cherry compote (and some of you have made it! and liked it! phew.). But this here, this is a recipe you absolutely need right this very moment, before sour cherries exit stage left for another year.

DSC_0026-1
DSC_0026-1

Reader, make some sour cherry hand pies. Not just any hand pies, but these - for these may be the most perfect hand pies I've ever made or eaten. And while I know in light of my raving about the whole sour cherry-ness of these pies what I'm about to say will seem strange, it all starts with the crust. That's right: after years of making pie, using my old-faithful all-butter pie recipe (which I think I originally got from the lovely Deb), I'm changing my tune on the perfect crust.

DSC_0422
DSC_0422
DSC_0433
DSC_0433

Don't worry, we're not talking about radical departures here. Just small tweaks that make a big difference.

1. A food processor and a pastry blender produce equally good crust, but the method matters. I tend to choose between processor and pastry blender based on my mood. Lazy me chooses the processor. If I've had a sh***y day and need to get out some aggression, the pastry blender is great. Here's the catch: when cutting the butter into the flour, if you're using a pastry blender, go for pea-sized pieces of butter, since you'll be folding the liquid into the dough rather than blending it. If you're using a food processor, follow Melissa Clark's great advice and go for lima bean-sized pieces. That way, you've got some wiggle room so that when you add the liquid and pulse again, you can pulse until the liquid is incorporated without worrying that the butter pieces will become too small.

DSC_0417
DSC_0417

2. Pie crusts should taste good on their own. Never is this more important than when making hand pies, where the ratio of filling to crust is much smaller than in regular pie. When you get a bite that's mostly crust, it should taste delicious. I've find most pie crust recipes woefully under-seasoned. I've settled on 1 teaspoon of salt and 2 teaspoons of sugar in the dough for a single-crust pie, but feel free to experiment yourself.

3. For the best results, chill everything. We're talking the bowl, the pastry blender, the flour, the butter (after cutting it into chunks), the ice water...everything. Freezing your whole workstation will inhibit the formation of gluten, which will prevent your dough from turning chewy.

That's the newest from the pie dough frontier. I tell you, these hand pies I made last week, their crust was flaky and crunchy, with big shards breaking off at each bite. It doesn't get better than this.

Today's Saturday. If you've got the time, head to the market, grab one last batch of sour cherries, and make yourself some hand pies. You can freeze them between layers of wax paper, and they'll last for weeks. As you dole them out to family and friends, you'll slow down and enjoy a summer that seems to be flying by.

Sour Cherry Hand Piesadapted from Karen DeMasco and Martha Stewart's crust and cherry pie recipes

Crust recipe makes 1 single-crust pie, or 25 hand pies

For the crust:

1 1/2 cups flour 1 teaspoon salt 2 teaspoons sugar 12 tablespoons (1 1/2 sticks) chilled unsalted butter, cut into small pieces and rechilled 1/4 cup ice water

For the filling: 1 1/2 pounds fresh sour cherries, pitted 2 tablespoons unsalted butter 2/3 cup plus 1 tablespoon sugar 2 tablespoons cornstarch 2 teaspoons lemon juice

1 egg (for eggwash) sanding sugar

If using a food processor, combine flour, salt, and sugar in the processor bowl and pulse to combine. Add butter and pulse several times until butter is in pieces the size of lima beans.

Add half the water and pulse several times. Add the remaining water and pulse again, stopping when mixture forms clumps that bind together. If mixture is still too dry, add more ice water a tablespoon at a time, until dough holds together.

Turn dough onto a floured work surface and bring it together by hand. Divide dough in half, wrap each half in plastic, and refrigerate at least 45 minutes.

Meanwhile, make the filling: heat the 2 tablespoons butter in a large skillet over medium heat until foam subsides, then add cherries with any juices and the sugar and lemon juice and simmer, stirring, until sugar is dissolved. (Cherries will exude juices.) Transfer a few spoonfuls of the cherry liquid into a small bowl, and add cornstarch, whisking to form a paste. Continue to simmer the cherry mixture until cherries are tender but not falling apart, about 8 minutes. Then stir cornstarch mixture into simmering filling and boil, stirring frequently, 2 minutes. Transfer filling to a bowl and put in fridge.

Preheat oven to 375°F and line two baking sheets with parchment paper or silpat.

While cherries are cooling, remove one piece of dough from fridge and roll out on floured work surface to  1/8-inch thickness. Use a 4-inch biscuit cutter to cut disks of dough, and transfer disks to one of the baking sheets. When the dough has been cut into disks and one baking sheet is full, gather the dough scraps into a ball, re-wrap in plastic, and return to the fridge. Spoon about 2 teaspoons (depending on size of biscuit cutter) of filling into the center of each disk. Fold each disk over itself to make a half-moon that fully encapsulates the filling, then use the edge of a fork to crimp around the edges of each pie. Transfer baking sheet to the freezer for 10 minutes. Meanwhile, repeat with second half of the dough. Gather the scraps from the second piece, combine with the first scraps, and roll out one last time, repeating steps above. Transfer second filled baking sheet to freezer.

Remove baking sheets from the freezer, and brush pies with egg, then sprinkle with sanding sugar. (Regular or demerara sugar will work just fine.) Use a paring knife to make three diagonal vents in the top of each pie. Transfer to the oven and bake 25-30 minutes, until golden brown. Cool 10 minutes; serve warm or at room temperature. Hand pies can be frozen in an airtight container between layers of wax paper for upto 1 month.

In dessert, pies and tarts
8 Comments
← Newer Posts Older Posts →

Subscribe by email:

  • books (1)
  • crisps and crumbles (1)
  • frozen (1)
  • toys (2)
  • gifts (3)
  • egg whites (5)
  • fried (5)
  • how to use--- (6)
  • drinks (10)
  • menus (11)
  • travel (11)
  • fish (12)
  • kosher for passover (14)
  • thanksgiving (14)
  • vegan (20)
  • snacks (21)
  • techniques (21)
  • soup (26)
  • bread (28)
  • pies and tarts (28)
  • cake (33)
  • events (34)
  • condiments (36)
  • various and sundry (39)
  • uncategorized (42)
  • cookies and bars (46)
  • weekday lunch (47)
  • appetizers (48)
  • salad (51)
  • gluten-free (56)
  • comfort food (61)
  • breakfast and brunch (77)
  • sides (81)
  • dessert (90)
  • main dishes (100)
  • healthy (139)
  • easy (155)
  • vegetarian (180)

| LATEST |

Featured
Blue Chair Fruit's Black Raspberry Jam
Thai Grapefruit Salad
Mango Sticky Rice
Winter 2016: Odds and Ends
Povitica: The Best Babka Ever
Persimmon Walnut Bread
Sprout Chaat Salad + New Site!
Maple Walnut Squares
How to Give Thanks
Croissants (really, I made croissants) + other croissant-ish things

| hEALTHY |

Featured
Sprout Chaat Salad + New Site!
Fennel frond pesto + what to do with those pesky stalks
Asparagus Toasts with Pistachios and Mint
Eggplant-Walnut Pâté + Passover Ideas
1-DSC_0861-600x401.jpg
Lentils and Rice with Tamarind Sauce and Dukkah
Big Kale Salad with Pomegranate and Feta
Punchy Crunchy Ginger Salad

| BreakfAST |

Featured
Povitica: The Best Babka Ever
Croissants (really, I made croissants) + other croissant-ish things
Mushroom and Kale Breakfast Strata
Barley Porridge with Orange and Black Sesame
Ramps 'n' Eggs Biscuit Sandwiches
Asparagus Toasts with Pistachios and Mint
Apple-Cheddar Scones with Sage
Menemen - Turkish Eggs with Tomatoes and Peppers
You must select a collection to display.

© 2016 Rivka Friedman. All Rights Reserved.