• Home
  • About
  • Recipe Index
  • Contact
Menu

Rivka Friedman

Street Address
City, State, Zip
Phone Number

Your Custom Text Here

Rivka Friedman

  • Home
  • About
  • Recipe Index
  • Contact

Tuscan Kale and Chickpea Soup

October 20, 2014 Rivka
1-DSC_0694.jpg

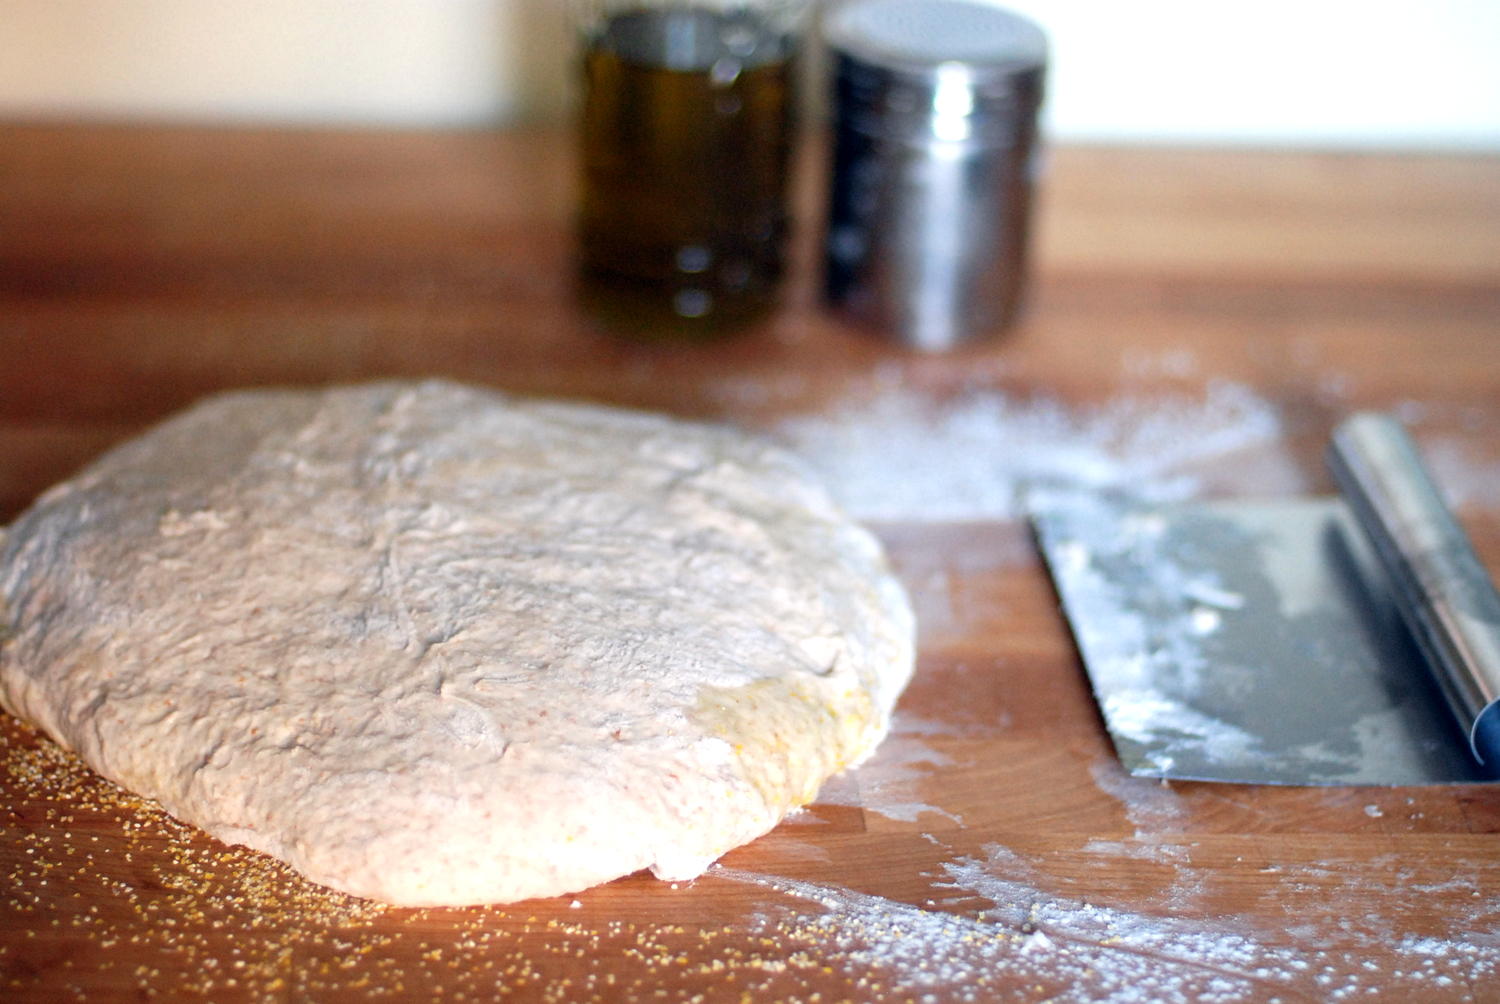
I have a (very cynical) theory that for every 10 vegetarian soup recipes out there, 9 of them had authors who sneaked in some chicken stock when no one was looking. I often read these recipes incredulously: you're telling me your meatless soup is deep and complex, and yet it contains no miso, no tomato paste, no porcini mushrooms, no smoked anchovies - no umami whatsoever. Heck, it doesn't even have much in the way of spices. This all seems mostly impossible.

But as I'm not coming to find, there are magical exceptions to this rule. There are owners of a certain restaurant in Brooklyn by the name of Franny's, which I have love-love-loved for a very long time, who make pretty much everything turn to gold. They are experts at pasta and pizza; masters of crostini and of fritti, those fried bites that start a meal. Well, no surprise: it turns out, they're pros at soup, too.

Making a vegetarian soup taste complex and flavorful absolutely requires attention to detail and process; this soup has steps. But, as usual, I did find a couple of shortcuts that'll make this soup use fewer pots and take less time. That said, as written, this probably isn't an ideal choice for a make-and-eat weeknight supper situation. I made a double recipe last weekend, and it lasted us much of the week. Fortunately, this is a soup that improves over time. I also suspect that it'd freeze beautifully, and I'm making a third batch this, the whole of which I'll be freezing for some very theoretical time down the road when time is more of the essence.

1-DSC_0703.jpg

Speaking of said time: lots of you have emailed and commented to check in on preggo and bebe. Thank you so, so much. It's the home stretch around here. The babe is in position and ready to go. We've managed to not find out the sex (though this morning's appointment nearly spoiled that - be careful!), and I'm really glad we kept it under wraps; I think it's changed the nature of our anticipation. I thought this stage would be full of wondering and theorizing about what the kid will be like; instead, since that's a total mystery, I've been thinking a lot more about how we'll be as parents. I'm happy not to know more yet; I'm happy to be patient. (I'm also happy to be enjoying a not-at-all small number of peaceful restaurant meals with the lady and with friends; if only I could log them for later.)

The other good news about this phase, at least for my meat-loving wife, is that I've been clearing out the freezer of space-hoggers like spare ribs. In honor of our anniversary, I stovetop-smoked them for about an hour, then let them melt away in a low oven . The whole process was way easier than it sounds. Tutorials here and here, recipe inspiration here, if you're interested. We served them with some very good BBQ baked beans, which I'll tell you about one of these days.

Thinking more about those ribs, I'm happy to have the dregs of my last batch of this soup in the fridge. It'll make a healthy, filling supper.

Good to counteract those apple cider doughnuts I made this weekend, which I'll tell you about later this week. Till then -

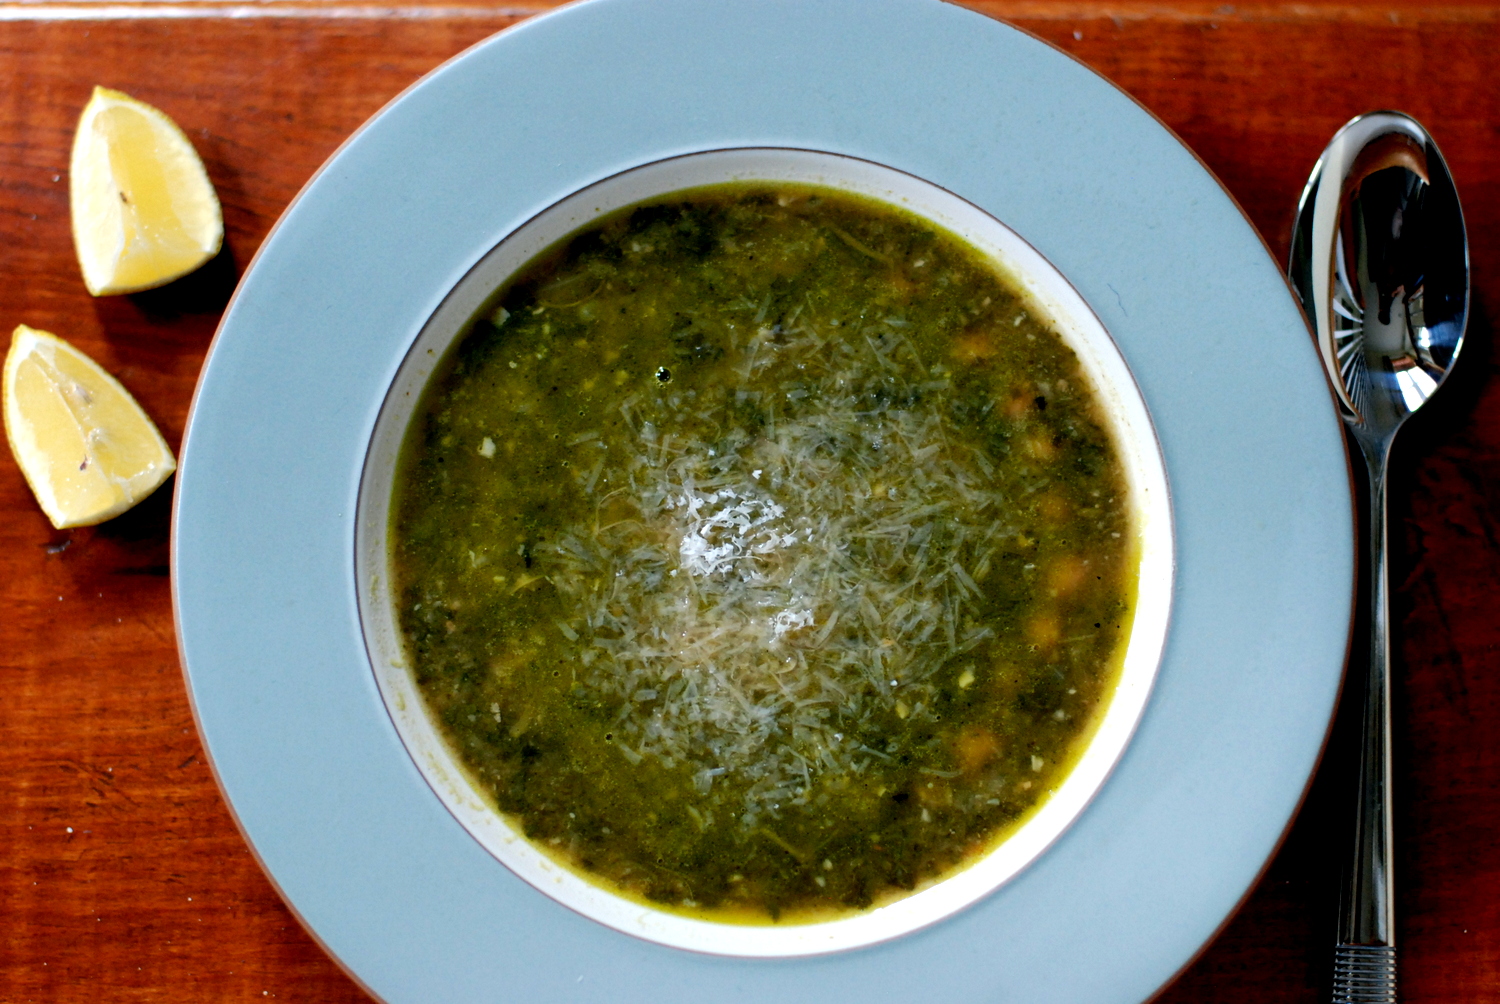
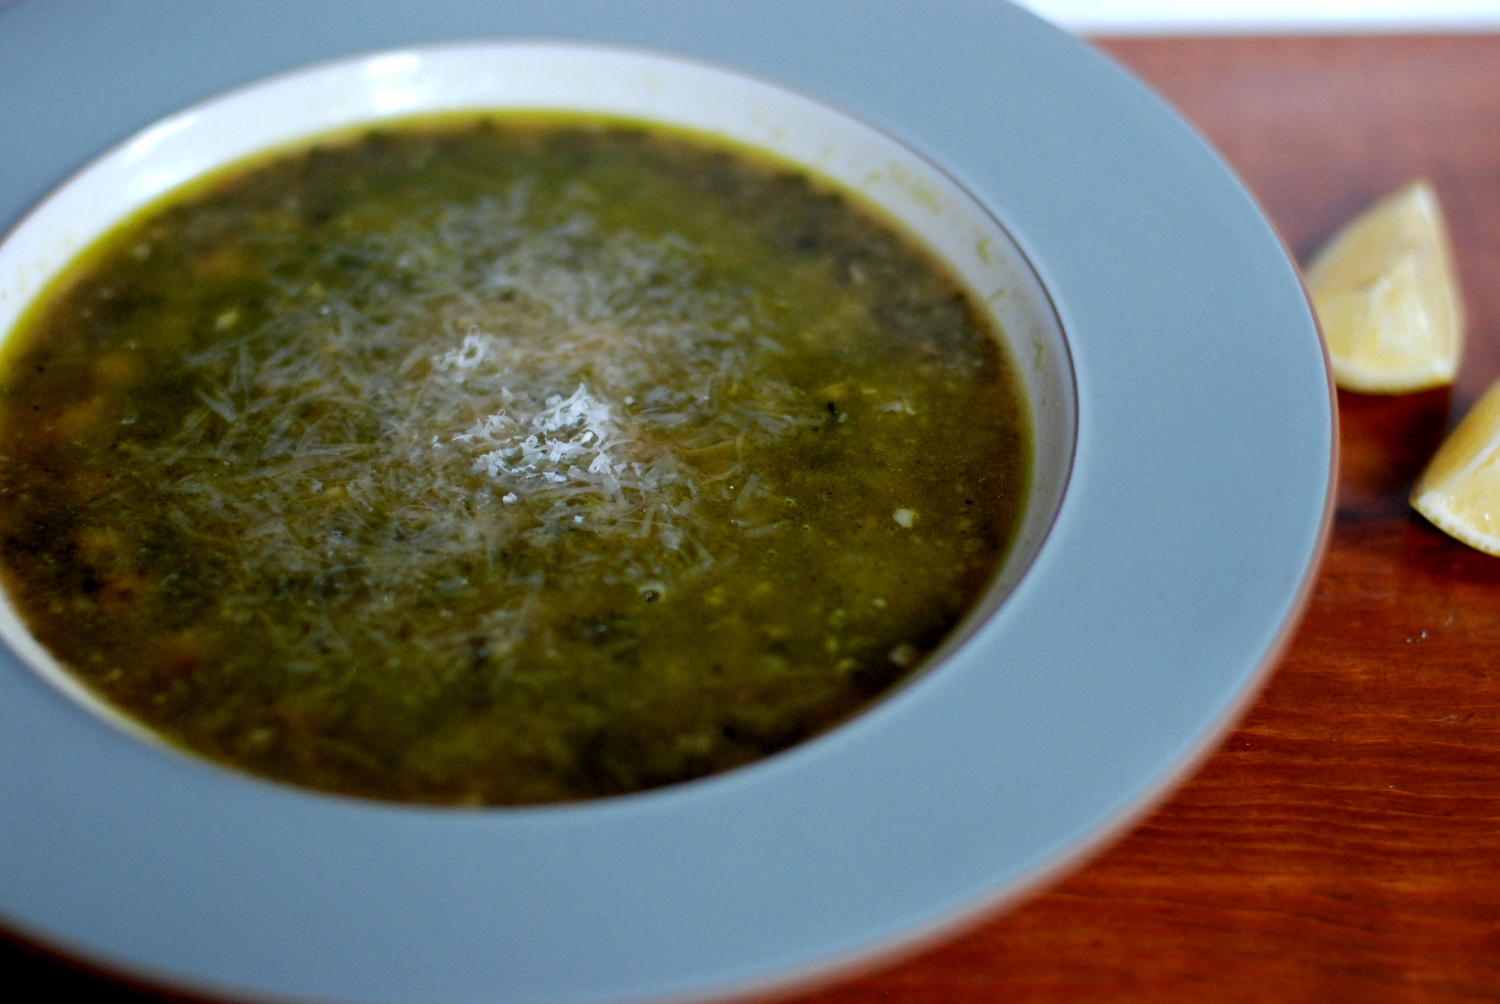
Franny's Kale Chickpea SoupAdapted from Franny's: Simple Seasonal Italian Serves 8

On my shortcuts: I skipped the cheesecloth sachet, of course. Instead, I diced the onion small enough that it disintegrated into the soup; I cut the carrot and celery just in half, for easy removal; and the rosemary sprig was easy enough to find and remove. You're also supposed to put 3 garlic cloves in the sachet, but since garlic is such a prominent flavor in the soup anyway, I didn't see the harm in leaving them in there. I'm pretty sure 2 of the 3 found their way into the blender with the portion that got pureed, and I ended up with one of them in my bowl, all smooth and melty, which was delightful. I also sauteed the rest of the garlic in a pan big enough to accommodate the kale, saving one pan in the process. I'm sure you're wondering whether you can make this with canned chickpeas, and while I'm sure you can, I'm also sure the cooking time helps marry the flavors and textures of this soup. Still, I know time is of the essence. If you try it with canned chickpeas, will you report back?

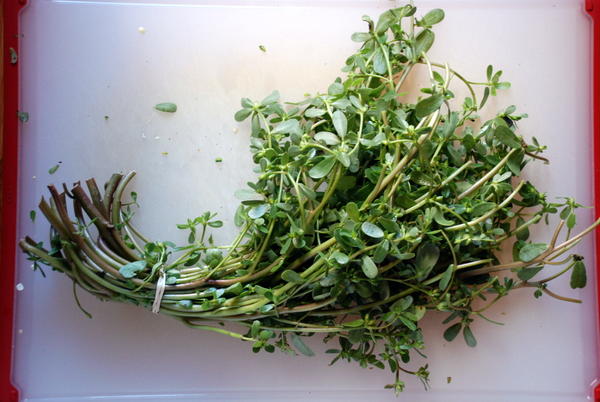
One more note: this soup is pretty perfect as is, but I did just want to note that it works well with greens other than kale. I haven't tried it with collards and probably wouldn't start there, since they can taste a bit chalky after a long liquidy cook. That said, beet greens, in particular, are fantastic in this soup. So if you have a small bunch of kale and a big pile of greens from those beets, don't hesitate to make this.

And one tiny other thing: 1 cup of olive oil. A lot, yes, but not the 1 1/2 cups originally called for, and also not really that much, at 2 tablespoons per serving. Disagree? Think about the fact that most cookie recipes call for 2 sticks butter. That's a cup right there. I've already cut the amount of olive oil by 1/3 - don't skimp further. If anything, be more generous if you feel so inclined.

2 cups dried chickpeas
1 carrot, peeled and cut in half
1 celery stalk, cleaned and cut in half
1 onion, halved (or diced, if you don't want to fish it out with the carrot and celery; see note above)
11 garlic cloves, peeled
5 strips lemon peel
1 sprig rosemary
1 tablespoon kosher salt, more to taste
3 1/2 quarts water
1 cup extra-virgin olive oil, divided; more for drizzling
1/4 teaspoon chili flakes
2 big bunches Tuscan kale or beet greens Freshly cracked black pepper Lemon wedges, for serving
Grated Parmigiano-Reggiano cheese, for serving

Put the chickpeas in a medium bowl, cover with at least an inch of water, and let soak overnight.

In a large pot, combine carrot, celery, onion, 3 garlic cloves, lemon peel, rosemary, 1/2 cup olive oil, 1 tablespoon salt, and the 3 quarts water. Bring to a boil over high heat,  then reduce the heat to medium-low and simmer until the chickpeas are tender, about 1 hour (more if chickpeas are old). Taste at the end of cooking, and add more salt as needed.

Meanwhile, finely chop or (faster!) crush the remaining 8 garlic cloves. Remove the center ribs from the kale and coarsely chop the leaves (you should have about 16 cups, but if not, no stress). Set up your blender and have the blender canister at the ready.

In a large skillet, heat 1/4 cup olive oil over medium heat. Add the garlic and chili flakes and cook until the garlic is fragrant but not golden, about 1 minute. Transfer to the blender canister (it's okay if some is left in the pan). Immediately add 1/3 of the kale, toss to combine, and cook, tossing occasionally, until tender, about 3 minutes. Transfer cooked kale straight into the blender. Add 2 tablespoons of olive oil and another 1/3 of the kale, and cook in a similar manner, transferring to the blender when cooked. Repeat with the last 2 tablespoons olive oil and the last batch of kale.

When the chickpeas are cooked, fish out the carrot, celery, rosemary, and onion if not diced. Then scoop 2 cups of them and their liquid into the blender with the kale, and puree until smooth. Add this puree back to the pot with the rest of the chickpeas, and cook over medium-high heat until hot.

Serve with grated Parmigiano-Reggiano, a drizzle of olive oil, and lemon wedges on the side.

In appetizers, comfort food, gluten-free, soup, vegan, vegetarian, healthy
Comment

No-Knead Breadsticks

August 21, 2014 Rivka
tomato and olive stecca

In recent years, seemingly in complete indifference to logic and better judgment, I've settled on and stayed loyal to a bread recipe that's a royal pain in the hinder parts. That recipe is Tartine's Country Loaf, which I make plain, but also with olives, or cherries, or semolina and sesame and raisins (a favorite to get us through the colder months). It takes forever and is extremely involved. Did you want to do something fun on Sunday? I'm sorry, I can't; I have to make bread.

the dough.
the dough.

But then summer rolls around, and summer in DC, as you know, is terrible, and my will to sit through hours of proofing and kneading and rising and 500-degree baking wilts as quickly as my poor plants in the August humidity. Fortunately, there are sane people like Jim Lahey in the world, who understand that sometimes, you don't want to knead the bread, or sit at home and watch the bread, or really fuss with the bread at all. You just want to eat the bread. Is that so much to ask?

Turns out, it's not. That's why no-knead bread is wonderful (as are the manyvariations thereof). And in an effort to spruce up a recent Friday night dinner party with bread other than challah, I turned to yet another variation on Lahey's original no-knead recipe: the Stecca.

Stecca is basically a long, wide breadstick. The recipe builds only minimally on the usual no-knead formula, and the result provided a nice change of pace from our usual routine.

ready to bake
ready to bake

And hopefully this goes without saying, but don't feel bound to cherry tomatoes and olives; whole peeled garlic cloves, caramelized onions, or just some rosemary would also work well.

I'm starting to think you can do pretty much anything with this dough. Which is my way of saying, stay tuned for more no-knead riffs in the future.

it's really good with garlic cloves, too.

What are you making this weekend?

No-Knead BreadsticksAdapted from My Bread, by Jim Lahey

I used halved cherry tomatoes and pitted olives in most of my steccas, but I popped a couple of garlic cloves into some of the sticks, and those were really delicious. Highly recommend doing that.

3 cups bread flour, plus more for the work surface
1/2 teaspoon salt
3/4 teaspoon sugar
1/4 teaspoon instant or other active dry yeast
1 1/2 cups cool (55 to 65°F) water
1/4 cup extra-virgin olive oil
3/4 teaspoon coarse sea salt, for sprinkling
1 pint cherry tomatoes,
1 cup pitted olives,
10 cloves of garlic, or any other topping you'd like

Combine flour, salt, sugar, and yeast in a medium bowl. Add the water and mix until you have a wet, sticky dough, about 30 seconds. Cover the bowl and let sit at room temperature until the surface is dotted with bubbles and the dough is more than doubled in size, at least 12 hours and up to 18 hours.

Generously dust a work surface with flour. Use a bowl scraper or rubber spatula to scrape the dough out of the bowl in one piece. Fold the dough over itself two or three times and gently shape it into a somewhat flattened ball. Brush the surface of the dough with some of the olive oil and sprinkle with 1/4 teaspoon of the coarse salt (which will gradually dissolve on the surface).

Place a tea towel on your work surface and generously dust it with wheat bran, cornmeal, or flour. Gently place the dough on the towel, seam side down. If the dough is tacky, dust the top lightly with wheat bran, cornmeal, or flour. Fold the ends of the tea towel loosely over the dough to cover it and place in a warm, draft-free spot to rise for 1 to 2 hours. The dough is ready when it is almost doubled. If you gently poke it with your finger, it should hold the impression. If it springs back, let it rise for another 15 minutes.

Half an hour before the end of the second rise, preheat the oven to 500°F  and set a rack in the center of the oven. Oil a 13-by-18-inch rimmed baking sheet. (If not rimmed, not the end of the world, but know that your oil may dribble off the sides of the pan.)

Cut the dough into quarters. Gently stretch each piece evenly into a stick shape approximately the length of the pan. Place on the pan, leaving at least 1 inch between the loaves. Brush with olive oil and sprinkle with the remaining 1/2 teaspoon coarse salt and any toppings you're using.

Bake the baguettes for 15 to 25 minutes, until the crust is golden brown. Cool on the pan for 5 minutes, then use a strong spatula to transfer the stecca to a rack to cool thoroughly. Serve at room temperature, or reheat briefly in a warm oven.

In appetizers, bread
Comment

Sweet-and-Sour Onion Focaccia

February 19, 2014 Rivka
1-DSC_0822
1-DSC_0822

I wanted to tell you this story about how I've always believed that Friday night dinner must start with challah, even if we're having pan-fried dumplings and make-your-own spring rolls, which don't go with challah at all. I was going to tell you about how sometime a couple years ago, thanks to our smarter-than-we-are friends in DC, we realized that if we're serving spaghetti and meatballs for Friday night dinner, by all means, we can skip challah in favor of something more Italian. It was a longer story than that, but then it occurred to me that I should just cut to the chase here: doughy, crisp-edged focaccia; singed onions, licked with vinegar and the sweetness of their own caramel; a bit of Pecorino cheese on top. Need I say more? I imagine you are convinced.

1-DSC_0878
1-DSC_0878
1-DSC_0880
1-DSC_0880

And you should be. This is straight-up one of the best focaccia recipes I've ever made, and I'm psyched to share it with you.

The recipe comes from Martha Stewart Living, a magazine I do not read. My friend Jana is the Martha expert, and she's the one who introduced me to this focaccia. It seems like Martha is less keen on crusts than we are, though, because she makes seven cups of flour into just one, very billowy, very doughy focaccia, where I (at Jana's recommendation) have split the thing in two. The result is a crustier, chewier bread, which I enjoy. To follow queen Martha or little old me? Choice is yours.

We ate this while it was still hot (it's a different ballgame that way, isn't it?), and we love-love-loved it. And then, the second time we made it, I really pushed things over the edge by adding the remnants of Ottolenghi's caramelized garlic (which we had leftover after making this frittata) and, I mean, wow.

I've made it three times. By now, I'm a pro. And I've learned a couple things along the way. In addition to splitting the dough in half, I also slice my onions thickly. If you shred them into thin rings, as suggested, they seem to disappear into the bread. 1/2-3/4-inch slices ensure that even after the softening, browning, and baking, the onions stay intact and prominent. They also burn less easily. I'd definitely recommend doing it this way.

1-DSC_0920
1-DSC_0920
1-DSC_0923
1-DSC_0923

Over time, I've also learned to eliminated the very fussy folding method, where you turn the dough out onto a floured board and fold it letter-style over itself. This step is impossible without a bench scraper, which I trust many of you don't have; it's also maddening, because the dough is so darn wet that you can't help yourself from adding flour; and lastly, the advice to "put the dough back into the bowl seam-side down" is tough to follow if your dough is so wet that it doesn't even have a seam. To save myself the headache, I opted instead for the "turning" method employed by Chad Robertson of Tartine Bakery, whereby you work the dough by turning it in its rising bowl. That means no dumping, flouring, scraping, sticking, or fussing. Just a few turns of the dough over itself, and the towel goes right back on for its next rise. Easy as pie.

1-DSC_0941
1-DSC_0941
1-DSC_1029
1-DSC_1029

One last note: while the Pecorino is lovely on this focaccia, it can be skipped. I made this focaccia dairy-free last time to no complaints. Just be sure to add little sprinkles of flaky sea salt to the bread before baking, which will replace the saltiness of the Pecorino (not to mention give the focaccia a satisfying crunch).

1-DSC_1080
1-DSC_1080

Enjoy this one, friends.

Sweet-and-Sour Onion FocacciaAdapted from Martha Stewart

Martha says this makes one large focaccia, but I like it split into two smaller, thinner focaccia breads. Your choice. For other baker's notes, see the post itself.

For the focaccia dough: 2 1/4 pounds bread flour (about 7 cups), plus more for dusting 3 1/2 cups warm water (about 110 degrees) 1 teaspoon dry yeast 2 tablespoons coarse salt

For topping the focaccia: 1/2 cup plus 2 tablespoons extra-virgin olive oil 2 large red onions, halved and sliced into rings 1/2- to 3/4-inch thick Coarse salt and ground pepper 2 tablespoons cider vinegar 1/2 cup grated Pecorino Romano cheese (add a couple teaspoons of flaky salt before baking if you skip the cheese) 1 teaspoon red-pepper flakes

Whisk together flour, water, and yeast in the bowl of a stand mixer. Cover bowl with plastic wrap or a towel, and let rise in a warm place until tripled in bulk and full of sponge-like bubbles, about 2 hours.

Add salt. Attach bowl to mixer fitted with the dough hook. Mix on low speed 3 to 5 minutes, scraping down sides of bowl as needed. When dough begins to cling to and almost climb sides of bowl, raise speed to medium; mix 15 seconds. Dough will be wet, slack, and very sticky.

Using floured hands (or not - if your dough is really wet and gluteny, you won't even need to flour them), reach into the bottom of the bowl and scoop a long "tail" of dough up, over, and back onto itself. This is one turn. Repeat three more times, turning the bowl 90° between each turn, so you've turned all four "sides" of the dough. Then recover bowl with a towel or plastic wrap, and let rise in a warm place until doubled in bulk, about 1 hour.

Repeat the turning process, recover bowl, and let rise in a warm place until doubled in bulk again, about 1 hour more.

Preheat oven to 450° and set a rack in lower third of oven. Coat two 17-by-12-inch rimmed baking sheets with total 1/4 cup of the olive oil; set aside.

Divide dough in half and place on prepared sheets. Drizzle each with an additional tablespoon of olive oil. Push dough out toward edges of sheet. Cover with plastic wrap; let rest 10 minutes. With plastic wrap still on top, press out dough to fill sheet. Remove plastic (dough should be very bubbly and supple). Drizzle remaining 2 tablespoons olive oil over top of each focaccia.

Meanwhile, in a large skillet, heat 2 tablespoons oil over medium-high. Add onions and season with salt and pepper. Cook, stirring occasionally, until onions are tender and golden brown in spots, 12 minutes. Add vinegar and cook, stirring and scraping up browned bits with a wooden spoon, 1 minute.

With your fingertips, poke dimples all over dough, then top with browned onions, red-pepper flakes, and cheese (optional).

Bake until golden brown around edges, 25-30 minutes.

Let cool on sheet 5 minutes; if focaccia seems like it is sticking to the pan, scrape it off using a metal spatula. It does like to stick, but if you use enough oil on the bottom of the pan, it's usually fine.

Cut into 20 pieces and serve warm or at room temperature.

In appetizers, bread, vegan
2 Comments

Purslane Salad with Cantaloupe and Feta

September 12, 2013 Rivka
1-DSC_0404
1-DSC_0404

Purslane is in season here, and if you've had the chance to buy it straight from a grower, you know that it's far more active of a plant than it might look on the shelf of Whole Foods. Purslane is no wimpy pile of leaves; it's a big, flowery, almost overgrown plant, with thick stems the size of garlic scapes and row after row of firm, round leaves. It announces itself by looks alone, and with its bright, tangy flavor, boy does it pack a punch.

1-DSC_0243
1-DSC_0243

The stems of purslane, I recently discovered, are quite mucilaginous, not unlike okra. I tried to saute them in a bit of olive oil and I ended up with a stew the texture of gumbo. Next time, I'll leave the stems whole and either grill them, or saute them in a very hot pan with very hot oil, to keep the goo at bay.

But the leaves, that's where the fun is. Purslane is tart, like sorrel, which makes it a perfect pair for summer's sweetest melons.

Last week, when most of what we had in the house consisted of tomatoes in one form or another, I did manage to get my hands on both this purslane and a beautiful cantaloupe. I'd also bought a fresh block of feta, which added the much-needed salty component to this salad. The dressing was an entirely unfussy combination of sherry vinegar and good olive oil (substitute red wine vinegar if you don't have sherry), with a bit of flaky salt and pepper. And because I couldn't resist using some of the beautiful spearmint that I'd bought for the most amazing soup ever (stay tuned), that went in, too. Super simple, really refreshing.

1-DSC_0346
1-DSC_0346

If you've found purslane and are looking for other things to do with it, here are a few recommendations:

  • Use as a bed for steak salad or duck confit
  • Add to potato salad; dress with a spicy, mustard-heavy dressing
  • Toss with sesame noodles; dress with a thin, soy-based dressing heavy on the sesame oil
  • Combine with sauteed tofu, julienned carrots, and some avocado in rice paper rolls; serve with peanut sauce

And if you want even more ideas, Clotilde over at Chocolate and Zucchini wrote a post with more suggestions that you can fit into a single season.

1-DSC_0388
1-DSC_0388

Happy purslaning!

Purslane Salad with Cantaloupe and Feta serves 2 as a main course, 4 as an appetizer or component of a meal

1 big bunch of purslane 2 cups diced cantaloupe 5 oz. good, briny feta cheese, crumbled or cubed (your choice) 3 sprigs spearmint or peppermint, just leaves 2 tablespoons sherry or red wine vinegar 1/4 cup good olive oil flaky salt and pepper (about 1/4 teaspoon each, less if your salt is fine)

Separate the thin stems and their attached leaves from the thick central branch, and cut them into smallish sprigs.

Toss purslane, cantaloupe, feta, and mint in a large bowl.

Combine sherry, olive oil, salt, and pepper, and whisk until combined. Drizzle over salad and toss to combine. Spoon out onto small plates and serve immediately.

In appetizers, gluten-free, salad, vegetarian, easy, healthy
5 Comments
← Newer Posts Older Posts →

Subscribe by email:

  • books (1)
  • crisps and crumbles (1)
  • frozen (1)
  • toys (2)
  • gifts (3)
  • egg whites (5)
  • fried (5)
  • how to use--- (6)
  • drinks (10)
  • menus (11)
  • travel (11)
  • fish (12)
  • kosher for passover (14)
  • thanksgiving (14)
  • vegan (20)
  • snacks (21)
  • techniques (21)
  • soup (26)
  • bread (28)
  • pies and tarts (28)
  • cake (33)
  • events (34)
  • condiments (36)
  • various and sundry (39)
  • uncategorized (42)
  • cookies and bars (46)
  • weekday lunch (47)
  • appetizers (48)
  • salad (51)
  • gluten-free (56)
  • comfort food (61)
  • breakfast and brunch (77)
  • sides (81)
  • dessert (90)
  • main dishes (100)
  • healthy (139)
  • easy (155)
  • vegetarian (180)

| LATEST |

Featured
Blue Chair Fruit's Black Raspberry Jam
Thai Grapefruit Salad
Mango Sticky Rice
Winter 2016: Odds and Ends
Povitica: The Best Babka Ever
Persimmon Walnut Bread
Sprout Chaat Salad + New Site!
Maple Walnut Squares
How to Give Thanks
Croissants (really, I made croissants) + other croissant-ish things

| hEALTHY |

Featured
Sprout Chaat Salad + New Site!
Fennel frond pesto + what to do with those pesky stalks
Asparagus Toasts with Pistachios and Mint
Eggplant-Walnut Pâté + Passover Ideas
1-DSC_0861-600x401.jpg
Lentils and Rice with Tamarind Sauce and Dukkah
Big Kale Salad with Pomegranate and Feta
Punchy Crunchy Ginger Salad

| BreakfAST |

Featured
Povitica: The Best Babka Ever
Croissants (really, I made croissants) + other croissant-ish things
Mushroom and Kale Breakfast Strata
Barley Porridge with Orange and Black Sesame
Ramps 'n' Eggs Biscuit Sandwiches
Asparagus Toasts with Pistachios and Mint
Apple-Cheddar Scones with Sage
Menemen - Turkish Eggs with Tomatoes and Peppers
You must select a collection to display.

© 2016 Rivka Friedman. All Rights Reserved.