• Home
  • About
  • Recipe Index
  • Contact
Menu

Rivka Friedman

Street Address
City, State, Zip
Phone Number

Your Custom Text Here

Rivka Friedman

  • Home
  • About
  • Recipe Index
  • Contact

Best Mushroom Pizza (or any white pie, really)

March 25, 2015 Rivka
1-DSC_0861-600x401.jpg

I've been on a bit of a library bender. Did you know you can borrow Kindle books from the library? Like, without leaving the house? I'm working my way through the Goldfinch and My Brilliant Friend. Both highly recommended. And, in case two books isn't enough to juggle, I'm also casually reading a real-life paperback copy of The Debt to Pleasure, a novel full of foodstuff. It's glorious. Here, from the instructions for a certain Russian pancake:

"When smoke starts to rise out of the pan add the batter in assured dollops, bearing in mind that each little dollop is to become a blini when it grows up, and that the quantities here are sufficient for six. Turn them over when bubbles appear on top. Serve the pancakes with sour cream and caviar. Sour cream is completely straightforward and if you need any advice or guidance about it then, for you, I feel only pity."

Further evidence of my many-books-at-a-time habit: I have three cookbooks checked out of the library, and as of last week, they were all piled on my nightstand. One is Jim Lahey's My Pizza, which I may have owned at one point but no longer do. It's almost due back at the library, so last weekend we had friends over and I put the cookbook to use at a pizza night. The momentous occasion here is not that I actually cooked from a book before returning it, though that gets honorable mention; what's really noteworthy is that, after many failures, a couple semi-successes, and much handwringing, I finally mastered white pizza.

250x250_Soup2.png
1-DSC_0877-600x401.jpg

Tomato pie lovers, take note: I am on your team. D is, too -- perhaps even more vehemently than I. We both are loyal to red pies. That's partly because we love tomatoes, but partly it's because white pies are often brittle, dry things with a heap of vegetables, but nothing to soften those vegetables and coax them into submission. More like flatbread than like pizza.

The answer, at least according to Jim Lahey? Embrace the genius of bechamel.

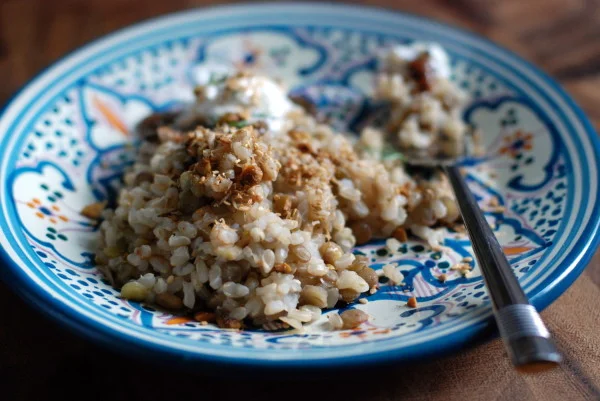
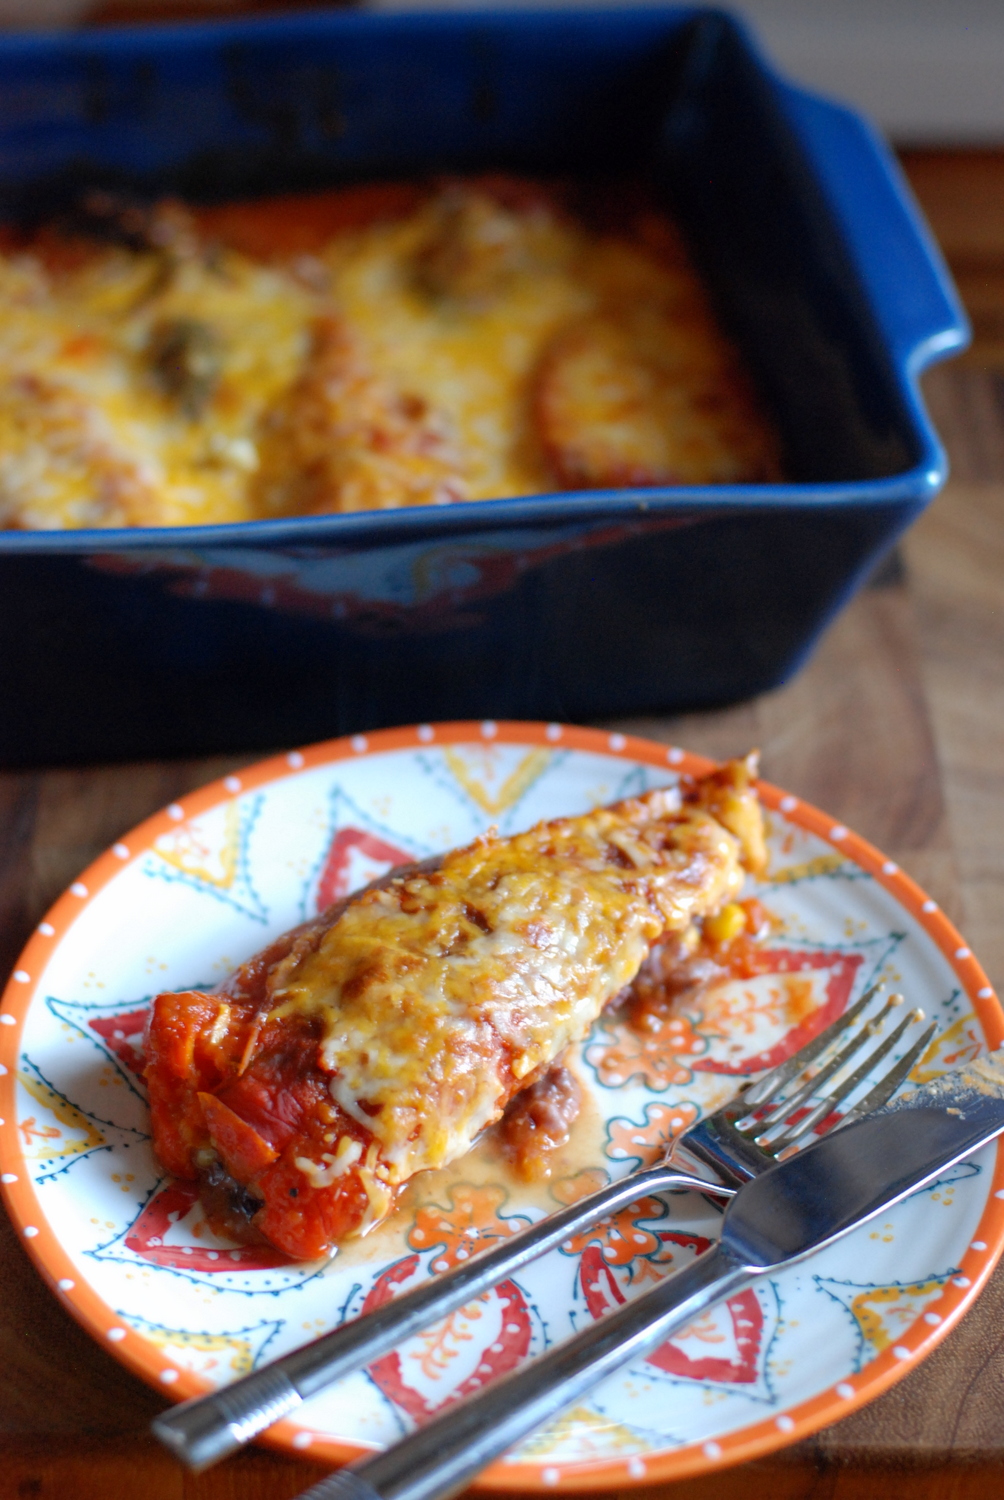
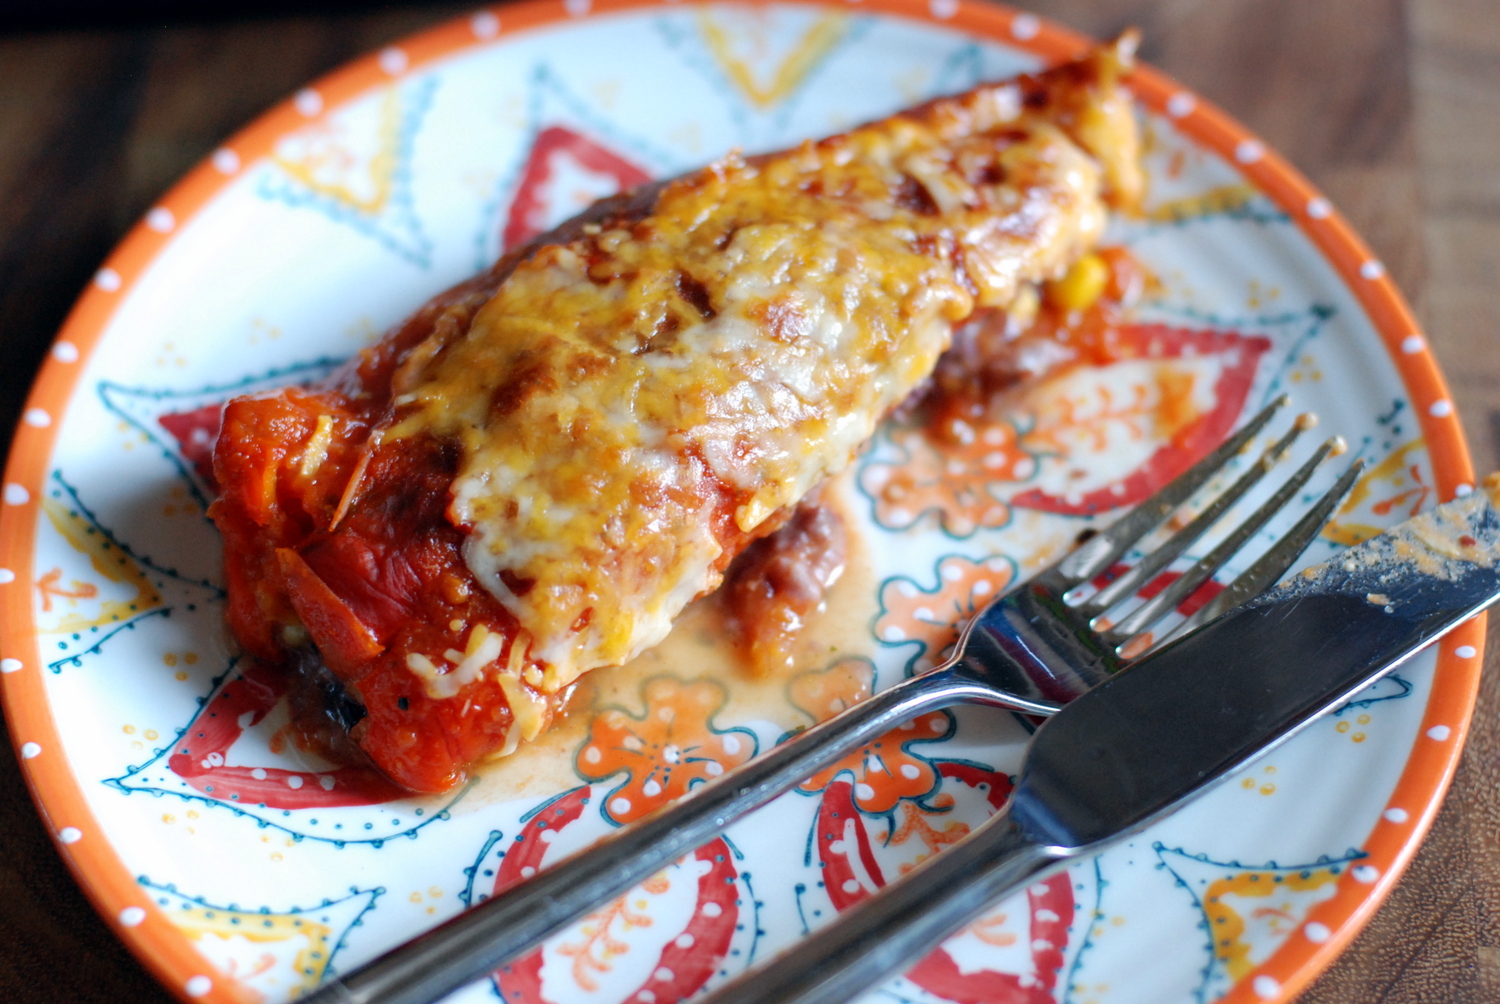
Bechamel is white pizza's answer to tomato sauce. It bridges the gap between crust and topping. Also -- dare I suggest it has an advantage over tomato? -- it gets bubbly and browned in the oven, adding more meltiness than mozzarella alone can provide. Under the scalding heat of my oven at its max, last Sunday's white pizzas became glorious, white-hot pillows cushioning piles of sliced mushrooms, garlic confit, and caramelized onions. Because the bechamel had less liquid than tomatoes, the underbelly of my white pies stayed impressively crisp.

1-DSC_0880-600x401.jpg

The verdict was clear. Red pies still hold the special spot in our hearts, but bechamel-blanketed white pies now make the permanent roster, too.

If you're not a mushroom fan (weirdo), we also really loved the cauliflower version: chopped cauliflower, bits of green olive (the kind with pimentos, so throwback), lots of garlic confit and caramelized onions, and maybe a chopped anchovy or two.

With that, back to Passover cleaning.

Best Mushroom Pizza
Adapted from Jim Lahey's My Pizza
Makes 2 personal pizzas or 1 large (13 x 18 sheet pan) pizza

This is a pizza with several steps, but it more than rewards your patience.  In truth, the process won't take more than an afternoon; most of the prep work can be completed while the dough rises. We use a white flour dough for most pizzas around here, but these tomato-less pies respond particularly well to a whole wheat crust enriched with a bit of honey.

Dough:
250 grams (2 cups) all-purpose flour, plus more for shaping the dough
275 grams (1 3/4 cups) white whole wheat (or regular whole wheat) flour
1 gram (1/4 teaspoon) active dry yeast
16 grams (2 teaspoons) fine sea salt
350 grams (1 ½ cups) water

Bechamel:
243 grams (1 cup) whole milk
57 grams (1/2 stick) unsalted butter
9 grams (1 heaping tablespoon) all-purpose flour
1 grams (1/8 teaspoon) fine sea salt
3 rasp grates of nutmeg or a pinch of ground nutmeg

Garlic confit:
8 cloves garlic
1/4 cup olive oil
1/2 teaspoon salt

Caramelized onions:
1 onion, halved and sliced into rings
1 tablespoon butter
1/2 teaspoon salt

Toppings:
20 grams (6 tablespoons) grated Parmigiano Reggiano cheese
100 grams fresh mozzarella, pulled into small clumps
300 grams (10.5 ounces) mixed sliced mushrooms (we used shiitake, cremini, and oyster)
1 recipe garlic confit
1 recipe caramelized onions
1 recipe bechamel

Make dough: Combine flours, salt, and yeast in a medium mixing bowl. Add water and honey, and stir with a fork to combine. (Everyone else uses a wooden spoon, but I don’t get it – everything sticks to wood.) Cover the bowl with plastic wrap or a kitchen towel, and set aside in a warm, draft-free spot for about 18 hours, until the dough has doubled in volume. This will take less time in a very warm spot and more time in a cold spot.

Lightly flour a work surface and turn dough onto floured surface. Divide in half, and shape each half into a ball, by lightly stretching the four sides of each piece out and back into the center of the ball, one by one, helping build surface tension in the dough. Then shape each piece into a ball, and turn seam-side down onto the work surface. If dough is sticky, dust each with a bit more flour.

Cover with a damp cloth and let rest for at least an hour while you assemble the fillings, or wrap the balls individually in plastic and refrigerate for up to 3 days. If refrigerating, return to room temperature by leaving them out on the counter, covered in a damp cloth, for 2 to 3 hours before needed.

Make bechamel while dough rises: In a small saucepan, melt butter over medium heat until it foams. Add flour, and stir until flour and butter are fully combined but flour has not started to brown. Add milk in a slow stream, whisking to combine it with the roux. It will start to thicken slightly as it heats up; continue stirring to prevent clumps. When milk is the thickness of heavy cream, add salt and nutmeg, give a good stir, and remove from the heat. It will continue to thicken as it cools. By the time it’s fully cool and ready to go on pie, it will be almost shmearable.

Make garlic confit: In a small saucepan, combine garlic, olive oil, and salt over medium-low heat. Garlic should sizzle lightly; if it looks like it’s starting to brown too quickly, turn down the heat. Cook for 10-15 minutes, until cloves are soft and lightly golden. Set aside to cool.

Make caramelized onions: Peel onions, halve them from pole to pole, and slice into thin half-rings. Pile the onions into a large shallow skillet that has a lid. Turn the heat to medium and add the butter and salt. When the onions start making those wonderful sizzling noises, give the onions a good stir, reduce the heat to low, and cover the pan. After 20 minutes, check the onions. They should have sweated down considerably to the point where they are very soft and possibly turning tan. Cook the onions 5-10 more minutes uncovered, stirring occasionally to prevent sticking and ensure even cooking. Remove from heat and set aside.

Assemble and bake pizzas: If using a pizza stone, place in whatever part of your oven contains the heat: in my gas oven, the heat comes from the bottom so I put my stone in the bottom third of the oven. Preheat oven as high as it will go (for me, that’s 550 degrees F).

If using a stone, dust your peel with semolina or flour. Take one ball of dough, and gently stretch it, slowly and deliberately, until it is 9-11 inches across. Set the disk onto your peel; working quickly, spoon the béchamel over the surface and spread it evenly, leaving about an inch of the rim untouched. Sprinkle the surface with Parmigiano. Distribute mozzarella clumps, mushroom slices, bits of the garlic confit, and caramelized onions over the surface. Sprinkle a bit more Parmigiano on top.

Use a quick, jerking motion to transfer the dough from peel to stone. Bake 6-8 minutes, until pizza is bubbling and golden brown. Use peel or a very large flat spatula to remove pizza from oven. Slice and serve immediately.

If using a metal sheet pan, drizzle sheet pan with olive oil, transfer the dough onto the pan, and slowly and deliberately spread the dough until it mostly fills the sheet pan. This may take time; if the dough tenses up, let it rest for 10 minutes or so and it will relax and be ready for spreading. Once dough mostly fills the pan, distribute ingredients as described above.

Bake pan pizza for 7-10 minutes, until brown and bubbly. Remove, slice into squares, and serve immediately.

In comfort food, main dishes, vegetarian
2 Comments

Lentils and Rice with Tamarind Sauce and Dukkah

March 9, 2015 Rivka
1-DSC_1161-600x401.jpg

As someone who rarely eats meat and almost never makes it to the fishmonger, I'm always on the lookout for vegetarian main dishes that don't just feel large side dishes. Mujadarra is one of my favorites: basmati rice, Puy lentils, and lots of spiced yogurt for serving and scooping.

This here is another rice+lentils creation, the idea for which came from a couple of Food52 recipes. The first is a pistachio dukkah, which I've had my eye on for a while; do you know all about dukkah already? It's pretty new to me, and altogether delightful: a combination of nuts, seeds, and spices that's technically a condiment but very easily slips into savory granola territory. The Food52 folks warned me that I might shovel this stuff straight into my mouth, and that's pretty much what happened. Fortunately, I made a double batch.

1-DSC_1156-600x401.jpg
1-DSC_1159
1-DSC_1159

The other recipe was for lentils and rice with tamarind sauce, which rather ingeniously called for tempering nigella seeds before mixing them with tamarind paste. Nigella seeds are a favorite discovery from my time living in Jerusalem: their flavor is subtle, a bit like caraway but less severe and more mysterious. I don't use them nearly enough.

Combined, these two recipes became a pretty magical vegetarian main: a pile of rice and lentils drizzled with tamarind sauce, sprinkled with crunchy dukkah, and served with a scoop of yogurt. It'd be great alongside curried tofu or salmon with Indian spices, but it's substantial and interesting enough to stand on its own.

In other news, our kitchen is finally finished; I can't wait to share pictures now that it's ready for its glamour shot. Stay tuned.

1-DSC_1165-600x401.jpg

And looking through photos for this post, I realized that I managed to make a rather astonishing amount of food while the kitchen project was underway. I owe you homemade chilaquiles (with homemade tortilla chips that are easy, really!), a walnut cake, and the best chocolate tart I've ever made, scouts' honor. Let's get to it.

Lentils and Rice with Dukkah and Tamarind Sauce
Adapted from a couple recipes on Food52
Serves 4 as a main, 6 as a side

For the rice and lentils:
1 1/2 cups (scant 10 oz.) brown rice
1 cup (7 oz.) green lentils

For the sauce:
2 tablespoons coconut oil (or substitute vegetable oil or ghee)
1 tablespoon nigella seeds
1/4 cup tamarind puree
3 teaspoons brown sugar
1/2 teaspoon salt

For the dukkah:
3 tablespoons coriander seeds
1 tablespoon cumin seeds
1/2 cup shelled pistachio nuts
1/4 cup sesame seeds
3 tablespoons unsweetened shredded coconut
1 teaspoon sea salt
1/2 teaspoon freshly cracked black pepper

For serving:
Yogurt
Chopped cilantro, fennel fronds, minced chives, or another green herb

Make rice and lentils: Fill a large pot with water, add a big pinch of salt, and bring to a boil over high heat. Add rice, and cook for 35-40 minutes, until rice is cooked through but retains its bite. 10 minutes into the cooking time, add lentils; the two should be done at about the same time. Drain and set aside.

Make the dukkah: Toast coriander and cumin seeds in a small skillet over medium heat until fragrant, about 2 minutes. Allow spices to cool completely before transferring to a spice grinder or mortar and pestle and grinding. Transfer ground spices to a mixing bowl.

Meanwhile, roast nuts in the same small skillet until golden, about 5 minutes. Transfer to a cutting board and finely chop. Transfer to mixing bowl. Add sesame seeds to the skillet and toast until golden brown, about 2 minutes, then transfer to mixing bowl. Finally, toast coconut in the skillet, stirring constantly until golden, about 2 minutes. Add to mixing bowl. Add salt and pepper, and adjust spices/s&p as needed.

Make sauce: In the same skillet, heat oil over medium heat. Add nigella seeds and cook for about 1 minute; they might sputter a bit, so be careful. Remove from heat. Add tamarind puree and brown sugar (again, might sputter), stirring to combine. Add salt and combine. Taste and adjust salt/sugar as needed.

To serve: Scoop a portion of rice and lentils onto a plate. Drizzle with a spoonful of tamarind sauce, sprinkle with dukkah, and top with a dollop of yogurt and a pinch of herbs.

In gluten-free, main dishes, vegan, vegetarian, healthy
5 Comments

Punchy Crunchy Ginger Salad

February 9, 2015 Rivka
1-DSC_1022-600x401.jpg

So here's something that just occurred to me: It's ironic -- cruelly ironic -- that the season of resolutions (and trying to keep them) coincides with the season of trying not to freeze here on the east coast. The food pages hawk salads and smoothies; bluster and chill begs for stew and hot cocoa. Perhaps we should mark the new year in May, or just move to California. Or Australia. Alas, I don't have much pull with the folks who set the calendar - and I may have even less sway when it comes to convincing my wonderful wife that the west coast would suit us well. DC friends, rejoice: we're not leaving.

1-DSC_1017
1-DSC_1017

Instead, we're hunkering down under fleece blankets and finding one too many excuses to make hot cocoa. But even the frigid depths of January and February require occasional salads. We can't subsist entirely on soup (though rest assured, I have tried). Here's what I have to say about those winter salads: they don't always want leaves. They certainly don't want to be nibbled, or speared politely with a small fork. These are hungry days; we want to shovel our salads with a spoon, in big heaps, and let them fill our bellies.

1-DSC_1047
1-DSC_1047

And I think I speak for all of us when I say that January salads need not be so salad-y.  I'll take my winter greens with crunchy croutons, fried shallots, crispy eggs, and maybe even some steak. In this case, I went for a handful of the un-salad additions, and lo, I did not regret that decision. There were plenty of fried aromatics (shallots, garlic; even lemongrass one time); crunchy non-vegetable things (peanuts, pickled ginger); and a zippy little dressing of fish sauce, lime juice, and palm sugar that I can't get enough of these days. There were also out-of-season tomatoes, which really were not worth adding. Resist the urge.

1-DSC_1033-600x401.jpg

Tomatoes or not, this salad is punchy and crunchy. It's partially a riff on Naomi Duguid's recipe from her wonderful book, Burma, The elements of her recipe - pickled ginger, crunchy vegetables, a zinger of a dressing - are all here. I added cabbage and daikon because I wanted a more substantial, slaw-like salad. But when you set out to make it, know that only the ginger and the dressing are mandatory; everything else is optional, and you can build the salad however you'd like, or however the contents of your fridge allow.

1-DSC_1048-600x401.jpg

And just now, I realized that despite nay-saying the new years resolution crowd, I've posted not one but two salads over the past few weeks. Apologies! I think it's time I dunk my head in a big vat of chocolate pudding and set things straight.


Punchy Crunchy Ginger Salad
Inspired by recipes in Chow and Naomi Duguid’s Burma
Serves 2-3

I tried several methods of pickling my own ginger for this salad, hence the various types of ginger you see in the photos above. If you’ve got the time and the drive, definitely do it, using either of the recipes I linked here. The first is sweeter, the second more savory; the results from both are really worthwhile. If you do pickle your own ginger, a 6-8-inch knob produces about 1 cup fresh, or 3/4 cup pickled ginger. It’s worth making more than you need, as the leftovers are great in all sorts of things. But salads shouldn’t be complicated, and I’m happy to report that jarred pickled ginger — widely available — works just as well here.

As for everything else, this recipe is extremely flexible. Aim for 5-6 cups leaves and vegetables; 3/4 cup of nuts and seeds; and about 1/2 cup crisped alliums. What you use is entirely up to you.

One other note: to make this salad, you crisp shallots and garlic in some oil, and then use that oil in the dressing. 1/4 cup of frying oil should leave you with about 2 tablespoons left for the dressing, but if not, feel free to supplement with more of whatever oil you used.

For the salad:

1/4 cup canola or vegetable oil
4 shallots, peeled and thinly sliced
4 cloves garlic, peeled and thinly sliced
1/3 cup pickled ginger, sliced into thin strips
10 oz (about 5 heaping cups) radicchio, cabbage, or a mix, shredded
1/2 cup shredded daikon (optional)
1/2 cup grape or plum tomatoes, halved or quartered depending on size (optional)
1/4 cup + 2 tablespoons roasted salted peanuts
1/4 cup + 2 tablespoons roasted salted pumpkin seeds
1/4 cup sesame seeds, toasted in a dry pan over medium heat until fragrant

For the dressing:

2 tablespoons palm sugar or brown sugar
2 tablespoons oil from fried shallots/garlic (supplemented if necessary)
2 teaspoons fish sauce or soy sauce, more to taste
6 tablespoons lime juice (from 2-3 limes)
1 thai chile, sliced (seeded if less spice desired)

Fry the shallots and garlic: Line a small plate with paper towel and set next to your stove. Heat oil in a small pan over medium heat until it shimmers. Add shallots in a single layer (do this in batches if necessary), reduce heat to medium-low, and cook for 5-7 minutes, turning once or twice, until shallots are uniformly golden brown. Strain well, and transfer to towel-lined plate. Repeat with remaining shallots, if cooking in batches. If oil looks low, add an extra tablespoon or two.

Add sliced garlic to pan, and cook for 2-4 minutes, until golden brown. Strain and transfer to plate. Reserve oil for dressing.

Make the dressing: Combine all ingredients in a jar, seal, and shake thoroughly, until sugar is dissolved and ingredients are emulsified. Dunk a finger in the dressing and taste it; add more fish/soy sauce, lime juice, or sugar to taste.

Combine all salad ingredients in a large bowl, and pour most of dressing over top. Mix well, then taste, and add remaining dressing if necessary. Serve within 30 minutes of dressing the salad – the fried alliums don’t stay crisp for too long.

In main dishes, salad, vegetarian, healthy
Comment

Chile Relleno Casserole

September 22, 2014 Rivka
1-DSC_0878.jpg

During our week on Hilton Head Island, my brother-in-law and I spent an afternoon bouncing around recipe ideas and exchanging high fives over recent cooking successes. I told him about my dosas and a particularly good peach slab pie, he told me about the ethereal cake doughnuts he'd recreated from an old family recipe. Then he told me about some slam-dunk chiles rellenos he made, and I started to get jealous. Or maybe just really hungry. I wanted those chiles rellenos, stat.

1-DSC_0824.jpg
1-DSC_0839-001.jpg

Stephen's version sounded pretty authentic. The chiles were deep-fried, and the sauce was a split-egg concoction that had to be timed perfectly. He nailed it and reaped the rewards. But I'm settling into a slightly lower-key mode of cooking, one that involves lots of casseroles and things I can make in advance. I also vaguely remembered an episode of a bobby flay show from back before I swore off the terrible food network, where a California restaurant called La Casita Mexicana made its famous chile relleno in the oven, instead of in the fryer. Between my faint memory and my very not faint appetite, I figured something could be done.

1-DSC_0851.jpg

Chiles rellenos casserole recipes abound, but they're almost all egg-based - like a massive frittata enveloping stuffed chiles. I wanted the chiles to stand out more, and  - shocker - I wanted the casserole to be saucy. So I riffed on the method for manicotti, basically swapping peppers in for noodles and Mexican stuff for all that ricotta.

1-DSC_0856.jpg
1-DSC_0866.jpg

Here's where the road forks. I loved this dish. Next time, I'd make two pans full and freeze one unbaked - it's the perfect thing to have tucked away in the depths of the freezer for a lazy dinner at home. But D found the whole thing way too spicy, and she ended up taking out the leftover corn filling and making it into a quesadilla. Winners, losers. I think she just got a particularly hot pepper - mine was pretty mild. See below for some thoughts on avoiding the last-minute scramble and/or sad face due to heat.

1-DSC_0879.jpg

Notes on the fuss: Even though this is a casserole, it isn't the "dump everything in a pan and bake" kind of casserole. It's a bit on the fussy side. If you're feeling hesitant about the fuss, you can skip the tomatillos+tomatoes step and just use a large jar of whatever salsa you like. You can also probably skip blending the beans, and just toss them in with the corn; the result will be different, but no less tasty. Lastly, if you do bother to make the recipe, you might make a double batch. This is the sort of thing that freezes beautifully, and that way, it's twice the food for the effort.

Notes on the heat: One last note: poblanos are notoriously inconsistent in spice level. Some are as mild as bell peppers, and others are really quite hot. If you're nervous about the casserole being too spicy, you might consider substituting Anaheim chiles or even banana or bell peppers. Another nice option, though not widely available, are Jimmy Nardellos, which are shaped long and lean, but are not at all spicy.

Can I make this vegan? Definitely. Skip the cheese (or replace with soy cheese) and you're good to go.

Chile Relleno Casserole Serves 4 with leftovers

7 or 8 poblano chiles
3 tomatillos, husked and rinsed
12 oz. canned crushed tomatoes
1 canned chipotle in adobo (you may not need all of it)
1 can kidney beans
1 teaspoon epazote or dried oregano, divided
1 tablespoon olive oil or butter
kernels from 2 ears corn (about 2 cups)
2 scallions, sliced
salt
1/2 cup grated cotija cheese
1 cup grated cheddar or pepper jack cheese, or a mixture

Roast the peppers: Preheat the oven to 425 degrees F. Set the poblanos and tomatillos on a baking sheet lined with foil, and roast until blistered and soft all over, about 30 minutes total, turning peppers once halfway through roasting. Transfer peppers to a heatsafe bowl, cover with a piece of plastic wrap, and let the peppers steam while you prepare the sauce. Lower the oven to 350 degrees.

Prepare the sauce: Transfer tomatillos in the jar of a blender or a food processor (I like a miniprep). Add the tomatoes and half the chipotle, and blend until smooth. Taste, and add any salt and, if desired, more chipotle, as needed. Transfer to a bowl and set aside.

Prepare the fillings: Drain the beans, and add to the same blender or food processor container along with half the epazote or oregano. Blend until mostly smooth, adding water by the tablespoon if the beans won't blend. When beans are mostly smooth, set aside.

Heat the olive oil or butter in a saute pan over medium heat. When hot, add scallions, corn, and remaining epazote or oregano. Cook 5-7 minutes, until some of the corn has turned golden. Transfer to a bowl, add cotija cheese, and stir to combine.

Assemble and bake casserole: By now, the peppers should have steamed enough that their skins slip right off. It's okay if little bits of skin remain, but try to remove as much as possible. Slit each pepper lengthwise down one side of the pepper, and scoop out the core and seeds from the pepper. Lay the slit pepper on a cutting board or work surface. Repeat with remaining peppers.

Pour 1/2 cup of the sauce into a 9x13" baking pan. Smear a large spoonful of the bean puree onto the inside of each pepper. Top with a couple spoonfuls of the corn-cotija mixture. Wrap the clean side of the pepper over the filled side, and transfer the filled pepper into the baking pan. Repeat with remaining peppers, laying peppers in the pan in alternating directions. You probably will have some leftover corn mixture; reserve it for stuffing quesadillas, or just eat it as is.

Spoon the remaining sauce over the peppers, and top with the grated cheddar or pepper jack cheese. At this point, the casserole can be frozen (preferably without the cheese), to be baked at a later date. Alternatively, transfer to the oven and bake for 25 minutes, until cheese is bubbly and melted. Let cool for 5 minutes before serving.

In main dishes, vegan, vegetarian, weekday lunch, healthy
Comment
Older Posts →

Subscribe by email:

  • books (1)
  • crisps and crumbles (1)
  • frozen (1)
  • toys (2)
  • gifts (3)
  • egg whites (5)
  • fried (5)
  • how to use--- (6)
  • drinks (10)
  • menus (11)
  • travel (11)
  • fish (12)
  • kosher for passover (14)
  • thanksgiving (14)
  • vegan (20)
  • snacks (21)
  • techniques (21)
  • soup (26)
  • bread (28)
  • pies and tarts (28)
  • cake (33)
  • events (34)
  • condiments (36)
  • various and sundry (39)
  • uncategorized (42)
  • cookies and bars (46)
  • weekday lunch (47)
  • appetizers (48)
  • salad (51)
  • gluten-free (56)
  • comfort food (61)
  • breakfast and brunch (77)
  • sides (81)
  • dessert (90)
  • main dishes (100)
  • healthy (139)
  • easy (155)
  • vegetarian (180)

| LATEST |

Featured
Blue Chair Fruit's Black Raspberry Jam
Thai Grapefruit Salad
Mango Sticky Rice
Winter 2016: Odds and Ends
Povitica: The Best Babka Ever
Persimmon Walnut Bread
Sprout Chaat Salad + New Site!
Maple Walnut Squares
How to Give Thanks
Croissants (really, I made croissants) + other croissant-ish things

| hEALTHY |

Featured
Sprout Chaat Salad + New Site!
Fennel frond pesto + what to do with those pesky stalks
Asparagus Toasts with Pistachios and Mint
Eggplant-Walnut Pâté + Passover Ideas
1-DSC_0861-600x401.jpg
Lentils and Rice with Tamarind Sauce and Dukkah
Big Kale Salad with Pomegranate and Feta
Punchy Crunchy Ginger Salad

| BreakfAST |

Featured
Povitica: The Best Babka Ever
Croissants (really, I made croissants) + other croissant-ish things
Mushroom and Kale Breakfast Strata
Barley Porridge with Orange and Black Sesame
Ramps 'n' Eggs Biscuit Sandwiches
Asparagus Toasts with Pistachios and Mint
Apple-Cheddar Scones with Sage
Menemen - Turkish Eggs with Tomatoes and Peppers
You must select a collection to display.

© 2016 Rivka Friedman. All Rights Reserved.