 In honor of the holiday season, Daring Bakers’ took on what may be the holy grail of daring recipes: Buche de Noel, or Yule Log. Until Lis and Ivonne charged DBers with making this, I didn’t even know it was a food. See, traditionally, the Yule Log was a large, thick piece of wood burned by Pagans just after winter solstice (which was on Friday), in order to thank their gods for making the days longer and the weather warmer in the months to come. Today, not many people burn Yule Logs, but apparently, loads of people eat them around Christmastime.
Now I'm not one to balk when the going gets tough -- but that doesn't mean I won't bring in reinforcements. Fortunately for me, my dear friend Dellie was visiting from Boston, so we devoted a few hours one night last week to this undertaking. Boy was I wise -- both to set aside lots of time and to enlist a cooking compatriot: Buche is quite the project!
 A classically-constructed Buche consists of a soft “genoise” cake, layered with some type of filling, rolled into a jellyroll shape, and coated with a thick layer of buttercream frosting. Oh, yes – how could I forget? – it’s also shaped like a log. To do this, you lop off a diagonal slice from the front of the unfrosted cake, and place it about ¾ of the way down the log with the diagonal end jutting upwards, to resemble a broken branch from the log.


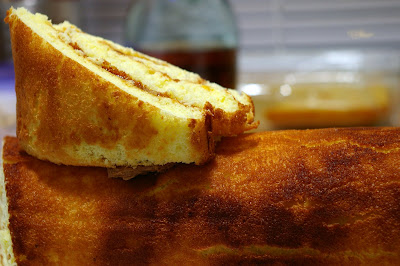 Sound weird and odd and energy-intensive? But we haven’t even finished explaining the insanity that is Buche: after you’ve mixed and folded and mixed and baked and rolled and cut and placed and rolled and blahblahblah, you make some meringue, shape some stems and caps, and build meringue mushrooms (yes, you heard me correctly). To do this, you poke a hole in the bottom of each cap, fill with some raw meringue (or frosting, if you’re like we are) and insert the stem.
When you’re finished with the hours of stove-hovering, you’ll see something like this:
 Now, correct me if I’m wrong – maybe Dellie and I were being too judgmental – but is this not the most random dessert you’ve ever seen? Cake shaped like a log and scraped to look like bark with some mushrooms growing out the sides?
…Yea, I thought so.
Having said that, it sure was fun to make – especially with the company of such a dear friend! -- and if you have a hankering for some seriously weird dessert-making and a few odd hours to kill, then sure, try this at home, why don’t ya?
For all the rest of you, just ooh and ahh at this one, and have yourselves some Happy Holidays!

Buche De Noel
Sources: Perfect Cakes by Nick Malgieri and The Williams-Sonoma Collection: Dessert
Serves 12
Cake should be stored in a cool, dry place. Leftovers should be refrigerated
Plain Genoise:
3 large eggs
3 large egg yolks
pinch of salt
¾ cup of sugar
½ cup cake flour - spoon flour into dry-measure cup and level off (also known as cake & pastry flour)
¼ cup cornstarch
one 10 x 15 inch jelly-roll pan that has been buttered and lined with parchment paper and then buttered again
1.Set a rack in the middle of the oven and preheat to 400 degrees F.
2.Half-fill a medium saucepan with water and bring it to a boil over high heat. Lower the heat so the water is simmering.
3.Whisk the eggs, egg yolks, salt and sugar together in the bowl of a heavy-duty mixer. Place over the pan of simmering water and whisk gently until the mixture is just lukewarm, about 100 degrees if you have a thermometer (or test with your finger - it should be warm to the touch).
4.Attach the bowl to the mixer and, with the whisk attachment, whip on medium-high speed until the egg mixture is cooled (touch the outside of the bowl to tell) and tripled in volume. The egg foam will be thick and will form a slowly dissolving ribbon falling back onto the bowl of whipped eggs when the whisk is lifted.
5.While the eggs are whipping, stir together the flour and cornstarch.
6.Sift one-third of the flour mixture over the beaten eggs. Use a rubber spatula to fold in the flour mixture, making sure to scrape all the way to the bottom of the bowl on every pass through the batter to prevent the flour mixture from accumulating there and making lumps. Repeat with another third of the flour mixture and finally with the remainder.
7.Scrape the batter into the prepared pan and smooth the top.
8.Bake the genoise for about 10 to 12 minutes. Make sure the cake doesn’t overbake and become too dry or it will not roll properly.
9.While the cake is baking, begin making the buttercream.
10.Once the cake is done (a tester will come out clean and if you press the cake lightly it will spring back), remove it from the oven and let it cool on a rack.
Coffee Buttercream:
4 large egg whites
1 cup sugar
24 tablespoons (3 sticks or 1-1/2 cups) unsalted butter, softened
2 tablespoons instant espresso powder
2 tablespoons rum or brandy
1.Whisk the egg whites and sugar together in the bowl of an electric mixer. Set the bowl over simmering water and whisk gently until the sugar is dissolved and the egg whites are hot.
2.Attach the bowl to the mixer and whip with the whisk on medium speed until cooled. Switch to the paddle and beat in the softened butter and continue beating until the buttercream is smooth. Dissolve the instant coffee in the liquor and beat into the buttercream.
Filling and frosting the log:
1.Run a sharp knife around the edges of the genoise to loosen it from the pan.
2.Turn the genoise layer over (unmolding it from the sheet pan onto a flat surface) and peel away the paper.
3.Carefully invert your genoise onto a fresh piece of parchment paper.
4.Spread with half the coffee buttercream (or whatever filling you’re using).
5.Use the parchment paper to help you roll the cake into a tight cylinder.
6.Transfer back to the baking sheet and refrigerate for several hours.
7.Unwrap the cake. Trim the ends on the diagonal, starting the cuts about 2 inches away from each end.
8.Position the larger cut piece on each log about 2/3 across the top.
9.Cover the log with the reserved buttercream, making sure to curve around the protruding stump.
10.Streak the buttercream with a fork or decorating comb to resemble bark.
11.Transfer the log to a platter and decorate with your mushrooms and whatever other decorations you’ve chosen.
Meringue Mushrooms:
3 large egg whites, at room temperature
¼ teaspoon cream of tartar
½ cup (3-1/2 ounces/105 g.) granulated sugar
1/3 cup (1-1/3 ounces/40 g.) icing sugar
Unsweetened cocoa powder for dusting
1.Preheat the oven to 225 degrees F. Line 2 baking sheets with parchment. Have ready a pastry bag fitted with a small (no. 6) plain tip. In a bowl, using a mixer on medium-low speed, beat together the egg whites and cream of tartar until very foamy. Slowly add the granulated sugar while beating. Increase the speed to high and beat until soft peaks form when the beaters are lifted. Continue until the whites hold stiff, shiny peaks. Sift the icing sugar over the whites and, using a rubber spatula, fold in until well blended.
2.Scoop the mixture into the bag. On one baking sheet, pipe 48 stems, each ½ inch (12 mm.) wide at the base and tapering off to a point at the top, ¾ inch (2 cm.) tall, and spaced about ½ inch (12 mm.) apart. On the other sheet, pipe 48 mounds for the tops, each about 1-1/4 inches (3 cm.) wide and ¾ inch (2 cm.) high, also spaced ½ inch (12 mm.) apart. With a damp fingertip, gently smooth any pointy tips. Dust with cocoa. Reserve the remaining meringue.
3.Bake until dry and firm enough to lift off the paper, 50-55 minutes. Set the pans on the counter and turn the mounds flat side up. With the tip of a knife, carefully make a small hole in the flat side of each mound. Pipe small dabs of the remaining meringue into the holes and insert the stems tip first. Return to the oven until completely dry, about 15 minutes longer. Let cool completely on the sheets.
4.Garnish your Yule Log with the mushrooms.
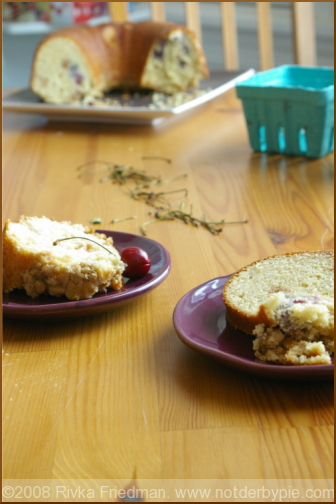
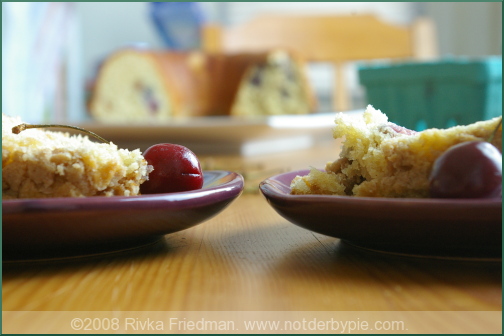
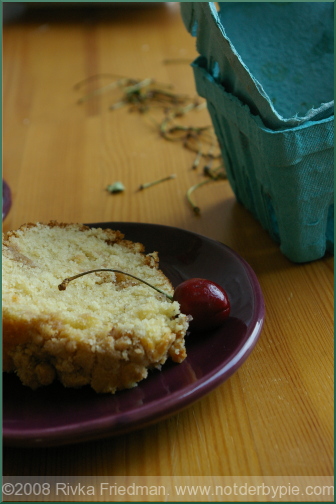
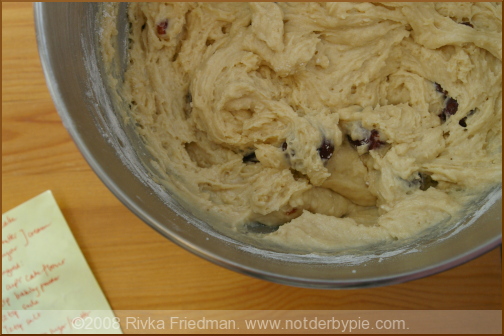 I don't know if trashy is your cup of tea, but when I was a kid I absolutely loved Entenmann's ultimate crumb cake. The ratio of crumbs to cake on that thing was approximately 8:1, the little bit of cake base wholly overwhelmed by a thick coat of streusel. Still, I hardly ate the cake. Frankly, I just liked those crumbs.
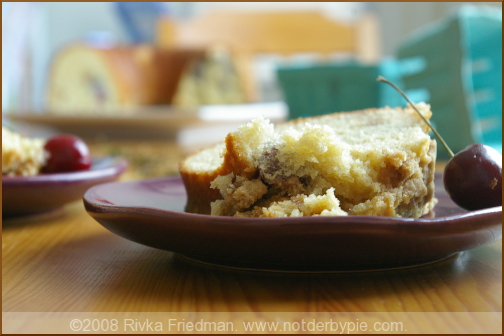


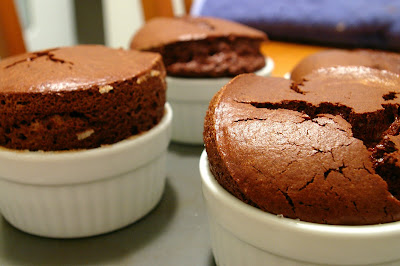

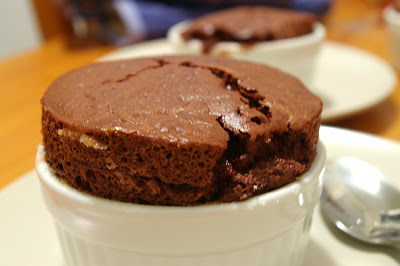
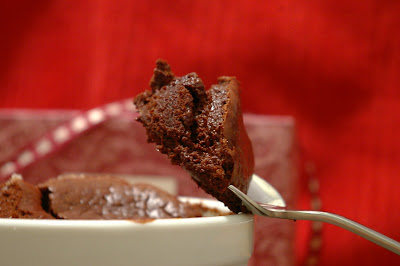 Chocolate Souffle

