Greens? mouthwatering. Pictures? Not so much.

(After a long, long hiatus -- nearly 2 weeks! -- I've finally got a recipe for you. I recently started a new job, which, in contrast to the old one, actually necessitates my doing work. It's been tough to adjust to a full -- often overflowing -- workday and still make time to blog, but I'm coming around. Thanks for continuing to read, and I promise, more great recipes are in the wings!) spinach1.jpg
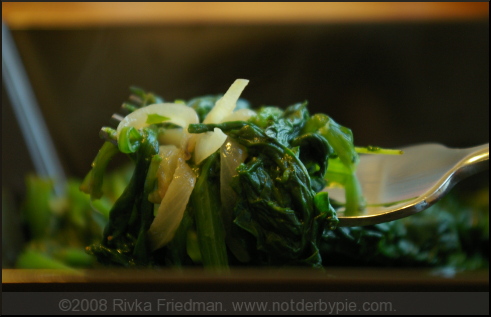
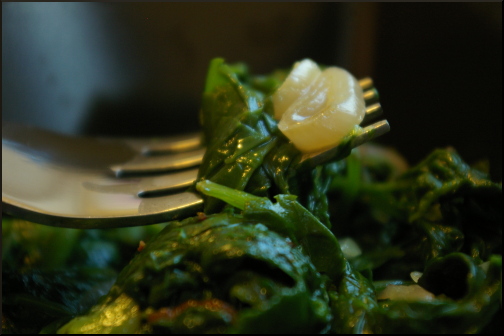
Honestly, I don't think I've ever posted such ugly pictures (save some of my early shots, which are pretty embarrassing). My apologies if looking at them makes you lose your appetite. I didn't even bother to put the watermark on that second one -- let's face it; no one's going to claim to have taken that ugly pic.

But the spinach, people, the spinach. It's absolutely delicious, and I insist that after staring for way too long at these ugly pictures, you go bother to make the spinach that's in them. I happened to have spinach in the fridge, and stumbled upon this recipe in The New Best Recipe (aka my New Best Cookbook). It's not my usual tune to make creamed spinach. I'm more drawn to raw salads and quick-sautees with Asian flavors than I am to heavy, Southern-style greens. However, I will certainly be making frequent exception to that rule from now on. TNBR's creamed spinach recipe yielded a perfectly delicate green, sweet from the cream and a pinch of sugar, slightly salty, a bit spicy from the freshly-grated nutmeg, and buttery from a sauteed shallot and, well, butter. I guess it's not hard to see how anything can be made tasty if you add sugar, salt, cream, butter, and shallots. But anyway, this spinach was pretty much a home run. I actually cut the cream in half, and it was still delicious, so if you'd be inclined, do the same.

spinach2.jpg

Assertive Greens with Shallots and Cream makes 2 cups

  • 2 Tbsp butter
  • 2 shallots, chopped fine
  • 1 recipe Blanched Assertive Greens (below)
  • 1/4 cup heavy cream
  • 1/2 tsp. sugar
  • 1/2 tsp. minced fresh thyme leaves
  • 1.4 tsp. freshly-grated nutmeg
  • salt and pepper
  1. Melt the butter in a large saute pan over medium heat. When the foaming subsides, add the shallots and cook, stiring frequently, until golden brown, 3-4 minutes.
  2. Add the greens and stir to coat them with the butter. Stir in the cream, sugar, thyme, and nutmeg.
  3. Cover and cook until the greens are heated through, about 2 minutes. If any excess liquid remains, remove the lid and continue to simmer until the cream has thickened slightly, about 1 minute.
  4. Season with salt and pepper to taste, and serve immediately.

    Assertive Greens:

    • 1 1/2 tsp. salt
    • 2 pounds assertive greens, such as kale, mustard greens, collard greens, etc.

    Bring 2 quarts of water to a boil in a Dutch oven or a large, deep saute pan. Add the salt and the greens, and stir until wilted. Cover and cook until just tender, 7 minutes. Drain into a colander. Rinse the pan, then refill with cold water, and put the greens into the cold water to stop the cooking. Gather greens by the hand, and squeeze dry.
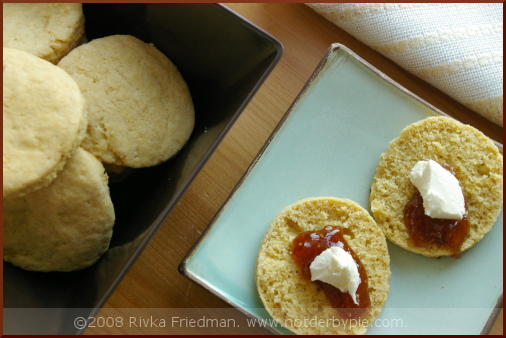
Vintage Breakfast Biscuits

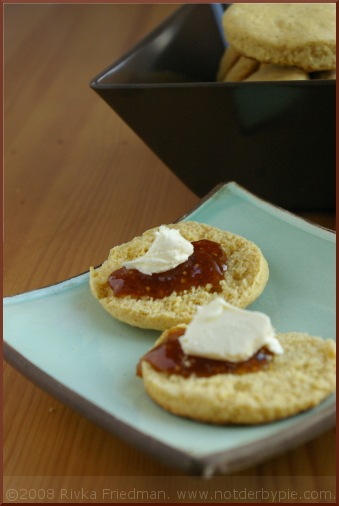
vintage1.jpg I'm gonna go out on a limb here and say that everyone loves a good buttermilk biscuit. What's not to love? buttery rich flavor and mouthfeel, flaky texture, piping hot innards, and now I have to stop because I'm salivating. Back in Israel, D used to get super excited at the prospect of biscuits for breakfast. Now that I've discovered my absolute favorite buttermilk pancake recipe, biscuits get less airtime in our house, but I haven't totally forgotten about them.

vintage2.jpg

This weekend, I decided rather impulsively to throw a batch together. Mind you, this wasn't an 8am inspiration I had -- it was the middle of the afternoon. We don't do biscuits for dinner in my house, and likely wouldn't be eating the bulk of them until the next day (or even -- eek! -- the day after.) But I still couldn't resist. I decided to compromise by making a more durable biscuit, one that could serve as a crumpet or scone equivalent for an afternoon snack with tea.

vintage3.jpg

Buried deep in my never-stack of must try recipes, many of which I print out four to a page and stack above my cookbooks (yep, D loves that little stack of papers that never disappears), was a lovely recipe for Vintage Jam Tarts from Heidi at 101 cookbooks. Heidi's recipe was from her grandma -- hence the "vintage" in the title -- and her tarts looked appetizing and unfussy. The method behind vintage jam tarts was to make a simple biscuit dough, cut circles out of the dough, and remove a smaller circle from half of the biscuits. Heidi stuck some jam in between, baked them off, and voila! -- easy tarts.

vintage5.jpg

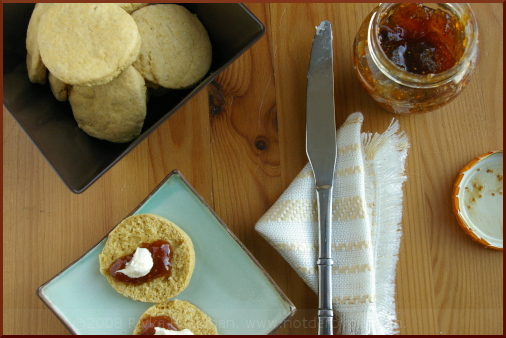
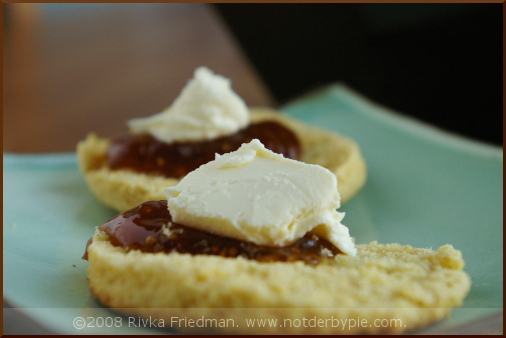
As I wanted biscuits, I halved the recipe and skipped the sandwiching step, leaving me a rather generous batch of thin, flaky biscuits. As the taste and texture of these biscuits were more subtle and delicate than usual, I skipped my old standby of raspberry jam and opted instead for some fig spread and clotted cream. (Note: clotted cream is a delightfully thick cream, so dense it's spreadable as butter. It's available at Whole Foods and other specialty markets, or here, at Amazon. I should probably call them crumpets at this point, sounding as British as I do.

vintage4.jpg

Vintage Breakfast Biscuits

  • 1 cup finely-ground cornmeal
  • 1 cup whole wheat pastry flour
  • 2 cups all-purpose flour
  • 1 1/2 teaspoons finely ground sea salt
  • 2 tablespoons baking powder
  • 3 tablespoons sugar
  • 1 cup unsalted butter, chilled, and cut into 1/4-inch chunks
  • 1 1/2+ cups milk
  • 1 egg, just the egg white
  • 1/3 cup jam (any flavor(s) you like)

Preheat your oven to 425 degrees.

Into a large bowl, or preferably, a food processor add the cornmeal, flours, salt, baking powder, sugar. To the dry ingredients add the butter. Using a pastry cutter or 30-35 quick pulses of the food processor, blend the mixture until it resembles tiny, sandy pebbles.

Dump the mixture into a medium bowl, add 1 1/2 cups of milk and with a fork stir just until everything is combined. You are going to roll out the dough, so if it is too wet, stir in a couple extra tablespoons of flour, if it is too dry stir in an extra tablespoon or two of milk. You don't want to overwork the dough, or your tarts will be tough, so stir only as much as you have to.

Dump the dough out onto a well-floured surface, pull it together into one large mound, and roll out until it is about 1/3-inch thick. Pat with more flour if things get sticky - sticky dough is your enemy in this recipe. Cut the biscuit dough with a medium cutter (the one I used was about 2-inches across), then cut into half the rounds with a slightly smaller cutter if you're making tarts.

Brush the large rounds with a bit of egg white - this will give the tarts that nice golden color. Place the outer rings on top, brush those with the egg white, and fill with a bit of jam.

Place the tarts on a rimmed baking sheet and bake for 10-13 minutes - I found that 10 minutes was enough for the biscuits. The rimmed baking sheet is important to use if you're making tarts because they tend to have a bit of runoff, and you want to prevent a mess in your oven.

Makes about 1 - 2 dozen tarts, depending on the size of your cutters.

Shakshuka

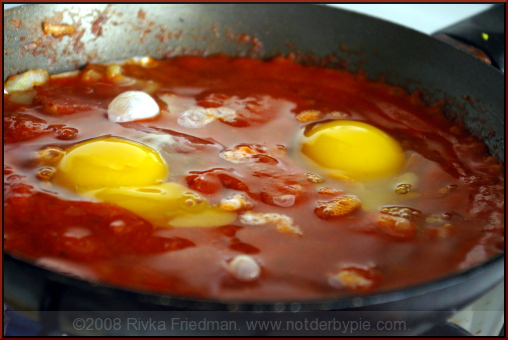
shakshuka4.jpg To say I love shakshuka is both a huge understatement and slightly misleading. How's that? Well, I more than love shakshuka; it's one of my absolute favorite breakfasts, lunches, and dinners, and hell, snacks. When D and I can't agree on what to put in the omelet or pancakes, I just say "shakshuka?" and everyone shuts up. (Usually.)

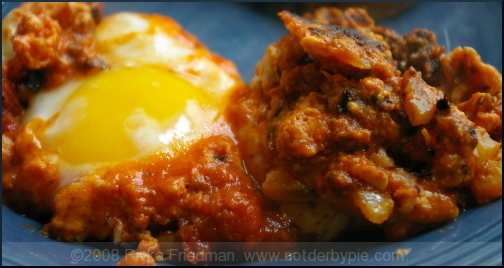
However, I like shakshuka my way. And my way is... well, my way is delicious, but it's not really shakshuka. Traditional shakshuka is an Israeli dish comprising sunny-side-up eggs in a spicy, onion-y tomato sauce. That's how I make it for D, but not for me. Please don't yell or scream or call me a fake foodie, but I don't like runny eggs. I know they're delicious and wonderful and life-changing for many-a-gourmet, but I'll have my eggs rubbery as leather and burnt on the outside, thank you very much. Scoff if you must.

shakshuka1.jpg

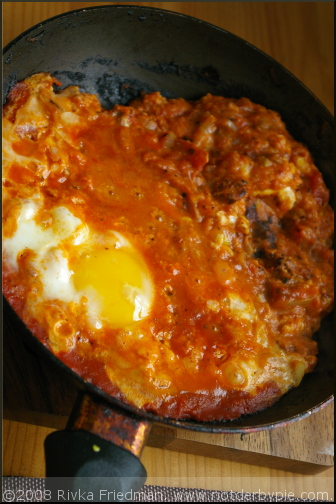
Shakshuka is easily fixed to my liking: about 2/3 of the way through the cooking process, after the egg has developed what know-it-alls call a skin, I go at it with a fork and break up the scary bits of ooziness into the sauce. Some of it mixes in with the sauce, and some stays separate; the end result is a bit of scrambled egg in a fantastically thick tomato sauce. And a happy Rivka.

Until yesterday, I'd been making shakshuka with whatever tomato sauce I had lying around and few, if any, additions. However, recently I took a field trip during my lunch break to Penzey's Spices (only the best freakin' spice shop ever ever ever, in my humble opinion. But don't trust me -- just ask the experts.) Among my treasures was a bottle of aleppo pepper, which has got a nice bite, lovely fruity and floral aromas, and an addictive flavor. I added some to my shakshuka this morning and will be doing so from now on -- it was a wonderful addition to an already great dish! If you don't have aleppo pepper just lying around your house, tsk tsk. Kidding. Just use some other chili flakes or powder, or skip it entirely; it's hard to make shakshuka taste bad.

shakshuka2.jpg

Shakshuka

  • 2 eggs
  • 2 cups tomato sauce
  • 2 Tbsp. chopped onion or shallot
  • 1/4 tsp. aleppo pepper
  • 1 Tbsp. olive oil
  • salt

In an omelet pan, sweat the onion in the olive oil over medium heat until translucent, stirring constantly, about 1 minute. Try not to let the onions burn -- though if they brown a bit it's no biggie.

Add the pepper and toss to coat; add the tomato sauce all at once, have an apron on so that it doesn't pop all over you, and stir to incorporate the onions.

Crack the eggs, one by one and side by side, into the tomato sauce. Turn up the heat to medium high. Cover the pan with a piece of tin foil or a larger pan. Leave be for a minute.

When you uncover the pan after a minute or so, you'll notice that the eggs have started to develop a skin; if you prefer your shakshuka cooked incorrectly, as I do, start to break up the yolks with a fork and stir into the sauce. Otherwise, just leave them as they are. Use a spatula or fork to scrape the burnt bits of sauce from the bottom of the pan.

After about 4 minutes, your eggs should be fully cooked and salmonella free. Traditionally, the shakshuka would be brought to the table in the pan, and people would scoop portions onto their plates there. Alternatively, scoop one egg and a fair amount of sauce onto each person's plate, and serve good, crusty bread alongside.

shakshuka5.jpg

Make-your-own Mexican Dinner

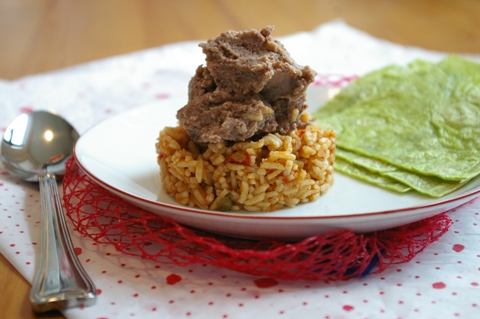
mexican-dinner.JPG D and I were both very excited at the thought of turkey burgers, but you can't make turkey burgers when the grocery store is out of turkey. hmm.

After a few moments' hesitation about what to make my very hungry and over-studied cohabiter, I settled on mexican. Now, before you get too excited, this isn't Diana Kennedy, from-under-the-adobe-flap Mexican (though I love Kennedy's cookbooks, especially this one, and need to make some of her recipes soon!). This is Americanized Mexican food with just a few twists to make it more authentic. And you know what? It's pretty damn good. Because we're kosher, we do either the meat inside or the cheese on top. But please, don't hold back. A little cotija cheese and sour cream never hurt anyone.

mexican.JPG

Whether you're cooking for an army of hungry people or just a few grumbling stomachs, make a mexican buffet, and you'll be sure to please the folks around your table.

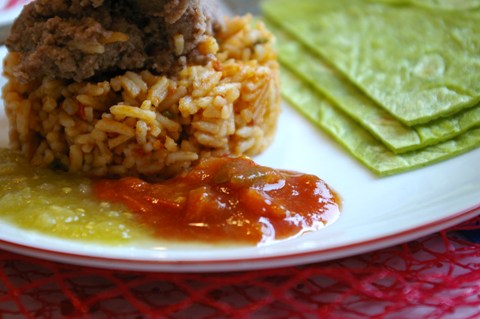
**I'm sorry that my pictures only show some of the featured items (no chicken or guac); I wasn't much in a chicken mood (especially since they were boneless breasts, which I don't so love), and didn't want to make D wait to eat while I photographed. I like to think I'm at least considerate enough to not stand between D and food.

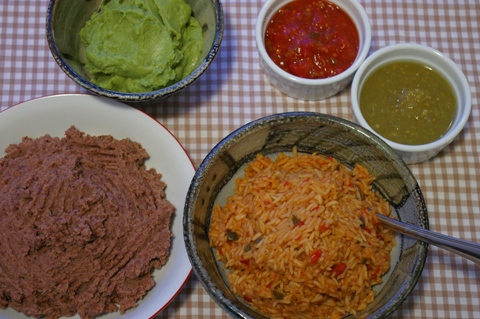
Here's my spread -- and feel more than free to vary these dishes according to your eaters' picky habits.

Flour tortillas (I like spinach flavor) Hot, Tangy Chicken Spanish Rice Smoky Refried Beans Guacamole Salsa Salsa Verde

mexican-birdseye.JPG

Hot, Tangy Chicken

  • 4 boneless chicken breasts, sliced into strips
  • salt and pepper
  • or 1 tsp. coriander (dried)
  • 1 Tbsp. chopped cilantro
  • 2 Tbsp. lime juice
  • 2 Tbsp. hot sauce
  1. marinate all ingredients for at least 45 minutes.
  2. Preheat the oven to 200 degrees.
  3. Put 1 Tbsp. olive oil in a heavy-bottomed pan and turn the heat on medium-high.
  4. Scoop marinated chicken into pan, reserving liquid.
  5. Saute for 3 minutes on each side, until cooked through and browned.
  6. Add liquid to the pan and cook until reduced to 1/3, about 5 minutes.
  7. Transfer to an oven-safe pan and leave, covered, in the oven, to keep warm.

Spanish Rice

    2 cups basmati rice (can be brown)
  • 2 3/4 cups water
  • 2 Tbsp. tomato paste
  • 1 jalapeno pepper, seeded and diced (be careful!)
  • 1/2 cup diced red bell pepper
  • 1/4 cup diced onion
  • 2 cloves garlic, diced
  • 1 tsp chili powder
  • 4 Tbsp. paprika
  • 1/2 tsp. oregano
  • 1/2 tsp. coriander
  • 1 tsp. salt
    Put 1 Tbsp. olive oil in a saucepan over medium heat.
  1. Add diced onions, jalapeno, and garlic, and sweat (until translucent), about 2 minutes.
  2. Add spices and bell pepper, and cook for 3 minutes.
  3. Add 2 1/2 cups water, turn the heat to high, cover pan, and bring to a boil.
  4. When water is boiling, add rice, and cook, uncovered, for 15 minutes.
  5. If after 15 minutes most of the liquid has evaporated, add an extra 1/4 cup and cook, stirring constantly.
  6. After most of the liquid has evaporated, cover pot, turn off the heat, and allow to steam for 5 minutes. Then fluff rice with a fork.

Refried Beans

Smoky Refried Beans

  • 2 cans black beans
  • 1/8 cup water
  • 1 Tbsp. olive oil
  • 1 1/2 tsp. pimenton, or smoked spanish paprika
  • 1 tsp. salt
  • cotija cheese, optional
    1. Drain beans and rinse through a few times.
    2. Blend beans and 1/8 cup water in food processor or blender until mostly smooth (though some little bits won't hurt).
    3. Add oil, pimenton, and salt; pulse a few more seconds til blended.
    4. Add more water if needed; you're looking for a smooth consistency that's not overly thick, but not runny either.
    5. Put bean mixture in an oven- or microwave-safe dish and cover.
    6. Bake in the oven at 350 until warmed through (about 15-20 minutes), or nuke in the microwave for ten-ish minutes until hot.
    7. Top with crumbled or grated cotija cheese and a bit of hot sauce, if you wish.

    Guacamole

    • 4 avocados, halved and scooped into a bowl.
    • 1 lime
    • 2 cloves garlic, mashed or chopped
    • 2 Tbsp. onion, chopped or mashed
    • 1/4 cup chopped tomatoes
    • 1/2 a jalapeno pepper, seeded and chopped (more or less to taste)
    • salt
    1. Are there really instructions to this "recipe?"
    2. Mash avocados, garlic, and onions in a big bowl (best to mash with a mortar and pestle, but I don't have one...).
    3. add tomatoes.
    4. add salt to taste.
    5. add lime to taste.
    6. add jalapeno....you get the drift.
    7. Mix it all up and EAT!

    I bought both salsa and salsa verde, but each is made relatively easily when you have the time: try this recipe from Simply Recipes, this one from Good Eats, or this salsa verde recipe, also from the much-abhored but also-very-useful Food Network.

    A couple tips on serving this feast:

    • Tortillas can be heated inside tin foil so that they stay soft and warm, then used as wraps to make burritos.
    • Alternatively, cut each into quarters, and toast them in a dry frying pan until they crisp up a bit, then use them as you would nan with indian food, to scoop up some rice, beans, chicken and sauce.
    • One last possibility is to fill them in advance, roll them, line them side by side in a pan, top with salsa and cheese, and bake, enchilada style. The possibilities are endless!

      mexican-closeup.JPG