Shana Tova!

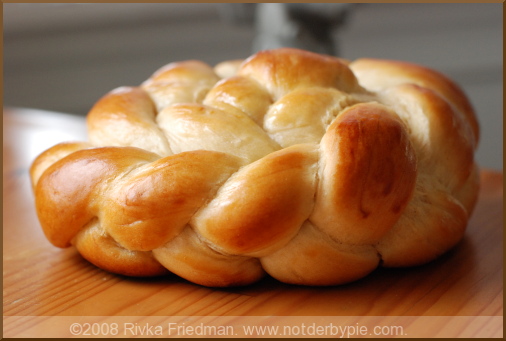
roundchallah1.jpg To all those celebrating the Jewish New Year (and to all of you, regardless of whether or not this happens to be the start of a New Year for you)...

May this be a year of happiness,

a year in which we take time out to enjoy the small pleasures,

a year in which we do not hesitate to try many new things,

a year in which we find new ways to love our families, friends, and significant others,

a year in which we use our strength to help those more in need than we,

and of course, a year in which we eat wonderful, wonderful food.

Shana Tova, Bria, U'Metuka: a happy, healthy, and sweet new year!

(Also, between my recent foot surgery and the upcoming holidays, I actually missed the first anniversary of NDP!! I can promise a celebratory post after all these holidays pass and my foot heals...but for now, happy blogiversary to NDP!)

roundchallah2.jpg

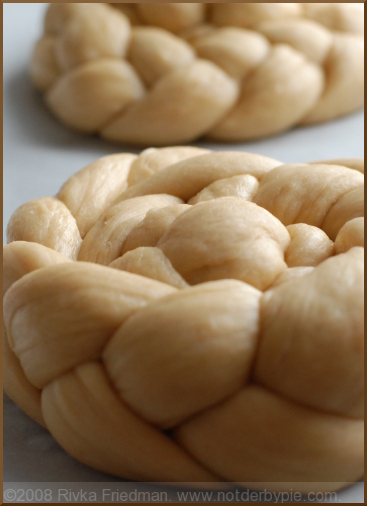
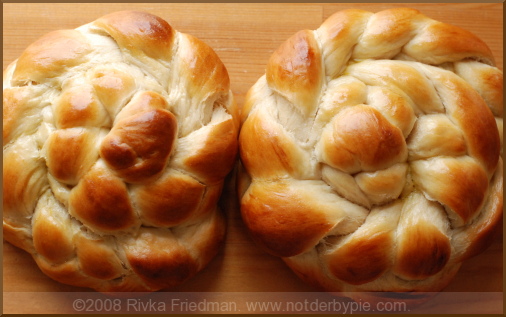
Ima's Challah link to recipe On Rosh Hashana, the Jewish New Year, we have a custom of making the challot round, to symbolize the cycle of the year that renews on this day. Braid each loaf extra long, then, starting at one end, wrap the braid around itself, lifting the braid slightly on top of itself as you go. Tuck the end under, brush with eggwash, and bake as normal.

roundchallah3.jpg

Sticky, Gooey Cinnamon Buns

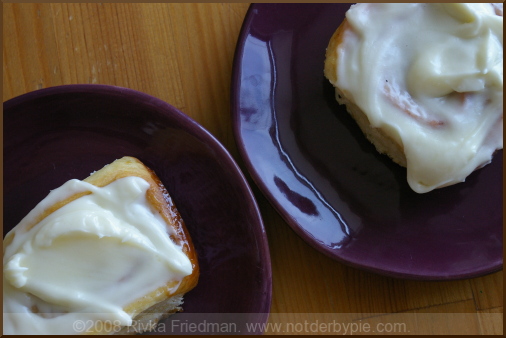
cinnabuns3.jpg If you've gone this long without making cinnamon buns (which, shockingly, I have), it's likely not because you're skeptical that they'll be worth it. What other foods smell ridiculously appetizing, even when what you smell is usually a corporate chain version loaded with high fructose corn syrup and other delicacies? No doubt they taste fantastic and are worth the effort, so that's not the cause of hesitation. More likely, you're just a bit daunted by the task. To me, cinnamon buns have always sounded like a very work-intensive, time-intensive project, possible only for those with half a day to devote to the task. I just figured that with a project as seemingly complex as cinnamon buns, I should hold off until I had an occasion to do them. Perhaps you did, too.

Such an occasion arrived last Sunday, when a bunch of us threw a bridal shower for our friend D, who's getting married in November. D's not so into the gush-gush-rip-the-wrapping-paper-ohh-ahh stuff, so when B suggested a book shower, D readily agreed. It's really right up her alley. We pitched the shower as a chance to get D a book that belongs on every shelf, a book you especially love, or a book that you thought D would love -- and, considering we got lots of oohs and ahhs and no doubles, I think it was a success! cinnabuns1.jpg
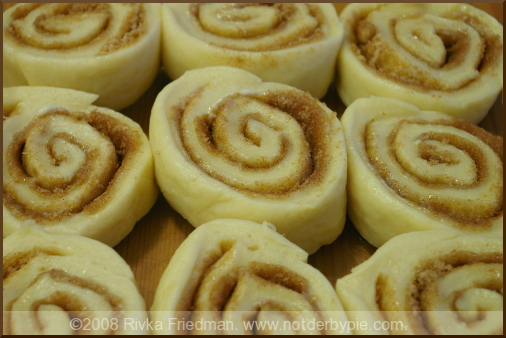
Anyway, B suggested that we make cinnamon buns for the shower (yes, she's full of good ideas, that B!) and I'd been meaning to make them for a while, so I jumped at the chance. We both just assumed they'd take a while, so I started them early at my house, the plan being that I'd bring the risen dough over to her place and we'd fill, roll, and bake them together.

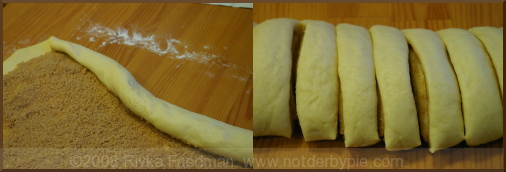
Well, I started a little earlier than planned, and before I knew it, it was time to roll out the buns but it wasn't time to go over to B's. Sorry, B -- I owe you cinnamon-bun-round-two! Needless to say, I managed on my own. In fact, I more than managed -- I practically cranked out the buns with little to no effort, and they looked totally gorgeous, if I dare say so myself. Let my experience demystify this ostensibly massive undertaking. It's no biggie, small beans, piece-a-cake. Get my drift? Time does most of the work -- all you really need is enough patience to not jump out of your chair before they're ready.
cinnabuns2.jpg

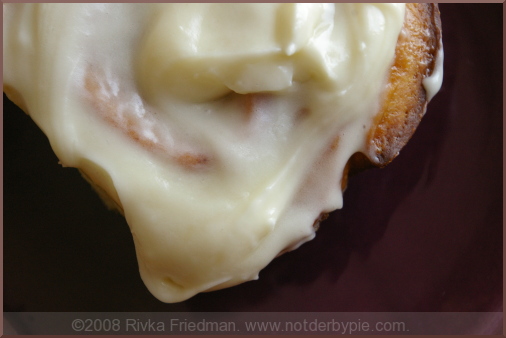
B made the cream cheese glaze. Her report: so easy, and it took only 2 minutes. What are you waiting for?? And in case it's not screamingly obvious: the cream cheese glaze is the best part. By far. If you're like me, always worried that you won't get enough of the goo on your cinnamon bun, don't fret: this recipe made enough for me to really slather it on and still have some left over to lick. mmmm.
cinnabun4.jpg

Cinnamon Rolls with Cream Cheese Glaze from Bon Appetit

Dough: 1 cup whole milk 3 tablespoons unsalted butter 3 1/2 cups (or more) unbleached all purpose flour, divided 1/2 cup sugar 1 large egg 2 1/4 teaspoons rapid-rise yeast (from 2 envelopes yeast) 1 teaspoon salt Nonstick vegetable oil spray

Filling: 3/4 cup (packed) golden brown sugar 2 tablespoons ground cinnamon 1/4 cup (1/2 stick) unsalted butter, room temperature Glaze: 4 ounces cream cheese, room temperature 1 cup powdered sugar 1/4 cup (1/2 stick) unsalted butter, room temperature 1/2 teaspoon vanilla extract

For dough: Combine milk and butter in glass measuring cup. Microwave on high until butter melts and mixture is just warmed to 120°F to 130°F, 30 to 45 seconds. Pour into bowl of stand mixer fitted with paddle attachment. Add 1 cup flour, sugar, egg, yeast, and salt. Beat on low speed 3 minutes, stopping occasionally to scrape down sides of bowl. Add 21/2 cups flour. Beat on low until flour is absorbed and dough is sticky, scraping down sides of bowl. If dough is very sticky, add more flour by tablespoonfuls until dough begins to form ball and pulls away from sides of bowl. Turn dough out onto lightly floured work surface. Knead until smooth and elastic, adding more flour if sticky, about 8 minutes. Form into ball.

Lightly oil large bowl with nonstick spray. Transfer dough to bowl, turning to coat. Cover bowl with plastic wrap, then kitchen towel. Let dough rise in warm draft-free area until doubled in volume, about 2 hours.

For filling: Mix brown sugar and cinnamon in medium bowl.

Punch down dough. Transfer to floured work surface. Roll out to 15x11-inch rectangle. Spread butter over dough, leaving 1/2-inch border. Sprinkle cinnamon sugar evenly over butter. Starting at 1 long side, roll dough into log, pinching gently to keep it rolled up. With seam side down, cut dough crosswise with thin sharp knife into 18 equal slices (each about 1/2 to 3/4 inch wide).

Spray two 9-inch square glass baking dishes with nonstick spray. Divide rolls between baking dishes, arranging cut side up (there will be almost no space between rolls). Cover baking dishes with plastic wrap, then kitchen towel. Let dough rise in warm draft-free area until almost doubled in volume, 40 to 45 minutes.

Position rack in center of oven and preheat to 375°F. Bake rolls until tops are golden, about 20 minutes. Remove from oven and invert immediately onto rack. Cool 10 minutes. Turn rolls right side up.

For glaze: Combine cream cheese, powdered sugar, butter, and vanilla in medium bowl. Using electric mixer, beat until smooth. Spread glaze on rolls. Serve warm or at room temperature.
Summer vegetable (and fish) stew

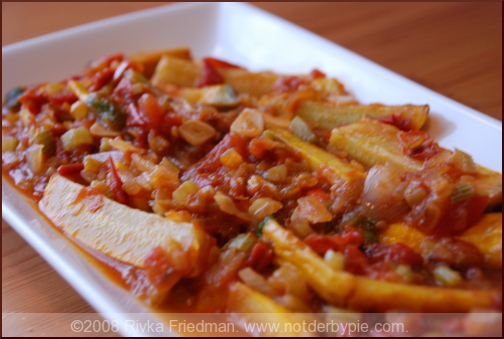
stew1.jpg If you're anything like me, your fridge is swimming with zucchini and corn, your counters teeming with beautiful tomatoes. Not that I'm complaining, mind you -- I wouldn't dare, with summer produce this close to done -- I'm just saying, I've got three bumper crops and I don't even have a garden. What's a girl to do?

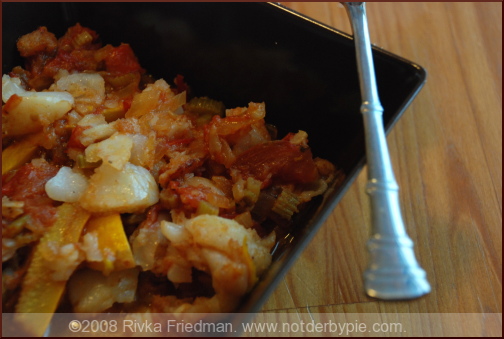
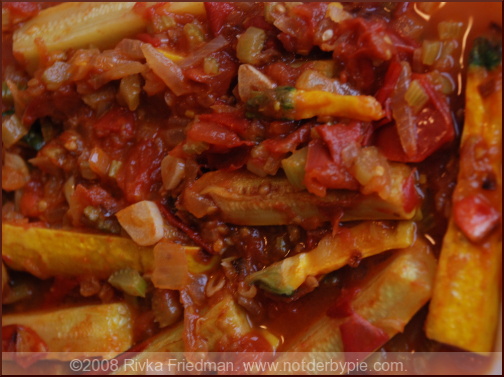
Not fret, that's for sure. I've found countless] great sources for ideas to use up the big three. Not to mention the inner-workings of my own crazy imagination...which led to this summer vegetable (and fish) stew. The fish in () because it's optional. (Not that everything in this recipe isn't optional -- hell, you could change the stew entirely for all I care -- but I've been told by my friends that I need to be more assertive and instructive, less "just do what you want"ish. I'm trying.) You want to know a secret? I didn't plan on making this a fish stew at all. I planned on making braised zucchini-ratatouille dish, then pan-frying some turbot fillets and laying them nicely on top. All went as planned, until I flipped my fillets (which were doing beautifully in a generous helping of browned butter). I'd hoped for them to have a nice, crisp browned crust, but instead the grains had separated and stuck to the bottom of the pan and it didn't look pretty at all. For your sake -- so that you wouldn't have to look at a picture of a yummy-ugly dish -- I took the ratatouille, tossed it right back in the pan, and started spearing the fillets with my spatula to break them up a bit. As I finished them off in the ratatouille, they started to break down a bit, forming a nice-looking stew. I served the stew (to myself and D) with a slice of good, crusty sourdough, which proved ideal for mopping up the juices at the bottom of my bowl. What started as a mistake ended...quite nicely, if you ask me. stew2.jpg

I also want to take a moment and pay homage to the humble celery. I often hate on celery, having disliked its taste when raw for quite some time, and having dreaded those ants-on-a-log snacks as a kid. I buy it almost never -- in fact, the last time I bought it was probably in college. But I had a bunch left over from the caponata, and I thought that since this stew was a clean-the-fridge stew anyway, could adding a little celery hurt? No, it most certainly couldn't. And sure enough, celery's flavor was awesome in the stew. Can I describe how so? Nope. Maybe you should try it and see for yourself?

stew3.jpg

Summer vegetable (and fish) stew

  • olive oil
  • 2 stalks celery, minced
  • 1/2 a yellow onion, minced
  • 2 cloves garlic, sliced
  • carrot, if you'd like (I didn't have any but a handful minced would do)
  • 1 tomato, chopped
  • 1 bay leaf, optional
  • 1 zucchini or yellow squash, or three of those small summer squash, cut vertically into thick slices
  • <1/2 cup liquid (stock, wine, and water will all work)

  • salt and pepper
  • 1 Tablespoon butter
  • 2 fillets turbot or other white, mild fish (total a bit more than half a pound)
  • In a heavy bottomed saute pan over medium heat, add a few Tbsp. of olive oil, and sweat the onion and garlic until very aromatic and translucent, about 2 minutes. Add bay leaf, celery, and carrots, if using, and continue to cook until soft, about 5-6 minutes. Add zucchini/squash and saute until browned, about 4 minutes. Add tomato, stir to incorporate, and add a bit of your liquid of choice, to scrape up the little bits that have gathered on the bottom of the pan. Season with salt and pepper to taste. Continue to add liquid gradually, cooking for an additional 3-4 minutes until it all comes together. Remove from heat, transfer to a bowl, and wipe out pan. (If you're not adding the fish, taste and adjust, and serve.)

    Blot fillets dry with paper towels and season liberally. Heat the butter in the same pan over medium heat until bubbly and starting to brown. Add fillets. Once in the pan, don't move them around all too much -- you want them to develop color and crispness. After about 2 minutes, flip. At this point, if yours turn out as mine did, there'll be little brown bits of fish deliciousness, and that's ok. Start cutting into the fish with your spatula, breaking up the fillets into smaller pieces. Then add the vegetables back into the pan, toss to mix, and cook for an additional 3-4 minutes until fish is fully cooked (but not too cooked), and serve in big, homey bowls with nice, crusty sourdough bread. YUM.

Portobello Burgers

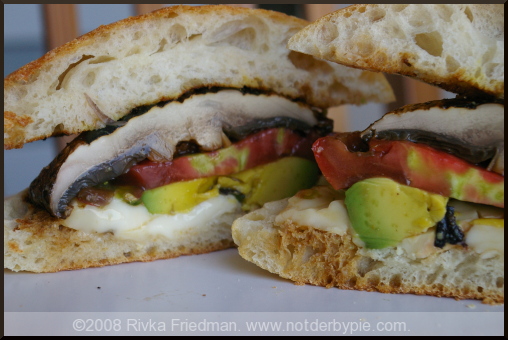
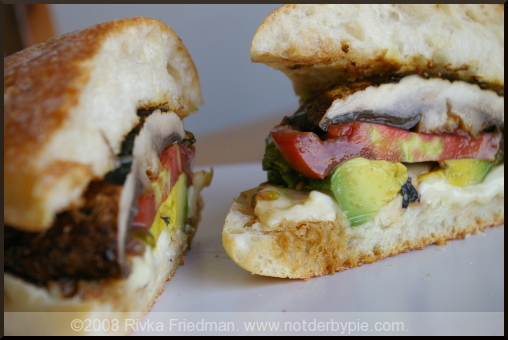
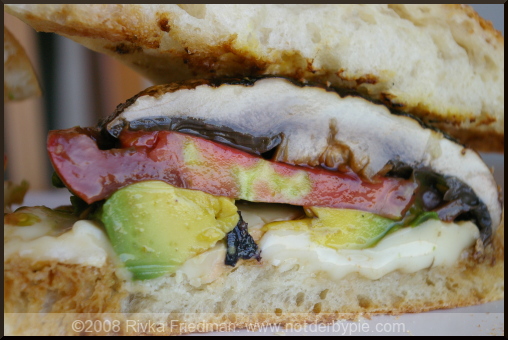
burger1.jpg Until two nights ago, I'd never made a portobello burger. Hard to believe, I know. It's, like, the simplest thing to make. Like, ever. And yet I somehow managed to make chocolate pretzels, potato foccacia, even Buche De Noel before getting around to this dead-simple dinner. Well, we've remedied that, folks, yes we have -- and it certainly won't be the last time I do it. Some facts about portobello burgers: they're freakin' easy. And tasty. Did I mention easy? Oh, and they're uber-versatile. Like last night, for example, D ate hers as she would a normal burger: pickles, honey mustard, tomato, bbq sauce. I had mine like a true snob: taleggio cheese, avocado, heirloom tomato, pesto, on ciabatta bread. Delicious either way, we'll both assure you. And really, took approximately 8 minutes to cook. I don't have a grill or grill pan, but I used a very hot castiron pan and it did the trick.

burger2.jpg

Will I be making these again? Uh, you bet. It's a non-recipe, but if you need step-by-step instructions, find them here, here, and here.

burger3.jpg

Portobello Burgers

Bun or roll (I used ciabatta) portobello mushroom, rinsed and stem removed 2 slices cheese: I used taleggio, but bleu, chedder, fontina, smoked mozzarella, or pepper jack would be lovely, among others toppings of all sorts. some suggestions: - cabbage, orange segments, teriyaki sauce - lettuce, tomato, mustard, pickles - lettuce, avocado, tomato, pesto - roasted red pepper, kalamata olives, feta, parsley - I could go on and on, you get the drift, yes?

Marinate the portobello for about 10-15 minutes in some sort of liquid (bbq sauce, teriyaki, pesto and olive oil and vinegar, etc).

Heat a heavy-bottomed stainless steel or castiron pan over medium-high heat. When the pan is hothot, drizzle a bit of olive oil in the pan, and immediately plunk down the mushroom, rounded side down. It'll sizzle away; that's a good sign. Meanwhile, toast your bread and gather your other ingredients for easy assembly.

Your burger should form a nice "crust" on the top of the cap after about 4 minutes in the pan; at that point, flip it over and cook another few minutes. Pile your burger with toppings, slice in half, and enjoy!

Price Comparison - local heirloom tomatoes: 3.99 per pound (definitely more expensive than hothouse tomatoes but soo much tastier) - portobellos, from the market, 3 bucks for 2; at the store, 6 oz (approx. 4) for 5 bucks - avocados, organic, not local (from CA): 2.39 a piece - pesto -- homemade from a gallon-size bag of basil, which cost 7 bucks