Dulce de Leche

dulce3.jpg Imagine a creamy, rich, brown caramel made from the simplest of ingredients -- milk and sugar -- and involving little more than a pot of boiling water and a couple hours. Hard to believe, but the best way to make dulce de leche is also the easiest way. And tell me you're not salivating as you eye the caramel I've got sitting in a jar in my fridge. This stuff is to die for, people.

dulce2.jpg

Ingredients: 1 can sweetened condensed milk. Special equipment: 1 big, tall pot and lots of water

Peel the label of the can of sweetened condensed milk. Do not open the can. Fill the pot with water so that the water level covers the can by at least an inch. Plunk the can into the pot to check, then remove. Set the pot over high heat and bring to a boil; once the water is boiling, add the can, and turn the heat down to medium high, bringing the water to a simmer. The can should be standing on one side, not rolling around. Now, I noticed that the can tends to make a lot of noise as the bubbles from the boiling water try to escape from beneath it. One trick, if you happen to have two pairs of tongs lying around, is to prop the can on a tilt by sticking a small ball of tin foil underneath it. This stops the noise. Leave the can in the simmering water for at least 2 hours (longer for a firmer caramel -- I left it in for 3), and make sure to replenish the water as often as you need to in order to keep the water level above the can. I had to add about a cup every half hour to 45 minutes.

dulce1.jpg

When 2 hours (or your desired cooking time) have elapsed, turn off the heat and leave the can in the water for at least half an hour, to cool slightly. If you were to remove it immediately, the heat inside the can would overpower the air pressure surrounding it, and it would explode.

After 30-45 minutes, remove the can with tongs; if it's not too hot to touch, you can open it with a can opener. Dulce de leche will start oozing out as you open the can, and you should feel free to -- ahem -- clean it up. With your fingers. And then try it. Gaahhh it's so good :)

dulce4.jpg

Make-your-own Mexican Dinner

mexican-dinner.JPG D and I were both very excited at the thought of turkey burgers, but you can't make turkey burgers when the grocery store is out of turkey. hmm.

After a few moments' hesitation about what to make my very hungry and over-studied cohabiter, I settled on mexican. Now, before you get too excited, this isn't Diana Kennedy, from-under-the-adobe-flap Mexican (though I love Kennedy's cookbooks, especially this one, and need to make some of her recipes soon!). This is Americanized Mexican food with just a few twists to make it more authentic. And you know what? It's pretty damn good. Because we're kosher, we do either the meat inside or the cheese on top. But please, don't hold back. A little cotija cheese and sour cream never hurt anyone.

mexican.JPG

Whether you're cooking for an army of hungry people or just a few grumbling stomachs, make a mexican buffet, and you'll be sure to please the folks around your table.

**I'm sorry that my pictures only show some of the featured items (no chicken or guac); I wasn't much in a chicken mood (especially since they were boneless breasts, which I don't so love), and didn't want to make D wait to eat while I photographed. I like to think I'm at least considerate enough to not stand between D and food.

Here's my spread -- and feel more than free to vary these dishes according to your eaters' picky habits.

Flour tortillas (I like spinach flavor) Hot, Tangy Chicken Spanish Rice Smoky Refried Beans Guacamole Salsa Salsa Verde

mexican-birdseye.JPG

Hot, Tangy Chicken

  • 4 boneless chicken breasts, sliced into strips
  • salt and pepper
  • or 1 tsp. coriander (dried)
  • 1 Tbsp. chopped cilantro
  • 2 Tbsp. lime juice
  • 2 Tbsp. hot sauce
  1. marinate all ingredients for at least 45 minutes.
  2. Preheat the oven to 200 degrees.
  3. Put 1 Tbsp. olive oil in a heavy-bottomed pan and turn the heat on medium-high.
  4. Scoop marinated chicken into pan, reserving liquid.
  5. Saute for 3 minutes on each side, until cooked through and browned.
  6. Add liquid to the pan and cook until reduced to 1/3, about 5 minutes.
  7. Transfer to an oven-safe pan and leave, covered, in the oven, to keep warm.

Spanish Rice

    2 cups basmati rice (can be brown)
  • 2 3/4 cups water
  • 2 Tbsp. tomato paste
  • 1 jalapeno pepper, seeded and diced (be careful!)
  • 1/2 cup diced red bell pepper
  • 1/4 cup diced onion
  • 2 cloves garlic, diced
  • 1 tsp chili powder
  • 4 Tbsp. paprika
  • 1/2 tsp. oregano
  • 1/2 tsp. coriander
  • 1 tsp. salt
    Put 1 Tbsp. olive oil in a saucepan over medium heat.
  1. Add diced onions, jalapeno, and garlic, and sweat (until translucent), about 2 minutes.
  2. Add spices and bell pepper, and cook for 3 minutes.
  3. Add 2 1/2 cups water, turn the heat to high, cover pan, and bring to a boil.
  4. When water is boiling, add rice, and cook, uncovered, for 15 minutes.
  5. If after 15 minutes most of the liquid has evaporated, add an extra 1/4 cup and cook, stirring constantly.
  6. After most of the liquid has evaporated, cover pot, turn off the heat, and allow to steam for 5 minutes. Then fluff rice with a fork.

Refried Beans

Smoky Refried Beans

  • 2 cans black beans
  • 1/8 cup water
  • 1 Tbsp. olive oil
  • 1 1/2 tsp. pimenton, or smoked spanish paprika
  • 1 tsp. salt
  • cotija cheese, optional
    1. Drain beans and rinse through a few times.
    2. Blend beans and 1/8 cup water in food processor or blender until mostly smooth (though some little bits won't hurt).
    3. Add oil, pimenton, and salt; pulse a few more seconds til blended.
    4. Add more water if needed; you're looking for a smooth consistency that's not overly thick, but not runny either.
    5. Put bean mixture in an oven- or microwave-safe dish and cover.
    6. Bake in the oven at 350 until warmed through (about 15-20 minutes), or nuke in the microwave for ten-ish minutes until hot.
    7. Top with crumbled or grated cotija cheese and a bit of hot sauce, if you wish.

    Guacamole

    • 4 avocados, halved and scooped into a bowl.
    • 1 lime
    • 2 cloves garlic, mashed or chopped
    • 2 Tbsp. onion, chopped or mashed
    • 1/4 cup chopped tomatoes
    • 1/2 a jalapeno pepper, seeded and chopped (more or less to taste)
    • salt
    1. Are there really instructions to this "recipe?"
    2. Mash avocados, garlic, and onions in a big bowl (best to mash with a mortar and pestle, but I don't have one...).
    3. add tomatoes.
    4. add salt to taste.
    5. add lime to taste.
    6. add jalapeno....you get the drift.
    7. Mix it all up and EAT!

    I bought both salsa and salsa verde, but each is made relatively easily when you have the time: try this recipe from Simply Recipes, this one from Good Eats, or this salsa verde recipe, also from the much-abhored but also-very-useful Food Network.

    A couple tips on serving this feast:

    • Tortillas can be heated inside tin foil so that they stay soft and warm, then used as wraps to make burritos.
    • Alternatively, cut each into quarters, and toast them in a dry frying pan until they crisp up a bit, then use them as you would nan with indian food, to scoop up some rice, beans, chicken and sauce.
    • One last possibility is to fill them in advance, roll them, line them side by side in a pan, top with salsa and cheese, and bake, enchilada style. The possibilities are endless!

      mexican-closeup.JPG

Etrog Marmalade

from the archive. It's the last day of sukkot. Your lulav is on the table getting brown, and your etrog is still in the fridge, getting dry. Same story, every year: what on earth are you going to do with a palm branch, some willow and myrtle leaves, and a fruit that really doesn't have all that much fruit inside? My answer is usually...uh...throw them away? I know, you're not supposed to. If you have a better suggestion...

Leave it to my mother to be creative; that's really her forte. She's been using the etrog in her Thanksgiving cranberry sauce for years now, and a few years back she started making marmalade. Now she doesn't go to all the trouble of soaking jars in a hot water bath, sealing them professionally and destroying any possibilities that bacteria will sneak in and give all of us botulism -- but hey, these marmalades aren't around for long enough that we really have to worry about it. Her no-nonsense packaging solution is mini tupperware containers. They stay just fine in the fridge until Passover, and by then my dad makes sure to finish them off.


While it may sound like a complicated project, it's really not: the ratio of sugar:liquid:fruit is one:one:one, and once it's on the stove top you just stir until it drips off the spoon in a particular way. The catch is that it's incredibly time-consuming. Pick up a paper, 'cause between the measuring, the waiting, the stirring, the checking, the packaging and (finally) the tasting, this is an all-day affair. Actually, make that an all-day-and-the-night-before affair, since if you don't like your marmalade to taste horridly bitter, you have to soak the peels overnight.

But it sure it worth the trouble.

So as I've already mentioned, when my mom told me she was doing this, I literally dropped everything and went on over. The smell of citrus and sweet sticky stuff assaulted me as I walked in the door -- not that that's a bad thing. My mom was slaving away over the stove, and I did what any good daughter would do: popped my camera out of its case and started snapping away! There's no recipe for marmalade; there are proportions, and there are steps, and then there are steps that you can't skip. At least, that's how I see it. Every recipe always has skippable steps. I've skipped a lot of steps that recipe authors claim are crucial -- is my food bad? you tell me. But in this recipe, there are a couple things you really should do, like soaking the peels and checking marmalade regularly. Don't skip 'em. :)

Etrog Marmalade

Ratio of fruit:sugar:water/juice is one:one:one.
fruit: we use etrog, apricot, orange, kiwi, pomegranate, cranberry...you name it.
equal amount of sugar
equal amount of water.
**My mom substituted some lime syrup she had lying around for a bit of water in one batch, and some juice she had for some water in another. If you sub juice or fruit syrup or other sweet liquid for any of the water, cut the sugar accordingly. By "accordingly" I mean if you use, say, 1/2 a cup of juice, cut the sugar by about 1/8-1/4 of a cup, say.

Begin the night before you plan to make the marmalade.
Wash and scrub the peels of any citrus fruits you plan to use. Then peel the fruit, pick out any pith (that's the white stuff between peel and fruit) (optional), and grind peels in the food processor until they're in small bits. I warn you -- this stuff is fragrant!

Soak the peels in water overnight. You'll drain them the next morning. This should help remove some of the bitterness that the peels would have imparted to your marmalade.

The next morning, drain the peels.
If you plan on using apricots or any other dried fruit, you have to reconstitute them before using them. Reconstituting dried fruit involves letting them soak in boiling water until they puff up a bit and get juicy. I enjoy some reconstituted dried fruit more than their fresh versions, and apricots are no exception: they're juicy like fresh apricots, but softer, and their flavor is greatly intensified. If you do reconstitute any dried fruit (and I recommend apricots), save the liquid and use it instead of some of the water in your recipe.

Here's a cheat sheet of how we used each fruit in our marmalade. This can serve as inspiration for you when you make yours, but it is in now way exhaustive.

  • Apricots: reconstituted, then pureed, and saved the liquid
  • Etrog: no real "fruit" in etrog, just peels -- so ground and soaked peels
  • Orange/Lemon: ground and soaked peels, chopped segments of fruit
  • Lime: lime syrup (can also use fruit and peels)
  • Pomegranate: syrup, juice
  • Cranberries: these cook very quickly and have a lot of natural pectin in them, so they firm up easily. Add them to your marmalade about 5-7 minutes before it's finished.
  • Kiwi: mushed up fruit/pulp

Now you're ready to make marmalade.

Into a heavy saucepan, put equal parts of fruit, sugar, and liquid. Turn the heat on high until it reaches a boil, then lower the heat to low-med and let the mixture simmer. This will take between 15-20 minutes. The idea is to check for doneness with a wooden spoon. Every so often, stick your spoon deep into the marmalade, remove, and hold it horizontally over the pot, letting everything drip off of it.

  • At first, the marmalade will be liquidy and will dip easily, in a steady stream.
  • As marmalade reduces, it will start to coat the spoon and drip a bit more slowly.
  • When marmalade is nearing doneness, it will form two points on the spoon from which it drips.
  • When it's done, the two points will merge into one, and it will sort of dribble off the spoon in one slow motion.

Basically, you'll stop cooking it when it's thick to your liking. There's no real rule about this -- it's a matter of taste.

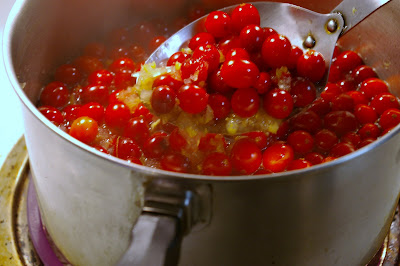
As for cranberries, I mentioned about that they should go in about 5 minutes before your citrus fruit are finished, if you choose to use them. They'll gel much more quickly than the rest.

When your marmalade is finished cooking, transfer it to a pyrex or coated glass bowl and allow it lots of time to cool. It will thicken further as it comes down to room temperature. When it's gone down to warm, you can start putting it in your tupperware containers. (If you want to do this the professional way, see here for canning instructions.)

You can eat your marmalade on toast, as a sauce on chicken or meat, as a condiment on most anything, or out of the tupperware with a spoon. And can I tell you? It's pretty darn great.
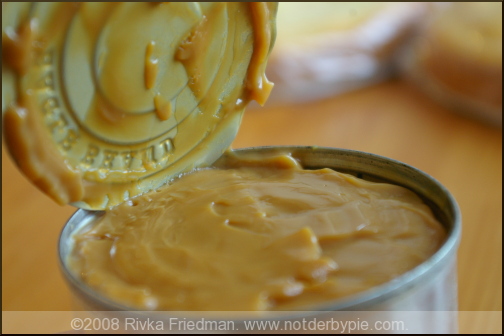
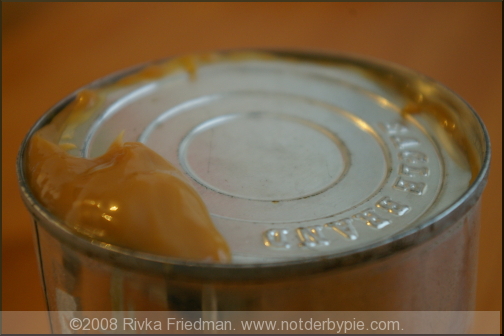
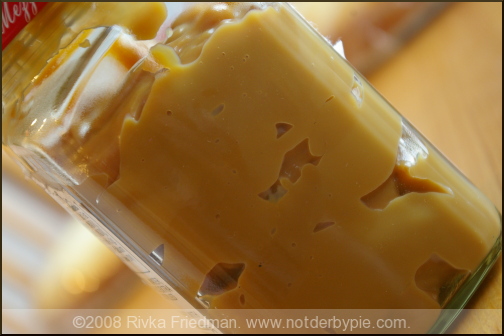
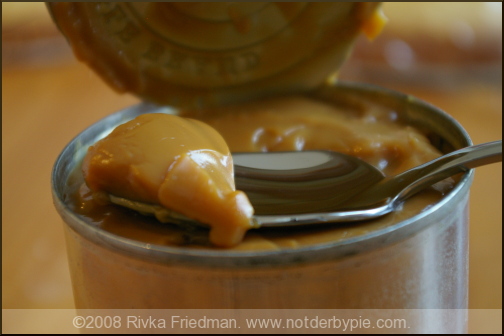
Pesto, two ways

When I first learned to make pesto, it was "dump everything in the cuisinart and pulse." I'm still of the philosophy that if you have good indregients, that method is just fine. However, when Heidi over at 101 cookbooks posted about making pesto like an Italian grandmother, I knew I'd have to try it the "proper" way at some point. (Her pics are beautiful...too bad I can't say the same for my own; they really capture the dim lighting of a classic first apartment.) Heidi, thank you for inspiring amateurs like myself to try this technique!

The major difference between store-bought pesto and classic Italian pesto is texture. The bottled stuff spreads like a paste, whereas the more traditional, labor-intensive product is like a finely-chopped salsa (just, uh...more finely chopped). Without further ado, pesto:

Heidi says that a mezzaluna is the best tool for chopping. Alternatively, use a half-moon-shaped pizza slicer (or just make do with a good, big, sharp knife). In any event, plan on allotting about half an hour for all the chopping, since you'll only be chopping a bit at a time.


As you'll notice from my pictures, I actually tried this twice. The first time I used a silicon cutting mat and the traditional proportions: a bunch of fresh basil, a few cloves of garlic, a handful of pinenuts, and about a cup of parmigiano reggiano. I followed Heidi's directions to first chop the basil and garlic, then add the pine nuts, then add the cheese. It worked quite nicely, though I added olive oil to the top to preserve it as she recommended, and I found that it made the pesto more oily than I had wanted it.


The second time, I used a wooden cutting board (smart Rivka, smart), varied the proportions a bit, and changed my technique as well. I made a pine nut-heavy pesto, as a compromise for D, who is not a basil lover (I know, I don't get it either.) (Of course, I forgot that she also hates pine nuts. Silly me.) I also decided to chop the pine nuts and cheese before the basil and garlic, to see how it would change things. In the end.....the Italian Grandmother knows best. If you don't start with the basil and garlic, they become very difficult to chop to the degree of fineness required. The nuts and cheese are much easier to incorporate into the basil and garlic than vice versa. Am I shocked that an Italian pro knows better than amateur me? no. Did I have to try just to make sure? apparently.

Pesto
One handful fresh basil
a few (2-4) cloves of garlic, to taste
heaping handful of pine nuts
scant cup Parmigiano Reggiano, grated fresh
good olive oil

Begin by chopping the basil and garlic together until fine.
Add pine nuts in two or three additions, chopping until the mix resembles a finely-chopped salsa.
Add cheese in two or three additions; I find that the cheese helps hold the pesto together, so that by the second addition of cheese, the ingredients start to become well-incorporated.
Pour some olive oil over the top (about 1/4 cup?) and continue chopping, until mixture can be combined into a block on the cutting board.

If you're planning to use this later, pack it into a bowl or tupperware and cover with a generous layer of olive oil, which will prevent the basil from oxidizing and turning dark.