• Home
  • About
  • Recipe Index
  • Contact
Menu

Rivka Friedman

Street Address
City, State, Zip
Phone Number

Your Custom Text Here

Rivka Friedman

  • Home
  • About
  • Recipe Index
  • Contact

Sour Cherry Hand Pies, and the Perfect Pie Crust

July 9, 2011 Rivka
DSC_0425
DSC_0425

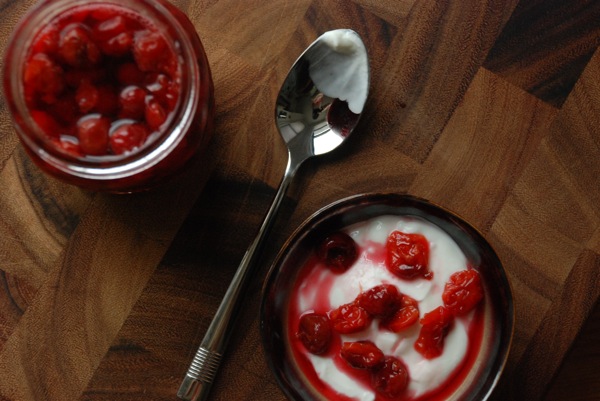
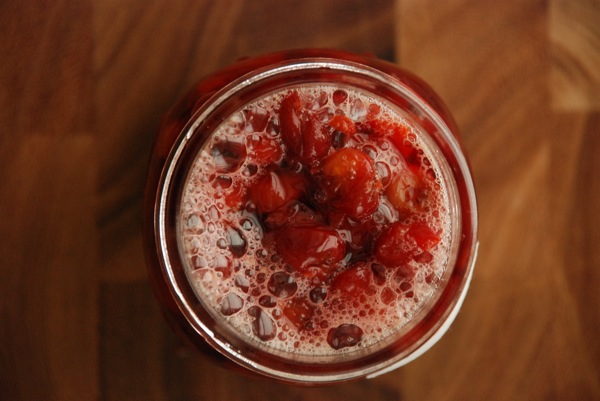
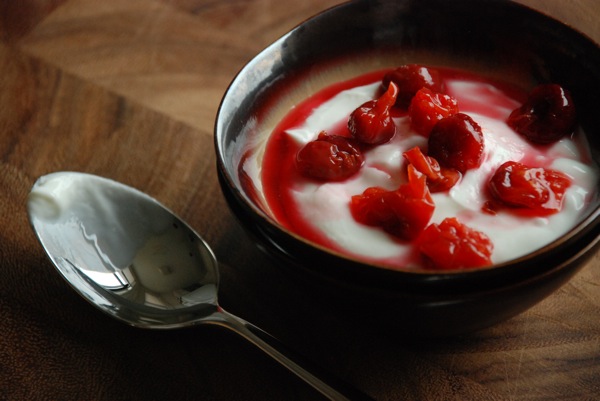
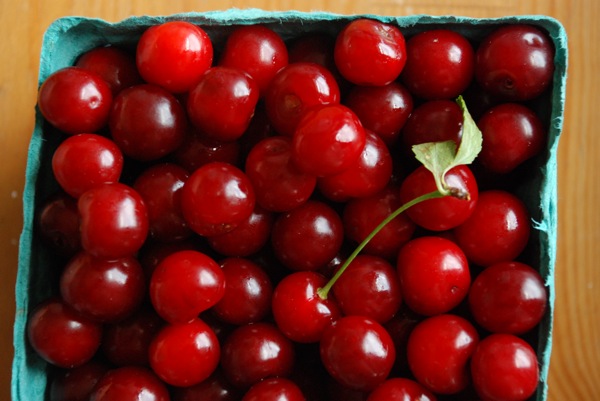
I hope by now you've become as hooked on sour cherries as I am. I've been preaching some gospel about the fleeting summer fruit, pushing you all to make this sour cherry compote (and some of you have made it! and liked it! phew.). But this here, this is a recipe you absolutely need right this very moment, before sour cherries exit stage left for another year.

DSC_0026-1
DSC_0026-1

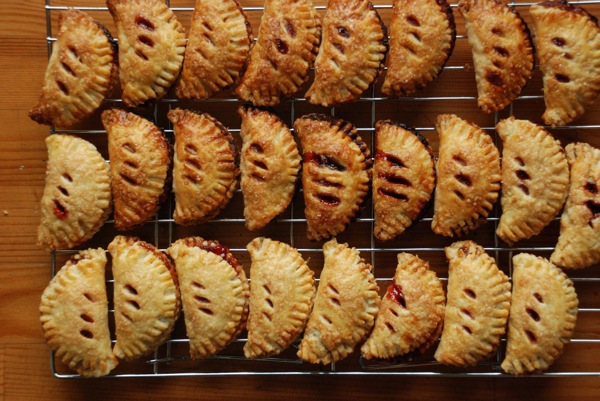
Reader, make some sour cherry hand pies. Not just any hand pies, but these - for these may be the most perfect hand pies I've ever made or eaten. And while I know in light of my raving about the whole sour cherry-ness of these pies what I'm about to say will seem strange, it all starts with the crust. That's right: after years of making pie, using my old-faithful all-butter pie recipe (which I think I originally got from the lovely Deb), I'm changing my tune on the perfect crust.

DSC_0422
DSC_0422
DSC_0433
DSC_0433

Don't worry, we're not talking about radical departures here. Just small tweaks that make a big difference.

1. A food processor and a pastry blender produce equally good crust, but the method matters. I tend to choose between processor and pastry blender based on my mood. Lazy me chooses the processor. If I've had a sh***y day and need to get out some aggression, the pastry blender is great. Here's the catch: when cutting the butter into the flour, if you're using a pastry blender, go for pea-sized pieces of butter, since you'll be folding the liquid into the dough rather than blending it. If you're using a food processor, follow Melissa Clark's great advice and go for lima bean-sized pieces. That way, you've got some wiggle room so that when you add the liquid and pulse again, you can pulse until the liquid is incorporated without worrying that the butter pieces will become too small.

DSC_0417
DSC_0417

2. Pie crusts should taste good on their own. Never is this more important than when making hand pies, where the ratio of filling to crust is much smaller than in regular pie. When you get a bite that's mostly crust, it should taste delicious. I've find most pie crust recipes woefully under-seasoned. I've settled on 1 teaspoon of salt and 2 teaspoons of sugar in the dough for a single-crust pie, but feel free to experiment yourself.

3. For the best results, chill everything. We're talking the bowl, the pastry blender, the flour, the butter (after cutting it into chunks), the ice water...everything. Freezing your whole workstation will inhibit the formation of gluten, which will prevent your dough from turning chewy.

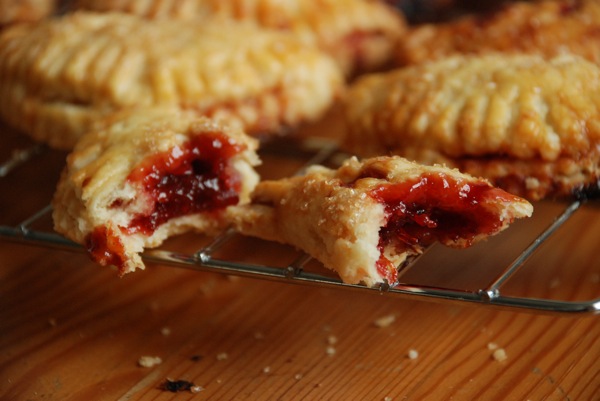
That's the newest from the pie dough frontier. I tell you, these hand pies I made last week, their crust was flaky and crunchy, with big shards breaking off at each bite. It doesn't get better than this.

Today's Saturday. If you've got the time, head to the market, grab one last batch of sour cherries, and make yourself some hand pies. You can freeze them between layers of wax paper, and they'll last for weeks. As you dole them out to family and friends, you'll slow down and enjoy a summer that seems to be flying by.

Sour Cherry Hand Piesadapted from Karen DeMasco and Martha Stewart's crust and cherry pie recipes

Crust recipe makes 1 single-crust pie, or 25 hand pies

For the crust:

1 1/2 cups flour 1 teaspoon salt 2 teaspoons sugar 12 tablespoons (1 1/2 sticks) chilled unsalted butter, cut into small pieces and rechilled 1/4 cup ice water

For the filling: 1 1/2 pounds fresh sour cherries, pitted 2 tablespoons unsalted butter 2/3 cup plus 1 tablespoon sugar 2 tablespoons cornstarch 2 teaspoons lemon juice

1 egg (for eggwash) sanding sugar

If using a food processor, combine flour, salt, and sugar in the processor bowl and pulse to combine. Add butter and pulse several times until butter is in pieces the size of lima beans.

Add half the water and pulse several times. Add the remaining water and pulse again, stopping when mixture forms clumps that bind together. If mixture is still too dry, add more ice water a tablespoon at a time, until dough holds together.

Turn dough onto a floured work surface and bring it together by hand. Divide dough in half, wrap each half in plastic, and refrigerate at least 45 minutes.

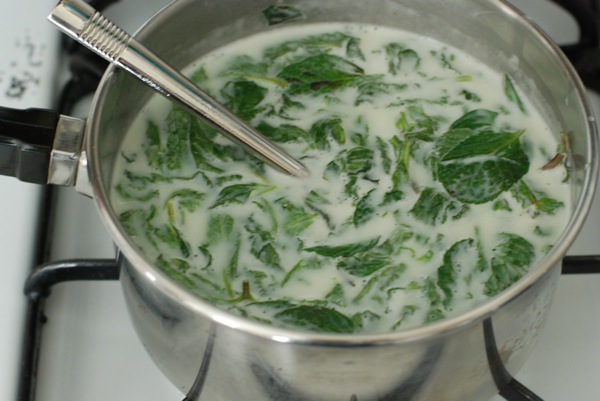
Meanwhile, make the filling: heat the 2 tablespoons butter in a large skillet over medium heat until foam subsides, then add cherries with any juices and the sugar and lemon juice and simmer, stirring, until sugar is dissolved. (Cherries will exude juices.) Transfer a few spoonfuls of the cherry liquid into a small bowl, and add cornstarch, whisking to form a paste. Continue to simmer the cherry mixture until cherries are tender but not falling apart, about 8 minutes. Then stir cornstarch mixture into simmering filling and boil, stirring frequently, 2 minutes. Transfer filling to a bowl and put in fridge.

Preheat oven to 375°F and line two baking sheets with parchment paper or silpat.

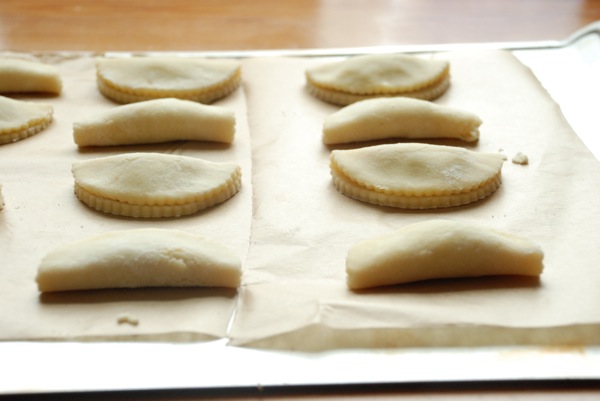
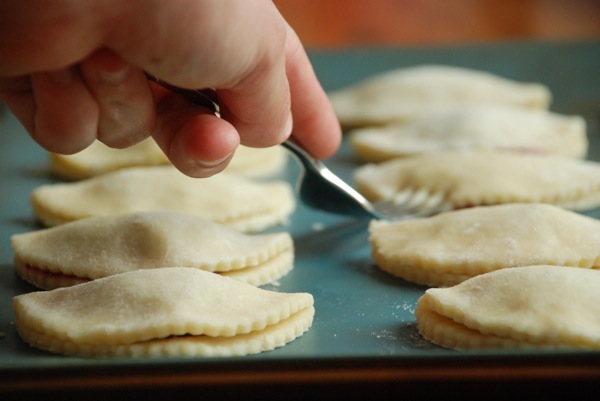
While cherries are cooling, remove one piece of dough from fridge and roll out on floured work surface to  1/8-inch thickness. Use a 4-inch biscuit cutter to cut disks of dough, and transfer disks to one of the baking sheets. When the dough has been cut into disks and one baking sheet is full, gather the dough scraps into a ball, re-wrap in plastic, and return to the fridge. Spoon about 2 teaspoons (depending on size of biscuit cutter) of filling into the center of each disk. Fold each disk over itself to make a half-moon that fully encapsulates the filling, then use the edge of a fork to crimp around the edges of each pie. Transfer baking sheet to the freezer for 10 minutes. Meanwhile, repeat with second half of the dough. Gather the scraps from the second piece, combine with the first scraps, and roll out one last time, repeating steps above. Transfer second filled baking sheet to freezer.

Remove baking sheets from the freezer, and brush pies with egg, then sprinkle with sanding sugar. (Regular or demerara sugar will work just fine.) Use a paring knife to make three diagonal vents in the top of each pie. Transfer to the oven and bake 25-30 minutes, until golden brown. Cool 10 minutes; serve warm or at room temperature. Hand pies can be frozen in an airtight container between layers of wax paper for upto 1 month.

In dessert, pies and tarts
8 Comments

Sour Cherry Compote

June 26, 2011 Rivka
DSC_0499
DSC_0499

It seems my latest attempt to test the temper of this bearable summertime weather has, gleefully, been ignored. DC persists in being comfortable. In June! No, I'm not complaining.

Instead, I'm reveling in the joy of walking down to the farmers' market on Sunday mornings after a workout, all hot and prepared to stay that way, only to encounter 80-degree breezes and precious little humidity. Sacks full of produce, I can walk home without needing the day to recover. Call it the tyranny of low expectations, but it's quite a thrill.

The nice (for summer) weather makes the bounty of East Coast produce an even greater bonus. To wit: I turned on my oven this week to make sour cherry hand pies, and guess what? No one fainted. Success. I'll have a recipe for that soon.

For now, there's this lovely compote, which you should make not next week, not tomorrow, but right now, before sour cherries vanish. It all happens so quickly, and I don't want you to miss out. The beauty of this compote is that it's a cinch to make, and it'll keep in your fridge for weeks, extending the fleeting season of my favorite summer fruit.

DSC_0477
DSC_0477

You might wonder when you'll have occasion to use a compote, but trust me: if it's in your fridge, you'll suddenly find ample uses. Over scones or pancakes; alongside grilled meats; swirled into yogurt; spooned over vanilla ice cream. If those possibilities aren't sufficient, you could eat it straight from the jar. Or use it in these wonderfully sloppy sour cherry pies. Think of fruit compote as a headstart to all other desserts. Crumbles, pies, muffins, ice creams -- all of these would benefit from some compote mixed in.

DSC_0453
DSC_0453
DSC_0486
DSC_0486

Sour Cherry Compoteadapted from Karen DeMasco's The Craft of Baking

4 cups (1 lb.) stemmed, pitted sour cherries (fresh or frozen) 3/4 cup sugar juice of 1 lime (or lemon)

Set a strainer over a metal bowl.

Combine cherries, sugar, and lime juice in a small saucepan and set over medium high heat. Cook -- watching carefully, because it will inevitably bubble over the minute you turn away -- until mixture bubbles and starts to foam, and cherries are soft, about 7 minutes. Pour mixture into strainer set over bowl; cherries will separate from syrup. Pour syrup back into sauce pan, and transfer cherries to the metal bowl.

Cook syrup over medium-low heat (you're looking for a simmer here) until reduced by half, about 10 minutes. Remove from heat and cool about 10 minutes more.

Put cherries into a glass jar, and pour syrup over cherries. Refrigerate. Compote will keep in the fridge for a few weeks, if it lasts that long.

In condiments, dessert, easy
7 Comments

Mint Chocolate Chip Ice Cream

June 18, 2011 Rivka
DSC_0128
DSC_0128

DC's pulled some fast ones this summer. I keep expecting those terrible Washington heat waves, and not that we haven't had a couple -- remember the day when I ate my way through a chili cook-off in 105-degree weather? dumby -- but on balance, this city is seeming suspiciously temperate.

Still, I'm not one to press my luck. It wants to be 77 degrees out? Fine by me. And if Murphy's Law is worth anything at all, I'm crossing my fingers that making ice cream might keep the summer demons away just a little bit longer.

DSC_0103
DSC_0103

Not just any ice cream, mind you. In this house, mint chocolate chip ranks right up there with mango, strawberry, and cucumber-basil as one of the most refreshing ice cream flavors there is. It's an old favorite of D's: she tends to alternate between it, oreo, and chocolate chip cookie dough. It's probably obvious if you read this blog that I'm not big on either of those other two, but D surprised me with a trip to Portland over Memorial Day weekend, and I can't let the wife-of-the-year award go to her completely uncontested. Enter homemade mint chocolate chip ice cream.

DSC_0114
DSC_0114

Here's the strange thing about homemade mint chocolate chip ice cream: it tastes almost nothing like store-bought variety -- something that, even after years of replicating store-bought items at home to great success, I actually didn't anticipate. In retrospect, it makes perfect sense. The main flavor in the homemade stuff that doesn't come through in Breyer's or Haagen Dazs is a distinctly green flavor, like you chopped up fresh mint, steeped it in milk, and then made ice cream. (Oh, right. That is what I did.) The milk tastes somehow sweeter and fruitier, the chocolate not in big hunks but in dainty drizzles, resulting from the "stracciatella" technique of splattering melted chocolate into the freezing custard in thin threads. Quite frankly, it's the best mint chocolate chip ice cream I've ever had. I'm pretty sure it earned me some points - makin' a strong bid for wife of the month, at least.

DSC_0123
DSC_0123
DSC_0131
DSC_0131

Mint Chocolate Chip Ice CreamAdapted from David Lebovitz's The Perfect Scoop

1 cup whole milk 1/4 cup (150 g) sugar 2 cups heavy cream pinch of salt 2 cups (80 g) lightly packed fresh mint leaves 5 large egg yolks 4 oz good bittersweet chocolate, chopped

Warm the milk, sugar, 1 cup of cream, and salt over medium-low heat. When milk mixture is warm, add mint leaves and stir into milk. Cover pan, remove from heat, and let steep about 1 hour. When this process is completed, the milk should look ever so faintly green. It's very exciting.

Strain the milk into a medium saucepan (you can strain it into a bowl and then back into the same saucepan as before), pressing hard on the mint leaves to extract as much flavor as possible. Discard mint leaves. Pour the remaining cup of cream into a fairly large bowl, and set aside.

Set the mint-infused milk over medium heat to rewarm. In a separate bowl, whisk the egg yolks thoroughly. Once the milk has been rewarmed, add ladlefuls of the milk to the egg mixture to temper the eggs - work slowly to avoid scrambling the yolks. Once you've added a few ladlefuls of the milk to the eggs, pour the egg-milk mixture into the remaining warmed milk, and whisk to combine. Set over low heat. Stir constantly with heatproof spatula or wooden spoon, as mixture gradually thickens. Make sure the heat is as low as possible to avoid curdling your custard. When mixture coats the back of a wooden spoon (or spatula), it's done; remove it from the heat, and pour through a fine-mesh strainer into the bowl with the remaining cup of cream.

Freeze ice cream according to your ice cream maker's instructions.

While ice cream churns, melt chocolate in a double boiler until completely smooth.

At the very end of churning - we're talking right before you transfer your ice cream to a container - drizzle melted chocolate into ice cream maker while running, so that the chocolate distributes itself in thin threads into the ice cream. Freeze thoroughly before serving.

In dessert, gluten-free
7 Comments

How to Use: Ginger

December 5, 2010 Rivka
DSC_0434.jpg

Until recently, I'd always bought ginger at the grocery store. It always looked kind of dry and gnarly outside, but I'd learned that peeling it revealed a soft, fresh, meaty interior, as great in stir-fry as it was steeped in tea. But last year, I learned that the folks at Next Step Produce, a local farm, were selling the knobs of fresh ginger at the Dupont farmers' market. The stuff was sort of legendary; a certain Jeremy Brosowsky had been singing its praises for months, and when fall finally rolled around, I was eager to pick some up. The fresh ginger was approximately 5,723 times more expensive than the stuff at Harris Teeter, so I had high hopes, and I wasn't disappointed. The flavor was smoother and sweeter, and yet more pronounced. It was also easier to slice. I was hooked.

I already was pretty big on ginger, but once I had the fresh stuff to play with, I couldn't stop. D can attest, since she's not very into it. I continue to insist that if she'd only give it a chance, she might like it. Quite the stubborn wife, aren't I?

If you're a ginger lover, welcome to heaven. If you're a hater, please, don't click away. Humor my insanity stubbornness -- ginger is great. I'm doing my darnedest to convince you, if not with the recipes that follow, then with some fun facts: ginger is one of the few tubers that's great in both sweet and savory preparations. Its spice brings depth to soy marinade, and it also does wonders in ice cream. Research has also shown that ginger has medicinal properties. (Yes, I just linked to wikipedia. Sue me.)

Ok, to the good stuff. Here are some creative and/or delicious ways to use ginger.

In tea. Ginger makes a fantastic hot drink. Whether you're dropping a few slices into a cup of lemon tea or simply steeping it with hot water and honey, its flavor is strong and pungent; a glass of anything ginger-infused will clear your passages on the spot. Other flavors that work well infused along with ginger are cinnamon, maple, and apple. Add a few slices to mulled cider; you won't be sorry.

In marinade. One of the best uses for ginger is in marinade. As in ice cream, the pungency softens as it soaks, and perfumes whatever it coats, be it something as robust as beef or as bland as tofu. Below is one of my favorite marinades, from a recipe for tuna in Bon Appetit

Ginger-Chile Marinade

3 tablespoons unseasoned rice vinegar 2 tablespoons finely grated peeled fresh ginger 2 tablespoons peanut oil 2 tablespoons Asian sesame oil 2 tablespoons soy sauce 2 tablespoons honey 1 tablespoon chopped fresh cilantro 1 serrano chile, seeded, minced

Fried. Minced fried ginger is one of my favorite additions to Asian dishes. I think the first time I did it was when I made this Ginger Fried Rice, and since then, I've added it to countless similar dishes. Just as fried garlic is lovely over pasta with olive oil and parmesan, fried bits of ginger take ordinary fried rice, braised tofu, or cabbage slaw to a new level.

In Ginger Ice Cream. Seriously, my favorite ice cream flavor is ginger. The cream and egg yolks smooth out ginger's rough edges and counterbalance its spice. I've included my ginger ice cream recipe below, which is an adaptation of one from the great David Lebovitz.

Ginger Ice Cream

3 ounces of unpeeled ginger 1 cup whole milk 2 cups heavy cream 3/4 sugar Pinch of salt 5 large egg yolks 1/2 cup crystallized ginger, chopped (optional)

Cut ginger into thin slices. Place ginger in a medium saucepan, add enough water to cover the ginger, and bring to a boil. Boil for 2 minutes, then drain, discarding the liquid.

Return the blanched ginger slices to the saucepan and add milk, half of cream, sugar, and salt. Heat the mixture until hot but not boiling, then cover and remove from the heat. Let steep at room temperature for 1 hour.

Rewarm the ginger-milk mixture. Remove the ginger slices with a slotted spoon and discard. Pour the remaining cup of cream into a large bowl and set a mesh strainer overtop.

In a separate medium bowl, whisk the egg yolks. Slowly pour the warmed mixture into the egg yolks, whisking constantly, then scrape the warmed egg yolk mixture back into the saucepan.

Stir the mixture constantly over medium heat with a heatproof spatula or wooden spoon, scraping the bottom and corners of the pan as you stir, until the mixture thickens enough to coat the back of the wooden spoon. Pour the custard through the strainer into the cream, and stir to combine.

Chill the mixture thoroughly in the refrigerator, then freeze it in your ice maker according to instructions If using crystallized ginger, add when ice cream looks like soft serve frozen yogurt, about 2 minutes before it has finished churning.

Make Ginger Simple Syrup.

If you've got leftover ginger lying around and you don't know what to do with it, here's a tip: make ginger simple syrup. Simple syrup will capture the ginger flavor and extend it indefinitely (the stuff has serious shelf life). Store it in a small jar in your fridge door, and you'll find countless ways to use it: add it to a glass of bourbon, drizzle it in tea, or make this easy summer cocktail, the Tamarind Ginger Fizz.

And there you have it: a smattering of ideas for what to do with ginger. Hopefully I've enticed you ginger lovers and converted some of the ginger haters out there!

Before you go, do me a favor and take my survey about what ingredient I should feature on the next How to Use. The last box is blank: if you're not keen on any of the options I suggest, feel free to write in your own.

[SURVEYS 1]

In dessert, how to use---
8 Comments
← Newer Posts Older Posts →

Subscribe by email:

  • books (1)
  • crisps and crumbles (1)
  • frozen (1)
  • toys (2)
  • gifts (3)
  • egg whites (5)
  • fried (5)
  • how to use--- (6)
  • drinks (10)
  • menus (11)
  • travel (11)
  • fish (12)
  • kosher for passover (14)
  • thanksgiving (14)
  • vegan (20)
  • snacks (21)
  • techniques (21)
  • soup (26)
  • bread (28)
  • pies and tarts (28)
  • cake (33)
  • events (34)
  • condiments (36)
  • various and sundry (39)
  • uncategorized (42)
  • cookies and bars (46)
  • weekday lunch (47)
  • appetizers (48)
  • salad (51)
  • gluten-free (56)
  • comfort food (61)
  • breakfast and brunch (77)
  • sides (81)
  • dessert (90)
  • main dishes (100)
  • healthy (139)
  • easy (155)
  • vegetarian (180)

| LATEST |

Featured
Blue Chair Fruit's Black Raspberry Jam
Thai Grapefruit Salad
Mango Sticky Rice
Winter 2016: Odds and Ends
Povitica: The Best Babka Ever
Persimmon Walnut Bread
Sprout Chaat Salad + New Site!
Maple Walnut Squares
How to Give Thanks
Croissants (really, I made croissants) + other croissant-ish things

| hEALTHY |

Featured
Sprout Chaat Salad + New Site!
Fennel frond pesto + what to do with those pesky stalks
Asparagus Toasts with Pistachios and Mint
Eggplant-Walnut Pâté + Passover Ideas
1-DSC_0861-600x401.jpg
Lentils and Rice with Tamarind Sauce and Dukkah
Big Kale Salad with Pomegranate and Feta
Punchy Crunchy Ginger Salad

| BreakfAST |

Featured
Povitica: The Best Babka Ever
Croissants (really, I made croissants) + other croissant-ish things
Mushroom and Kale Breakfast Strata
Barley Porridge with Orange and Black Sesame
Ramps 'n' Eggs Biscuit Sandwiches
Asparagus Toasts with Pistachios and Mint
Apple-Cheddar Scones with Sage
Menemen - Turkish Eggs with Tomatoes and Peppers
You must select a collection to display.

© 2016 Rivka Friedman. All Rights Reserved.