Baked Oatmeal

baked-oatmeal.JPGBy now you all know that Sunday morning breakfast is practically an institution in this house of mine. Usually, it involves some form of yeasty, delicious bread, from apricot couronne to challah french toast to the fall-favorite, spiced pumpkin bread. This morning, D and I and our house guest Eric somehow managed to sleep past the crack of dawn, and when we rolled out of bed at 10, making bread for breakfast was totally, like totally, out of the question.

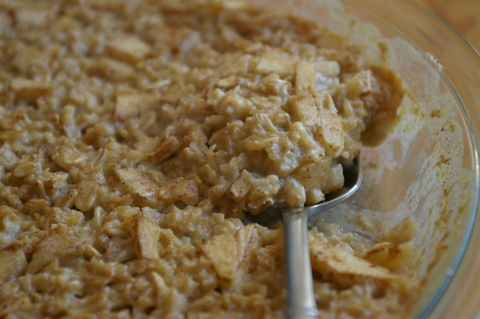
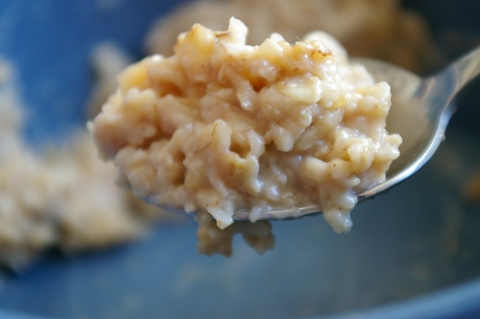
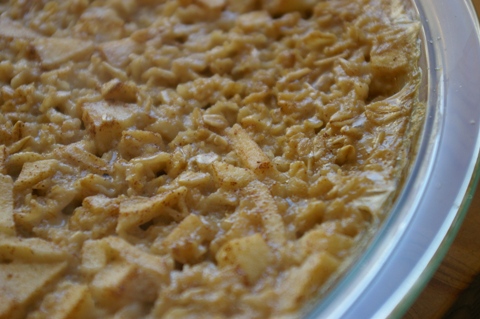
Sprawled horizontally on the couch, I started thinking about recipes that take little-to-no effort. Baked rice pudding instantly came to mind: I remember marvelling at how fantastically easy it was to make such a flavorful and luscious (and not all too unhealthy!) dessert. Inspired by the laziness of my rice pudding adventure, I decided to try the same technique with oatmeal. Granted, oatmeal doesn't require the stirring and monitoring that rice pudding does -- just zap it in the microwave and voila! you're good to go. But nuked oatmeal lacks the crust that I was so craving this morning (being without my bread and all.) Baking oatmeal would likely create a crisp exterior, which, when cracked, would yield soft, plump oats. And all it would involve was mixing everything together, transfering to a pan, and tossing in the oven. The whole thing sounded really promising. The result? Delicious, though I will say that I'd change a couple things the next time. And yes, dear readers, you will be privy to the lessons learned from my mistakes, so that you may make baked oatmeal perfectly the first go-round. Lucky you. :)

Lesson 1: a pinch of salt makes all the difference. Fortunately, I discovered this before serving, so I added a dash to each bowl and gave them a good mix before giving them to my eager taste-testers. It really is true that salt intensifies other flavors. Just a pinch helps balance the sugar and the creamy texture of the milk.

Lesson 2: A brulee-like top adds a dimension of luxury to an otherwise-rustic dish. This can be achieved in a variety of ways, not the least of which is sprinkling the finished product with sugar and crisping it with a torch. If you have a less-equipped kitchen, simply sprinkle sugar on top with three minutes remaining, turn the oven up to 400 degrees, and bake it off until the sugar has browned. This whole step, of course, is optional.

Lesson 3: Tart fruit are a key contrast to the sweet creaminess of the oatmeal. I used apples, but not enough; assume at least 2/3 cup of chopped tart fruit (peaches, plums, apples, and raisins are all excellent choices) for 1 cup of oats.

Now, without further ado....

spoon-full-of-baked-oatmeal.JPG

Baked Oatmeal serves two, but easily doubled

  • 1 cup oats
  • 1 1/3 cups milk (I used 2%, but any sort will do)
  • 2/3 cup water
  • 1 tsp cinnamon
  • a dash nutmeg
  • 2/3 cup (at least) chopped tart fruit, such as apples, raisins, cherries, nectarines, plums, peaches, etc.
  • 1/4 cup brown sugar, honey, or maple syrup
  • pinch of salt
      1. Preheat the oven to 350 degrees.
      2. Mix all ingredients in a mixing bowl.
      3. Stir to combine. Make sure that sugar begins to dissolve.
      4. Lightly spray a shallow baking dish (I used an 8" casserole, but any old dish will do.)
      5. Pour mixture into dish, and transfer to oven.
      6. Bake 40 minutes, or until all most liquid has evaporated.
      7. If desired, sprinkle with sugar when oatmeal is nearly finished, crank the oven to 400, and bake off until sugar has browned.
      8. Add more milk to serve, if desired.
      9. spoon-baked-oatmeal.JPG

Easy, Healthy Butter Bean Stew

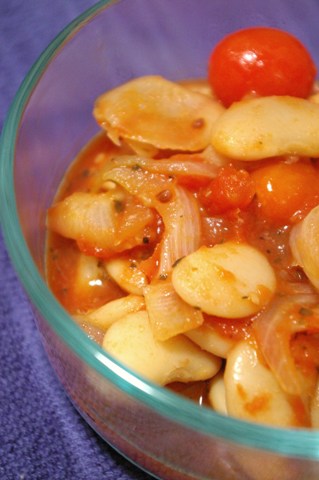
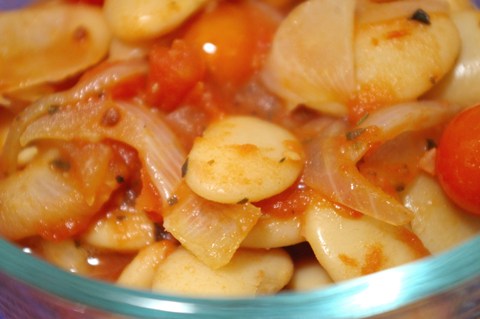
stew Bet you never thought you'd see "healthy" and "butter" next to each other in the same sentence!

Last night, after heating up some broth for a very sick D., I moseyed back to the kitchen to figure out dinner for myself. The fridge was pretty cleaned out, save some pretty blood oranges, 6 grape tomatoes, and a bit of leftover fennel. But fear not, dear readers! A few ingredients really do go a long way. I feel a little bit like Rachael Ray when I say this, but a delicious and healthy meal really is only 30 minutes away.

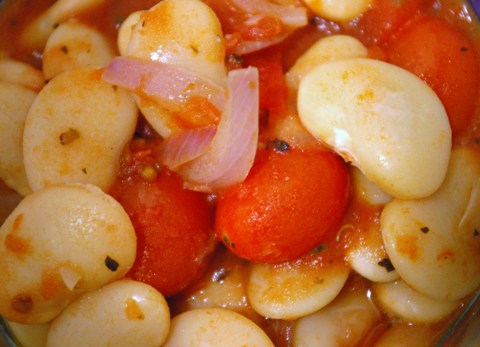
close-up Will you roll your eyes if I say this was not a recipe? Fine, you win. Here's the recipe, but please, pretty please, feel free to adapt this in any way you see fit. If you've got regular white beans, they'll do just fine (though I do love the starchy, buttery texture of butter beans, hence called). If you wish, add some feta cheese and parsley. This can go in any number of different directions, all equally easy and delicious.

Butter Bean Stew

  • 1 Tbsp. olive oil
  • 1 shallot, chopped
  • 2 cloves garlic, chopped
  • 1 tsp. each dried oregano and dried basil
  • 1 bay leaf
  • piece of a parmagiano reggiano rind, if available (feel free to substitute other cheese such as feta)
  • 1 cup crushed tomatoes
  • handful grape or cherry tomatoes
  • For this one-pot wonder, I tossed some chopped garlic and shallots in a Tbsp of olive oil, let them sweat for a couple minutes, added salt, pepper, a bay leaf, and a Tbsp. each of dried oregano and dried basil. Then I drained and added a can (yes, a can!) of butter beans, and tossed them around to coat. I added a piece of the rind from parmigiano reggiano cheese. Then I added a bit of leftover canned crushed tomatoes (I'd estimate about 1 cup or so) and the six cherry tomatoes I had. I don't need to tell you to add more if you have more...

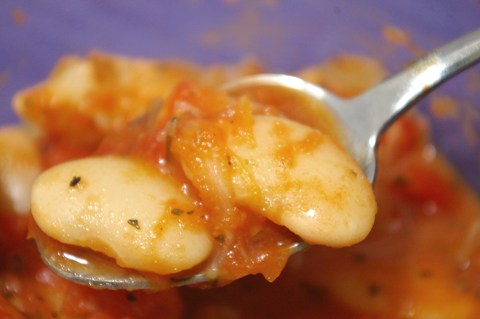
    From this point on, you basically just watch the whole thing simmer away until you can't stand it any longer. If desired, add some water to keep a thinner consistency. I lasted about 15 minutes -- plenty of time for all the flavors to come together. Ladel into a bowl atop a nice, crusty crouton or piece of toast, and enjoy just so. spoonful

Simple antipasti

In Italy, antipasti are meant to whet your appetite. (Granted, when I ate out in Italy, my appetite needs little whetting -- what with all the whiffs of freshly-made pasta and roasted tomato sauce drifting from the kitchen to my table.) Nonetheless, in Italy, antipasti are simply appetizers, mere preludes to the main dish. In my house, they're just part of the meal. After all, roasted vegetables with a splash of quality balsamic vinegar and just the right amount of good olive oil make a perfect accompaniment to whatever's being served. In my humble opinion, they need not precede the main course -- in fact, they do just fine right alongside it. By far the best thing about antipasti is their simplicity. Season, drizzle, and roast, that's all there is to it! These simple steps work wonders for eggplant, zucchini, onions, tomatoes, even sweet potatoes. The trick is to slice thinly, and flip once half-way through the roasting process so that both sides crisp up. If you're sparing with the oil, as I am, best use a pastry brush, which will spread the oil over the entire surface without soaking them all too much. And while cooking spray is fine for the pan, I strongly recommend sticking to real olive oil for the vegetables themselves; olive oil is a strong player in the saturated, concentrated flavor that antipasti develop. I can safely say that this "recipe" has no recipe, but a method, instead: slice whatever vegetables you use about 1/4-1/8 inch thick, as uniformly as possible. Line a roasting pan with a single layer of vegetables. Brush each side with olive oil, sprinkle salt and pepper, and add herbs if you like (I favor sage for eggplant, and rosemary with sweet potatoes, onion, and a new addition -- turnips). Bake at around 400 degrees for 15-20 minutes until the tops are browned; flip, and bake another 10-15 minutes. Check regularly to avoid burning (which I unfortunately have a tendency to do!). Once the vegetables are out of the oven, transfer to a platter, drizzle with good balsamic vinegar, add salt and pepper to taste, and bring to room temperature before serving.

Carrot Soup

It's already December and I still haven't posted a freezable soup recipe? Can't be. My nose is red and my paws are frosty these days. If only it were possible to have the kettle whistling by the time I walked in the door, so that I could instantly hold a piping hot mug of chai after weathering the cold. Until someone invents that kettle, there's frozen soup. There're few things easier than popping a soup-filled ziploc out of the freezer and nuking your dinner on a cold winter night. Start to finish, it only takes 4 minutes, and the results are just as good, if not better, than freshly made soup. The ingredients have had time to mingle with each other a bit more, so frozen soups often taste flavor-saturated than their fresh siblings. Top the soup with some homemade croutons and you're good to go!

Carrot soup is one of the simplest and lowest-maintenance options for wintertime. Once all the ingredients have landed in the pot, simply cover and hang out by the fire for an hour or two. Then throw it all in the food processor, et voila!

Spiced Carrot Soup serves 4-6.

Ingredients:

  • 2 tablespoons vegetable oil
  • 1/2 cup minced onion or shallot
  • 3 Tbsp. minced peeled fresh ginger
  • 2 tsp. cinnamon
  • 1/2 tsp. allspice
  • 1/2 tsp. freshly grated nutmeg
  • 1/4 tsp. cayenne pepper
  • 1/8 tsp. cumin
  • 2 tsp. salt (if using water; if using chicken stock or broth, no salt is needed)
  • 3-4 cups (or more) chicken stock, chicken broth, or water, as needed
  • 4 cups sliced peeled carrots (about 1 1/2 pounds)
  • 1 cup or so orange juice
  • pinch brown sugar or a couple tsp. maple syrup, if needed
  1. Heat oil in heavy large saucepan over medium-high heat. Add onion or shallot, ginger, salt, and spices, and sauté until onion is translucent, about 5 minutes.
  2. Add carrots, and toss to coat with onion mixture.
  3. Add 3 cups liquid, or enough that liquid covers carrots by about 1 inch. Cover and simmer until carrots are tender, about 30 minutes. Add orange juice, and cook a few minutes longer. If needed, add sugar or syrup to sweeten.
  4. Transfer in batches to the food processor and puree. Adjust the seasoning if necessary.
  5. Transfer pot to fridge and chill; if desired, when soup is just warm, transfer to ziplocs and freeze in 1-serving portions. Be sure to eliminate all air from the bag before closing.

Homemade Croutons

  • leftover bread; I used homemade no-knead bread with whole wheat flour and raisins.
  • pam or olive oil
  • salt and pepper
  1. Preheat oven to 350 degrees.
  2. Slice bread, and cut slices into 1/2-inch cubes.
  3. Lay out cubes in a shallow baking sheet, in a single layer.
  4. Spray with pam or drizzle with oil, and sprinkle generously with salt and pepper.
  5. Bake at 350 for about 10 minutes, then turn oven down to 300 and bake another ten minutes, until crisp.
  6. Allow to cool completely before storing in bags or jars.