• Home
  • About
  • Recipe Index
  • Contact
Menu

Rivka Friedman

Street Address
City, State, Zip
Phone Number

Your Custom Text Here

Rivka Friedman

  • Home
  • About
  • Recipe Index
  • Contact

Menemen - Turkish Eggs with Tomatoes and Peppers

October 14, 2014 Rivka
1-DSC_0308.jpg

It must have been 2005 when I first fell for shakshuka, the Israeli dish of eggs fry-poached in a spicy, oniony tomato sauce. For a few years, I obsessively sought it out at restaurants; eventually, I taught myself to make it at home. There are a few places - like the kitschily named but legit Dr. Shakshuka, in Tel Aviv - that make it consistently well: their whites are always set, their yolks perfectly runny, every time. Back when I lived in Jerusalem, there was a little cafe near my apartment that I loved, but that had a problem with runny whites in their shakshuka. It was either that or a hard yolk, and I wanted neither - so I learned to ask for my eggs "mikushkashot" - scrambled. They happily obliged, and I wound up with soft-scrambled eggs in that same punchy sauce. Don't tell anyone, but I've always liked my invented version better.

At the time, I thought shakshuka was something unique that you could only find in Israel. I should have known better: nearly every wonderful "Israeli" food, from falafel to shawarma to hummus to labneh, was cribbed from another Middle Eastern culture. Shakshuka is no exception; it's originally from North Africa, or so I understand from Google. And now, of course, it's on trendy menus all over the country. Shakshuka has hit the big time.

1-DSC_0301.jpg

Israel isn't the only copycat. It seems every culture has its own name and nuanced method for cooking eggs in tomatoes. There's the classic Eggs in Purgatory (...is it a classic? I did a bit of poking for historical origins of the dish, and aside from finding several mentions of "Catholic" and "uovo in purgatorio," I came up short), and some folks have added more chile and renamed the dish Eggs in Hell. But the version I've come to love more recently is called Menemen, hailing from Turkey, which is basically the hacked-up version of shakshuka I've been ordering and making all along. Apparently, I didn't invent it after all. But all the good cooks steal ideas from each other, so the copycat badge is one I'm proud to wear.

Like shakshuka, menemen is a dish you'll like more if you make it your own. My brother and the internet have taught me that some like their menemen chunky - with defined pieces of egg, tomato, and pepper - and others like the dish reduced to almost a custard, where everything sort of blends together. I'm not quite at the point where I can control exactly how it comes out, but I tend to make it - and like it - somewhere between the two extremes.

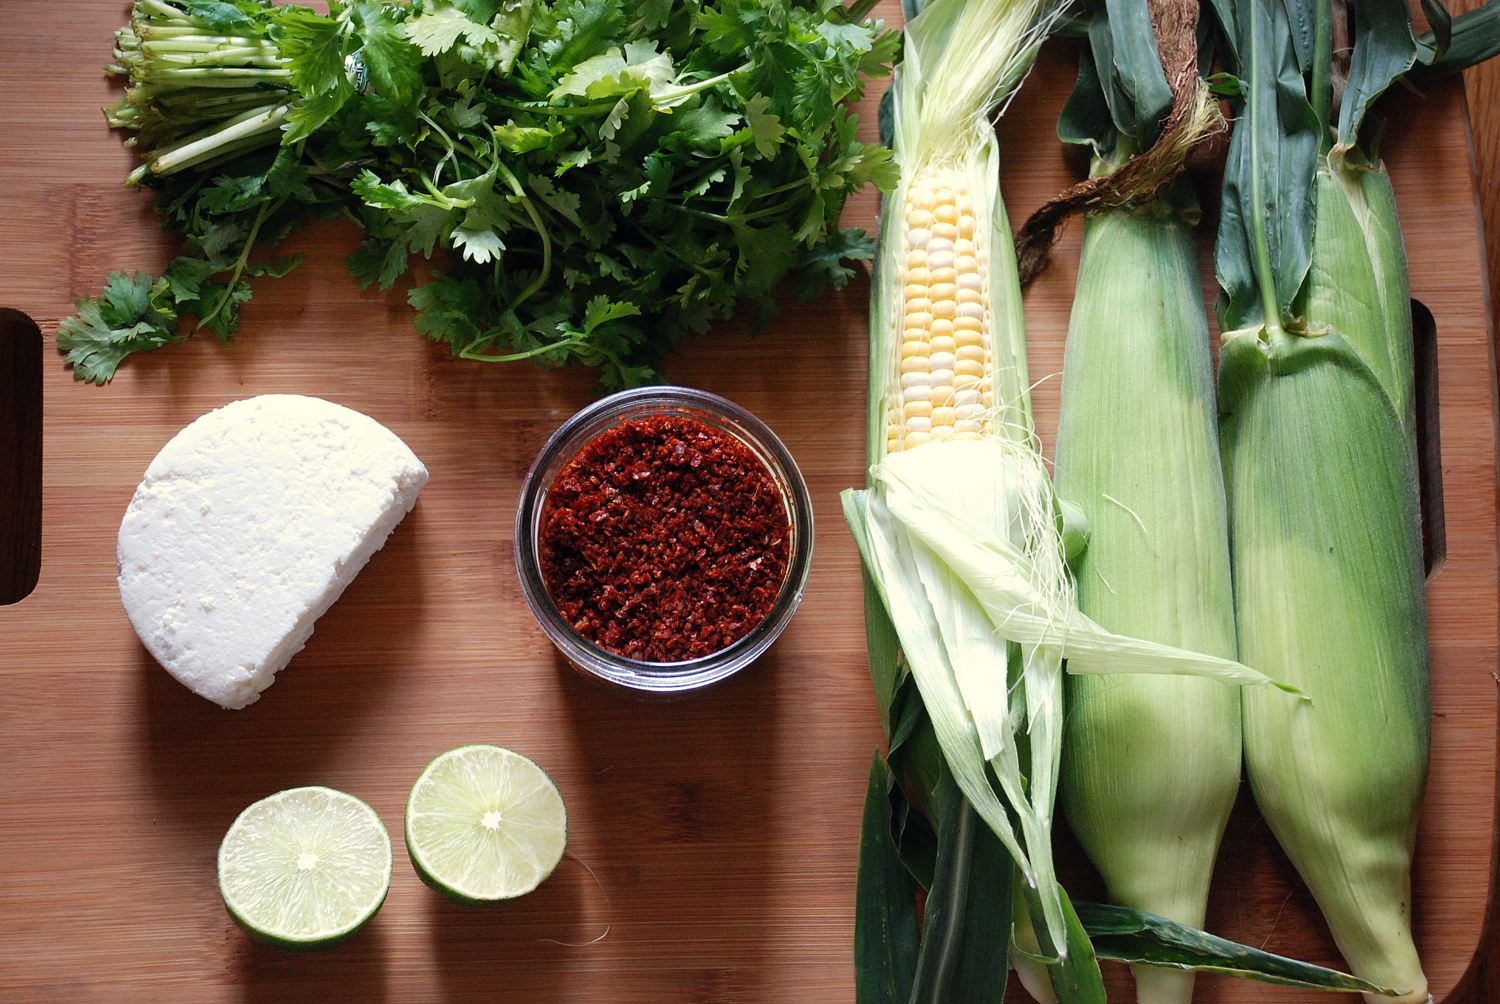
According to my bro, the best menemen has a good mix of tomato and pepper, and plenty of egg - which, in Turkey, doesn't always happen; eggs are more expensive than vegetables. His favorite menemen also keeps the tomatoes on the slightly liquidy side, which I also enjoy (though it makes cooking the eggs a bit more challenging). And - shock! - he likes his menemen with beyaz peynir, which is like a mild feta, or tulum, a grassy Turkish goat's milk cheese. And plenty of pul biber, a Turkish condiment of chile and salt.

1-DSC_0304.jpg

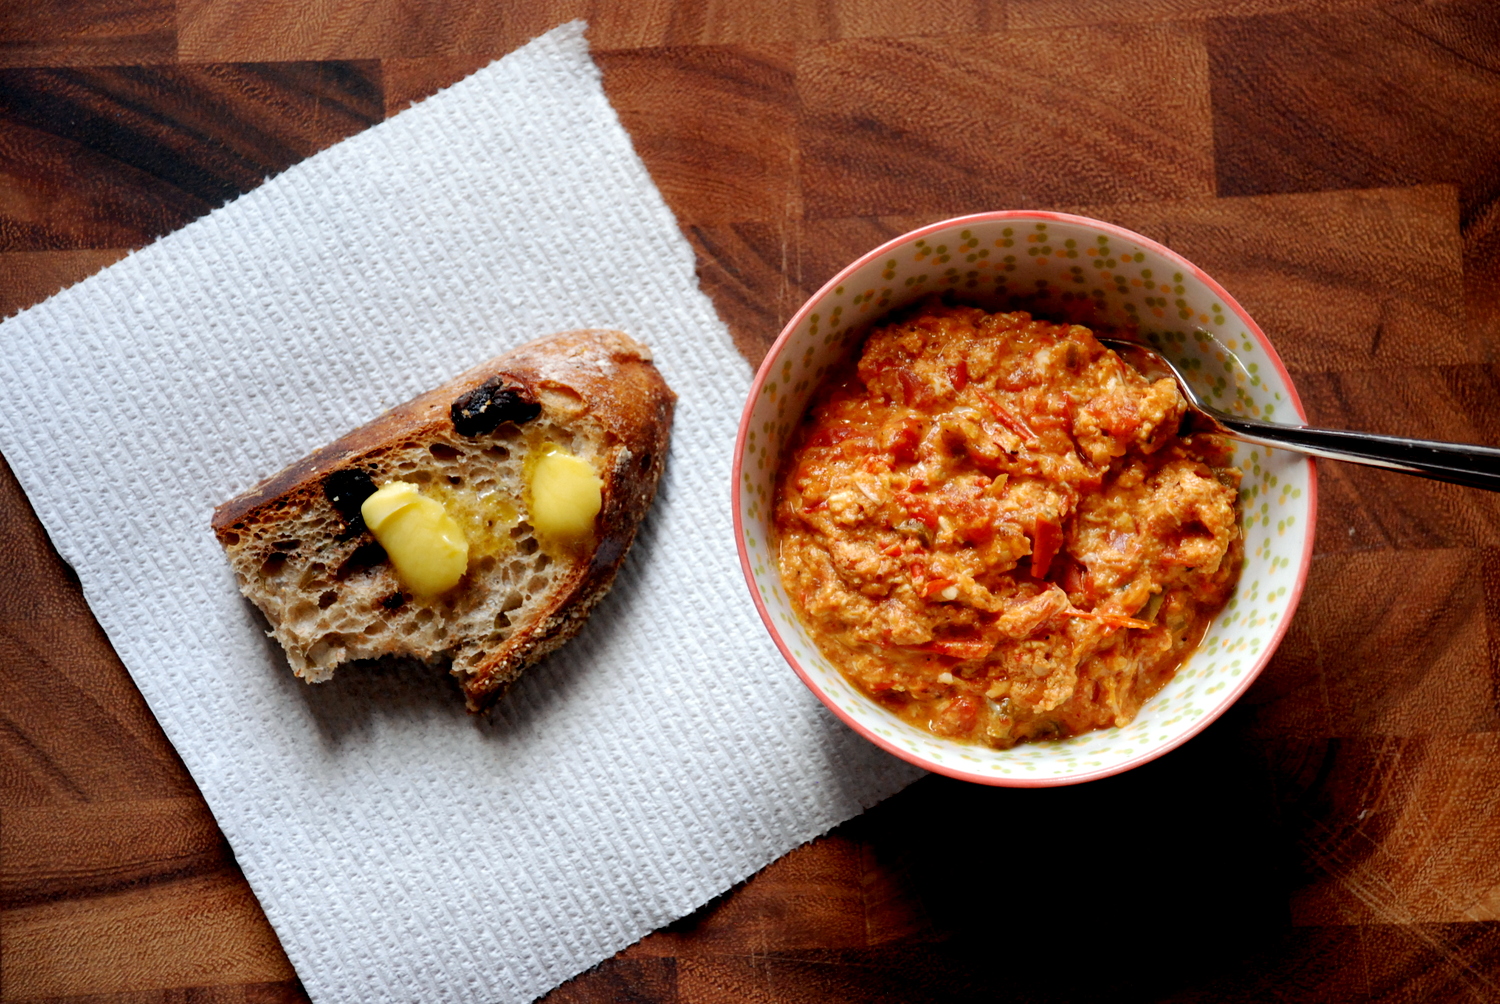
So that's the fully-loaded version. But I tend to keep things pretty simple: onion, tomato, pepper, some chile, eggs. A hunk of good bread to sop everything up. That's a happy morning in my book.

I broke the news to my brother that I'd be posting about menemen, and he said he'd try to get me a menemen set the next time he goes to Turkey. Who knew there were menemen sets? Turns out, because you're supposed to serve it in the same dish in which you cook it, there are beautiful stove-safe bowls - made of hand-formed metal - specifically for menemen. I'd love to get my hands on one of those eventually, but for now, a good old skillet and bowl do the trick.

What's your favorite way to eat eggs and tomatoes? You know you have one - now share it.

Menemen - Turkish Eggs in Tomatoes and Peppers Serves 2

Like all egg dishes, menemen is deeply personal. I like my peppers to retain some crunch; I prefer my tomatoes a little runny, even though it makes cooking the eggs harder; and I like my eggs less custardy, with some defined curds. With both personal preferences and stoves so idiosyncratic, it seemed silly to offer cooking times. I've done it anyway, but more important are the signs that my menemen is ready for the next step. Those trump cooking times here. If you want your peppers/tomatoes/eggs firmer or softer, then by all means. Make this dish your own.

2 tablespoons olive oil
1/2 a small onion, diced
2 long green (non-spicy) peppers, seeded and chopped (or substitute a bell pepper)
2 large tomatoes, chopped
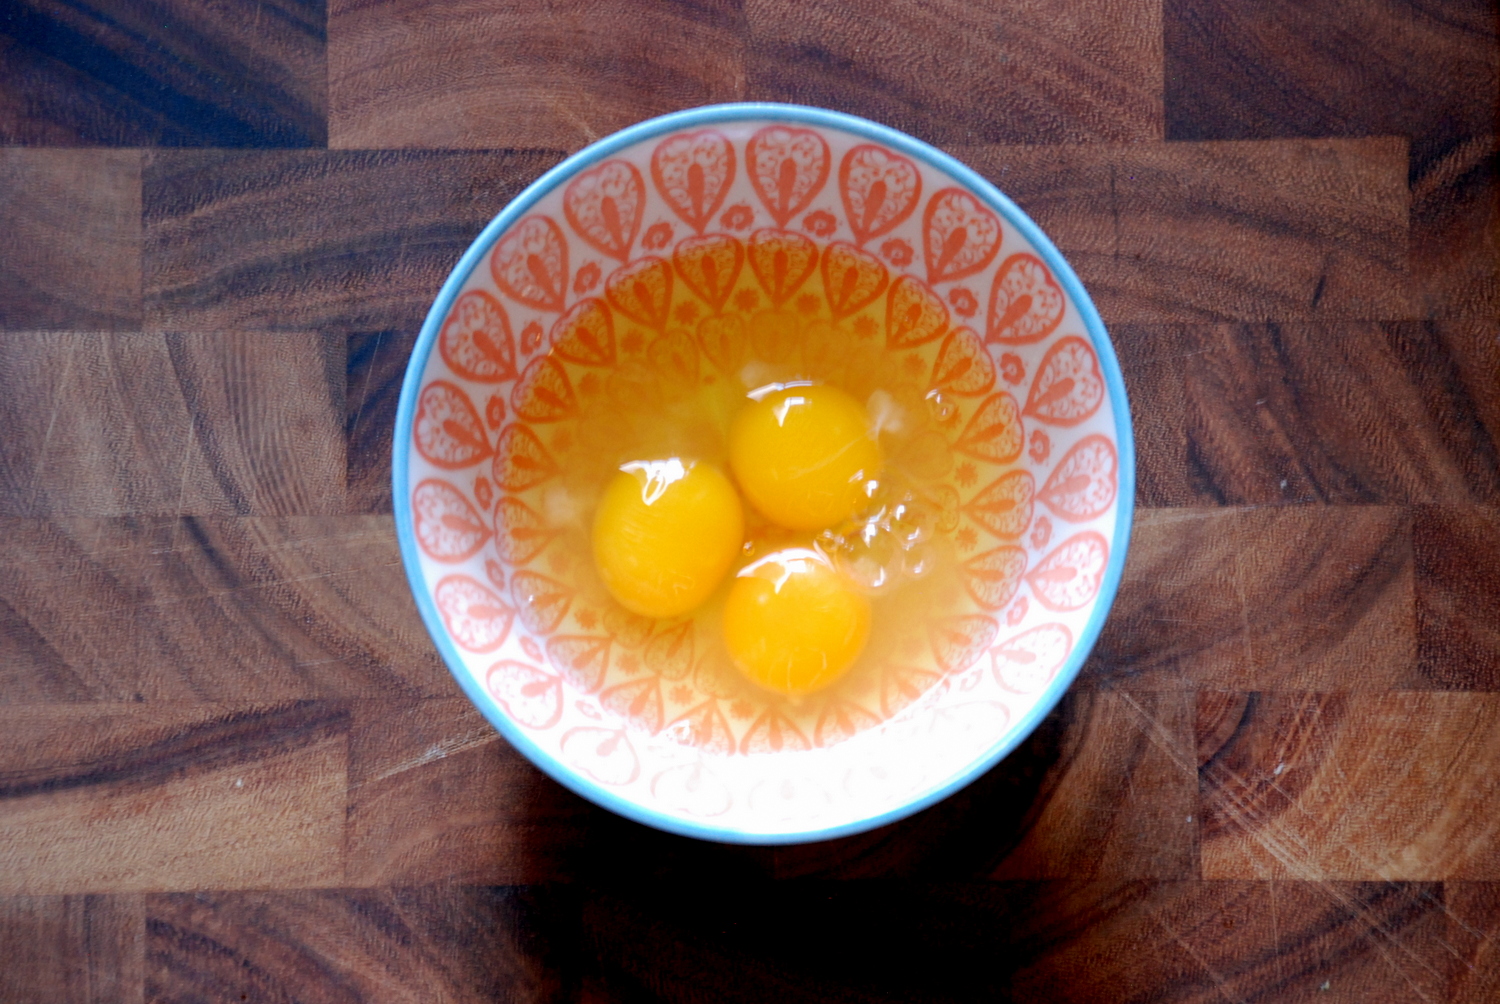
2 eggs
salt z
1/2 teaspoon of your best semi-spicy red pepper flakes - ideally Turkish or Aleppo pepper
cheese, olives, more pepper, parsley, or whatever else you'd like to incorporate (optional)
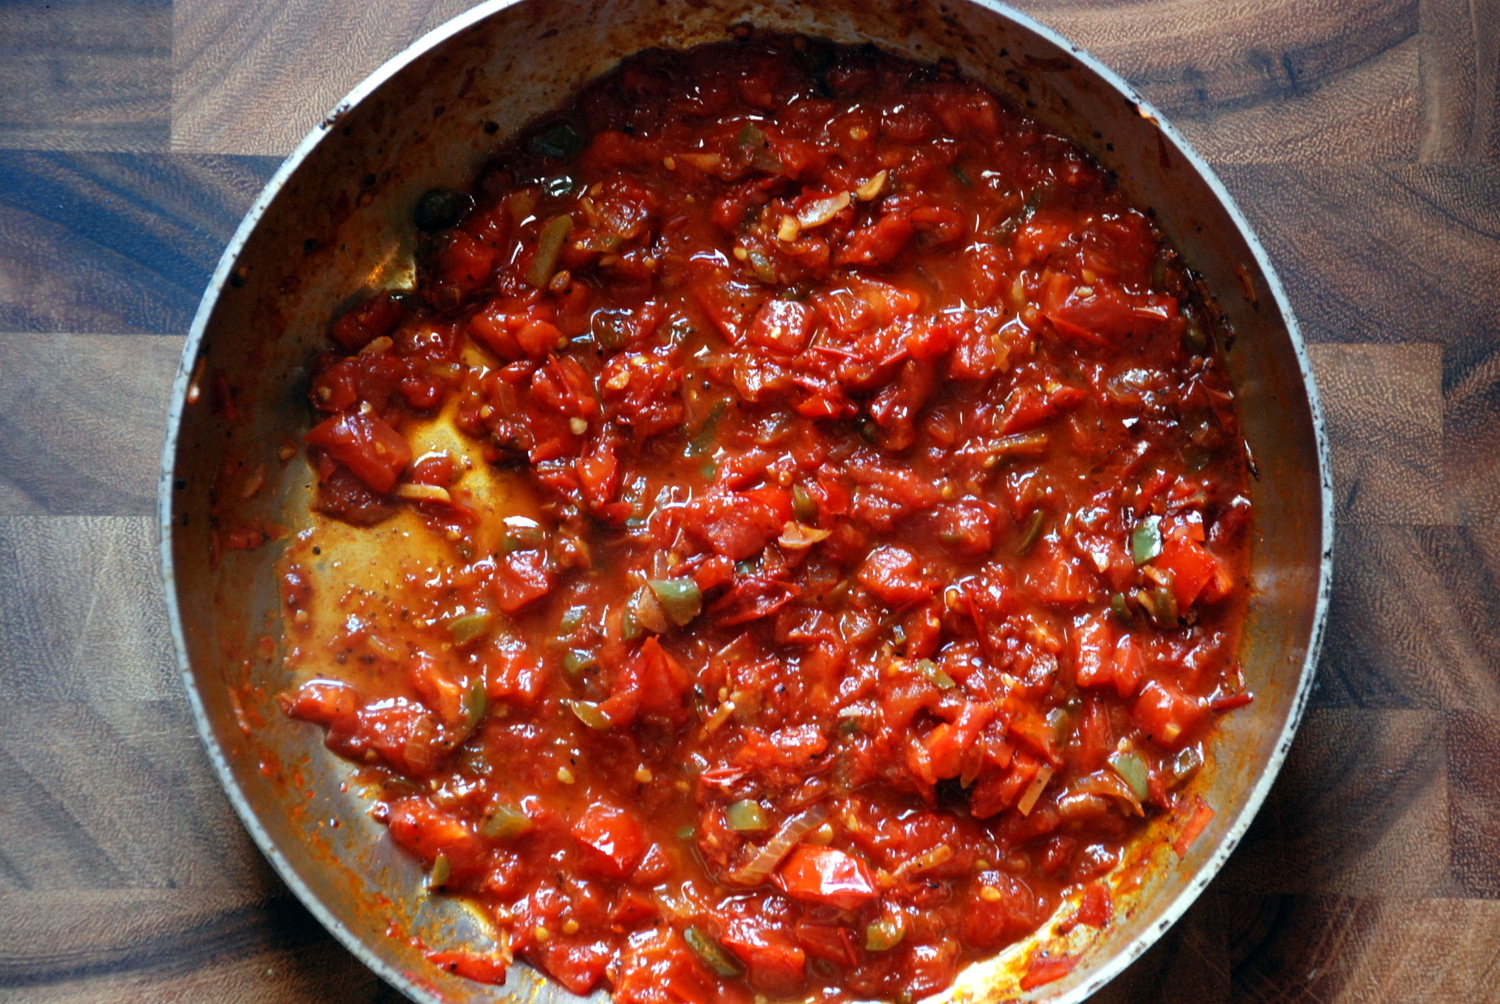
crusty bread (less optional)

Add the olive oil to a large frying pan (stainless steel, cast iron, and non-stick all work) and set over medium heat. Add the onion and peppers with a pinch of salt. Give a few tosses, and cook until onions take on light color and everything smells fragrant but peppers are still somewhat firm, about 3 minutes.

Add tomatoes, another pinch of salt, and the pepper. Give a good stir, and let them cook until much, but not all, of their liquid has evaporated and they look saucy, about 4 minutes more.

Lightly beat eggs with a pinch of salt in a small bowl. When tomato mixture is ready, add eggs all at once, and use a wooden or silicone spatula to gently fold them into the tomato mixture. Because I like curds in my menemen, I take care to fold them only occasionally; if you prefer a more uniform dish, you can stir it slowly but continuously. Either way, you're looking for the whites to almost cook through. They should be basically opaque when you plate the menemen, as they'll continue cooking for a few seconds off the heat, but not much. If you prefer very runny eggs (and the uncooked whites don't bother you), you can add the eggs, stir a few times to incorporate, and transfer the menemen to bowls almost immediately. Your choice.

Serve menemen with any of your preferred fix-ins, and crusty bread on the side.

In breakfast and brunch, gluten-free, vegetarian, easy, healthy
-1 Comments

Okra Curry

October 1, 2014 Rivka
1-DSC_0675.jpg

A long while back, I got into a major Indian food kick. I made dosas (but really, really good dosas), eggplant curry, sambar, mushroom muttar curry, and more. I bought and made chutneys and stocked way too much ghee and ate as much Indian food as I could get my hands on.

Summer seems to call for a hiatus from piping hot bowls of curry, but now that fall has arrived, I'm back on the bandwagon. It's still early for long-cooked food, but this okra comes together quickly and tastes fresh - the perfect transition into September.

1-DSC_0651.jpg

I posted about this on Instagram when I made it on a whim a while back, but since then it's become enough of a regular that I felt it deserved a proper post. I still see okra at most of our markets (not to mention growing from the pot on our walkway - my neighbor is quite the gardener!), so there's still time to make this before okra is gone.

1-DSC_0659.jpg
1-DSC_0668.jpg

In case I lost you way back with scary thoughts of slime, rest assured: this curry is not slimy. Just look at the photo above - see mom? No slime! A few tips to avoid the goo:

  • I've found slime more likely in large okra and in okra that isn't super fresh. The smaller and fresher the pieces, the better.
  • When cutting your okra, keep a paper or cloth towel close at hand. Wipe the knife often - after every two or three pieces - and you'll minimize the goo.
  • Lastly, and you'll see this in the recipe below, cook the okra all the way before adding the sauce. You want those pieces crisp and browned, maybe even a bit shriveled. By the time you add the sauce, there won't be any slime to speak of, and your okra will end up silky, but not gummy.
1-DSC_0680.jpg
1-DSC_0684.jpg

Off to the races, folks.

Okra Curry

As noted above, you want the okra to be fully cooked before it's added to the sauce. This will minimize slime in the curry. The only other thing I wanted to mention is that while a cast iron pan works great for cooking the okra, the sauce should really be made in a stainless steel pan, since acid can ruin the nonstick surface of good cast iron. -R

1 quart okra
3 tablespoons ghee or vegetable oil
1 medium onion, diced
1 thai chili (or use a serrano), seeded and diced
1 teaspoon black mustard seeds
1 1/2 cups tomato puree
2 tablespoons tamarind puree
1/2-inch knob fresh ginger, grated
salt

Trim stem ends of okra and slice lengthwise in half or quarters, depending on size. Keep a towel nearby as you slice; if you notice the knife getting slimy, wipe off your knife before continuing. This will help minimize slime in the final curry.

Heat 1 tablespoon of ghee or oil in a large saute pan (cast iron and stainless steel both work) over medium-high heat. Add enough okra to sit in a single layer in the pan; I found I needed to do this in two batches. Cook okra mostly undisturbed for about 3-5 minutes, letting it really brown on the first side before flipping it; you want to draw out the moisture (read: slime) and dry out the okra as much as possible.  If the pan smokes, turn down the heat a little bit, or just turn on your fan - try to keep that pan as hot as possible.

Flip the okra (this doesn't have to be an exact science; a few turns with a pair of tongs should get most of the okra turned) and cook on the second side for another 3-5 minutes or so. At this point, your okra should be very deep brown and mostly dry. Transfer to a heatsafe bowl, and repeat with another tablespoon of ghee/oil and the second batch of okra. Transfer second batch to the same bowl once it's been cooked. (I use two pans at once to minimize total cooking time.)

Add the third tablespoon of ghee/oil to a stainless steel saute pan and set over medium-high heat. Add diced chile (as much of it as you want - feel free to hold back and add more later), onion, and mustard seeds, and saute until onion has started to turn golden around the edges. Then add tomato, tamarind, and grated ginger, stir to combine, and reduce heat to medium. Cook until onions soften, 5-7 minutes.

Add okra to the sauce and use tongs to coat every piece of okra with sauce. Toss a few times over the heat, just to incorporate, then serve hot with rice, naan, dal, dosa, or whatever else you feel like serving. This curry also reheats well.

In sides, vegan, vegetarian, easy, healthy
Comment

Chile Relleno Casserole

September 22, 2014 Rivka
1-DSC_0878.jpg

During our week on Hilton Head Island, my brother-in-law and I spent an afternoon bouncing around recipe ideas and exchanging high fives over recent cooking successes. I told him about my dosas and a particularly good peach slab pie, he told me about the ethereal cake doughnuts he'd recreated from an old family recipe. Then he told me about some slam-dunk chiles rellenos he made, and I started to get jealous. Or maybe just really hungry. I wanted those chiles rellenos, stat.

1-DSC_0824.jpg
1-DSC_0839-001.jpg

Stephen's version sounded pretty authentic. The chiles were deep-fried, and the sauce was a split-egg concoction that had to be timed perfectly. He nailed it and reaped the rewards. But I'm settling into a slightly lower-key mode of cooking, one that involves lots of casseroles and things I can make in advance. I also vaguely remembered an episode of a bobby flay show from back before I swore off the terrible food network, where a California restaurant called La Casita Mexicana made its famous chile relleno in the oven, instead of in the fryer. Between my faint memory and my very not faint appetite, I figured something could be done.

1-DSC_0851.jpg

Chiles rellenos casserole recipes abound, but they're almost all egg-based - like a massive frittata enveloping stuffed chiles. I wanted the chiles to stand out more, and  - shocker - I wanted the casserole to be saucy. So I riffed on the method for manicotti, basically swapping peppers in for noodles and Mexican stuff for all that ricotta.

1-DSC_0856.jpg
1-DSC_0866.jpg

Here's where the road forks. I loved this dish. Next time, I'd make two pans full and freeze one unbaked - it's the perfect thing to have tucked away in the depths of the freezer for a lazy dinner at home. But D found the whole thing way too spicy, and she ended up taking out the leftover corn filling and making it into a quesadilla. Winners, losers. I think she just got a particularly hot pepper - mine was pretty mild. See below for some thoughts on avoiding the last-minute scramble and/or sad face due to heat.

1-DSC_0879.jpg

Notes on the fuss: Even though this is a casserole, it isn't the "dump everything in a pan and bake" kind of casserole. It's a bit on the fussy side. If you're feeling hesitant about the fuss, you can skip the tomatillos+tomatoes step and just use a large jar of whatever salsa you like. You can also probably skip blending the beans, and just toss them in with the corn; the result will be different, but no less tasty. Lastly, if you do bother to make the recipe, you might make a double batch. This is the sort of thing that freezes beautifully, and that way, it's twice the food for the effort.

Notes on the heat: One last note: poblanos are notoriously inconsistent in spice level. Some are as mild as bell peppers, and others are really quite hot. If you're nervous about the casserole being too spicy, you might consider substituting Anaheim chiles or even banana or bell peppers. Another nice option, though not widely available, are Jimmy Nardellos, which are shaped long and lean, but are not at all spicy.

Can I make this vegan? Definitely. Skip the cheese (or replace with soy cheese) and you're good to go.

Chile Relleno Casserole Serves 4 with leftovers

7 or 8 poblano chiles
3 tomatillos, husked and rinsed
12 oz. canned crushed tomatoes
1 canned chipotle in adobo (you may not need all of it)
1 can kidney beans
1 teaspoon epazote or dried oregano, divided
1 tablespoon olive oil or butter
kernels from 2 ears corn (about 2 cups)
2 scallions, sliced
salt
1/2 cup grated cotija cheese
1 cup grated cheddar or pepper jack cheese, or a mixture

Roast the peppers: Preheat the oven to 425 degrees F. Set the poblanos and tomatillos on a baking sheet lined with foil, and roast until blistered and soft all over, about 30 minutes total, turning peppers once halfway through roasting. Transfer peppers to a heatsafe bowl, cover with a piece of plastic wrap, and let the peppers steam while you prepare the sauce. Lower the oven to 350 degrees.

Prepare the sauce: Transfer tomatillos in the jar of a blender or a food processor (I like a miniprep). Add the tomatoes and half the chipotle, and blend until smooth. Taste, and add any salt and, if desired, more chipotle, as needed. Transfer to a bowl and set aside.

Prepare the fillings: Drain the beans, and add to the same blender or food processor container along with half the epazote or oregano. Blend until mostly smooth, adding water by the tablespoon if the beans won't blend. When beans are mostly smooth, set aside.

Heat the olive oil or butter in a saute pan over medium heat. When hot, add scallions, corn, and remaining epazote or oregano. Cook 5-7 minutes, until some of the corn has turned golden. Transfer to a bowl, add cotija cheese, and stir to combine.

Assemble and bake casserole: By now, the peppers should have steamed enough that their skins slip right off. It's okay if little bits of skin remain, but try to remove as much as possible. Slit each pepper lengthwise down one side of the pepper, and scoop out the core and seeds from the pepper. Lay the slit pepper on a cutting board or work surface. Repeat with remaining peppers.

Pour 1/2 cup of the sauce into a 9x13" baking pan. Smear a large spoonful of the bean puree onto the inside of each pepper. Top with a couple spoonfuls of the corn-cotija mixture. Wrap the clean side of the pepper over the filled side, and transfer the filled pepper into the baking pan. Repeat with remaining peppers, laying peppers in the pan in alternating directions. You probably will have some leftover corn mixture; reserve it for stuffing quesadillas, or just eat it as is.

Spoon the remaining sauce over the peppers, and top with the grated cheddar or pepper jack cheese. At this point, the casserole can be frozen (preferably without the cheese), to be baked at a later date. Alternatively, transfer to the oven and bake for 25 minutes, until cheese is bubbly and melted. Let cool for 5 minutes before serving.

In main dishes, vegan, vegetarian, weekday lunch, healthy
Comment

Mexican Street Corn Salad

September 8, 2014 Rivka
1-DSC_0595.jpg

Late summer is a predictable season around here. There are tomatoes on the counter, which we position strategically to keep fruit flies at bay. (I can't say we necessarily succeed - those fruit flies are such a nuisance.) There's a glut of second nectarines and peaches, perfectly ripe and 99 cents a pound from Toigo, which we consume somewhat recklessly and with pride. There are Italian plums, which find their way into this famed torte and this less famous but quite tasty cake. And then, of course, there is all the corn.

The corn is also from Toigo. It's the sweetest corn available - so sweet that Beth (wife of Jeremy, he of Andalusian gazpacho and fried squash blossoms) made a corn soup last week and fretted that it was too sweet, that it needed some lime to cut the sweetness. If you're into corn ice cream, you'll want to start with Toigo's corn.  But even if you're making something savory, as I typically do, sweet corn is a good place to start.

If you've ever ordered elote, the flavors of this dish will be familiar. Elote is Mexican street corn: a whole cob, coated in crema and chile, then dunked in cotija and finished with a squeeze of lime. It's addictive.

But sometimes you want the corn off the cob, ready to fork straight into your mouth. Enter elote salad, a chopped-and-ready version of the messier original.

1-DSC_0603.jpg

Stateside versions often coat the corn in mayonnaise, which you know I despise. The salad renditions I found online also call for mayo, which makes an otherwise balanced dish look gloppy and gross. Why would you do that?  Here's my counter-proposal, cleaner and fresher and more suited to summer: sweet corn, a little butter, chile, cilantro, lime. Lots of cotija to finish. Enough forks for you and all your friends. Sounds pretty good, doesn't it?

And while you're bothering with 5 corn cobs at a time, save those stripped cobs. Simmer them in water for 30 minutes, and you have a killer corn stock - a perfect base for chowder and more.

Mexican Street Corn SaladServes 6 as a side dish, with leftovers

3 tablespoons butter 3 scallions, diced kernels from 5 ears yellow corn 2 teaspoons medium-mild chile flakes, or 1 teaspoon regular (hot) chile flakes (start small and add to taste) salt 1 large red tomato, diced juice of 1-2 limes (again, start with one and add if you need more acid; I used 1 1/2 limes) 4 oz. cotija cheese, grated 3 tablespoons chopped cilantro

Add butter to a large saute pan and set over medium heat. When butter sizzles, add scallions, toss to combine, and cook 5 minutes, until softened. Add corn, chile,  and 1 teaspoon of salt. Cook, stirring occasionally, just until very fragrant and starting to soften, 3 minutes or so; you want the corn to retain some bite. This is a warm salad, not mush.

Taste corn, and add more chile and/or salt as needed. Then add tomato chunks, reserving the accumulated liquid for another use. Stir to combine, and cook about 3 minutes more, just until tomatoes are warmed through.

Add lime juice to taste. Spoon into a deep bowl, top with cilantro and cotija, and serve warm.

In salad, sides, vegetarian, weekday lunch, easy, healthy
Comment
← Newer Posts Older Posts →

Subscribe by email:

  • books (1)
  • crisps and crumbles (1)
  • frozen (1)
  • toys (2)
  • gifts (3)
  • egg whites (5)
  • fried (5)
  • how to use--- (6)
  • drinks (10)
  • menus (11)
  • travel (11)
  • fish (12)
  • kosher for passover (14)
  • thanksgiving (14)
  • vegan (20)
  • snacks (21)
  • techniques (21)
  • soup (26)
  • bread (28)
  • pies and tarts (28)
  • cake (33)
  • events (34)
  • condiments (36)
  • various and sundry (39)
  • uncategorized (42)
  • cookies and bars (46)
  • weekday lunch (47)
  • appetizers (48)
  • salad (51)
  • gluten-free (56)
  • comfort food (61)
  • breakfast and brunch (77)
  • sides (81)
  • dessert (90)
  • main dishes (100)
  • healthy (139)
  • easy (155)
  • vegetarian (180)

| LATEST |

Featured
Blue Chair Fruit's Black Raspberry Jam
Thai Grapefruit Salad
Mango Sticky Rice
Winter 2016: Odds and Ends
Povitica: The Best Babka Ever
Persimmon Walnut Bread
Sprout Chaat Salad + New Site!
Maple Walnut Squares
How to Give Thanks
Croissants (really, I made croissants) + other croissant-ish things

| hEALTHY |

Featured
Sprout Chaat Salad + New Site!
Fennel frond pesto + what to do with those pesky stalks
Asparagus Toasts with Pistachios and Mint
Eggplant-Walnut Pâté + Passover Ideas
1-DSC_0861-600x401.jpg
Lentils and Rice with Tamarind Sauce and Dukkah
Big Kale Salad with Pomegranate and Feta
Punchy Crunchy Ginger Salad

| BreakfAST |

Featured
Povitica: The Best Babka Ever
Croissants (really, I made croissants) + other croissant-ish things
Mushroom and Kale Breakfast Strata
Barley Porridge with Orange and Black Sesame
Ramps 'n' Eggs Biscuit Sandwiches
Asparagus Toasts with Pistachios and Mint
Apple-Cheddar Scones with Sage
Menemen - Turkish Eggs with Tomatoes and Peppers
You must select a collection to display.

© 2016 Rivka Friedman. All Rights Reserved.