Best Cauliflower EVER

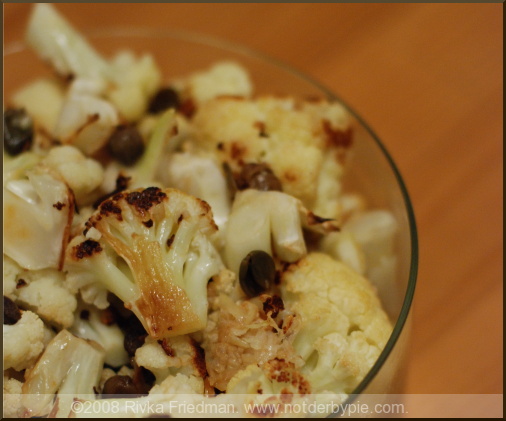
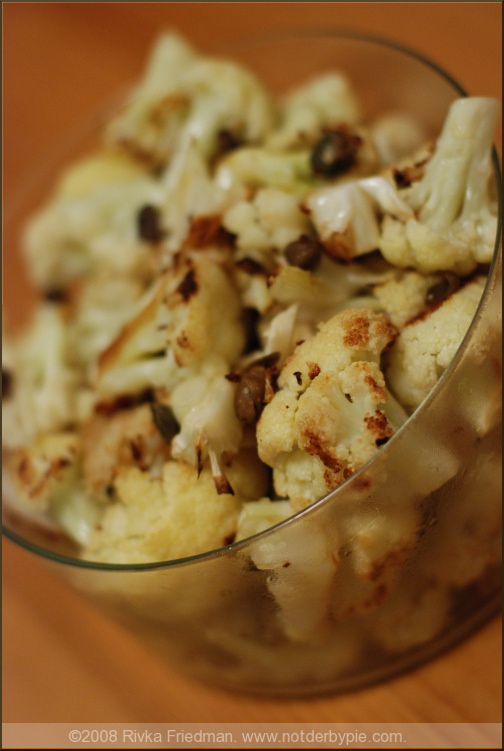
caulicaper1 Before you get annoyed that the title of this post is dramatic without being descriptive, consider the following: this recipe has 6 ingredients, including salt. It takes 25 minutes start to finish and is easily the most delicious cauliflower dish I I've ever had ever ever. Ever. Better to tell the world how wonderful it is than to try to name what can only be described as good, yes?

Now then, let me tell you about cauliflower with capers and sherry vinegar. That's all that's in this -- save for a drizzle or two of olive oil and a sprinkle of salt -- but it's good, lip-smackingly good. No surprise that it comes from the king of simple, Mark Bittman, and his wonderful bible "How to Cook Everything Vegetarian." Having cooked from it and read many chapters straight through, I think I can safely say that it's the best $23.10 you can spend in the cookbook section. Check it out here.

caulicaper2

No recipe, really -- here's how it works. Slice a whole head of cauliflower into florets, and put them in a reasonably wide (8x8 or 9x13 are both fine) shallow baking pan. Drizzle with a couple tablespoons of olive oil, toss to coat, and roast in a 400-degree oven for about 25 minutes, tossing a couple times during roasting, until a fork pierces the florets easily and they are deep brown in spots. Remove from the oven, and sprinkle with 1/2 a tsp. of salt, 1 clove of chopped garlic, 2 tablespoons of sherry or red wine vinegar, and 2-3 tablespoons of capers. (I just discovered the ones preserved in salt: you need to rinse them thoroughly, but they have such a wonderfully strong caper-y flavor that's not overwhelmed as the traditional vinegar-preserved capers often are.) Put them back in the oven for 3 more minutes, toss, and serve warm or at room temperature. It truly doesn't get easier than that, now does it?

Another Caponata Recipe

2caponata1 I know I've posted caponata on the blog before, but it's such a go-to recipe that I'm not surprised to see it up here again. Caponata is easy to make, very flavorful, and a true crowd-pleaser, even among the most carnivorous eaters. I made it this time as my contribution to a potluck lunch at work in honor of a colleague's last day, and was quite surprised by how popular it was with the meat-lovin crowd. I promised them I'd post the recipe, so even though I've already got a caponata recipe on the blog, here's one more. 2caponata3

This one takes its inspiration from a favorite dish that my mom used to make, called Huachinango a la Veracruzana, or Red Snapper, Veracruz style. It's essentially a whole red snapper (we used filets), baked in a tomato sauce that's laced with jalapeno peppers, green olives, capers, and raisins, and spiked with cinnamon. The flavors are assertive but balanced, and the dish is really tasty. I basically substituted eggplant for the snapper, and held the olives but put in some olive juice to lift the other savory flavors. I also had been eating too many jalapenos, so I subbed in chili flakes instead. If you've got green olives, they'd go great in this dish. I also browned the tomato paste in its own pan to make its flavor more complex, though that step is totally optional.

2caponata2

One of the best things about a chunky caponata like this one is that in addition to being a dip, to be eaten on crackers or baguette, it can double as a pasta sauce. I spooned some if it on top of some whole wheat rigatoni and topped it with feta cheese for an easy and tasty lunch.

This caponata also helped break a slightly frustrating cycle where everything coming out of my kitchen was just so-so. I leaned over this caponata pot, smelled its strong tomato and onion aromas, and thought, oh yea. This is gonna be good.

How good? Good enough that I ate it on pasta the next day.

2caponata4

Another Eggplant Caponata Recipe

olive oil, about 1/4 cup 6 garlic cloves 1 onion, coarsely chopped 1/2 tsp cloves 1 tsp cinnamon 1/2 tsp paprika 1/2 tsp chili flakes 1/2 tsp. cumin 1 tsp. coriander seeds, optional 2 eggplants, cubed into 1-inch pieces 2 Tbsp capers 1/2 cup tomato paste 1/3 cup raisins 1 1/2 cups water several leaves chopped fresh basil, optional 1 tsp dried italian spices (basil, oregano, etc) -- I use Penzeys Tuscan Sunset 1 Tbsp date honey (regular honey is also fine) 1/3 cup green olive juice (can also add 1/3 cup olives, if desired) 1 red bell pepper, coarsely chopped

In a large soup pot, heat olive oil on medium heat. Add onion and garlic; stir to coat, and cook for 3 minutes, or until translucent. Add all spices, toss to coat onions, and cook 2 minutes more. Add eggplant, stir to incorporate, and cook about 5 minutes until eggplant starts to soften and brown in spots.

(If you want to brown the tomato paste in a separate pan before adding to caponata, do so now. Put tomato paste in a small pan over medium heat, mush around, and cook about 5 minutes, until the bottom of the pan starts to turn brown. Add 1/2 cup water and, using a wooden spoon, scrape up the brown bits (called fond) into the tomato liquid. When all the fond has been incorporated into the tomato liquid, add the whole thing into the caponata along with the remaining 1 cup water. If not browning tomato paste, simply add it and all the water to the caponata. Stir to incorporate.

Add all remaining ingredients except for red pepper, stir to combine, and allow to simmer over medium-low heat for about 45 minutes, until well-incorporated. Now -- here's the tricky part -- taste it. Does it need more salt? More spice? Is the sweetness of the raisins and honey coming through enough for your taste? Add with a light hand in whatever direction you see fit, and continue to taste and adjust until what's in the pot makes you happy. Then add the red pepper pieces, and cook 15 minutes more.

Caponata will keep for at least 1 week stored in an airtight container in the fridge.

Beans in Broth with Caramelized Sweet Potato

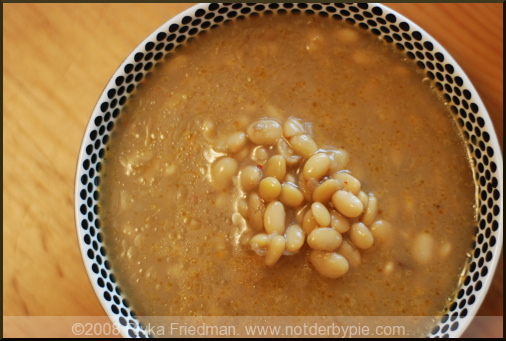
beansbroth Have I told you about Rancho Gordo? Having read too many articles about the joys of dried beans, I teamed up with my officemate and we ordered a shipment. Now, under my counter, I've got a healthy supply of them, including rio zape, tepari, mayocoba, garbanzo, and borlotti.

I've always loved beans. (It's tough not to when you grow up in a vegetarian house.) And I won't lie: nothing beats the convenience of canned beans. If you won't take it from me, take it from Adam: I couldn't agree more that in a pinch, canned kidney bean chili or canned garbanzo bean hummus tastes just great. But canned beans are on the mushy side, and they taste like salt. If I can spare the time and manage the advance prep, it's wonderful to bite into toothsome beans for dinner -- and nothing beats controlling your own seasoning.

Like I said, dried beans can't be made in a flash. They need to be soaked overnight, rinsed, and then simmered for at least a couple hours to achieve optimum texture. If you can manage the time, though, you'll see that dried beans have better texture and distinctive flavor, even when prepared uber-simply. Last night's dinner is a case in point.

Yesterday was a super cold day; I knew I'd want something warm and comforting for dinner, but I didn't want to use any meat products, so my frozen beef-broth cubes were out of the question. I'd put some beans in soaking water that morning, so that was a start. My normal inclination would be to dump the kitchen sink in a pot and hope it turned out well, but I've been thinking a lot about the value of restraint when seasoning food. Sometimes, the simplest dishes are the tastiest. How would my beans taste if instead of seasoning them with beef broth and 20 spices, I used water and 5? I decided that now was the time to try a minimalist bean dish.

On my way home, I did a quick mental-survey of my kitchen and remembered a lonely sweet potato in the bowl on the dining room table. As soon as I got home, I turned the oven to 350, wrapped the sweet potato (skin on) in old foil and tossed it in. I'd leave it there until the beans were done; by then, it'd be nice and caramelized, with a custard-like texture.

Meanwhile, I took 1 cup of soaked tepari beans (small, like cannellini) out of the fridge, drained them, and rinsed them a couple times. In a medium pot, I sauteed 2 chopped shallots in 2 Tbsp. of olive oil. To that, I added 1/2 tsp. coriander seeds, 1/2 tsp. smoked paprika, 1/2 tsp. aleppo pepper (chili flakes would work), a pinch of saffron, and 1 bay leaf. I stirred all this around for a couple minutes, then added the beans, stirred to coat with the seasoning, and added 3 cups of water. I turned the heat down to medium-low, and left the beans to simmer, covered, for about 2 hours, adding more water as necessary. In two hours' time, the spices mingled, and the beans released some of their own flavor as well. There was plenty of extra liquid, which formed a lovely pot liquor scented with coriander, smoked paprika, and, well...beans. I poured some into a bowl, added half of the sweet potato with its wonderful caramel-brown skin, got myself a spoon, curled up on the couch, and went to heaven. Amazing.

Beans in Broth with Caramelized Sweet Potato

(As I said, this recipe is simple, but truly amazing. So amazing, in fact, that I failed to take a picture of the finished dish. You'll have to let your imagination kick in here.)

1 sweet potato 1 cup tepari or other small white beans 2 shallots, chopped 1/2 tsp. aleppo pepper 1/2 tsp. smoked paprika 1/2 tsp. coriander seeds pinch saffron threads 1 bay leaf 3 cups water

Wrap sweet potato, skin-on, in foil and toss in the oven. Turn on to 350 or 400 degrees (we're flexible), and just let it rip. Give it at least an hour; the longer, the better. I left mine in for about 2 hours and 15 minutes, and it was as soft as custard.

Pre-soak beans overnight or for at least 3 hours in water that covers them by at least an inch. Drain and rinse; set aside.

In medium pot, saute 2 chopped shallots in 2 Tbsp. of olive oil. Add 1/2 tsp. coriander seeds, 1/2 tsp. smoked paprika, 1/2 tsp. aleppo pepper (chili flakes would work), and 1 bay leaf. Stir to incorporate, then add the beans, stirred to coat with the seasoning, and add 3 cups of water. Turn the heat down to medium-low, and leave the beans to simmer, covered, for about 2 hours, adding more water as necessary.

When beans are fork-tender but not mushy, pour a serving into a bowl with some of the bean broth, and add half the cooked sweet potato. If desired, top with grated parmesan cheese (though I didn't).

Winter Salad with Pears and Manchego, My Catering Debut

catering2.jpg Catering? Moi? Uh, NO. Not exactly. I'm flighty, forgetful, and a host of other wonderful things that don't mix with catering. And yet, today, my mom and I cooked and served brunch to a party of 8 at their home. The brunch was an item that my mom had offered in a silent auction at work; I'm a sucker for all things food-related, so when mom enlisted my help, I happily agreed.

Can I tell you how utterly shocked I am that brunch today went PERFECTLY? I mean, without a hitch. Not a single issue. Nothing forgotten, undercooked, overcooked, gross-tasting; everything plated on time, ready to go, delicious. I'm in awe of my beginner's luck. In awe, I tell you.

catering1.jpg

To be fair, we really lucked out. The couple that won our item has a beautiful and spacious house with a tricked out kitchen that's about the size of my whole apartment building. Mom and I hardly noticed each other in the kitchen, there was so much room. And we're used to working together in the house I grew up in, which has an itsy bitsy kitchen; we're the only two people who can happily coexist in that kitchen.

Also, the hosts had two ovens with pure-convection settings, so our finished dishes could be held at 135 degrees until they were ready to eat. That was very, very helpful. And on top of the space and equipment, the hosts and their guests were very chill, making the whole experience relaxed and enjoyable for the cooks as well.

catering3.jpg

In our post-mortem session during the drive home, mom and I agreed on the elements that were key to our success. First, in menu-planning, I made sure that the dishes were manageable given our timeframe. Specifically, each dish required either time to cook or time to plate, but not both. Second, when selecting recipes, I kept an eye out for things that people tend to like, even if I myself don't care for them. Best example was the french toast we made, which was stuffed with a cream cheese and apricot mixture. I don't much care for creamy things like that, but people swooned over it. Recipe to come in a later post, I promise.

Even with the caveats, I'm totally impressed that we made it work. And by made it work, I mean kicked its butt, hit it out of the park. We kinda rocked today! As you can tell, I'm really proud of our success. So proud, in fact, that when the guests asked if I was up for hire, I didn't hesitate to say "YES."

catering5.jpg

Don't worry, I'm not quitting my day job -- but I would totally, totally do this again. For money. And truthfully, considering the actual cost of brunch (inexpensive) and the relative bang for buck (diners thought it was fancy and delicious), I think I could make it worth my while. We'll see.

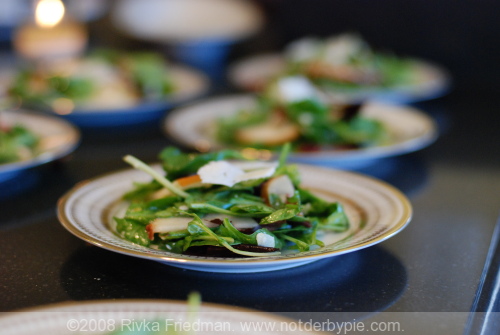
But all that's just prologue to today's recipe, a salad that will convert even the most adamant leaf-haters. It's dead-easy to make, and friendly to december's ever-dwindling supply of nice salad veggies. Best of all, it's freakin' delicious. Pics are from today's catered affair, with more pics and recipes to follow as I gather steam.

Hope you all had a lovely weekend!

Winter Salad with Pears and Manchego adapted from Epicurious

1/3 cup green (hulled) pumpkin seeds (pepitas; not toasted) 1/3 cup plus 1 tablespoon olive oil, divided 3 tablespoons Sherry vinegar (I used champagne vinegar) 1 teaspoon mild honey 1 teaspoon grainy mustard 8 cups packed salad greens, such as radish greens, spinach, watercress, and arugula, tough stems discarded 1 (1/2-pound) piece Manchego cheese, rind removed and cheese shaved into thin slices (preferably with a cheese plane) -- please don't measure greens. it's ridiculous. just use a package or two. 2 small red or yellow Bartlett pears, sliced thinly

preparation

Cook seeds in 1 tablespoon oil in a small heavy skillet over medium-low heat, stirring frequently, until puffed and beginning to brown, about 4 minutes. Transfer with a slotted spoon to paper towels and reserve oil. Season seeds with salt and pepper.

Whisk together vinegar, honey, mustard, 1/4 teaspoon salt, and 1/8 teaspoon pepper. Add remaining 1/3 cup olive oil and reserved oil from skillet in a slow stream, whisking until emulsified.

Toss greens, half of cheese, and pear slices with dressing. Divide among salad plates. Top with remaining cheese, and sprinkle with seeds.

Cooks' notes · Pumpkin seeds can be toasted 2 days ahead and kept separately from oil, covered, at room temperature. · Greens can be washed and dried 1 day ahead and chilled, wrapped in paper towels, in a sealed bag.