• Home
  • About
  • Recipe Index
  • Contact
Menu

Rivka Friedman

Street Address
City, State, Zip
Phone Number

Your Custom Text Here

Rivka Friedman

  • Home
  • About
  • Recipe Index
  • Contact

Cauliflower and Hazelnut Salad with Sherry-Maple Dressing

November 20, 2013 Rivka
1-DSC_0314
1-DSC_0314

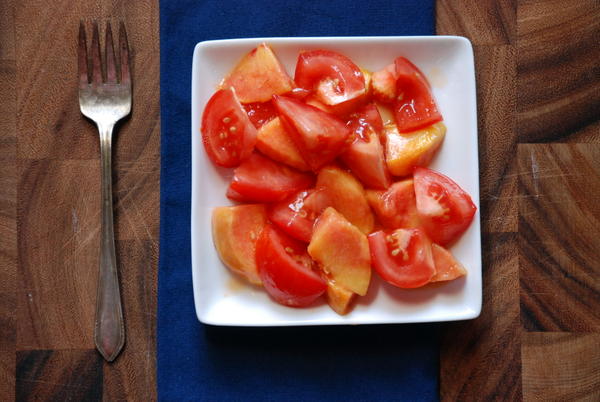
The seasons have turned, haven’t they? The pretty little pint of greenhouse cherry tomatoes on my counter notwithstanding, DC’s got a case of cold wind and short days that puts me in the mood for stew and hot cider.

But first, before I wind down on salads for weekday lunch, I want to share a good one that makes the most of fall produce and that I think you’ll enjoy serving all winter long.

Tell me you’re shocked that it comes from Yotam Ottolenghi; I don’t believe you. The new king of vegetables has struck again, and this time, there isn’t a drop of tahini or yogurt in sight. (That might surprise you.) The dressing is a simple concoction of sherry vinegar and maple syrup, which slicks a big pile of roasted cauliflower, celery, parsley, pomegranates, and toasted hazelnuts. Doesn’t it just sound like fall?

You won’t want to miss this one. Especially since later this week, you just might feel the urge to make a certain pie.

Stay tuned, friends.

Cauliflower and Hazelnut Salad with PomegranatesAdapted from Jerusalem, by Yotam Ottolenghi

1 head cauliflower, broken into bite-sized florets 5 tablespoons olive oil 1 large celery stalk, sliced thinly on the bias 5 tablespoons hazelnuts 1/3 cup parsley leaves 1/3 cup pomegranate seeds 1 tablespoon sherry vinegar 1 ½ teaspoons maple syrup ¼ teaspoon cinnamon ¼ teaspoon allspice Flaky salt and pepper

Preheat the oven to 425 degrees.

Line a baking sheet with parchment paper. Spread cauliflower on the baking sheet in a single layer, drizzle with 3 tablespoons olive oil, sprinkle lightly with flaky salt and pepper, and bake for 35-40 minutes, stirring once halfway through, until cauliflower is golden brown in spots.

Reduce oven temperature to 325 degrees.

Spread hazelnuts on a baking sheet lined with fresh parchment paper, and toast for about 15 minutes checking at the 10-minute mark) until uniformly golden brown. Let hazelnuts cool, then wrap hazelnuts in a towel and rub back and forth to loosen and remove their papery skins. Chop coarsely.

Meanwhile, make the dressing: Whisk remaining 2 tablespoos olive oil, sherry vinegar, maple syrup, cinnamon, and allspice in a medium bowl. Add ½ teaspoon flaky salt and a couple grinds of pepper and stir to combine.

In a large bowl, combine cauliflower, hazelnuts, pomegranate, celery, parsley, and dressing. Stir to incorporate, and serve.

In gluten-free, sides, vegan, vegetarian, weekday lunch, healthy
4 Comments

Peach-Tomato Salad, a few ways

July 26, 2013 Rivka
1-DSC_0621
1-DSC_0621

An unlikely pairing, these two. Tomatoes and peaches, when at their prime, are both so juicy and flavorful that you need something crusty to soak up all those juices. Peaches get tucked under biscuit dough and baked up into cobbler. In this house, tomatoes have no finer place than atop a slice of toasted garlic-rubbed sourdough bread, drizzled with olive oil and sprinkled with flaky salt. These are noble dishes. They make intuitive sense.

But rules are meant to be broken, especially in summertime, and this is the salad to do it. It is a big, summery bowl full of juice, and there's nothing to sop it up. (Spoiler alert: serve with crusty bread.) But the juice that gathers at the bottom of the salad bowl is the purest extraction of summer. It is elixir, and you will want to hoard it, and spoon it up, and drink it straight.

1-DSC_0645
1-DSC_0645

Without excellent peaches and tomatoes, this salad isn't worth making. Splurge at the farmers' market. Or, if your local famers' carry discounted "second" fruit with blemishes, this is a great place to use them. Once they're cut and macerated, you won't notice little imperfections in the fruit.

Let's talk about variations:

  • Add a big handful of arugula or watercress and a couple chunks of feta cheese
  • Toast 1/4 cup of almonds (or slivered almonds) and add them with a pinch of dried red chile
  • Add a teaspoon of pomegranate syrup and a pinch or two of sumac
  • My personal favorite: add chunks of avocado and a handful of homemade croutons

If you've got other ideas, don't hold back.

As far as how to serve this salad, other than gobble it plain, a big crusty piece of

bread

- I prefer toasted - is good for sopping up juices. You could also cut the fruit up smaller, add a chopped jalapeno and the juice of a lime, and you've got a beautiful

salsa fresca

that would be great served on any grilled white fish or on fish

tacos

. Boom.

1-DSC_0593
1-DSC_0593

Or, if you literally want to drink your salad, you can make it, and then puree it into a fantastic sweet-tart gazpacho. Chile and lime optional.

Drink up, friends. Enjoy the weekend.

Peach-Tomato Salad serves 2

2 ripe, juicy peaches 2 plump, red beefsteak tomatoes 2 tablespoons good, fruity olive oil 1/2 teaspoon flaky salt freshly ground pepper to taste

Peel the peach using a peeler or a paring knife. Split in half down the dimpled pole of the peach, and pry the two half moons away from the pit. Cut each half into 4 slices, and then cut each slice in half. Transfer to a bowl with all the accumulated juices.

Cut the tomato into similar segments: cut in half, cut each half into 4 slices, and halve each slice. Transfer to the same bowl with juices.

Drizzle the olive oil over the fruit. Add some of the salt, and use a spoon to fold everything together without bruising the fruit too much. Taste, and add more salt and fresh pepper to taste. At this point, the salad is ready. It can rest happily on the counter until you're ready to eat, or you can gobble it all down immediately.

Peach-Tomato Salsa serves 4

2 ripe peaches 2 ripe tomatoes juice of half a lime half a jalapeno or serrano chile salt and pepper to taste

Peel peaches. Cut into full slices, cut each slice into strips, and cut each strip into cubes. Size is your choice - I like itsy bitsy pieces for chips, but chunky hunks for tacos.

Repeat with tomatoes, cutting into similarly sized pieces as the peaches. Dice the chile as small as you can.

Combine everything but salt and pepper in a bowl. Add salt and pepper gradually, tasting as you go, until your salsa is balanced to your taste. Serve immediately, or let the juices accumulate for a while.

In salad, vegan, vegetarian, easy, healthy
Comment

Zucchini with Basil, Pine Nuts, and Croutons

July 15, 2013 Rivka
1-DSC_0132
1-DSC_0132

Well, London may have the edge when it comes to strawberries, but DC is just bursting with amazing fruits and vegetables this time of year. And I'm going to go out on a limb and say that eating that summer produce is way, way more fun when your A/C works. Because since May, ours hasn't. And now it does. And cold air, it is wonderful. (In other news: if you've come over to our house in the last couple months and been inexplicably hot, sorry about that.)

Now that we're no longer hot from the moment we wake up in the morning, I can bear a trip down to the Sunday market. This past Sunday, I picked up some bright red, plump sour cherries, two pounds of rhubarb (for recipes I'll be telling you about soon), and some lovely baby zucchini.

1-DSC_0114
1-DSC_0114

Baby zucchini is so, so pretty, no? All those different shapes and sizes? The little skinny sticks and the bigger, round patty pans? How can you not love them?

And yet, as is the case every year, I bring home a basket of those zucchini, and they sit. In the fridge. For days. Because people, I don't ever know what to do with them. They don't taste different than big zucchini, they just look different. So I feel like I have to leave them whole to preserve their cuteness. Otherwise, why not just buy the regular ones?

A couple years ago, I got hooked on this recipe for zucchini and snap peas dressed very simply with sesame oil. But not all baby zucchini can be left whole. At some point, you gotta cut the things up. Fortunately for me (and you), I've come up with a dish of zucchini sliced small enough that it can be eaten in a civilized fashion without your guests totally missing the fact that you sprang for the little guys.

The dish is inspired by something far more fussy from the legendary Dan Barber, a dish made with, yes, zucchini bread croutons. If you happen to have leftover zucchini bread lying around, this is a great way to put it to use. For the rest of us, say it with me now: summer is unfussy. Then go laugh at the fact that Oprah says this recipe takes 10 minutes. Really? Ba-ha.

Where were we? Yes. You're slicing baby zucs, getting 'em nice and browned, and tossing them with some basil oil, some toasted pine nuts, and some croutons. Simple? Simple.

1-DSC_0129
1-DSC_0129

If you don't feel like making croutons, simply toast a couple pieces of bread, smear their toasted tops with some ricotta or goat cheese, and pile the zucchini on top. You can also top this with shards of a harder cheese, like parmesan or pecorino. Even a harder goat cheese would work well.

1-DSC_0173
1-DSC_0173

While we're on the topic of do-what-you-want, if you -- like my beloved -- hate pine nuts (I know, how could she??), swap in almonds, hazelnuts, or no nuts whatsoever. If you don't love basil (again with D...crazy), try dill or mint. And if you don't feel like buying the baby zucs, big ones work just fine. I'm on a mission to make summer recipes flexible and un-fus-sy. I will prevail. And then we'll all not fuss one bit, and eat delicious summer food, and be very happy.

Zucchini with Basil, Pine Nuts, and Croutons Inspired by a recipe from Dan Barber serves 2-3 as a side dish or appetizer

1 pound small zucchini (about 5), trimmed and cut on the bias into 1" slices 4 tablespoons extra-virgin olive oil, separated 1/2 teaspoon flaky salt 1/4 teaspoon freshly ground pepper juice of half a lemon 1/4 cup basil chiffonade 1/4 cup pine nuts 1 cup torn croutons (I like sourdough, but any bread will work) 7 or 8 big shards of a salty, hard cheese like parmesan or pecorino (optional)  

Preheat the oven to 350 degrees and spread pine nuts onto a baking sheet in a single layer. Toast pine nuts until evenly golden, about 7 minutes. Set aside.

Add 2 tablespoons olive oil to a large heavy pan (I like cast iron) and set it over medium heat. When oil shimmers, add zucchini slices in a single layer. Season with salt and pepper, then let cook undisturbed for 3-5  minutes, until undersides are shiny and golden-brown. Patience is the virtue here; if you move the zucchini around too much, it will steam and not brown properly.

Flip browned slices onto their second side and cook for 3-5 minutes more. Meanwhile, transfer chiffonade basil (or other herb) to a small mixing bowl, and as the zucchini slices finish cooking, add them to the bowl and stir to wilt the basil. Add any oil that remains in the pan into the bowl, to help the basil wilt and emit its flavor.

Add the remaining olive oil to the same pan, heat on medium, and when it shimmers, add the croutons. Season with salt and pepper, and again, leave undisturbed for about 3 minutes until undersides are golden. Flip to get as many sides of each crouton as possible crisped and slicked with the oil. When croutons are golden and toasty, Remove to a plate.

To serve, arrange zucchini and basil, pine nuts, croutons, and cheese (if using) on a flat platter. Squeeze the lemon overtop and serve warm or at room temperature.

In appetizers, sides, vegan, vegetarian, easy, healthy
3 Comments

The Best Way to Caramelize Onions

May 14, 2013 Rivka
DSC_0395
DSC_0395

One of my favorite food-related articles from 2012 came from Slate. It was called, "Why do recipe writers lie and lie and lie about how long it takes to caramelize onions?" and it spoke the truth: caramelizing onions is a matter of patience. Doing it properly takes at least 40 minutes, and the recipes that tell you you'll have soft, brown onions in five or ten minutes are straight-up lying.

So, do I have some sort of trick to shorten your wait? Not exactly. But let's be honest: we see caramelized onions in a recipe, and we let out a sigh. There goes any hope of getting dinner on the table quickly. And friends, that's a problem I can solve.

The trick? Caramelize onions in bulk. Onions keep for a really long time; onions in lots of oil keep even longer. These will keep in the fridge for easily a week (actually longer, but if you're nervous about storing them for so long, top them with a hefty drizzle of olive oil). If you make a big ole' batch on a lazy Sunday, you'll have enough caramelized onions to get you through a week's worth of frittatas, tarts and more tarts, Mujaddara, and more.

And anyway, I find that it's easier to caramelize onions in bulk. Pile 'em into a big pan, turn the heat very low, and cover. Then walk away. It's pretty much that easy, and with no stress about how long they take, the promise of silky, soft, golden onions isn't too much to hope for.

Let's do this thing.

Best Caramelized Onions

5 large yellow onions 5 tablespoons butter, olive oil, or a mix (I like 3 and 2) 1 teaspoon salt

Peel onions, halve them from pole to pole, and slice into thin half-rings.

Pile the onions into the largest shallow skillet you have. If your largest shallow skillet doesn't fit them, put them into a wide pot. Make sure whatever pot or pan you're using has a lid.

Turn the heat to medium and add the butter/oil and salt. When the onions start making those wonderful sizzling noises, give the onions a good stir, reduce the heat to low, and cover the pot/pan.

After 20 minutes, check the onions. They should have sweated down considerably to the point where they are very soft and possibly turning tan. Spend the next 20-30 minutes cooking the onions uncovered, with the top off, and stirring occasionally to prevent sticking and ensure even cooking.

After 50-60 minutes, the onions should be very soft and deep golden brown. Store in a sealed container topped with a hefty drizzle of olive oil. Onions will keep for over a week.

Troubleshooting: If the onions look too dry, add water by the tablespoon and stir to incorporate with the onions. You can also add a bit more olive oil or butter if the onions aren't glistening enough.

If you have one of those amazingly powerful stoves where "low" is still pretty high (lucky you), you'll want to keep a closer eye on the onions to avoid burning them. Adding water and constant stirring are pretty good insurance policies there.

Finally, depending on how firm your onions are when you start out, they can soften quickly or very, very slowly. If your onions feel particularly soft, in 20 minutes of covered cooking they'll probably have "melted" - meaning, they'll be super soft and almost have lost their shape. Firmer onions will keep their shape in 20 minutes, so if you're hoping for super melty onions, you may want to leave them covered on the heat for a bit longer.

Here's to big batches of delicious ingredients. More to come.

In condiments, vegan, vegetarian Tags components of a meal, cooking economically
5 Comments
← Newer Posts Older Posts →

Subscribe by email:

  • books (1)
  • crisps and crumbles (1)
  • frozen (1)
  • toys (2)
  • gifts (3)
  • egg whites (5)
  • fried (5)
  • how to use--- (6)
  • drinks (10)
  • menus (11)
  • travel (11)
  • fish (12)
  • kosher for passover (14)
  • thanksgiving (14)
  • vegan (20)
  • snacks (21)
  • techniques (21)
  • soup (26)
  • bread (28)
  • pies and tarts (28)
  • cake (33)
  • events (34)
  • condiments (36)
  • various and sundry (39)
  • uncategorized (42)
  • cookies and bars (46)
  • weekday lunch (47)
  • appetizers (48)
  • salad (51)
  • gluten-free (56)
  • comfort food (61)
  • breakfast and brunch (77)
  • sides (81)
  • dessert (90)
  • main dishes (100)
  • healthy (139)
  • easy (155)
  • vegetarian (180)

| LATEST |

Featured
Blue Chair Fruit's Black Raspberry Jam
Thai Grapefruit Salad
Mango Sticky Rice
Winter 2016: Odds and Ends
Povitica: The Best Babka Ever
Persimmon Walnut Bread
Sprout Chaat Salad + New Site!
Maple Walnut Squares
How to Give Thanks
Croissants (really, I made croissants) + other croissant-ish things

| hEALTHY |

Featured
Sprout Chaat Salad + New Site!
Fennel frond pesto + what to do with those pesky stalks
Asparagus Toasts with Pistachios and Mint
Eggplant-Walnut Pâté + Passover Ideas
1-DSC_0861-600x401.jpg
Lentils and Rice with Tamarind Sauce and Dukkah
Big Kale Salad with Pomegranate and Feta
Punchy Crunchy Ginger Salad

| BreakfAST |

Featured
Povitica: The Best Babka Ever
Croissants (really, I made croissants) + other croissant-ish things
Mushroom and Kale Breakfast Strata
Barley Porridge with Orange and Black Sesame
Ramps 'n' Eggs Biscuit Sandwiches
Asparagus Toasts with Pistachios and Mint
Apple-Cheddar Scones with Sage
Menemen - Turkish Eggs with Tomatoes and Peppers
You must select a collection to display.

© 2016 Rivka Friedman. All Rights Reserved.