• Home
  • About
  • Recipe Index
  • Contact
Menu

Rivka Friedman

Street Address
City, State, Zip
Phone Number

Your Custom Text Here

Rivka Friedman

  • Home
  • About
  • Recipe Index
  • Contact

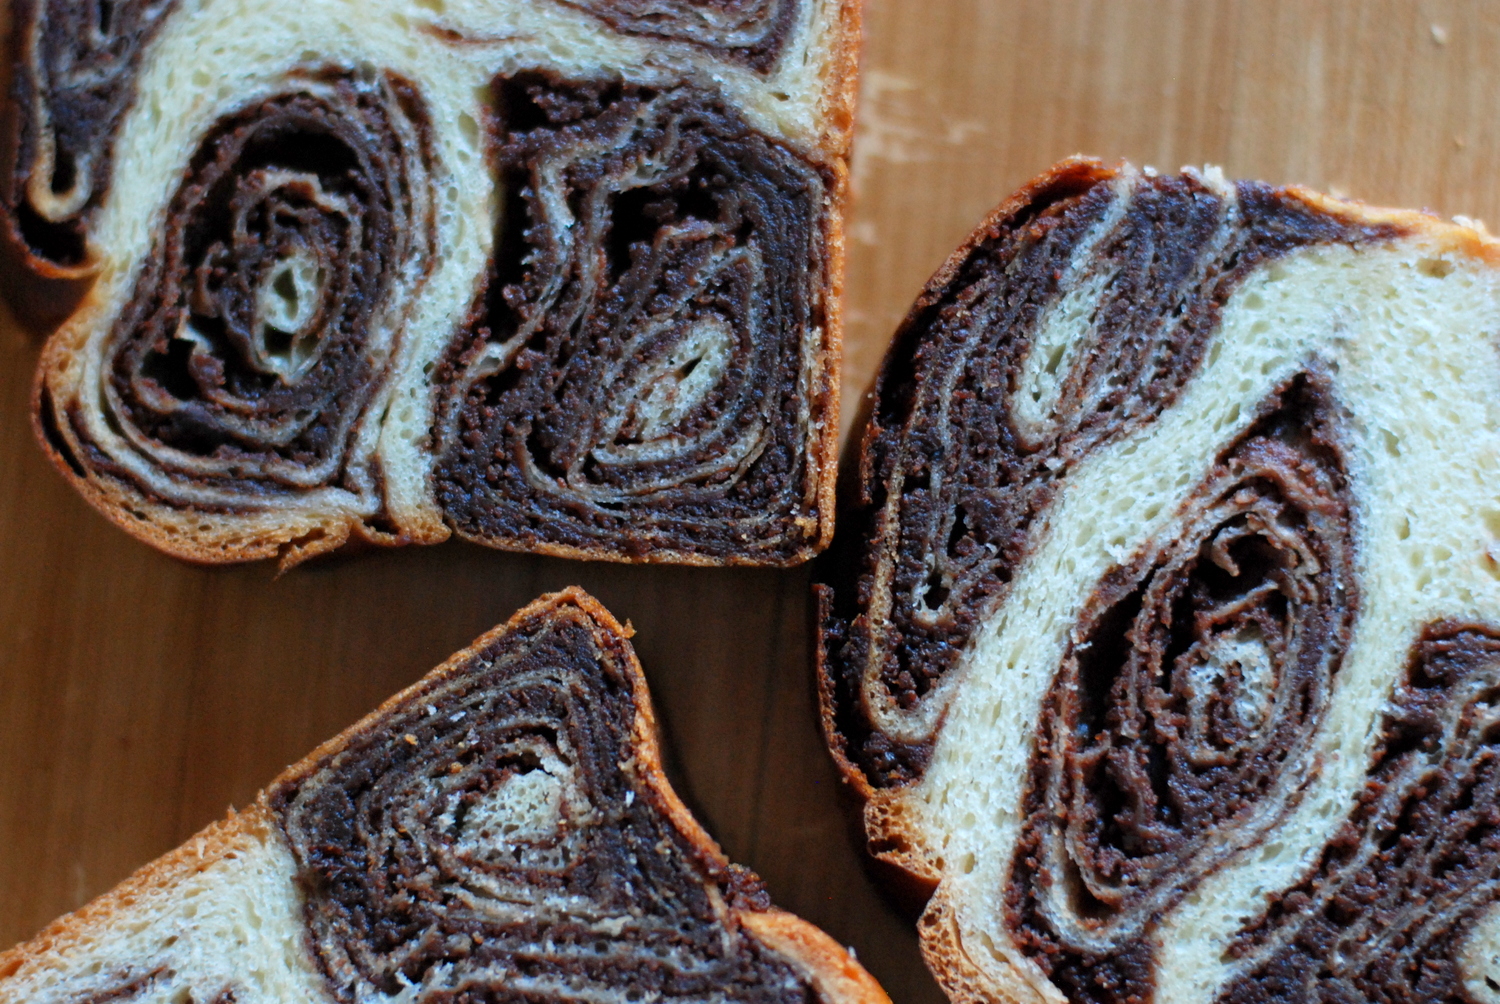
Povitica: The Best Babka Ever

January 20, 2016 Rivka

It's snowing! It's snowing! THE APOCALYPSE IS COMING! I hope you bought flour and sugar. I hope you happen to have walnuts in the house. Yes? Wonderful.

Meet my latest, love, the Povitica. It comes from my other latest love, the Great British Baking Show. If I may, for just a moment, evangelize on its (the show's) behalf, it is the sweetest, coziest little food show on television. Contestants do their preparation in advance, and come to weekly competition with dog-eared copies of recipes they’ve developed. If someone runs behind, others pitch in to help out. Even the hosts of the show sometimes provide assistance. There’s a lot of smiling and hugging, absolutely no product placement, and so much Englishness, you won’t know what to do with yourself. It's Victorian sponge for miles.

Don't let the coziness fool you: each episode brings a "bake" more ambitious than the last.  There are hot-water pastries and raised yeasted loaves, tiered pies and sculptured cakes. There are desserts you’ve never heard of, from Germany and Poland and France and Croatia, which if you saw in a cookbook might give you pause: lots of ingredients, pages of instruction, no sense of what the thing is supposed to look like if baked correctly. But when a bunch of (okay, very accomplished) home bakers give these recipes a go, under the pressure of a short timeline a televised competition, you watch them, and you think, yeah, maybe I could do that. One minute I’m watching the show, then next, I’m all I must have this in my oven now. That is why last week I up and baked a dobos torte, just because. And then this week, I got baking shpilkes  again, so I went totally mad and baked my beloved povitica.

Read More
In breakfast and brunch, cake, bread, comfort food, dessert Tags projects
13 Comments

No-Knead Breadsticks

August 21, 2014 Rivka
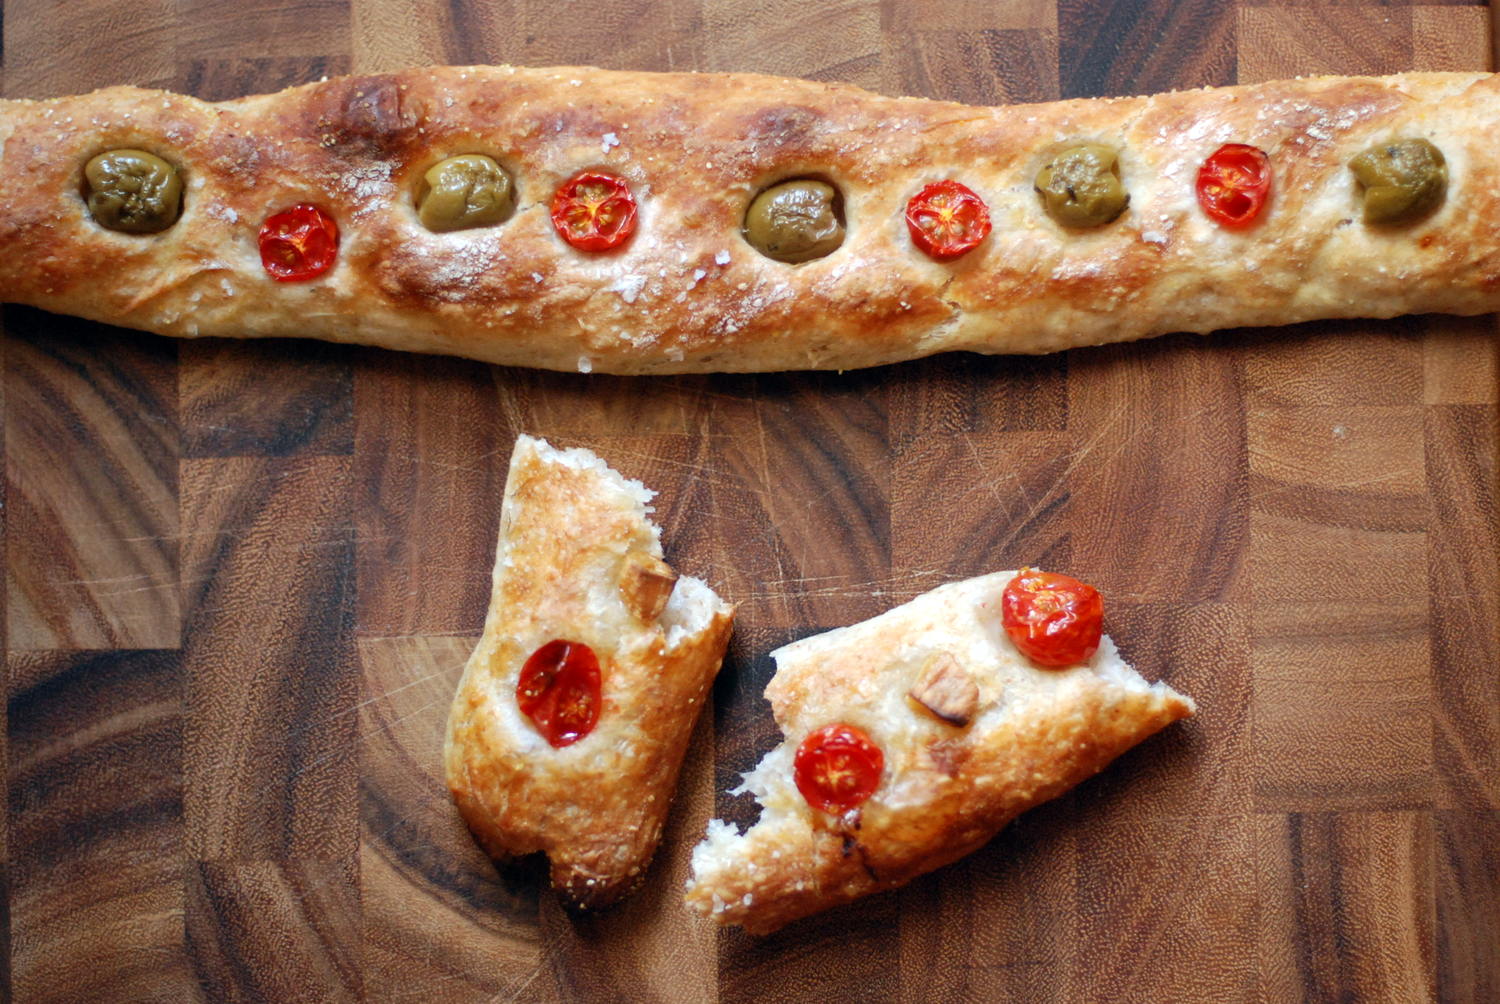
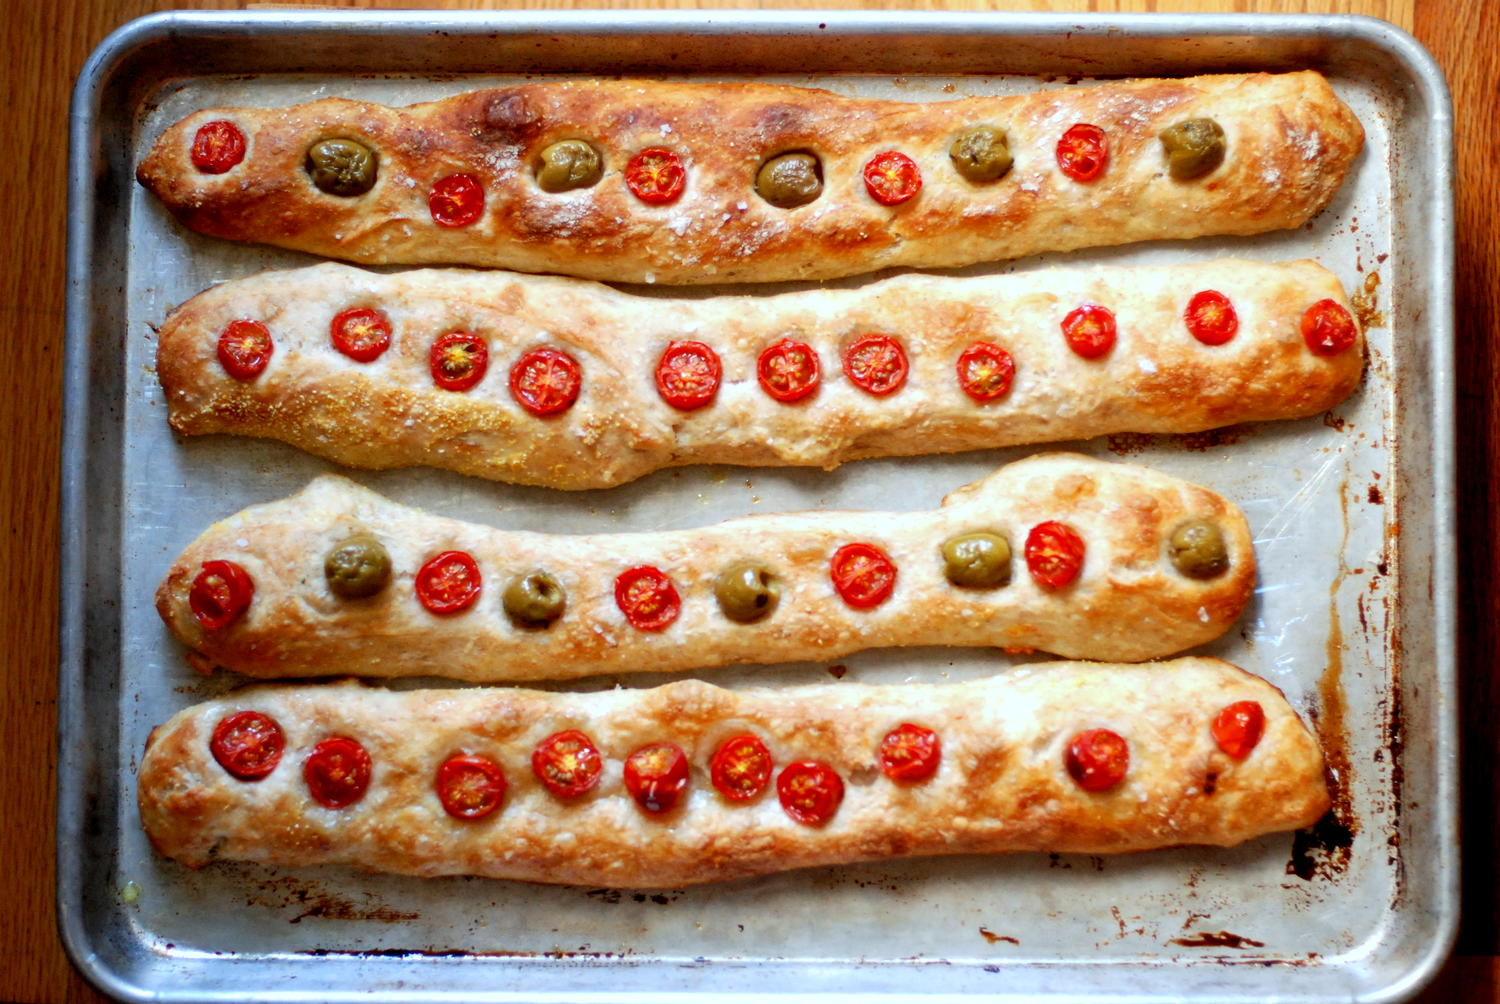
tomato and olive stecca

In recent years, seemingly in complete indifference to logic and better judgment, I've settled on and stayed loyal to a bread recipe that's a royal pain in the hinder parts. That recipe is Tartine's Country Loaf, which I make plain, but also with olives, or cherries, or semolina and sesame and raisins (a favorite to get us through the colder months). It takes forever and is extremely involved. Did you want to do something fun on Sunday? I'm sorry, I can't; I have to make bread.

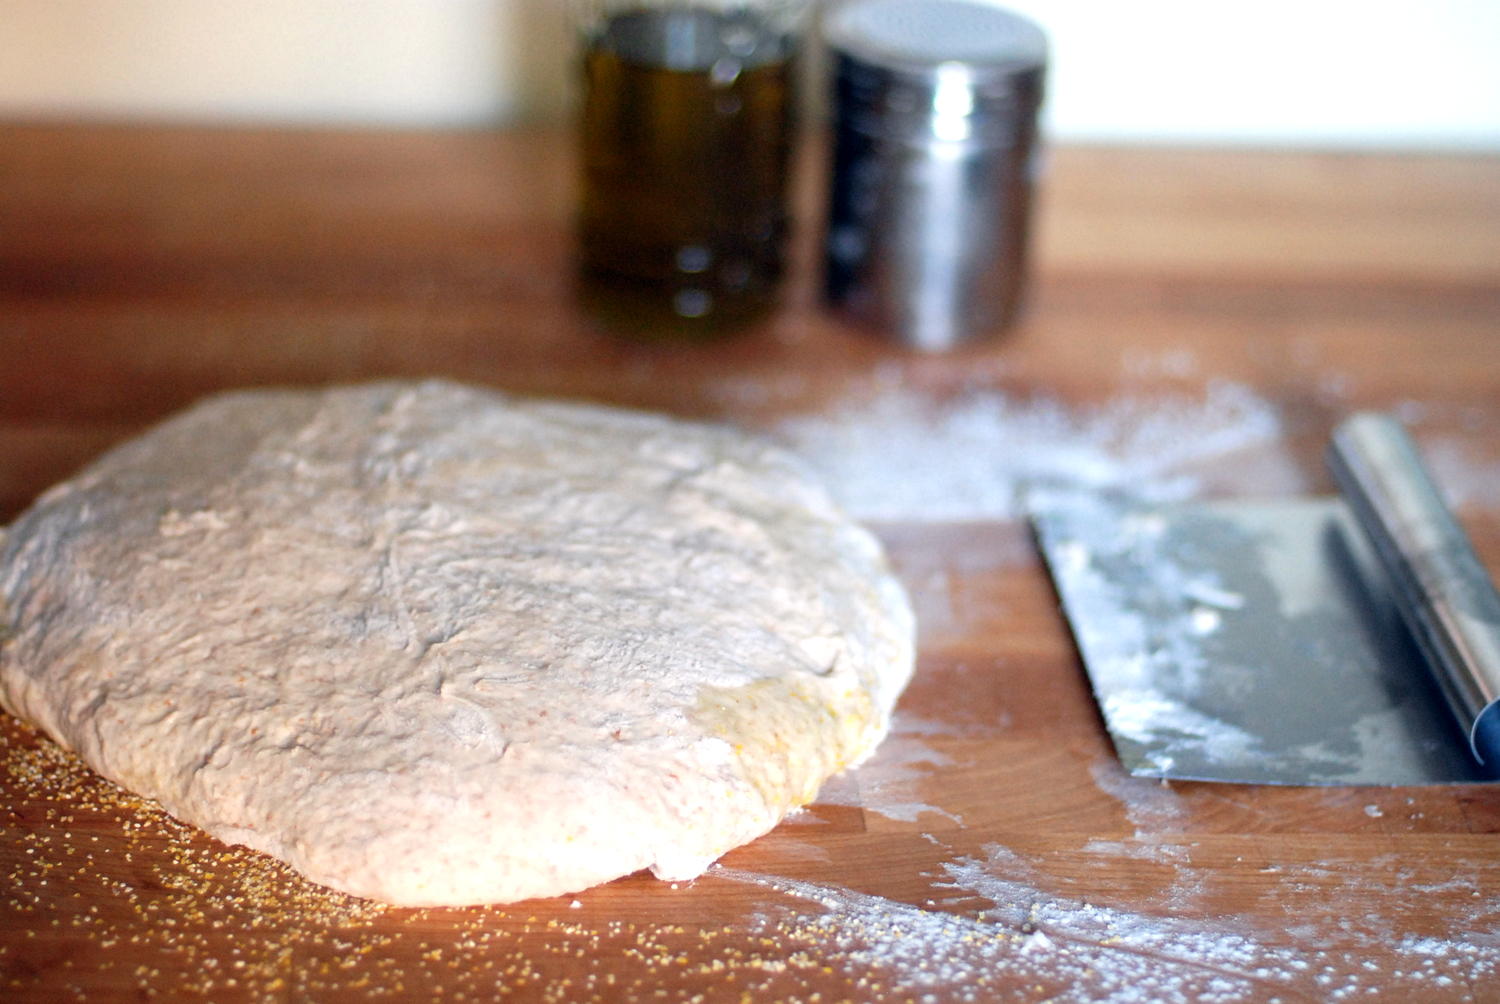
the dough.
the dough.

But then summer rolls around, and summer in DC, as you know, is terrible, and my will to sit through hours of proofing and kneading and rising and 500-degree baking wilts as quickly as my poor plants in the August humidity. Fortunately, there are sane people like Jim Lahey in the world, who understand that sometimes, you don't want to knead the bread, or sit at home and watch the bread, or really fuss with the bread at all. You just want to eat the bread. Is that so much to ask?

Turns out, it's not. That's why no-knead bread is wonderful (as are the manyvariations thereof). And in an effort to spruce up a recent Friday night dinner party with bread other than challah, I turned to yet another variation on Lahey's original no-knead recipe: the Stecca.

Stecca is basically a long, wide breadstick. The recipe builds only minimally on the usual no-knead formula, and the result provided a nice change of pace from our usual routine.

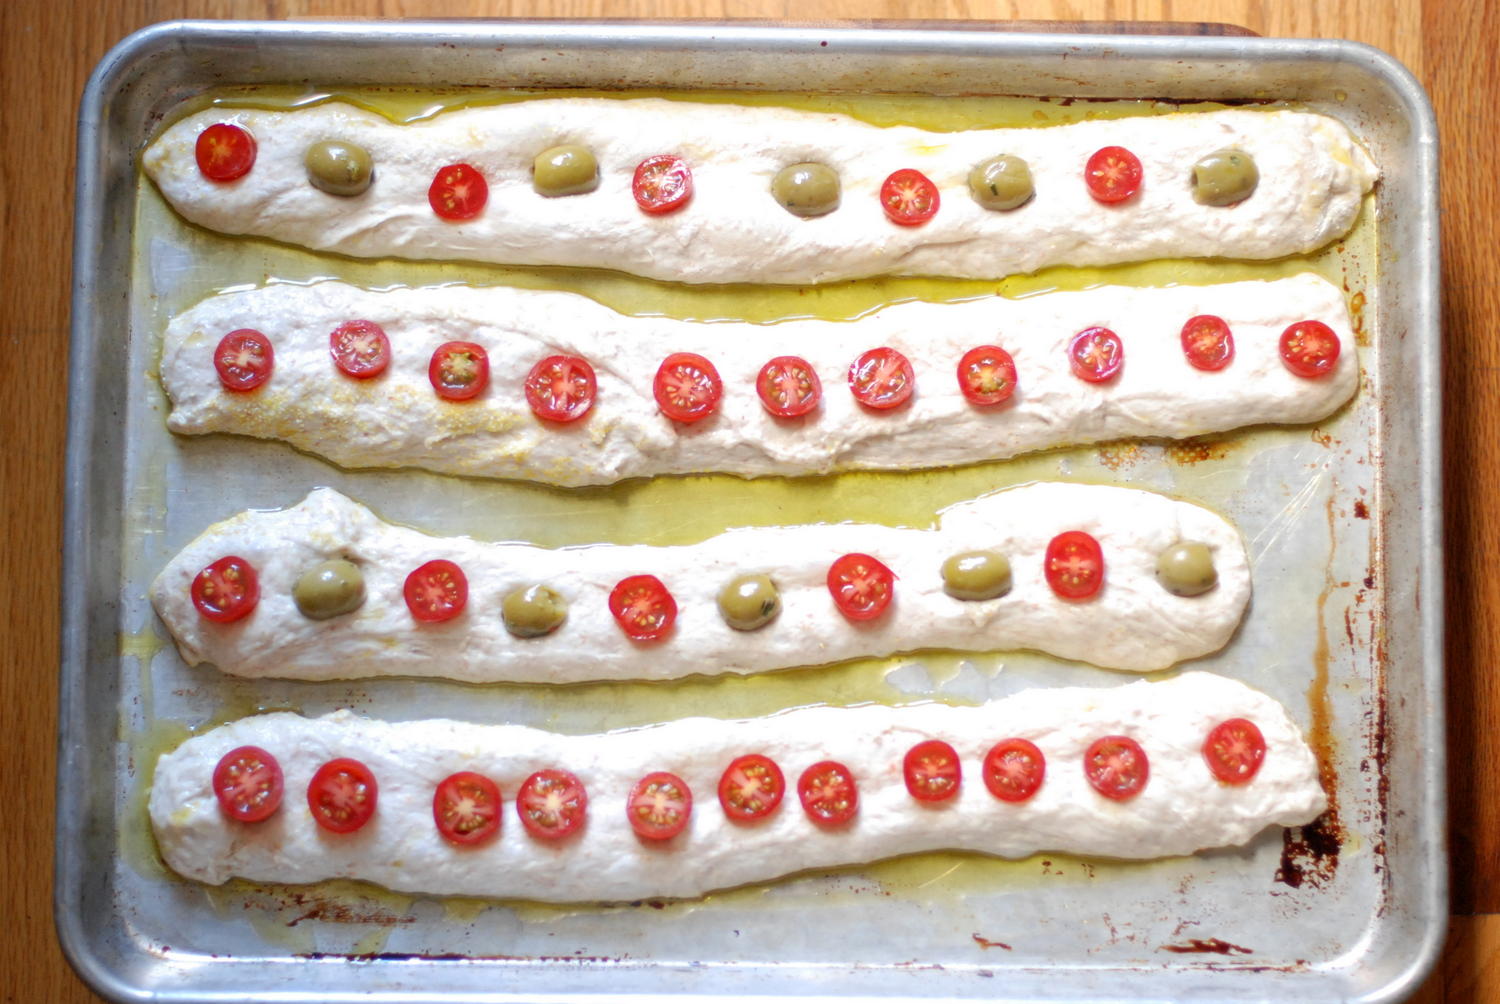
ready to bake
ready to bake

And hopefully this goes without saying, but don't feel bound to cherry tomatoes and olives; whole peeled garlic cloves, caramelized onions, or just some rosemary would also work well.

I'm starting to think you can do pretty much anything with this dough. Which is my way of saying, stay tuned for more no-knead riffs in the future.

it's really good with garlic cloves, too.

What are you making this weekend?

No-Knead BreadsticksAdapted from My Bread, by Jim Lahey

I used halved cherry tomatoes and pitted olives in most of my steccas, but I popped a couple of garlic cloves into some of the sticks, and those were really delicious. Highly recommend doing that.

3 cups bread flour, plus more for the work surface
1/2 teaspoon salt
3/4 teaspoon sugar
1/4 teaspoon instant or other active dry yeast
1 1/2 cups cool (55 to 65°F) water
1/4 cup extra-virgin olive oil
3/4 teaspoon coarse sea salt, for sprinkling
1 pint cherry tomatoes,
1 cup pitted olives,
10 cloves of garlic, or any other topping you'd like

Combine flour, salt, sugar, and yeast in a medium bowl. Add the water and mix until you have a wet, sticky dough, about 30 seconds. Cover the bowl and let sit at room temperature until the surface is dotted with bubbles and the dough is more than doubled in size, at least 12 hours and up to 18 hours.

Generously dust a work surface with flour. Use a bowl scraper or rubber spatula to scrape the dough out of the bowl in one piece. Fold the dough over itself two or three times and gently shape it into a somewhat flattened ball. Brush the surface of the dough with some of the olive oil and sprinkle with 1/4 teaspoon of the coarse salt (which will gradually dissolve on the surface).

Place a tea towel on your work surface and generously dust it with wheat bran, cornmeal, or flour. Gently place the dough on the towel, seam side down. If the dough is tacky, dust the top lightly with wheat bran, cornmeal, or flour. Fold the ends of the tea towel loosely over the dough to cover it and place in a warm, draft-free spot to rise for 1 to 2 hours. The dough is ready when it is almost doubled. If you gently poke it with your finger, it should hold the impression. If it springs back, let it rise for another 15 minutes.

Half an hour before the end of the second rise, preheat the oven to 500°F  and set a rack in the center of the oven. Oil a 13-by-18-inch rimmed baking sheet. (If not rimmed, not the end of the world, but know that your oil may dribble off the sides of the pan.)

Cut the dough into quarters. Gently stretch each piece evenly into a stick shape approximately the length of the pan. Place on the pan, leaving at least 1 inch between the loaves. Brush with olive oil and sprinkle with the remaining 1/2 teaspoon coarse salt and any toppings you're using.

Bake the baguettes for 15 to 25 minutes, until the crust is golden brown. Cool on the pan for 5 minutes, then use a strong spatula to transfer the stecca to a rack to cool thoroughly. Serve at room temperature, or reheat briefly in a warm oven.

In appetizers, bread
Comment

Semolina Bread with Sesame, Fennel, and Raisins

March 14, 2014 Rivka
1-DSC_0170
1-DSC_0170

It takes a bit of chutzpah to love the hell out of a bakery, gush and gush about its perfect croissants and chocolate rye cookies and baguettes and the rest, pick a hotel based purely on its proximity to said bakery, buy the baker's cookbooks, and then go doubt one of its recipes. But I couldn't help myself: I love pretty much everything about Chad Robertson's Tartine Bakery, and I bake my weekly loaf from his book, Tartine Bread, but I saw a recipe in there for semolina bread, and I'll confess it: I didn't believe it would work. How does cream of wheat become a loaf of bread with barely any regular flour in the mix? Seemed a bit like making bread entirely out of oats. I envisioned a wet, tacky blob with no crumb. I actually convinced myself that even though Chad Robertson considered this bread good enough to publish in his award-winning book, I wouldn't be able to get semolina dough to rise. Arrogant, much?

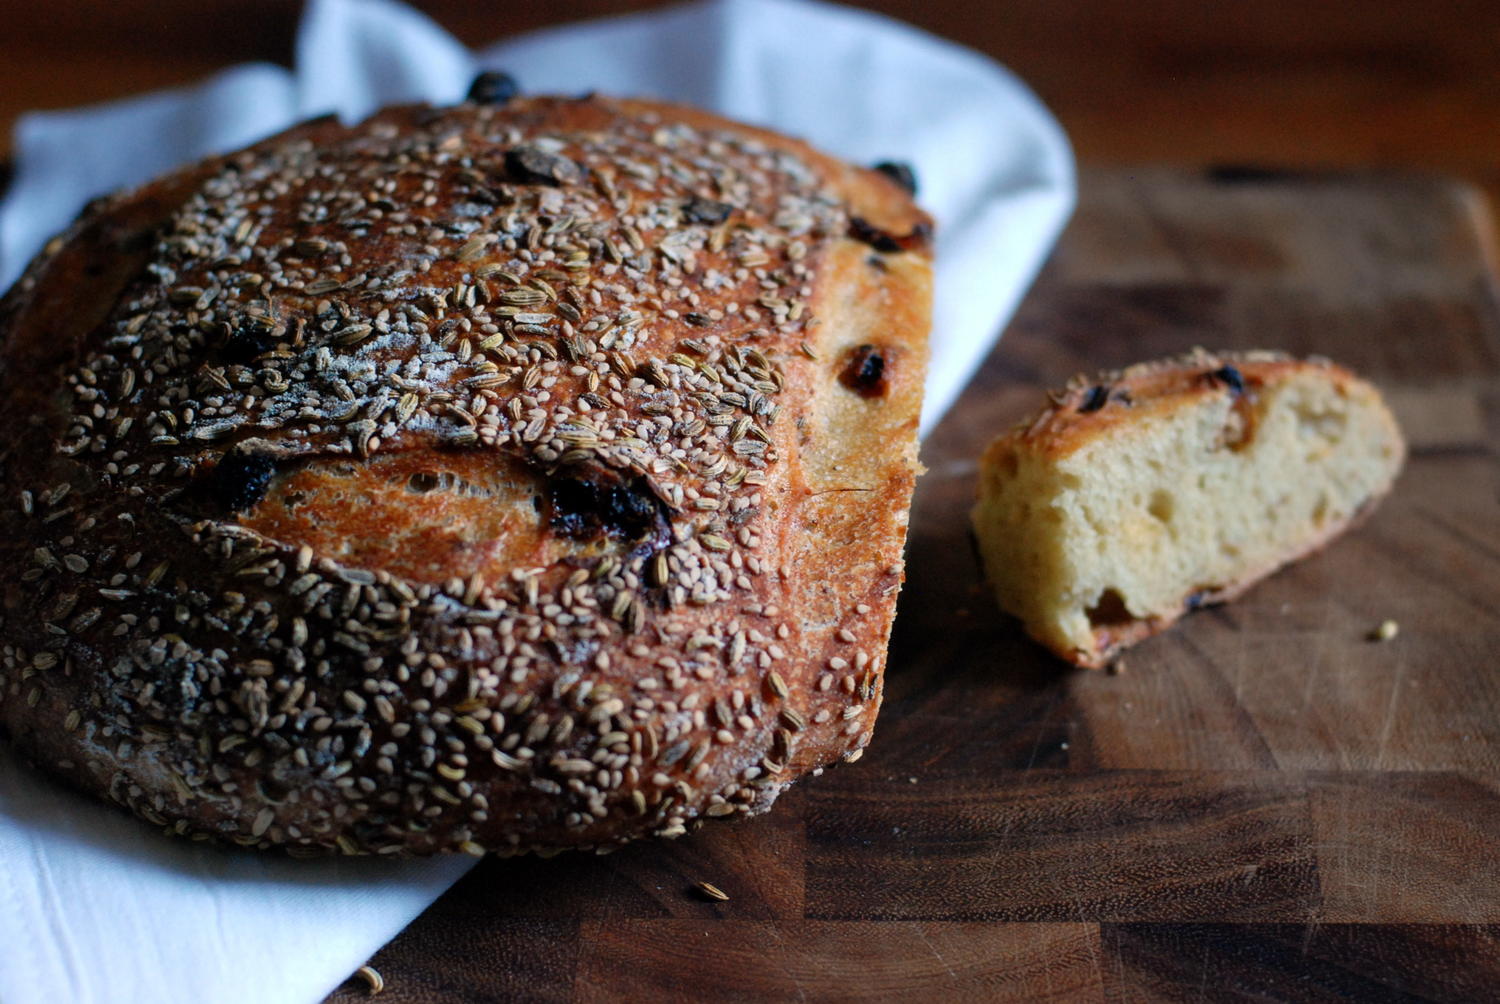
1-fennel bread
1-fennel bread

Fortunately, I threw caution to the wind. Obviously, I was dead-wrong in my doubts. What emerged from the oven last Friday was one of the best loaves I've ever made.

The bread was supple, guys. It had a beautiful crumb - tightly aerated, consistent. The flavor was sweet, and also sort of mysterious from the fennel and sesame Robertson has you grind up and incorporate into the loaf. The raisins give each slice little moments of sweetness. This bread? It was a total winner.

1-Collages7
1-Collages7

Let's talk about how to use it. First: toasted, smeared with good salted butter. You must.

Also, have a slice with more salted butter and some marmalade. It's an Amanda Hesser that could not find a better home.

Now then. It may sound like a strange combination, but I made a ridiculously tasty tartine (ha) with slices of this bread, a nice thick layer of fresh goat cheese, very timid application of harissa, a pile of simply-roasted cauliflower, and a squeeze of lemon.  Really, I want to eat it every day. And now, I'm thinking of making a roasted cauliflower recipe inspired by the bread: fennel and sesame seeds, raisins, olive oil, bread crumbs. YES.

I also made a lovely chickpea-fennel stew the other night which we loved ladled over this bread. The stew was heavy on the tomatoes and chilies, and had I thought for another second, I might even have added golden raisins to the mix. Fortunately, the raisins in the bread came through.

1-DSC_0183
1-DSC_0183

The point is that this bread goes with so much more than you might think. So give it a whirl, why don't you. That's what weekends are for.

Semolina Bread with Sesame, Fennel, and RaisinsAdapted from Tartine Bread

A few disclaimers. First, this is a sourdough bread. It starts with a leaven, made by combining a bit of mature starter with equal parts flour and water. That said, you can make this bread without sourdough by adding a bit of yeast. Both ingredient lists are below. The sourdough recipe calls for a larger leaven, because what you don't use in the bread will become your new starter.

Second, this is not a quick bread recipe. Candidly, it takes forever. That said, it really is quite flexible. If you miss a fold or let the dough rise too long, don't worry about it. I've tried every permutation of mistake, and I've never made a bad loaf of bread using this template.

Finally, consider yourself warned: you need to start this bread the night before you bake it.

For the leaven:

If using a starter:100 grams water 100 grams flour 1 tablespoon mature starter

If not using a starter: 50 grams water 50 grams flour 1/4 teaspoon yeast

In a medium mixing bowl, combine water and starter or yeast. Add flour, and use a fork to mix until no dry spots remain. Cover with a kitchen towel and set aside in a draft-free area overnight.

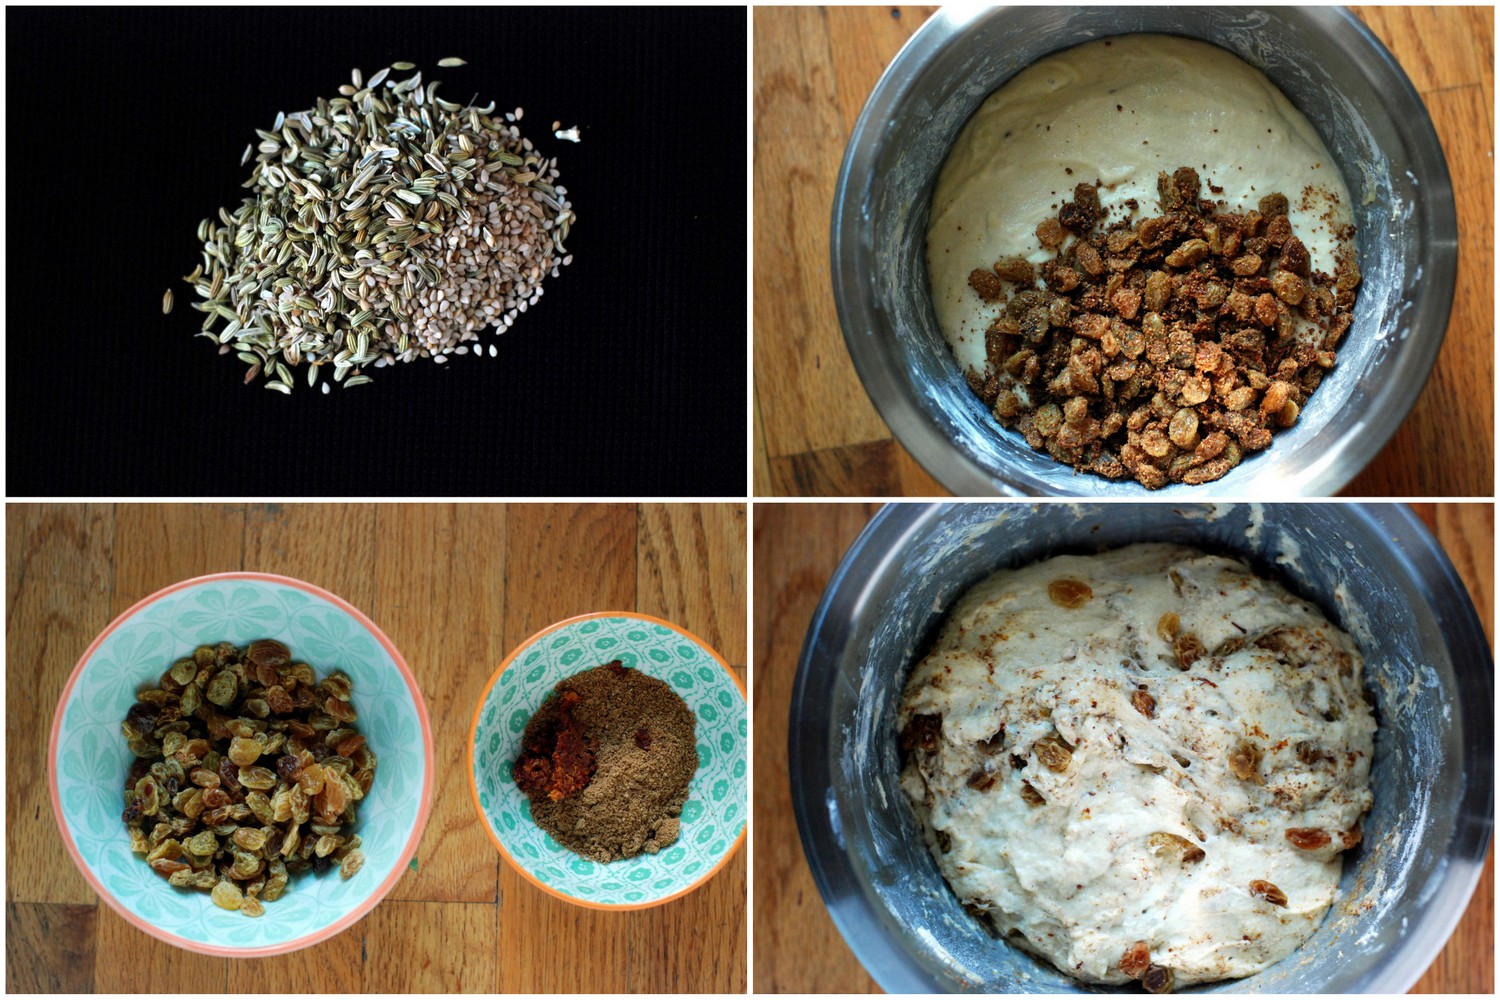
For the dough: 100 grams leaven 400 grams warm water, divided 350 grams semolina flour 150 grams all-purpose or bread flour 1 tablespoon fennel seeds 1 tablespoon sesame seeds 2 teaspoons salt 1 1/2 cups golden raisins zest of one orange 3 tablespoons each fennel seeds and sesame seeds for topping, optional

Make the dough: In a large bowl, combine 375 grams water with 100 grams of leaven. Stir to break up the leaven in the water. Add the semolina and regular flour, and stir using a fork or your hands until no dry bits remain. Let the dough rest in the bowl, covered loosely with a towel, for 40 minutes.

While the dough is resting, toast the tablespoons of fennel and sesame seeds in a dry skillet over medium-high heat for 3-5 minutes, until golden and fragrant. Transfer to a small bowl to cool. Then grind the seeds in a spice grinder until powdery. Soak the raisins in warm water for 30 minutes. Drain,  then add ground seeds and orange zest.

After the resting period, add the salt and the remaining 25 grams of warm water. squeeze the dough between your fingers to incorporate the salt and extra water; it will break apart a bit, but then start to reform as you work it.

Turn your oven on to its lowest setting and let it preheat for about 3 minutes, just until slightly warmer than room temperature. Then turn off.

Transfer the dough to a heavy container. Robertson prefers a clear one, so you can see the rise happen from the side. I've used both clear and opaque - your choice. Either way, cover with a wood cutting board, a pizza stone, or something else that's heavy and safe to put in a warm oven. You can also just wrap it in a kitchen towel, which I often do. The wood cover helps keep the dough insulated and warm. Either way, cover your dough and transfer to the warm oven to rise.

Between now and shaping, you'll give the dough a series of turns over 3-4 hours of fermentation. During the first 2 hours, you'll turn the dough every half hour. During the 3rd and 4th hours, you only turn the dough once every hour. In other words, the turns happen at the following intervals:

30-minute mark 1-hour mark 90-minute mark 2-hour mark 3-hour mark (by 4 hours, the dough definitely should be ready to shape)

To turn the dough, you'll reach into the rising container, grab the underside of the dough, and stretch it up, out, and over itself. Then you'll repeat that motion with the other 3 "sides" of the dough. Each turn is really 4 stretch-and-turn motions.

After the second turn, incorporate the raisin-spice mixture by pouring it into the dough and folding/mixing it in with your hands. No need to be gentle - your dough isn't delicate enough that you could wreck it. Just get the goodies in there.

At 30 minutes, do a turn, recover the dough, and put it back in the oven. Repeat every 30 minutes for the first 2 hours.  By the start of the 3rd hour, the dough should have grown a bit more aerated and light. By the end of hour 3 or somewhere into hour 4, it should look even a little billowy. The volume should have increased 30%. That's when you know it's ready for shaping.

Between you and me, on extra-cold days, the dough doesn't really get billowy. That's okay. At the 4 hour mark, I'll shape it anyway, and just give it a bit longer to rise before baking.

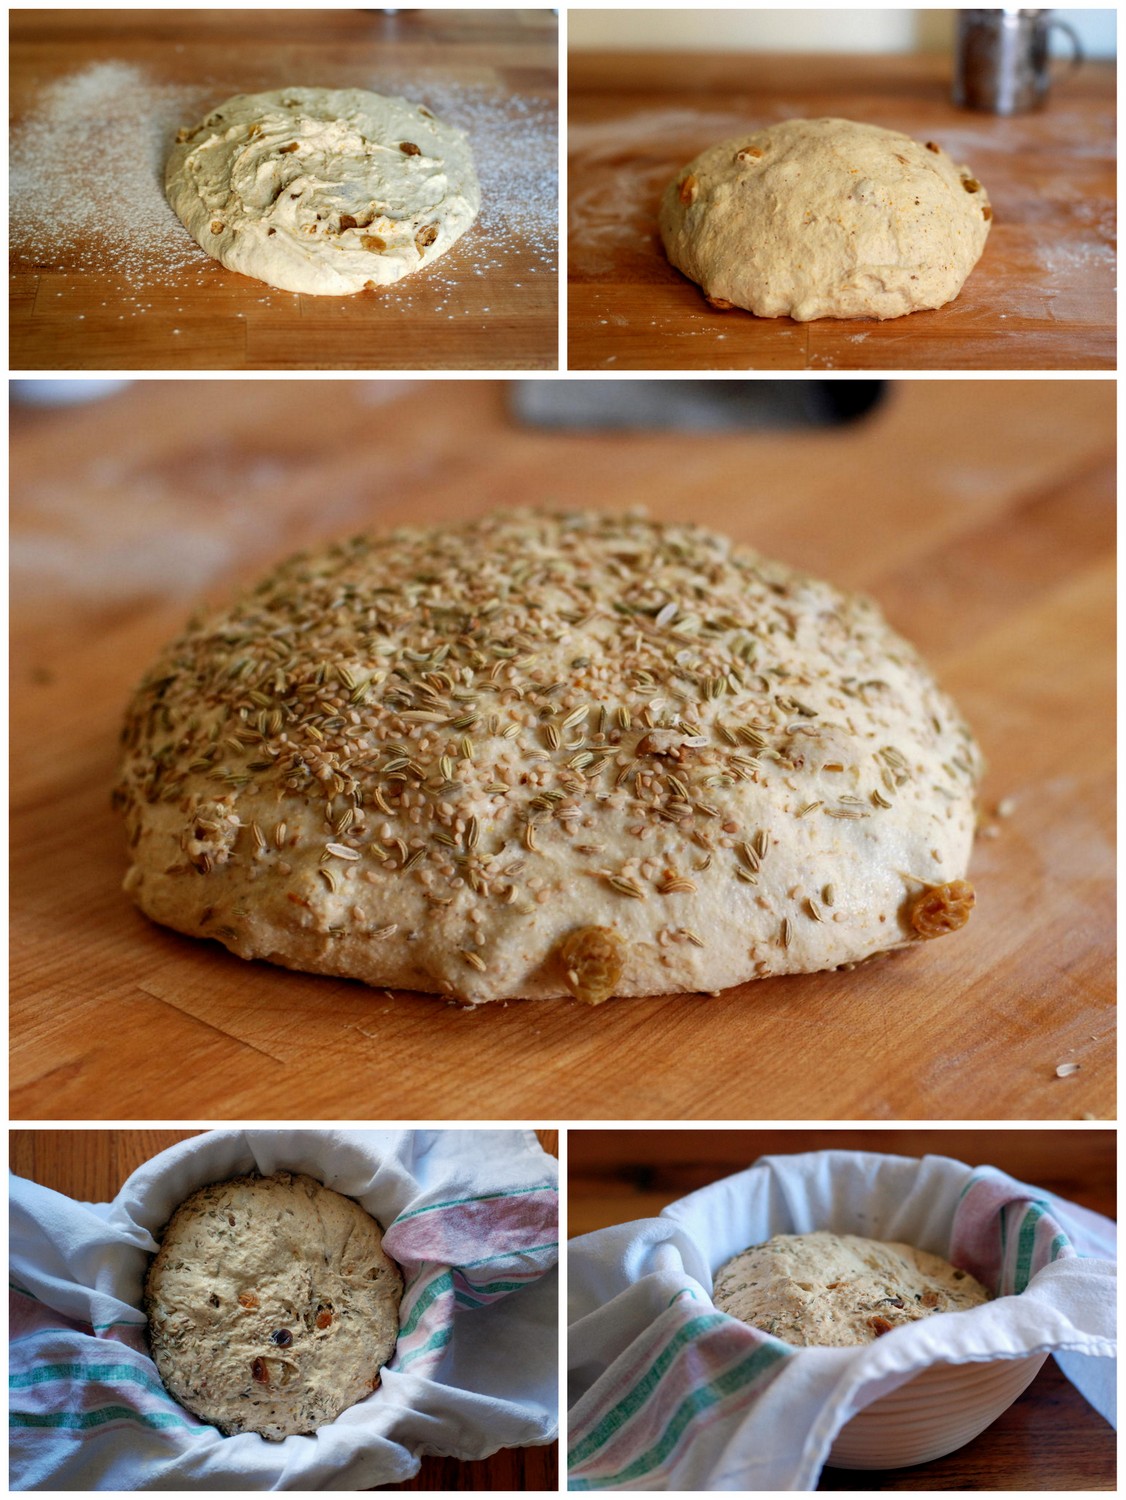
Shape the dough: When your dough is ready for shaping, pour it onto a lightly floured work surface. Then use a bench scraper to fold the dough onto itself, so the entire surface of the dough is dusted with flour.

You'll now do the initial shaping. Using your bench scraper in your dominant hand, start to tuck the dough under itself, turning the dough as you go, so the surface grows increasingly taut and internal tension ("spring") develops. Don't overdo it - you'll have another shot to build internal tension during the final shaping. Cover with a kitchen towel and let rest for 20-30 minutes.

If, after this initial shaping, the dough starts to look like a total pancake, instead of a fat, rounded blob, repeat the initial shaping and rest a second time. This ensures that your bread won't look like a pancake when it comes out of the oven.

Now, you're ready for the final shaping.

The final shaping is a series of folds, similar to the turns you completed in the bowl. To do them, turn your dough seam-side up (upside down). Fold the "side" of the dough closest to you up and over the middle. Then stretch the dough horizontally to your right, and fold that side over the middle. Stretch the dough to the left, and fold that side over the middle. Finally, stretch the far side of the dough, and fold it over all the other folds, then tuck it under as you turn the dough back onto its top. This last fold anchors the dough and ensures good internal tension, which should give you a nice, high loaf.

Cup your hands around the dough and roll your hands from top to bottom, to get a smooth, round top.

(If you're coating your bread in seeds, mix the seeds together, spread on a plate, and roll the top of your dough in the seeds until most of the surface is covered.)

Then, line a basket or bowl with a non-terrycloth towel (linen works great), sprinkle generously with flour or a mixture of rice and regular flour, and tuck the dough into its rising bowl, seam-side up.

At this point, the dough can rise for anywhere between 2 hours (in a warm, draft-free spot) and 5 hours (if your rising area is cool and drafty). The bread is much more flexible than you might think - mine rose for 7 hours yesterday, and it turned out great - so don't fret.

Bake the bread: Preheat the oven to 500° F. Put a dutch oven or other heavy, covered pot into the oven to preheat. When oven has been preheating for at least 30 minutes, remove the dutch oven (carefully!) and turn the dough into the dutch oven. A couple tips: wear oven mitts. Don't fret if your dough doesn't turn in evenly - happens to me all the time.

Cover your pot, return to the oven, and immediately reduce the temperature to 450°. Bake for 20 minutes. Then uncover and bake for 20-25 minutes more, until very brown and very crusty. Remove from the oven and let cool for at least 10 minutes before eating, if you can resist.
In bread
2 Comments

Sweet-and-Sour Onion Focaccia

February 19, 2014 Rivka
1-DSC_0822
1-DSC_0822

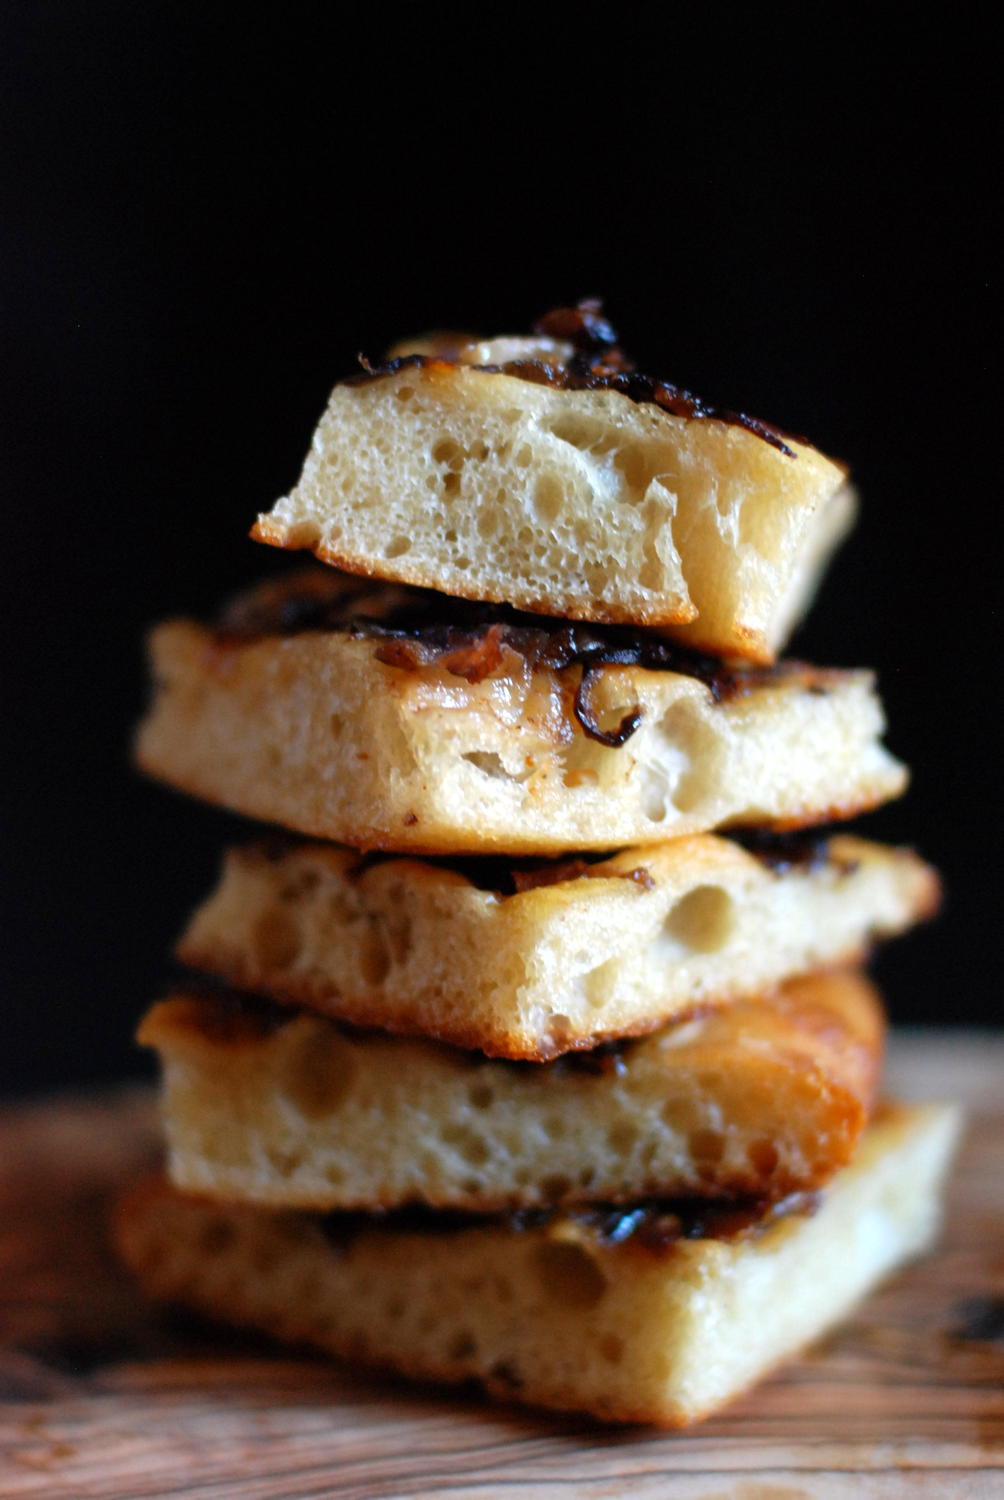
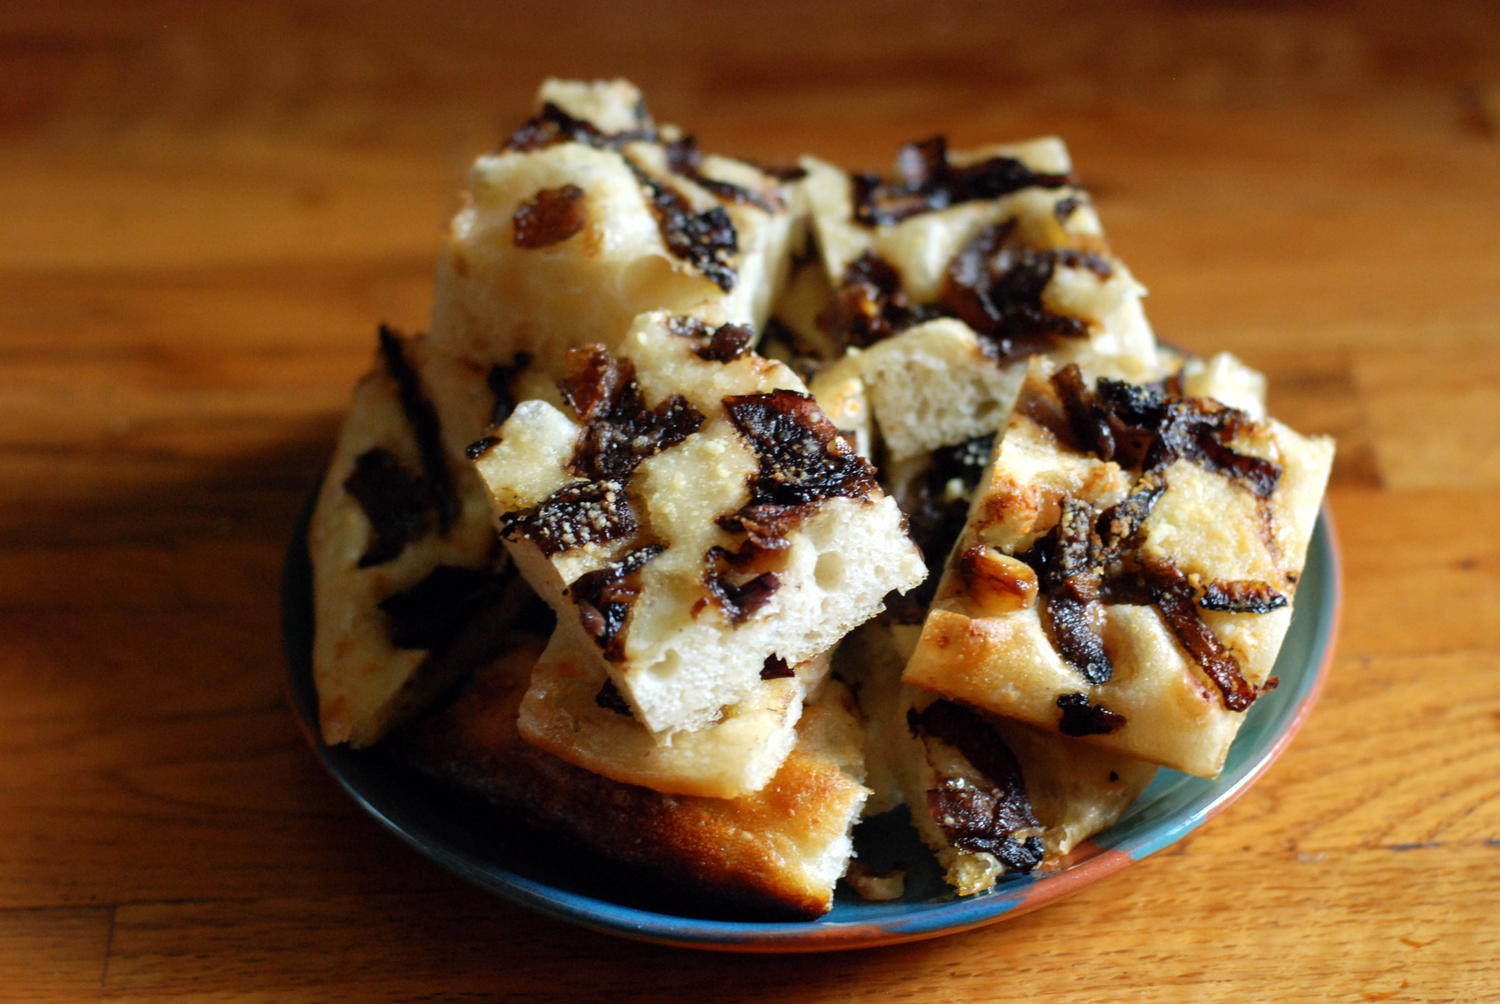
I wanted to tell you this story about how I've always believed that Friday night dinner must start with challah, even if we're having pan-fried dumplings and make-your-own spring rolls, which don't go with challah at all. I was going to tell you about how sometime a couple years ago, thanks to our smarter-than-we-are friends in DC, we realized that if we're serving spaghetti and meatballs for Friday night dinner, by all means, we can skip challah in favor of something more Italian. It was a longer story than that, but then it occurred to me that I should just cut to the chase here: doughy, crisp-edged focaccia; singed onions, licked with vinegar and the sweetness of their own caramel; a bit of Pecorino cheese on top. Need I say more? I imagine you are convinced.

1-DSC_0878
1-DSC_0878
1-DSC_0880
1-DSC_0880

And you should be. This is straight-up one of the best focaccia recipes I've ever made, and I'm psyched to share it with you.

The recipe comes from Martha Stewart Living, a magazine I do not read. My friend Jana is the Martha expert, and she's the one who introduced me to this focaccia. It seems like Martha is less keen on crusts than we are, though, because she makes seven cups of flour into just one, very billowy, very doughy focaccia, where I (at Jana's recommendation) have split the thing in two. The result is a crustier, chewier bread, which I enjoy. To follow queen Martha or little old me? Choice is yours.

We ate this while it was still hot (it's a different ballgame that way, isn't it?), and we love-love-loved it. And then, the second time we made it, I really pushed things over the edge by adding the remnants of Ottolenghi's caramelized garlic (which we had leftover after making this frittata) and, I mean, wow.

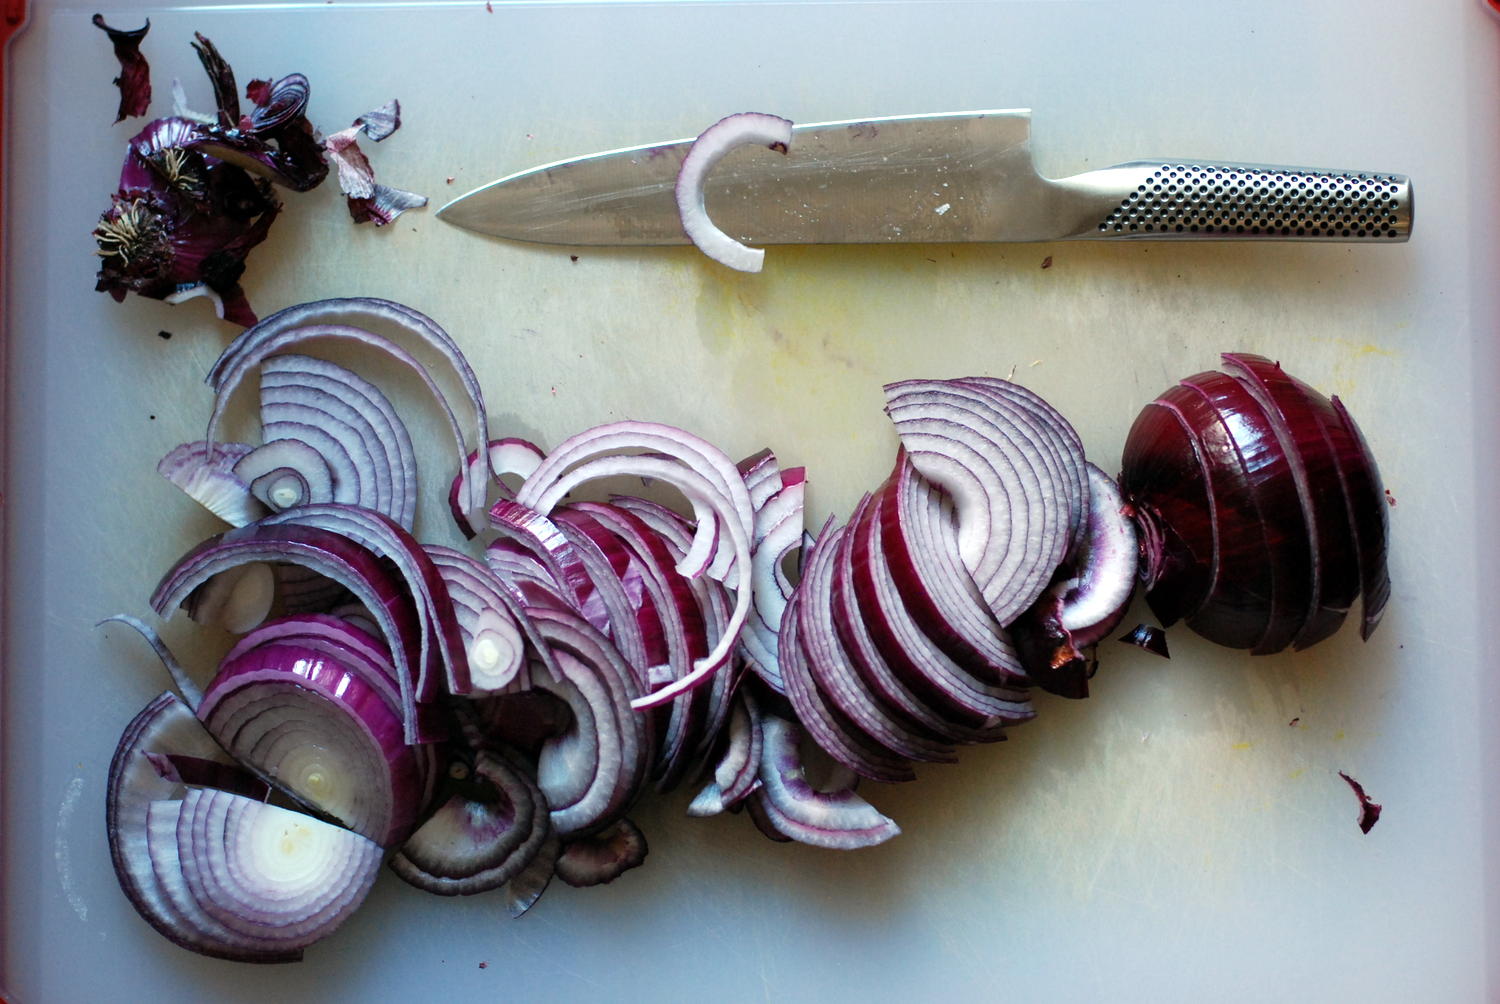
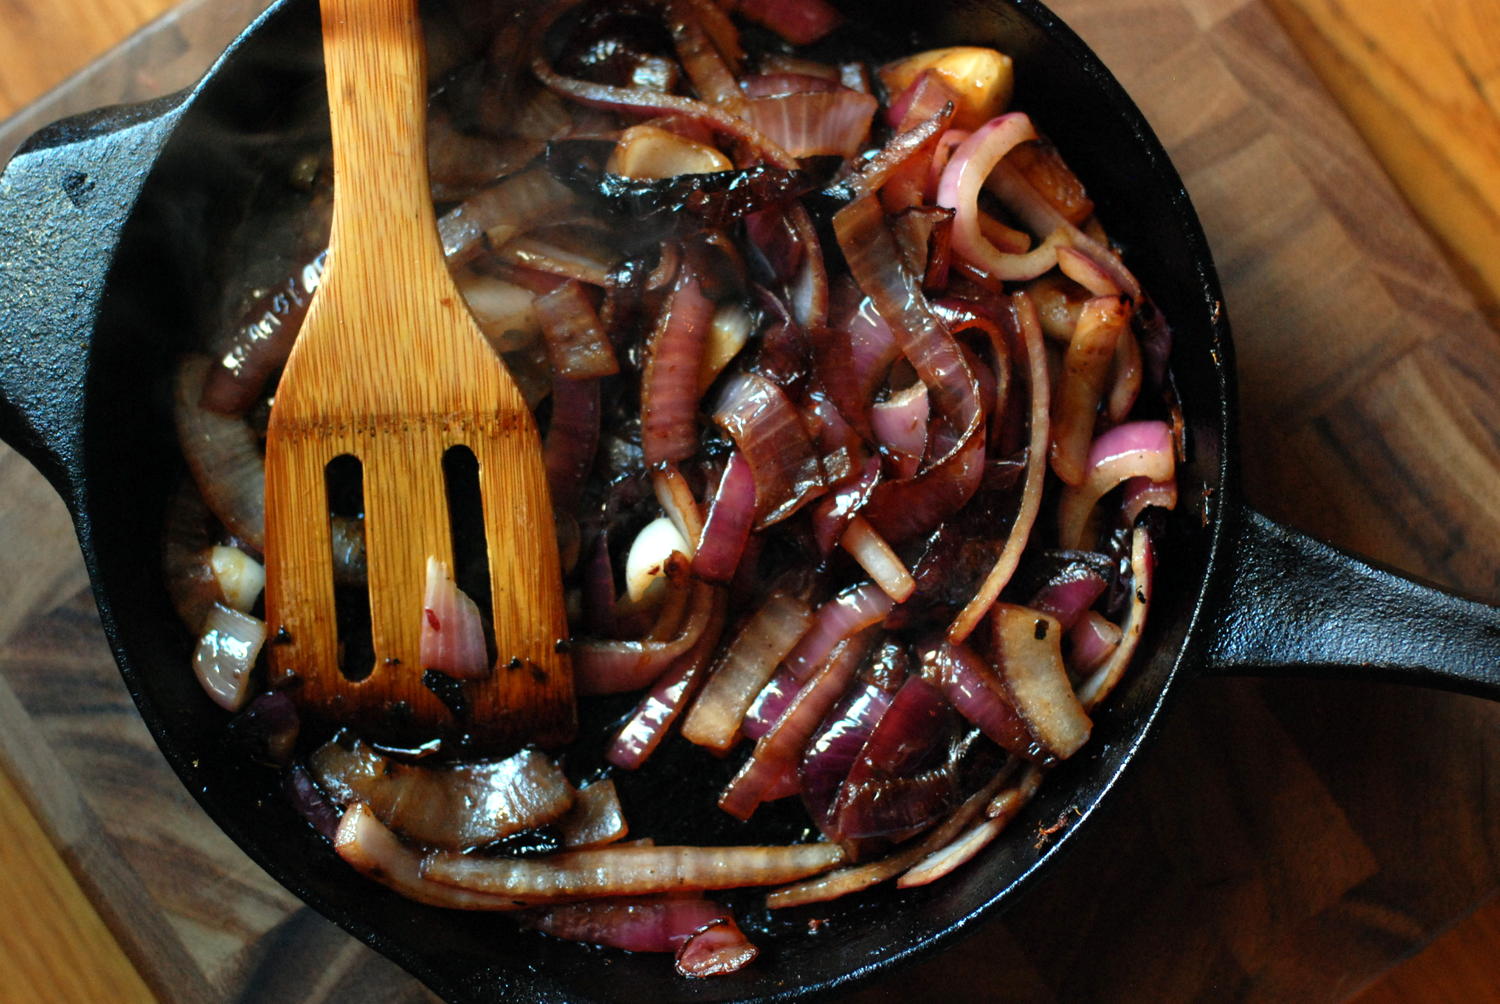
I've made it three times. By now, I'm a pro. And I've learned a couple things along the way. In addition to splitting the dough in half, I also slice my onions thickly. If you shred them into thin rings, as suggested, they seem to disappear into the bread. 1/2-3/4-inch slices ensure that even after the softening, browning, and baking, the onions stay intact and prominent. They also burn less easily. I'd definitely recommend doing it this way.

1-DSC_0920
1-DSC_0920
1-DSC_0923
1-DSC_0923

Over time, I've also learned to eliminated the very fussy folding method, where you turn the dough out onto a floured board and fold it letter-style over itself. This step is impossible without a bench scraper, which I trust many of you don't have; it's also maddening, because the dough is so darn wet that you can't help yourself from adding flour; and lastly, the advice to "put the dough back into the bowl seam-side down" is tough to follow if your dough is so wet that it doesn't even have a seam. To save myself the headache, I opted instead for the "turning" method employed by Chad Robertson of Tartine Bakery, whereby you work the dough by turning it in its rising bowl. That means no dumping, flouring, scraping, sticking, or fussing. Just a few turns of the dough over itself, and the towel goes right back on for its next rise. Easy as pie.

1-DSC_0941
1-DSC_0941
1-DSC_1029
1-DSC_1029

One last note: while the Pecorino is lovely on this focaccia, it can be skipped. I made this focaccia dairy-free last time to no complaints. Just be sure to add little sprinkles of flaky sea salt to the bread before baking, which will replace the saltiness of the Pecorino (not to mention give the focaccia a satisfying crunch).

1-DSC_1080
1-DSC_1080

Enjoy this one, friends.

Sweet-and-Sour Onion FocacciaAdapted from Martha Stewart

Martha says this makes one large focaccia, but I like it split into two smaller, thinner focaccia breads. Your choice. For other baker's notes, see the post itself.

For the focaccia dough: 2 1/4 pounds bread flour (about 7 cups), plus more for dusting 3 1/2 cups warm water (about 110 degrees) 1 teaspoon dry yeast 2 tablespoons coarse salt

For topping the focaccia: 1/2 cup plus 2 tablespoons extra-virgin olive oil 2 large red onions, halved and sliced into rings 1/2- to 3/4-inch thick Coarse salt and ground pepper 2 tablespoons cider vinegar 1/2 cup grated Pecorino Romano cheese (add a couple teaspoons of flaky salt before baking if you skip the cheese) 1 teaspoon red-pepper flakes

Whisk together flour, water, and yeast in the bowl of a stand mixer. Cover bowl with plastic wrap or a towel, and let rise in a warm place until tripled in bulk and full of sponge-like bubbles, about 2 hours.

Add salt. Attach bowl to mixer fitted with the dough hook. Mix on low speed 3 to 5 minutes, scraping down sides of bowl as needed. When dough begins to cling to and almost climb sides of bowl, raise speed to medium; mix 15 seconds. Dough will be wet, slack, and very sticky.

Using floured hands (or not - if your dough is really wet and gluteny, you won't even need to flour them), reach into the bottom of the bowl and scoop a long "tail" of dough up, over, and back onto itself. This is one turn. Repeat three more times, turning the bowl 90° between each turn, so you've turned all four "sides" of the dough. Then recover bowl with a towel or plastic wrap, and let rise in a warm place until doubled in bulk, about 1 hour.

Repeat the turning process, recover bowl, and let rise in a warm place until doubled in bulk again, about 1 hour more.

Preheat oven to 450° and set a rack in lower third of oven. Coat two 17-by-12-inch rimmed baking sheets with total 1/4 cup of the olive oil; set aside.

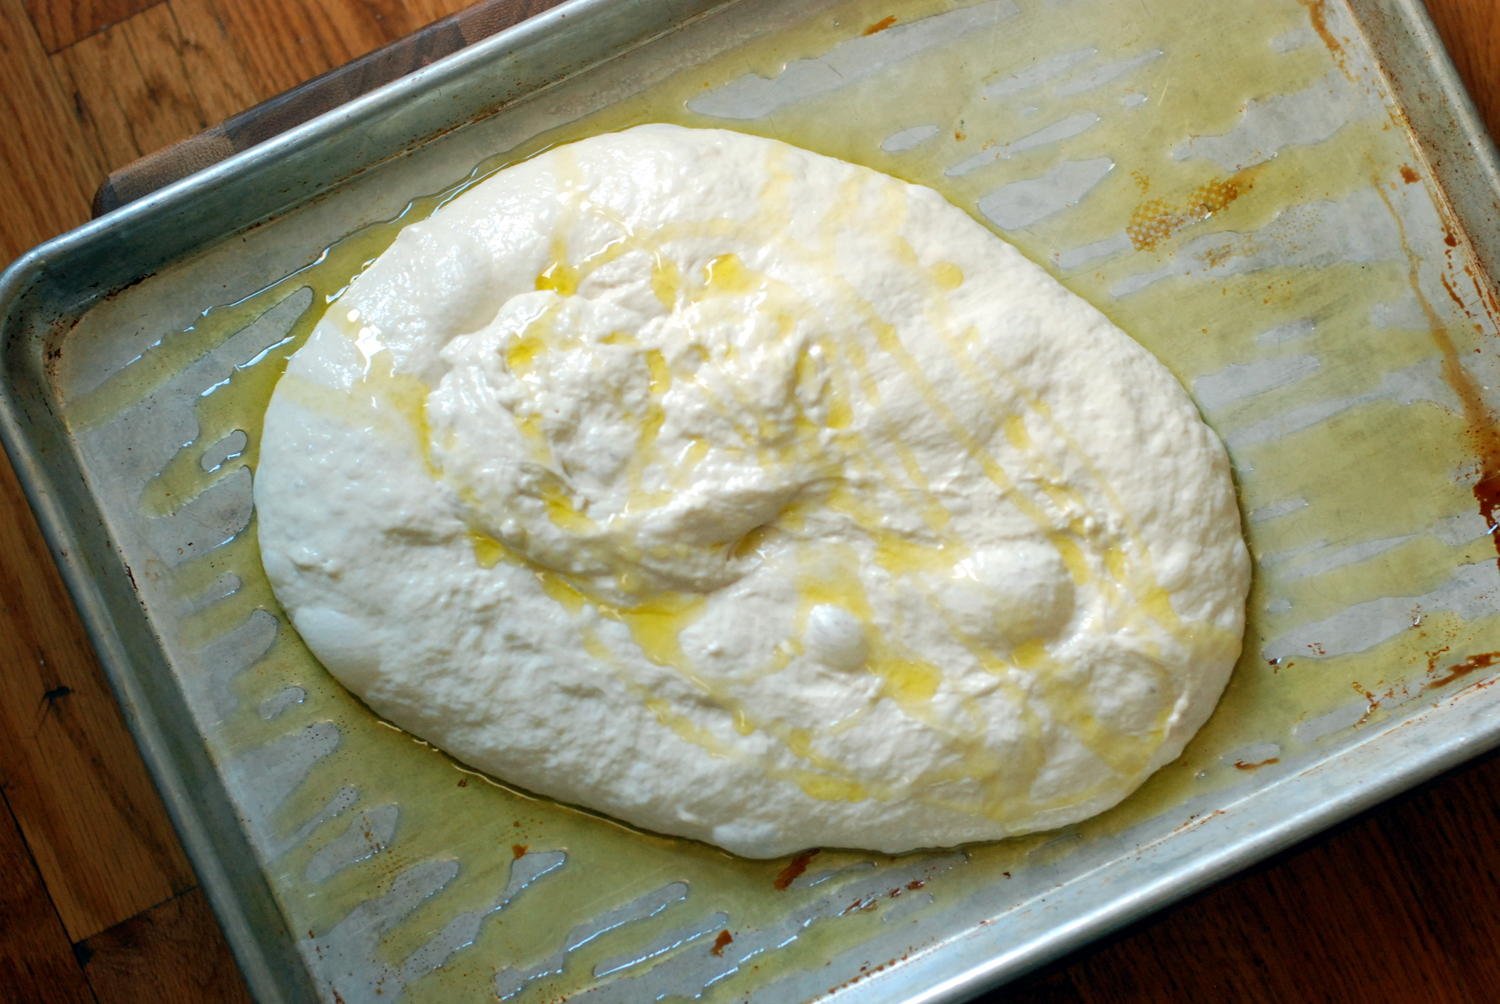
Divide dough in half and place on prepared sheets. Drizzle each with an additional tablespoon of olive oil. Push dough out toward edges of sheet. Cover with plastic wrap; let rest 10 minutes. With plastic wrap still on top, press out dough to fill sheet. Remove plastic (dough should be very bubbly and supple). Drizzle remaining 2 tablespoons olive oil over top of each focaccia.

Meanwhile, in a large skillet, heat 2 tablespoons oil over medium-high. Add onions and season with salt and pepper. Cook, stirring occasionally, until onions are tender and golden brown in spots, 12 minutes. Add vinegar and cook, stirring and scraping up browned bits with a wooden spoon, 1 minute.

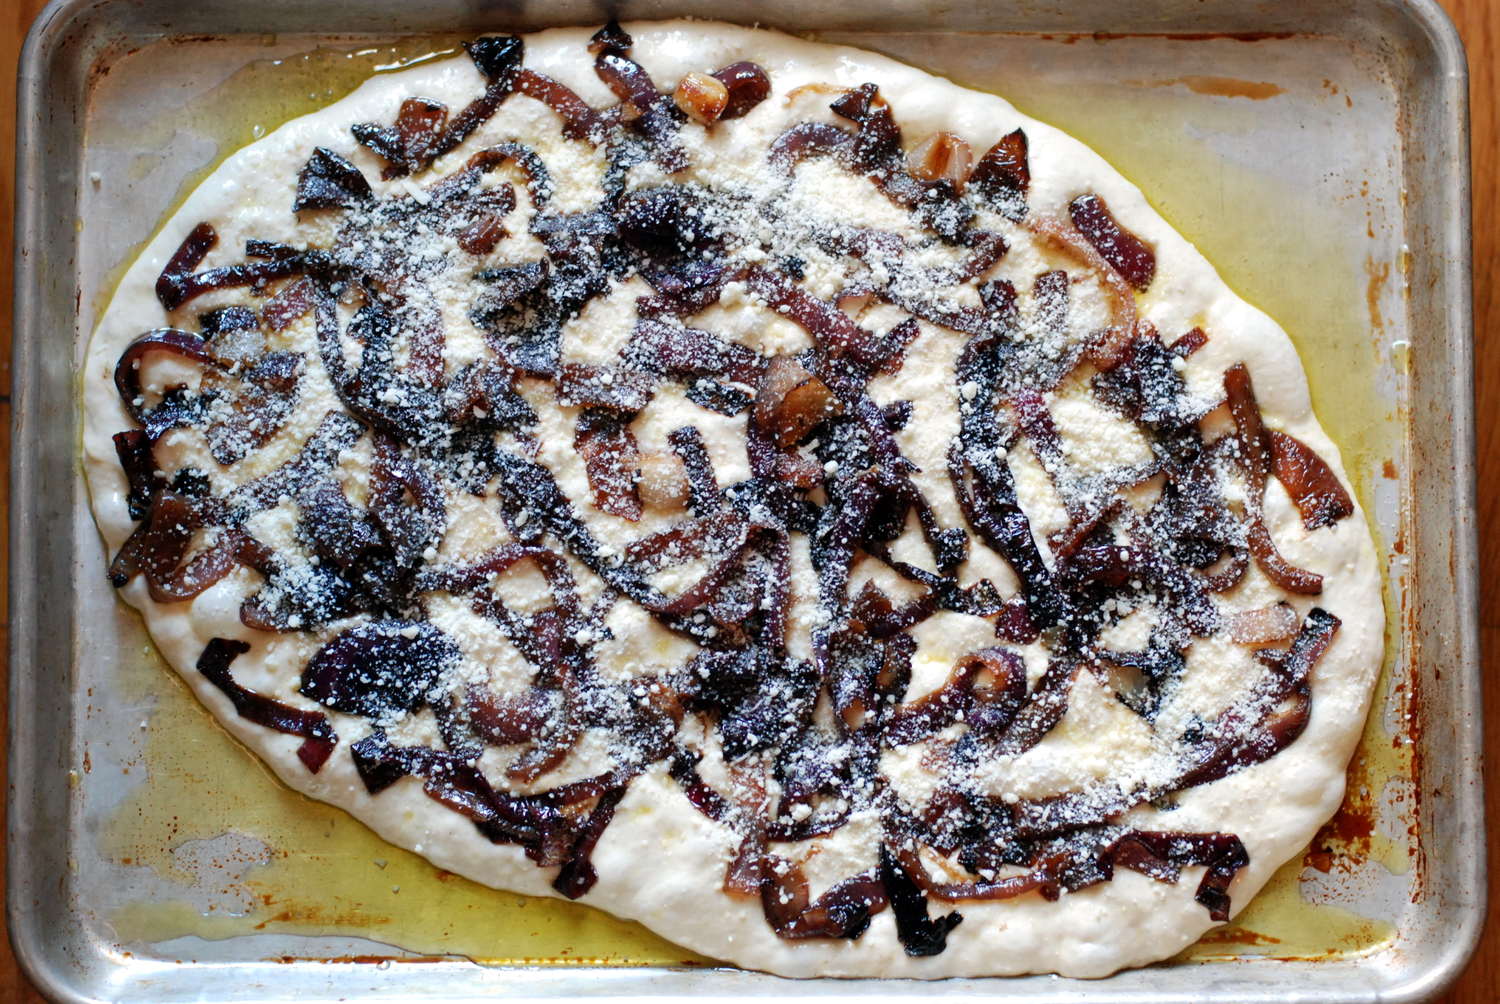
With your fingertips, poke dimples all over dough, then top with browned onions, red-pepper flakes, and cheese (optional).

Bake until golden brown around edges, 25-30 minutes.

Let cool on sheet 5 minutes; if focaccia seems like it is sticking to the pan, scrape it off using a metal spatula. It does like to stick, but if you use enough oil on the bottom of the pan, it's usually fine.

Cut into 20 pieces and serve warm or at room temperature.

In appetizers, bread, vegan
2 Comments
Older Posts →
No results found

Subscribe by email:

  • books (1)
  • crisps and crumbles (1)
  • frozen (1)
  • toys (2)
  • gifts (3)
  • egg whites (5)
  • fried (5)
  • how to use--- (6)
  • drinks (10)
  • menus (11)
  • travel (11)
  • fish (12)
  • kosher for passover (14)
  • thanksgiving (14)
  • vegan (20)
  • snacks (21)
  • techniques (21)
  • soup (26)
  • bread (28)
  • pies and tarts (28)
  • cake (33)
  • events (34)
  • condiments (36)
  • various and sundry (39)
  • uncategorized (42)
  • cookies and bars (46)
  • weekday lunch (47)
  • appetizers (48)
  • salad (51)
  • gluten-free (56)
  • comfort food (61)
  • breakfast and brunch (77)
  • sides (81)
  • dessert (90)
  • main dishes (100)
  • healthy (139)
  • easy (155)
  • vegetarian (180)

| LATEST |

Featured
Blue Chair Fruit's Black Raspberry Jam

One Saturday night a few weeks ago, friends tipped us off that Butler's Orchard had snap peas and blueberries and black raspberries all ready to go at once. Needless to say, we canceled all other plans for the next day, and by 8:30 am Sunday morning, we were off to the races. 

Blueberries are awesome to pick with an 18-month old. They free from the bush easily, they're plentiful at toddler height, and us oldies can reach the higher ones and save our backs while the kid gets the low-hanging fruit. We came home with 5 pounds of blueberries, 5 pounds of black raspberries, and stains just about everywhere.

Read more →
Thai Grapefruit Salad

If you've seen me in the past few weeks and expressed even vague interest in Asian food and/or cooking, I've probably bored you to tears gushing on about the best cookbook of the year (IMHO), 101 Easy Asian Recipes. The title is both accurate and a bit tongue-in-cheek, since it makes the book sound like something fusion-y and inauthentic and terrible, when in fact, it inauthentic, and unabashedly so, and wonderful. The back of the book has big speech bubbles boasting "100% inauthentic" and "very good" and "easy, really." It's fab.

The book comes from Peter Meehan, who has worked with David Chang (Momofuku) and Danny Bowein (Mission Chinese) for years, co-authored the Momofuku cookbook, and now edits Lucky Peach magazine. He's clearly a meticulous guy who gets how Asian food works -- the balance of flavors, the precision with cooking times, etc. But this book takes a step away from the "this has 500 ingredients/steps, but it's worth it"-style of recipes, opting instead for formulas that follow two important ground rules: no deep-frying, and no recipes within recipes. The rationale: Asian food isn't just for Sunday projects, it's for weeknight dinner with kids. Good bless you, Peter Meehan. 

Read more →
Mango Sticky Rice
Mango Sticky Rice

've had this Thai glutinous rice sitting in the bottom of my cupboard for months, but never quite worked up the guts to make it into something until, a few  weeks ago, the waiter at our little Laotian spot in the neighborhood told me that sticky rice may be the easiest thing on their menu to make at home. That doesn't necessarily say much, considering the menu includes items like crispy rice salad (involving rice that's cooked, mixed with other stuff, formed into balls, deep-fried, broken into pieces, and tossed with a gazillion other ingredients, which I know only because I've made it and whoa, pain in the butt doesn't even start). Still: "easier" was motivation enough not to let that rice sit untouched.

Read more →
Winter 2016: Odds and Ends

Not a full post today, but a bunch of odds and ends that I've been meaning to share.

Marmalading: That's what kept me out of trouble and away from insanity during our two-ish weeks of hibernation under an impenetrable and, apparently, unplowable 30 inches of snow. (Attention DC officials: occasionally, it snows here. Surprise! Buy another plow or two.) Fortunately, my fridge was chock-full of citrus you've never heard us, because Cathy went to Texas for a marathon series of cooking classes, and her trip coincided with Central Market's wonderful Citrus Festival, and she is a goddess and a wonderful friend and a crazy lover of citrus like yours truly. (I paid her in Barcelonian anchovies, yes). For most of last weekend, our home smelled like a heavenly mix of chartreuse hot cocoa (thank you Pam!) and boiling citrus peel. Not shabby. Not shabby at all.

Read more →
Povitica: The Best Babka Ever

It's snowing! It's snowing! THE APOCALYPSE IS COMING! I hope you bought flour and sugar. I hope you happen to have walnuts in the house. Yes? Wonderful.

Meet my latest, love, the Povitica. It comes from my other latest love, the Great British Baking Show. If I may, for just a moment, evangelize on its (the show's) behalf, it is the sweetest, coziest little food show on television. Contestants do their preparation in advance, and come to weekly competition with dog-eared copies of recipes they’ve developed. If someone runs behind, others pitch in to help out. Even the hosts of the show sometimes provide assistance. There’s a lot of smiling and hugging, absolutely no product placement, and so much Englishness, you won’t know what to do with yourself. It's Victorian sponge for miles.

Don't let the coziness fool you: each episode brings a "bake" more ambitious than the last.  There are hot-water pastries and raised yeasted loaves, tiered pies and sculptured cakes. There are desserts you’ve never heard of, from Germany and Poland and France and Croatia, which if you saw in a cookbook might give you pause: lots of ingredients, pages of instruction, no sense of what the thing is supposed to look like if baked correctly. But when a bunch of (okay, very accomplished) home bakers give these recipes a go, under the pressure of a short timeline a televised competition, you watch them, and you think, yeah, maybe I could do that. One minute I’m watching the show, then next, I’m all I must have this in my oven now. That is why last week I up and baked a dobos torte, just because. And then this week, I got baking shpilkes  again, so I went totally mad and baked my beloved povitica.

Read more →
Persimmon Walnut Bread

This is a happy-accident story, but it doesn't start that way. This past fall, I was determined to make hachiya persimmons into smooth, spiced butter. But each time I tried, I created something so ruined, so mouth-dryingly inedible, that I had to dump the entire thing. I did this too many times. cough three.

Fuyu persimmons are sweet and crunchy. They can be eaten as you would an apple. Hachiya persimmons are not as friendly. If you buy them hard, you must wait to eat them, or you will take a bite and your entire mouth will turn dry and chalky, like what tannins in wine do to your mouth but unpleasant, a thousand times unpleasant. To avoid this, you must tend to your hachiyas: put them in a paper bag, set them somewhere warm but not too warm, encourage them to ripen but protect them dutifully against spoilage. Hachiyas can be eaten when they are soft all over, and plump like a balloon. At that point, their astringency goes away, leaving behind soft, floral-flavored flesh that's wonderful as is, or in dozens of baked goods.

The catch, though, is that if even one bit of the persimmon hasn't reached that perfect stage of ripeness, its astringency will infiltrate and ruin whatever you're making with it. This is especially true in the case of butter, where the persimmons are cooked together and then pureed. And so it was for me, time after time, I found persimmons, coddled them to ripeness, cooked them, blended them, tasted them, cursed, and tossed the mixture into the trash. So wasteful, so frustrating. There must be a better way.

Read more →
Sprout Chaat Salad + New Site!

I want desperately to tell you all about this chaat-style salad I've been making almost daily, but it's probably rude to offer guests something to eat without first saying hi, so: 

Hi! I've got a new home.

Not Derby Pie is still there - go see for yourself - but it was time for a fresh start. I never really had the technical wherewithal to manage my own website. I faked it pretty well for 8 (!) years, but with every automatic Wordpress update, my site would break a little bit more – the header, gone! the comments, gone! etc – and late last year, I finally decided I needed a full reboot.  So, here we are: From now on, I'll be sharing new recipes over here, at rivkafriedman.net. 

I used Squarespace to build this site, and I hope you love its clean interface as much as I do. The search function is simpler, the design is 100% mobile-friendly, and I've managed to haul all of my old posts over to this new home, with only minor glitches in spacing and captions and whatnot. I'm 90% of the way there. The biggest issue is that ingredient lists in recipes transfer as a block, not a list. You may see some other minor formatting issues for a little while longer. If a recipe looks particularly garbled, you can always find it back on NDP.

New year, new start. I'm so excited to finally share this with you.

Now then, onto business. 2016's first sprouts are ready for a salad.

Read more →
Maple Walnut Squares

I know it's almost Christmas, but I'm about one month behind (on everything) and right now, I need to commit a tiny act of Thanksgiving blasphemy. I tell you this: the best dessert I ate on Thanksgiving was not pie.

By 7 pm the evening of the holiday, our house was full of neighbors who had decided to stay local. Our table was overflowing with pies, many of which our friends had brought: a glistening, lattice-topped sour cherry pie; several bourbon/brandy-filled pumpkin pies; a gorgeous rendition of Deb's chocolate tart with gingersnap crust (a slice of which I carefully set aside for myself, which my unsuspecting and always-cleaning lady accidentally threw away, *sob*) and many more. I tried too many; I loved them all. But I think my favorite bite of all was a slice of these maple walnut squares.

Read more →
How to Give Thanks
How to Give Thanks
Read more →
Croissants (really, I made croissants) + other croissant-ish things
Read more →

| hEALTHY |

Featured
Sprout Chaat Salad + New Site!

I want desperately to tell you all about this chaat-style salad I've been making almost daily, but it's probably rude to offer guests something to eat without first saying hi, so: 

Hi! I've got a new home.

Not Derby Pie is still there - go see for yourself - but it was time for a fresh start. I never really had the technical wherewithal to manage my own website. I faked it pretty well for 8 (!) years, but with every automatic Wordpress update, my site would break a little bit more – the header, gone! the comments, gone! etc – and late last year, I finally decided I needed a full reboot.  So, here we are: From now on, I'll be sharing new recipes over here, at rivkafriedman.net. 

I used Squarespace to build this site, and I hope you love its clean interface as much as I do. The search function is simpler, the design is 100% mobile-friendly, and I've managed to haul all of my old posts over to this new home, with only minor glitches in spacing and captions and whatnot. I'm 90% of the way there. The biggest issue is that ingredient lists in recipes transfer as a block, not a list. You may see some other minor formatting issues for a little while longer. If a recipe looks particularly garbled, you can always find it back on NDP.

New year, new start. I'm so excited to finally share this with you.

Now then, onto business. 2016's first sprouts are ready for a salad.

Read more →
Fennel frond pesto + what to do with those pesky stalks
Read more →
Asparagus Toasts with Pistachios and Mint
Read more →
Eggplant-Walnut Pâté + Passover Ideas
Read more →
1-DSC_0861-600x401.jpg
Best Mushroom Pizza (or any white pie, really)
Read more →
Lentils and Rice with Tamarind Sauce and Dukkah
Read more →
Big Kale Salad with Pomegranate and Feta
Read more →
Punchy Crunchy Ginger Salad
Read more →

| BreakfAST |

Featured
Povitica: The Best Babka Ever

It's snowing! It's snowing! THE APOCALYPSE IS COMING! I hope you bought flour and sugar. I hope you happen to have walnuts in the house. Yes? Wonderful.

Meet my latest, love, the Povitica. It comes from my other latest love, the Great British Baking Show. If I may, for just a moment, evangelize on its (the show's) behalf, it is the sweetest, coziest little food show on television. Contestants do their preparation in advance, and come to weekly competition with dog-eared copies of recipes they’ve developed. If someone runs behind, others pitch in to help out. Even the hosts of the show sometimes provide assistance. There’s a lot of smiling and hugging, absolutely no product placement, and so much Englishness, you won’t know what to do with yourself. It's Victorian sponge for miles.

Don't let the coziness fool you: each episode brings a "bake" more ambitious than the last.  There are hot-water pastries and raised yeasted loaves, tiered pies and sculptured cakes. There are desserts you’ve never heard of, from Germany and Poland and France and Croatia, which if you saw in a cookbook might give you pause: lots of ingredients, pages of instruction, no sense of what the thing is supposed to look like if baked correctly. But when a bunch of (okay, very accomplished) home bakers give these recipes a go, under the pressure of a short timeline a televised competition, you watch them, and you think, yeah, maybe I could do that. One minute I’m watching the show, then next, I’m all I must have this in my oven now. That is why last week I up and baked a dobos torte, just because. And then this week, I got baking shpilkes  again, so I went totally mad and baked my beloved povitica.

Read more →
Croissants (really, I made croissants) + other croissant-ish things
Read more →
Mushroom and Kale Breakfast Strata
Read more →
Barley Porridge with Orange and Black Sesame
Read more →
Ramps 'n' Eggs Biscuit Sandwiches
Read more →
Asparagus Toasts with Pistachios and Mint
Read more →
Apple-Cheddar Scones with Sage
Read more →
Menemen - Turkish Eggs with Tomatoes and Peppers
Read more →
You must select a collection to display.

© 2016 Rivka Friedman. All Rights Reserved.