• Home
  • About
  • Recipe Index
  • Contact
Menu

Rivka Friedman

Street Address
City, State, Zip
Phone Number

Your Custom Text Here

Rivka Friedman

  • Home
  • About
  • Recipe Index
  • Contact

Roasted Cauliflower with Red Onion-Yogurt Sauce

August 26, 2015 Rivka
1-DSC_1011-600x401.jpg

It makes no sense to start a post about cauliflower with a public service announcement about plums. That said, I happened to pick up a bag of methly plums at the market a couple weeks ago; they were juicy and wet, sold as seconds because they were...on the verge. They were begging to be mushed with some sugar and made into jam. So I did it. And friends, that jam is so good, so utterly addictive, that I'm rather heartbroken methly plums are now out of season here. With that, the PSA: if methlys are still growing where you are, get a bag. Combine them with some sugar, some lemon juice, and some ground ginger, or better yet, some ground galangal. Cook until bubbly but still runny. Jar. Smear some on toast with a bit of fresh cheese. Summer has never, ever, tasted this good.

1-DSC_0986-600x401.jpg

The dish I'm actually here to share with you won't win any awards for the summeriest dish around, but it's landed on our table four times in the past month, including twice for company. It's the thing Adi eats the most of right now - she can't seem to get enough cauliflower in the belly. And three of our guests have asked for the recipe, confirming that this is good enough to last beyond our family cauli kick.

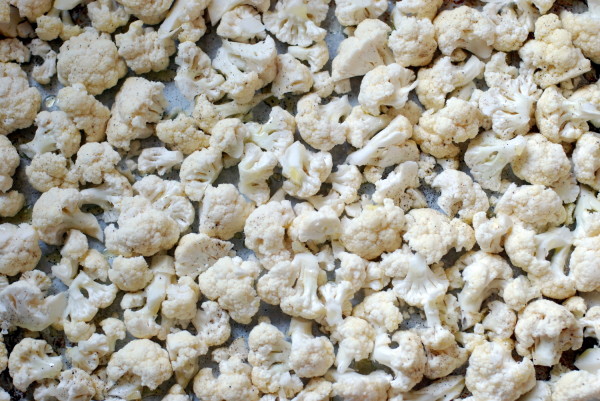
The florets are blasted in a super-hot oven for a surprisingly long time. You'd think they come out total mush, but instead, they come out browned in spots, very crispy, and fully cooked but still with bite.

But the real magic is the sauce: a beautiful, pink-hued yogurt blended with sauteed, caramel-edged red onions. The onions get soft enough to disappear completely into the yogurt, lending a sweet-savory depth that goes ridiculously well with singed cauliflower. Vinegar-soaked raisins and some mint leaves round out the salad. I can't get enough of it; none of us can, really.

1-DSC_1013-600x401.jpg

I'm always looking for dishes that work well together as part of a menu, and last night's meal pretty much hit the jackpot for me as far as menus that fit in my schedule without requiring too many concessions or short cuts, so I thought I'd share it. We had rosé night with our wine club, and I made dishes whose flavors I thought would complement rosés. I got some planning help from my buddies Jennifer Hess and Mike Dietsch, via twitter, so they deserve some credit for pulling this dinner party together. The menu was as follows:

  • Chilled curried summer squash soup, adapted from Saveur
  • Molasses-roasted salmon, roasted in the morning and chilled served cold
  • Tomato salad with spiced brown butter, inspired by this recipe (soon on the blog!)
  • Pissaladiere, made in advance and reheated in a warm oven before serving
  • Cauliflower with red onion yogurt sauce (recipe below), roasted in advance; served at room temperature
  • Peach crisp (adapted from this recipe)
  • Vanilla ice cream

This is a menu that I can see reusing in the future. Except for the salmon, which I assembled before lunch, I made pretty much everything during Adi's two-hour nap. The only a-la-minute prep required was to assemble the cauliflower salad, reheat the (baked, pre-sliced) pissaladiere, and dress the tomatoes. I felt less in the weeds as a host than I have in eons. That's what summer's all about.

Roasted Cauliflower with Red Onion-Yogurt Sauce

As you can see in the photos above, I tossed some zucchini coins in with the cauliflower. Highly recommend.

Serves 4 as a side

1 large head of cauliflower
4 tablespoons olive oil, divided salt and pepper
1 small or 1/2 a large red onion, cut into a large dice
Juice of 1 lemon Turkish or other fragrant dried red chile, to taste
1 cup Greek yogurt
1/4 cup red raisins or currants
2 tablespoons red wine vinegar
a sprig of mint

Preheat the oven to 450 degrees.

Cut the cauliflower into roughly 1-inch florets. Spread in a single layer on a rimmed 13x17 baking sheet; drizzle with 2 tablespoons of the olive oil, and sprinkle with salt and pepper. Roast, turning florets halfway through baking, until browned on both sides and cooked through but not mushy. For me, this takes about 45 minutes. Remove from the oven and set aside.

Meanwhile, add remaining 2 tablespoons of olive oil to a small saucepan and set over medium heat. When oil shimmers, add diced onion and a couple pinches of salt and pepper. Stir to coat in the oil, then cover saucepan and cook for about 10-15 minutes, stirring occasionally, until onions are mostly translucent but caramelized around the edges and very fragrant. Unlike caramelized onions, which are made over a low, slow burner, these are cooked over higher heat, resulting in a translucent onion with slightly browned/frizzled edges. If your heat is lower or your onions are taking longer to soften and cook, don't rush them; they're the basis of the yogurt sauce, so you really want to coax as much flavor out of them as possible.

Set onions aside to cool for 5-10 minutes, then add to a blender with any residual oil, and the yogurt, lemon juice, a pinch each of salt and pepper, and a pinch of the red chile. Blend, first on low, then on high; add water by the tablespoon if your blender is struggling to catch. When mixture is smooth, stop the blender and taste; add more salt, pepper, chile, or lemon as needed.

To serve, plate cauliflower on a shallow platter. Sprinkle currants/raisins evenly over the dish. Drizzle yogurt sauce over cauliflower, and finish with a few strewn mint leaves. Serve with extra yogurt sauce on the side.

In sides, healthy
Comment

Okra Curry

October 1, 2014 Rivka
1-DSC_0675.jpg

A long while back, I got into a major Indian food kick. I made dosas (but really, really good dosas), eggplant curry, sambar, mushroom muttar curry, and more. I bought and made chutneys and stocked way too much ghee and ate as much Indian food as I could get my hands on.

Summer seems to call for a hiatus from piping hot bowls of curry, but now that fall has arrived, I'm back on the bandwagon. It's still early for long-cooked food, but this okra comes together quickly and tastes fresh - the perfect transition into September.

1-DSC_0651.jpg

I posted about this on Instagram when I made it on a whim a while back, but since then it's become enough of a regular that I felt it deserved a proper post. I still see okra at most of our markets (not to mention growing from the pot on our walkway - my neighbor is quite the gardener!), so there's still time to make this before okra is gone.

1-DSC_0659.jpg
1-DSC_0668.jpg

In case I lost you way back with scary thoughts of slime, rest assured: this curry is not slimy. Just look at the photo above - see mom? No slime! A few tips to avoid the goo:

  • I've found slime more likely in large okra and in okra that isn't super fresh. The smaller and fresher the pieces, the better.
  • When cutting your okra, keep a paper or cloth towel close at hand. Wipe the knife often - after every two or three pieces - and you'll minimize the goo.
  • Lastly, and you'll see this in the recipe below, cook the okra all the way before adding the sauce. You want those pieces crisp and browned, maybe even a bit shriveled. By the time you add the sauce, there won't be any slime to speak of, and your okra will end up silky, but not gummy.
1-DSC_0680.jpg
1-DSC_0684.jpg

Off to the races, folks.

Okra Curry

As noted above, you want the okra to be fully cooked before it's added to the sauce. This will minimize slime in the curry. The only other thing I wanted to mention is that while a cast iron pan works great for cooking the okra, the sauce should really be made in a stainless steel pan, since acid can ruin the nonstick surface of good cast iron. -R

1 quart okra
3 tablespoons ghee or vegetable oil
1 medium onion, diced
1 thai chili (or use a serrano), seeded and diced
1 teaspoon black mustard seeds
1 1/2 cups tomato puree
2 tablespoons tamarind puree
1/2-inch knob fresh ginger, grated
salt

Trim stem ends of okra and slice lengthwise in half or quarters, depending on size. Keep a towel nearby as you slice; if you notice the knife getting slimy, wipe off your knife before continuing. This will help minimize slime in the final curry.

Heat 1 tablespoon of ghee or oil in a large saute pan (cast iron and stainless steel both work) over medium-high heat. Add enough okra to sit in a single layer in the pan; I found I needed to do this in two batches. Cook okra mostly undisturbed for about 3-5 minutes, letting it really brown on the first side before flipping it; you want to draw out the moisture (read: slime) and dry out the okra as much as possible.  If the pan smokes, turn down the heat a little bit, or just turn on your fan - try to keep that pan as hot as possible.

Flip the okra (this doesn't have to be an exact science; a few turns with a pair of tongs should get most of the okra turned) and cook on the second side for another 3-5 minutes or so. At this point, your okra should be very deep brown and mostly dry. Transfer to a heatsafe bowl, and repeat with another tablespoon of ghee/oil and the second batch of okra. Transfer second batch to the same bowl once it's been cooked. (I use two pans at once to minimize total cooking time.)

Add the third tablespoon of ghee/oil to a stainless steel saute pan and set over medium-high heat. Add diced chile (as much of it as you want - feel free to hold back and add more later), onion, and mustard seeds, and saute until onion has started to turn golden around the edges. Then add tomato, tamarind, and grated ginger, stir to combine, and reduce heat to medium. Cook until onions soften, 5-7 minutes.

Add okra to the sauce and use tongs to coat every piece of okra with sauce. Toss a few times over the heat, just to incorporate, then serve hot with rice, naan, dal, dosa, or whatever else you feel like serving. This curry also reheats well.

In sides, vegan, vegetarian, easy, healthy
Comment

Persian Stuffed Onions + Rosh Hashana Menus

September 17, 2014 Rivka
1-DSC_0816.jpg

This recipe isn't exactly my culinary Mount Everest. It's more like, say, pilates: the thing I know I'd like if I did it but can't quite get it up to try. Let's break it down: there's the separating of onions into layers, which looks at the outset like a royal pain. There's the filling, which involves meat and lots of spices and raw rice, which - would it really cook in the sauce? I couldn't be sure. And of course, there's that sauce, which calls for tamarind puree, which I don't always have just lying around the house. In sum, enough reasons to look longingly at a picture of the finished product, then turn the page -- again, and again, and again.

Perhaps we should chalk it up to the refreshed ambition that comes with the turn of a new year. Or perhaps, a more likely story, I'm looking down the road a couple months and seeing little other than nursing, and diaper changing, and maybe fingerscrossedplease some sleeping, but not a lot of cooking. Whatever the impetus, I had been convinced. If ever there were a time to see whether Persian stuffed onions are worth the fuss, it was now.

1-DSC_0749.jpg
1-DSC_0760.jpg

And you know what? They really are worth the fuss. First of all, they're not such a fuss. The onions, once boiled, are soft enough to separate easily. If you tear one of the layers (who me?), it doesn't matter in the least. The filling, which always looked like a pain, is actually quite the opposite: turns out, you don't need to cook it before stuffing the onions; it just cooks in the broth. (Lesson: snap judgment < actually reading the recipe.) And best of all, you can freeze the onions stuffed and uncooked, then bake them off at a later date. I'll be making a massive batch of these to stow away for the road ahead.

1-DSC_0782.jpg
1-DSC_0796.jpg
1-DSC_0805.jpg

Rosh Hashana Menu Planning: I've always flirted with Persian flavors for Rosh Hashana. For a few years running, I've served a main course of brisket with tamarind, and I almost always have some sort of sweet-sour vegetable to serve alongside. But this year, instead of just nodding toward the East, I'm building the entire menu around it.

The sweet and sour flavors of Persian cooking have always drawn me in. That they're so friendly to pomegranates, squash, and other fall produce only makes my job easier. So a couple weeks back, I started digging through The Food of Life, my guide to Persian cuisine, in search of ideas. I've settled (at least for now) on the following menu for dinner:

  • Deb's Fig and Olive Oil Challah
  • Persian Sumac Soup with Chickpea Dumplings (see Joan Nathan write all about those chickpea dumplings here)
  • Greens with Apples, Black Lentils, Celery Root, Walnuts, and Mustard Vinaigrette (a riff on this and this)
  • Tamarind Brisket (this year with lots of wine in the broth, because why not?)
  • Persian Stuffed Onions
  • Green Beans and Beets with Orange Segments and Sumac Vinaigrette
  • Apples and Honey Cake
  • A sorbet (either apple-bourbon, maple-almond, or a riff on one of these)

What are you making? I'd love to see your favorite recipes and menu ideas below - let's get the juices flowing.

Meanwhile, happy cooking, and happy new year. I hope the coming months are full of new adventures for all of us.

Persian Sweet and Sour Stuffed Onions Inspired by recipes in The Food of Life and Aromas of Aleppo Serves 4 as a main, 6 as a side dish

I'll be making two versions of these for our Rosh Hashana dinner: one vegetarian, one with ground lamb. I've given instructions for both versions below. One important note: the ratios here are hard to nail precisely, because every onion is different, and I don't know how many layers your onions will have. You are very likely to find yourself with either extra onion layers or extra filling after making this recipe. Don't sweat it. If you've got extra onion layers, dice them and add them to the sauce. If you have extra rice, cook it in a bit of broth and eat as a chef's snack, or freeze it for another time. Lastly, because the quantities vary so much, you may want to double the recipe, just to be safe. Leftovers freeze very well uncooked, and can be baked off and eaten at a later date.

For the vegetarian version:
3 large or 4 medium yellow onions
1 1/2 cups long-grain rice
1/2 cup golden raisins, chopped
1 tablespoon dried dill
1 teaspoon dried mint
1 teaspoon cinnamon
1/2 teaspoon ground cumin
1/2 teaspoon ground cardamom
1/4 teaspoon ground cloves
1 teaspoon salt
2 teaspoon pomegranate molasses
2 teaspoons tomato paste

For the meat filling: All of the above, but use only 1 cup of rice 1/2 pound ground lamb (or beef)

For the sauce:
2-3 tablespoons olive oil
1 1/2 cups tomato puree
2 cups vegetable or chicken broth
2 tablespoons tamarind puree or 2 teaspoons pomegranate molasses
2 teaspoons brown sugar
1/2 teaspoon cinnamon
1/4 cup dried apricots, coarsely chopped
1/2 teaspoon salt

Prepare the onions: Bring a large pot of water to a boil over high heat. Meanwhile, use a paring knife to trim the very tip off of the non-root ends of the onions, and to scrape away the dry outer layers from the onions. Any layer that is even partially dried should be removed. Take care not to stab the onions' flesh, and leave the root end of the onions intact.

Add the onions to the boiling water, and simmer for 20 minutes (25 minutes for larger onions) until flesh is very soft. Strain onions and set aside to cool. (To accelerate cooling process, transfer onions to an ice bath to cool.)

Prepare the filling: Soak rice in cold water for 30 minutes. Strain rice, then combine all ingredients - including raw ground meat, if using - in a large bowl. Use a fork or your fingers to ensure that everything is evenly distributed.

Stuff the onions: Fill a medium bowl halfway with water. I find it easiest to store the onion layers in water while working, so they don't dry out. Set up a plate, tray, or other container to hold your filled onions.

Take an onion in your hand, with the ends at top and bottom. Use the paring knife to slice a deep slit from end to end, cutting through about three layers of onion. The carefully remove the layers of onion, using your fingers to separate each layer. If a layer rips, don't sweat it - you can always patch over it once stuffed. Transfer onion layers to the bowl of water. If you can remove more sizable layers from the core of the onion, slice deeper with the knife and remove more layers. If not, set the core aside. Repeat with remaining onions.

Take an onion layer in your palm, fill it with a heaping tablespoon of filling, and wrap the layer around itself, loosely enclosing the filling. You want to leave room for the rice to expand, so don't wrap the layers too tightly. Transfer the filled onion layer to your plate or tray, and continue filling remaining layers of onions, lining them up on the tray as you go.

Freezing the onions: At this stage, you can wrap the filled onions tightly and freeze them for a few months. Thaw completely in the refrigerator before proceeding.

Cook the onions: Depending on the size of your pan, you may need to brown the onions in batches. If using a large roaster, all onions should fit in one batch. If using a sauce pan, brown the onions in 2-3 batches, using one tablespoon of the olive oil for each batch.

Pour olive oil into a large deep sauce pan or ovenproof roaster, and set over medium heat. When oil shimmers, carefully transfer as many stuffed onions as will fit in the bottom of the pan. Cook for 3-5 minutes, until golden, then turn and cook another 3-5 minutes on the other side. If using a sauce pan, transfer browned onions back onto your tray, and repeat with remaining onions until all onions have been browned.

Once all onions have been browned, make your sauce in the bottom of the same pan - no need to remove the onions; they'll be cooking in the sauce. Add all the sauce ingredients, shake the pan a bit to distribute the ingredients, give a little stir around the onions to help blend the sauce, and add any onions from the tray back into the pan. Cover with a lid or tin foil, and simmer over medium-low heat for 20 minutes, until broth has thickened and filling has fully cooked. Check at the halfway point: if your stove is very powerful, your liquid may evaporate more quickly, in which case you may need to add a few tablespoons of water to keep things moving. Feel free to add as much water as you need to keep the broth from sticking.

After 20 minutes of simmering, slice into an onion layer to ensure that everything looks fully cooked; if not, add another few tablespoons of water, shake to distribute, and cook another 5-10 minutes.

Serve hot, with sauce ladled over onions.

In gluten-free, menus, sides, vegetarian
-1 Comments

Mexican Street Corn Salad

September 8, 2014 Rivka
1-DSC_0595.jpg

Late summer is a predictable season around here. There are tomatoes on the counter, which we position strategically to keep fruit flies at bay. (I can't say we necessarily succeed - those fruit flies are such a nuisance.) There's a glut of second nectarines and peaches, perfectly ripe and 99 cents a pound from Toigo, which we consume somewhat recklessly and with pride. There are Italian plums, which find their way into this famed torte and this less famous but quite tasty cake. And then, of course, there is all the corn.

The corn is also from Toigo. It's the sweetest corn available - so sweet that Beth (wife of Jeremy, he of Andalusian gazpacho and fried squash blossoms) made a corn soup last week and fretted that it was too sweet, that it needed some lime to cut the sweetness. If you're into corn ice cream, you'll want to start with Toigo's corn.  But even if you're making something savory, as I typically do, sweet corn is a good place to start.

If you've ever ordered elote, the flavors of this dish will be familiar. Elote is Mexican street corn: a whole cob, coated in crema and chile, then dunked in cotija and finished with a squeeze of lime. It's addictive.

But sometimes you want the corn off the cob, ready to fork straight into your mouth. Enter elote salad, a chopped-and-ready version of the messier original.

1-DSC_0603.jpg

Stateside versions often coat the corn in mayonnaise, which you know I despise. The salad renditions I found online also call for mayo, which makes an otherwise balanced dish look gloppy and gross. Why would you do that?  Here's my counter-proposal, cleaner and fresher and more suited to summer: sweet corn, a little butter, chile, cilantro, lime. Lots of cotija to finish. Enough forks for you and all your friends. Sounds pretty good, doesn't it?

And while you're bothering with 5 corn cobs at a time, save those stripped cobs. Simmer them in water for 30 minutes, and you have a killer corn stock - a perfect base for chowder and more.

Mexican Street Corn SaladServes 6 as a side dish, with leftovers

3 tablespoons butter 3 scallions, diced kernels from 5 ears yellow corn 2 teaspoons medium-mild chile flakes, or 1 teaspoon regular (hot) chile flakes (start small and add to taste) salt 1 large red tomato, diced juice of 1-2 limes (again, start with one and add if you need more acid; I used 1 1/2 limes) 4 oz. cotija cheese, grated 3 tablespoons chopped cilantro

Add butter to a large saute pan and set over medium heat. When butter sizzles, add scallions, toss to combine, and cook 5 minutes, until softened. Add corn, chile,  and 1 teaspoon of salt. Cook, stirring occasionally, just until very fragrant and starting to soften, 3 minutes or so; you want the corn to retain some bite. This is a warm salad, not mush.

Taste corn, and add more chile and/or salt as needed. Then add tomato chunks, reserving the accumulated liquid for another use. Stir to combine, and cook about 3 minutes more, just until tomatoes are warmed through.

Add lime juice to taste. Spoon into a deep bowl, top with cilantro and cotija, and serve warm.

In salad, sides, vegetarian, weekday lunch, easy, healthy
Comment
Older Posts →

Subscribe by email:

  • books (1)
  • crisps and crumbles (1)
  • frozen (1)
  • toys (2)
  • gifts (3)
  • egg whites (5)
  • fried (5)
  • how to use--- (6)
  • drinks (10)
  • menus (11)
  • travel (11)
  • fish (12)
  • kosher for passover (14)
  • thanksgiving (14)
  • vegan (20)
  • snacks (21)
  • techniques (21)
  • soup (26)
  • bread (28)
  • pies and tarts (28)
  • cake (33)
  • events (34)
  • condiments (36)
  • various and sundry (39)
  • uncategorized (42)
  • cookies and bars (46)
  • weekday lunch (47)
  • appetizers (48)
  • salad (51)
  • gluten-free (56)
  • comfort food (61)
  • breakfast and brunch (77)
  • sides (81)
  • dessert (90)
  • main dishes (100)
  • healthy (139)
  • easy (155)
  • vegetarian (180)

| LATEST |

Featured
Blue Chair Fruit's Black Raspberry Jam
Thai Grapefruit Salad
Mango Sticky Rice
Winter 2016: Odds and Ends
Povitica: The Best Babka Ever
Persimmon Walnut Bread
Sprout Chaat Salad + New Site!
Maple Walnut Squares
How to Give Thanks
Croissants (really, I made croissants) + other croissant-ish things

| hEALTHY |

Featured
Sprout Chaat Salad + New Site!
Fennel frond pesto + what to do with those pesky stalks
Asparagus Toasts with Pistachios and Mint
Eggplant-Walnut Pâté + Passover Ideas
1-DSC_0861-600x401.jpg
Lentils and Rice with Tamarind Sauce and Dukkah
Big Kale Salad with Pomegranate and Feta
Punchy Crunchy Ginger Salad

| BreakfAST |

Featured
Povitica: The Best Babka Ever
Croissants (really, I made croissants) + other croissant-ish things
Mushroom and Kale Breakfast Strata
Barley Porridge with Orange and Black Sesame
Ramps 'n' Eggs Biscuit Sandwiches
Asparagus Toasts with Pistachios and Mint
Apple-Cheddar Scones with Sage
Menemen - Turkish Eggs with Tomatoes and Peppers
You must select a collection to display.

© 2016 Rivka Friedman. All Rights Reserved.