• Home
  • About
  • Recipe Index
  • Contact
Menu

Rivka Friedman

Street Address
City, State, Zip
Phone Number

Your Custom Text Here

Rivka Friedman

  • Home
  • About
  • Recipe Index
  • Contact

Vegetarian Bahn Mi Sandwiches

June 5, 2015 Rivka
1-DSC_0165-600x401.jpg

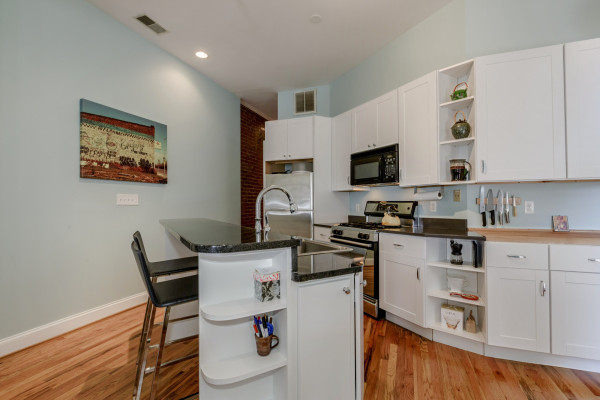
It seems like only a few weeks ago that we finally finished our new kitchen. It's actually been a couple months, but time flies when you're parenting a six-month-old (!).

kitchen-1-600x400.jpg

Back to the kitchen: it has a butcher block, which we "reclaimed" (can you do that if it was yours to start with?) from an old shelf and installed atop a long row of gleaming white cabinets; in the small finishes department, we put up a new knife strip, which holds my sharpies in a neat row, flush against the wall. It's sort of perfect, and it made us both excited to cook and eat in it for months and years to come.

kitchen 2
kitchen 2

We unpacked all of our stuff into our new space, set everything up, and figured we were done with the packing and moving for a while. Silly us. What actually happened - with shocking speed - was that we bought a house.

newton-kitchen-600x399.jpg

This isn't the move of five years ago, when we picked up all our belongings and walked four doors down the street. This is a different street in a different neighborhood. It shifts our center of gravity.

We're not moving until the end of the summer moving in two weeks! Does anything happen gradually anymore? I love our new house, but I really, really love our current home. Between us, I'm not quite ready to leave it.

Finalizing plans to sell a condo, buy a house, pack, move, and unpack all over again -- it's keeping us rather busy. This on top of my busiest season at work means the cooking is sort of on hold. But lurking amid the chaos of our packed calendars and many to-do lists was a day worth setting everything else aside an celebrating: our first Mothers' Day.

So we did. We shut down Redfin and went to the park to play, with Adi in the swing, my dad doing the pushing, and my mom chatting with other parents in the park like the pro that she is. Then we walked the half-block back to our place, and I whipped up some bahn mi sandwiches for dinner.

The sandwiches are suprisingly simple to make: you marinate and roast tofu (or, in a pinch, buy the pre-marinated stuff at the grocery store), and layer it onto a baguette slathered with spread and piled with crispy mushrooms and pickled vegetables.

As for the spread: Mayonnaise is traditional here, but as has been documented over and over again, I just don't enjoy the stuff. Taking my cue from the New England lobster roll, I ditched the mayo in favor of butter, and mixed in a bit of sriracha. I'm sure sriracha would taste great mixed with mayo, if you like that sort of thing.

Because it was Mothers' Day, I even made my own baguette -- from this extremely low-maintenance, relatively foolproof recipe. Since then, I've piled these same ingredients on a store-bought loaf, cut it in half, wrapped it in parchment paper, and taken it to the office for lunch.

Adi has just started to eat solids, which is a topic for another day. But I'm reasonably sure by the time she tries her first bite of bahn mi, our beloved condo will be quite far in the rear view mirror, and we'll be settled into our new home. Sigh, time.

Vegetarian Bahn Mi Sandwiches
Serves 4

For the tofu:
1 pound extra-firm tofu, sliced into half-inch slabs
2 tablespoons peanut butter
2 tablespoons warm water
2 tablespoons rice vinegar
1 tablespoon soy sauce
1 tablespoon sesame oil

For the pickles:
2 carrots, julienned
1 thick stump of daikon, julienned
1/3 cup rice vinegar
1/3 cup water
2 teaspoons sugar
1 1/2 teaspoons salt

For the mushrooms:
6 ounces shiitake mushrooms, sliced
2 tablespoons grapeseed or canola oil
salt and pepper
Juice of one lime

For assembling the sandwiches:
2 long baguettes, ends trimmed, halved
Pickled carrots and daikon
Marinated baked tofu
Sauteed mushrooms
1 avocado, halved and sliced
Sriracha butter
Cilantro

Make the tofu: Preheat the oven to 425 degrees F. Press a towel (or paper towel) firmly against each slab of tofu to remove some of the residual liquid, wringing the towel as you go. Combine all the ingredients for the tofu marinade, whisk until smooth, and brush on tofu slabs. Lay coated slabs on a rimmed baking sheet, leaving at least 1 inch of space between pieces. Bake for 15 minutes until tofu is firm and mostly dry. Set aside to cool.

Meanwhile, make the pickles: Combine water, vinegar, sugar, and salt in a small saucepan. Pile julienned vegetables into a heat-safe jar. Heat pickling liquid until it just comes to a boil, then remove from heat, let cool about 15 seconds, and pour into heat-safe jar, over vegetables. Set aside.

Make mushrooms: Heat oil in a small stainless steel or cast iron pan over medium-high heat. When oil shimmers, add mushroom slices; they should sizzle. Cook for a total of 6-8 minutes, flipping mushrooms as they start to brown, until all mushrooms are golden and crispy. Sprinkle with salt, transfer to a small bowl, and squeeze lime juice over top.

Make sriracha butter: Stir together butter with half the sriracha. Taste, and add more sriracha as desired.

Assemble sandwiches: Slice baguette into sandwich-sized pieces. Slice into each length of baguette lengthwise, leaving one end connected. Splay baguettes open on a work space.

Spread a layer of sriracha butter on the insides of each baguette length. Layer two slabs of tofu, a handful of the pickled vegetables, several mushrooms, slices of avocado, and a pinch of cilantro into each baguette. Serve.

Sandwiches will also keep relatively fresh for about 2 hours after assembly.

In uncategorized
1 Comment

Big Kale Salad with Pomegranate and Feta

March 2, 2015 Rivka
IMG_21201-600x450.jpg

A few days ago, I sat on our couch in stretchy leggings, nursing a mug of my favorite chai and watching Adi figure out what hands are. She brought them really close to her face and just stared, turning them slowly, trying to figure out whether they were attached to something, or someone, and what they might be there for.  And I realized, as I watched her patiently, painstakingly, unrelentingly trying to figure out her limbs, that this first chapter of parenthood might already be behind me.

I've got so many photos and videos of Adi cooing and laughing and doing sweet, adorable, hilarious things that my icloud won't sync. Among those photos are a few hastily snapped shots of the salads we've been eating for dinner, and the (very simple) stews I've been making on the weekends to feed us at work. My real camera is lurking neglected in some corner of our house, patiently waiting for our kitchen to be not 90% done, not 97% done, but actually, 100% done. (Did I mention we're redoing our kitchen? This seemed like the ideal time, because, you know, we don't have much else going on. We're waiting for it to be done, too, but not so patiently.)

IMG_1902-600x800.jpg
IMG_1933
IMG_1933
IMG_1959
IMG_1959
IMG_1993
IMG_1993

Since the above pics were taken, we got a fresh coat of paint, cabinet hardware, and a few more finishing details in place. I tell myself that once the granite is installed and the moving boxes are gone, I'll start blogging in earnest again, with the same frequency as before Adi was here. But that's probably not realistic. Life is busier now. There's less time, which means fewer fussy recipes, and fewer pictures. The whole enterprise of eating feels different these days; I'm proud if I manage to bake off a loaf of (no-knead) bread in time for Sunday breakfast. When dinner isn't one of my increasingly-becoming-my-specialty salads, it's a bag of soup or beans from the freezer. As I slowly but surely draw down my stash of frozen meals, I wonder when I'll have a chance to replenish it.

So what does this mean? If I had to guess, I'd bet on more posts about fast lunches and dinners, and fewer tales of day-long projects. Hopefully that's good news; everyone is busy, and everyone could use some inspiration when it comes to good, healthy, non-fussy meal options.

So here's one to start: plenty of kale, pounded soft. Diced cucumbers. A can of chickpeas. Feta cheese, pomegranate seeds, fresh croutons. That, and a couple clementines, was our dinner last Monday. And even though the weather outside was a biting, blustery, rather unbearable 5 degrees, we managed to eat salad for dinner - and feel full and satisfied and not sad that we didn't eat soup. A small victory, but a victory nonetheless.

I start the croutons on the stove, then transfer them to the oven so they don't char too much. I tear up the kale and dice the cucumbers while the croutons toast, so everything is ready at about the same time. As for the pomegranates, I tend to prep two at once, then stow the seeds in a container in the fridge for a la minute use. You can also buy the seeds ready to go at TJs and other grocery stores.

If you don't have pomegranate seeds in the house, don't despair. One night last week, I added in some grapefruit segments. Chickpeas became cooked cannellini beans from the freezer, and I added some slivered radish for crunch. The template is a big pile of kale, a simple vinaigrette, and enough croutons that dinner doesn't feel overly virtuous. Everything else is customizable. It's a winner, even in winter, and a staple once the chill starts to thaw.

Big Kale Salad with Pomegranates and Feta
Serves 2

1 big bunch Tuscan kale, leaves removed from ribs and torn into large pieces
2 thick slices of bread, cubed or torn into bite-sized pieces
1/4 cup olive oil, divided
2 Persian (small, crunchy) cucumbers, diced
Seeds from half a pomegranate
Slice of a red onion, diced
8 oz. chickpeas (half a can), rinsed
salt and pepper
1/4 cup feta cheese, crumbled
juice of 1/2 a lemon
1 tablespoon champagne or white wine vinegar

Preheat the oven to 325 degrees F. Put the kale in a large mixing bowl and massage the leaves lightly with your hands, to break up the fibrous texture and soften them.

Heat 2 tablespoons of the olive oil in a frying pan (I like cast iron) over medium heat. Add bread cubes and a light sprinkle of salt, and cook 2-3 minutes, until crisped on the bottom side. Turn croutons, then transfer to the oven for 8-10 minutes while you assemble the rest of the salad.

In a small bowl, combine remaining 2 tablespoons of olive oil, lemon juice, and vinegar. Add a large pinch of salt and a few grinds of pepper; whisk to combine.

Add remaining salad ingredients to the bowl with the kale. Drizzle dressing over salad, and toss to combine. Remove the croutons from the oven (careful – they’re hot!) and add them to the salad. Toss to combine, and serve.

In salad, uncategorized, vegetarian, weekday lunch, healthy
2 Comments

Any-Chile Hot Sauce + Mrs. Wheelbarrow's Practical Pantry

November 14, 2014 Rivka
1-DSC_0836.jpg

These past few weeks can be summed up as an epic attempt to fill our freezer with as much ready-to-eat food as possible. I've frozen unbaked scones in little zip-top bags. I've filled about ten containers with Persian beef-rice stew and carrot-ginger soup and plenty of chicken stock. I've even baked and frozen whole loaf cakes, to defrost for unexpected company. A couple hours this morning and a long day in a low oven produced a batch of Lisa Fain's chili, which is officially in the freezer.  Still on the cooking wishlist: This lovely eggplant tagine from Blue Apron, which my friend Rachel raved about and for which I have procured all the ingredients. (Stay in, baby, just a little bit longer!). Previously on the wishlist: cookie dough (rolled into balls and frozen unbaked, you know, for emergencies). It was a nice-to-have, but then I woke up at 5 and couldn't fall back asleep and, well, the cookie dough happened. Thanks, kiddo.

But the whole cook-to-fill-the-freezer thing isn't new. In truth, my attempts to fill our pantry began back in late summer, when I got to sneak a peek at the galleys of my dear friend Cathy's book.

1-DSC_0826.jpg

Do you know Cathy? She is Mrs. Wheelbarrow, canner, cheesemaker, charcuterie queen, and general goddess of the larder. She was one of the earliest contributors to my beloved Food52, and has penned some of my favorite recipes on the site. She teaches cooking classes out of her home, where I've learned to make canned tomatoes, salsa, and all sorts of other canned goodies, as well as goat cheese, feta, and even Camembert. She's also a hostess extraordinaire, and I've been lucky enough to attend many wonderful parties courtesy of her and her husband, Dennis.

Cathy.jpg

Now, after years of blogging, posting on Food52, and writing for Washington Post, New York Times, and more, Cathy's finally got her own corner of the universe: a book, Mrs. Wheelbarrow's Practical Pantry.

1-DSC_0829.jpg

To give you a sense of this book's utility, here's a list of some of the things I've made so far: strawberry jam. Tomato sauce. Tomato soup. Grape jelly. Salt-water pickles. Fennel-orange-olive pickles. Marinated artichoke hearts. (Amazing.) Blackberry-hazelnut conserve. Asian plum chutney. Peach-rosemary jam. Since I'm doing this from memory, I'm probably forgetting a few. You get the point: this book has been my constant companion through summer and fall. If you come over this year and I serve you something delicious from a jar, chances are the recipe for it came from Cathy's book.

But here's the best part: This isn't just a preserving book. While the canning and preserving recipes sit at the center, Cathy offers a slew of "bonus" recipes that put your jars to use. A rugelach recipe made with her jam, tortilla lasagna made wither chile-spiked tomatoes, and my personal favorite, inside-out samosas to serve with her fantastic mango chutney. Even if you're not big on canning, you'll find plenty to cook, and cook again, in the Practical Pantry.

1-DSC_0834.jpg

What most sets Cathy's book apart is its fearless approach. Cathy is first and foremost a teacher: She wants you to feel her excitement when there's a deal on second tomatoes or bruised peaches, and armed with this book, you will. You will jump to grab that big bag of $2 chiles, the long, slender box of "basil for pesto," the bushel of assorted spot-filled apples. You will lug the spoils home, and you will know exactly what to do with them.

1-DSC_0840.jpg

Those chiles, for instance, easily become a tangy, slightly sweet hot sauce that you can either can and shelve, or tuck in the fridge and eat immediately. (On everything.) To suit your mood, Cathy offers three different ways to make it: with raw chiles, charred, or smoked.

I first made this hot sauce at one of Cathy's classes. I got hooked pretty much instantly, and I've made it several times since. The recipe has changed a bit since I first encountered it, in one of Cathy's stapled cooking class handouts; not surprisingly, it's even better now.

In case it's not obvious what I think you should do, here it is: make this hot sauce. Buy this book. Then take it to bed one night, read it cover to cover, and bring some sticky tabs, because the next day, you're going to want to buy everything from the market, and cook this book from front to back.

Congrats, Cathy. It's gorgeous.

book.jpg

Cathy Barrow's Any-Chile Hot SauceFrom Mrs. Wheelbarrow's Practical Pantry Makes 16 ounces

For canning purposes, Cathy recommends jarring this in 4-oz. portions. Since I didn't can this latest batch, I just stored it in a big 8-oz. jar in the fridge.

1/2 pound fresh hot chiles of any kind (red are prettiest; any work with this recipe) 1 cup (8 ounces) white or apple cider vinegar 3 large garlic cloves 1/2 tablespoon kosher salt 2 tablespoons honey 1 1/2 tablespoons minced dried pineapple 1/2 tablespoon minced dried mango 1/4 teaspoon Coleman's dry mustard pinch ground ginger

Prep the chiles: to use them fresh, carefully stem and roughly chop them. Gloves are helpful here. Alternatively, you can char them in a heavy skillet or griddle over high heat for 6-8 minutes, until blistered all over. Then put them in a bowl, cover, and let steam for 1 hour. Stem and roughly chop (again: gloves). Last option is to smoke them using an electric smoker. Cathy recommends 30 minutes. Stem and chop.

Make the sauce: Combine vinegar, garlic, and salt in a large jar. Shake and swirl to dissolve the salt. Add chiles, cover, and leave on the counter overnight to brine.

Transfer the contents of the jar into a 1.5-quart non-reactive (not copper or aluminum) pot. Add honey, fruit mustard, and ginger. Cover and bring to a strong boil for 3 minutes. Beware of the fumes - you may want to wear a mask for this part.

Puree the sauce in a blender in batches, filling the container only halfway in each batch to avoid explosions. Run your blender long enough to ensure that the sauce is completely smooth.

Press the mixture through a fine-mesh strainer into a bowl. If you find large pieces of chile or garlic in the strainer, you can re-run them through the blender.

Return the sauce to the pot, bring back up to a boil, and boil for 5 minutes. Do not lean over the pot and smell it while this happens - you will regret it. Instead, dip a small spoon into the pot and then taste just a drop. If you want it sweeter or saltier, now is the time to add more honey and/or salt.

When your sauce is ready, either ladle it into sterilized, warm jars leaving 1/2-inch of headspace and process for 10 minutes in a boiling-water bath, or just ladle it into a big jar (preferably with a spout, but not necessary) and store in the fridge.

The sauce is shelf-stable for 1 year when canned, but it may separate; shake well before using.

In uncategorized
Comment

Nutmeg Apple Cider Doughnuts

October 24, 2014 Rivka
1-DSC_0996.jpg

It's Friday, which means it's almost the weekend -- which, in my strange wonderland, means it's time to choose weekend cooking projects. I've got my eye on this lovely, meringue-topped walnut cake from Food52, and possibly homemade bagels. I'm also contemplating steeping bourbon with some apple peels, a cinnamon stick, and some star anise, for when I'm allowed to drink the stuff again.

But I've got a different weekend cooking project in mind for you, if you're still shopping. In fact, it'd go very, very well alongside that bourbon I'm going to make. Or just some apple cider. Or some cold milk.  'Tis the season for apple cider doughnuts: They were my project last weekend and this weekend, they're all yours.

When I got a hankering for these guys last week, I went searching around for a yeast doughnut recipe, because everyone knows yeast-risen doughnuts are superior to their cake counterparts. Turns out - and here's proof of my goldfish cracker-sized memory - I made yeasted nutmeg doughnuts last year. They were delicious. (Make them!) But they take much more time to make, and I was nervous that between reducing the cider (key to getting a concentrated flavor) and all the rising, the doughnuts wouldn't be ready to bring to my friends Sunday afternoon, and that's what good friends do.

1-DSC_0928.jpg
1-DSC_0941.jpg
1-DSC_0961.jpg

Instead, I opted for a basic cake doughnut recipe, with a shockingly short preparation process and -- given all the frying involved -- not much stress, either. The recipe comes from Deb; she loved it, and generally, the recipes she loves are keepers. You reduce a bunch of cider, make what amounts to a cross between cookie dough and pancake batter, refrigerate or freeze it until firm, then roll it out and fry it: Presto.

1-DSC_0966.jpg
1-DSC_0977.jpg

My one meaningful contribution to the recipe was swapping out the usual cinnamon for gobs and gobs of freshly ground nutmeg. Inspired by Marion Cunningham's Nutmeg Muffins and these doughnut beauties from Saveur, I figured I was on terra firma. If anything can elevate a hunk of deep-fried dough, it's fresh nutmeg. I'd tell you to just use cinnamon (and less of it) if you don't grind your own, but Ina Garten recently told Amateur Gourmet Adam Roberts that this is not essential. As much as I disagree, who am I to contradict Ina? I'll leave the choice to you.

1-DSC_0987.jpg

Enjoy these doughnuts with a side of scarf weather, which it seems is headed our way. Happy weekend, and happy weekend cooking.

1-DSC_0993.jpg
1-DSC_1001.jpg

Other weekend cooking projects:

  • this beautiful apple danish braid
  • saltie's amazing focaccia
  • you can never go wrong with Tartine's salted chocolate rye cookies
  • salted caramel rice crispie treats from Cara, because duh
  • is it too early for Monkey Gingerbread?
  • or go all-out with these outrageous cranberry curd-stuffed nutmeg doughnuts from last year's Thanksgivukkah feast

One year ago: Grape-Cornmeal Snacking CakeTwo years ago: Vietnamese Leek and Eggplant Salad (which I'm making today!) and Perfect Chana DalThree years ago: Beef Stew with VadouvanFour years ago: Oven-Dried TomatoesFive years ago: Zuni's Roast Chicken with Bread Salad Six years ago: Steelcut Oatmeal with Peach CompoteSeven (!) years ago: Challah French Toast

Nutmeg Apple Cider DoughnutsAdapted from Hearth, via Smitten Kitchen

This recipe is pretty straightforward, so not a ton of notes here, but still: can't resist a few. I swapped out most of the cinnamon for lots of fresh nutmeg, and I highly recommend trying them that way. I also traded in some of the white flour for oat flour, which worked really well with the warm flavor of these doughnuts. If using all white flour, you need 3 1/2 cups, plus some for the work surface. Lastly, Deb took the plunge and fried in, eek, Crisco. She said the doughnuts were super-crispy, but I couldn't bear it; I just used vegetable oil. Again, choice is yours.

1 1/2 cups apple cider
1/2 cup oat flour
3 cups plus 2 tablespoons flour, plus additional for the work surface
2 teaspoons baking powder
1 teaspoon baking soda
1/8 teaspoon ground cinnamon
1/2 teaspoon salt
1 1/2 teaspoons freshly ground nutmeg
4 tablespoons (1/2 stick or 2 ounces) butter, at room temperature
1 cup granulated sugar
2 large eggs
1/2 cup buttermilk
Vegetable oil, canola oil, or shortening, for frying

Topping: 1 cup sugar + 1/8 teaspoon cinnamon + 1 1/2 teaspoons freshly ground nutmeg

Mix dough: In a medium bowl, combine flours, baking powder, baking soda, cinnamon, salt, and nutmeg. Set aside.

In a saucepan over medium heat, reduce cider to about 1/4 cup, about 30 minutes. Remove from heat and let cool.

Using a stand or electric mixer, beat butter and sugar on medium speed until smooth and light. Add eggs one at a time, mixing well after each addition. Reduce speed to low and add buttermilk and reduced cider; mix to combine. Scrape down the sides of the bowl as needed. Add flour mixture gradually, mixing just until combined.

Line a baking sheet with parchment or wax paper and sprinkle generously with flour. Put the dough onto the sheet, and sprinkle the top with more flour. Use your palms to flatten the dough until it is about 1/2 inch thick. Use more flour if the dough is still wet. Transfer the dough to the freezer until it is slightly hardened, about 20 minutes, or to the fridge for at least 2 hours.

Roll out doughnuts: Remove the dough from the freezer/fridge and transfer to a work surface sprinkled with flour. Using a 3 1/2-inch cutter for the outer shape and a 1-inch cutter for the hole, cut doughnuts. Transfer doughnuts and holes back to the lined baking sheet. Gently reroll scraps to cut the rest of the doughnuts.

Add enough oil or shortening to a deep-sided pan (I used cast iron) to measure a depth of between 2 1/2 and 3 inches. Attach a candy thermometer to the side of the pan and set over medium heat until the oil reaches 350°F. Have ready another rimmed baking sheet lined with paper towels and topped with a cooling rack.

Make the topping: Combine sugar, cinnamon, and nutmeg in a wide, shallow bowl. Set aside.

Fry the doughnuts: Slowly lower doughnuts into the oil, taking care to avoid splattering. Don't overcrowd the pan; my 10-inch pan comfortably held 2-3 doughnuts at a time. Fry each doughnut for 60 seconds on the first side, then slowly turn and fry 30-60 seconds on the other side. Transfer doughnuts to the cooling rack for 60 seconds, then dip into the spiced sugar and swirl around to coat about half the height of the doughnut. Set on the rack to cool completely; repeat with remaining doughnuts.

Serve warm, with cider or cold milk.

In uncategorized
Comment
Older Posts →

Subscribe by email:

  • books (1)
  • crisps and crumbles (1)
  • frozen (1)
  • toys (2)
  • gifts (3)
  • egg whites (5)
  • fried (5)
  • how to use--- (6)
  • drinks (10)
  • menus (11)
  • travel (11)
  • fish (12)
  • kosher for passover (14)
  • thanksgiving (14)
  • vegan (20)
  • snacks (21)
  • techniques (21)
  • soup (26)
  • bread (28)
  • pies and tarts (28)
  • cake (33)
  • events (34)
  • condiments (36)
  • various and sundry (39)
  • uncategorized (42)
  • cookies and bars (46)
  • weekday lunch (47)
  • appetizers (48)
  • salad (51)
  • gluten-free (56)
  • comfort food (61)
  • breakfast and brunch (77)
  • sides (81)
  • dessert (90)
  • main dishes (100)
  • healthy (139)
  • easy (155)
  • vegetarian (180)

| LATEST |

Featured
Blue Chair Fruit's Black Raspberry Jam
Thai Grapefruit Salad
Mango Sticky Rice
Winter 2016: Odds and Ends
Povitica: The Best Babka Ever
Persimmon Walnut Bread
Sprout Chaat Salad + New Site!
Maple Walnut Squares
How to Give Thanks
Croissants (really, I made croissants) + other croissant-ish things

| hEALTHY |

Featured
Sprout Chaat Salad + New Site!
Fennel frond pesto + what to do with those pesky stalks
Asparagus Toasts with Pistachios and Mint
Eggplant-Walnut Pâté + Passover Ideas
1-DSC_0861-600x401.jpg
Lentils and Rice with Tamarind Sauce and Dukkah
Big Kale Salad with Pomegranate and Feta
Punchy Crunchy Ginger Salad

| BreakfAST |

Featured
Povitica: The Best Babka Ever
Croissants (really, I made croissants) + other croissant-ish things
Mushroom and Kale Breakfast Strata
Barley Porridge with Orange and Black Sesame
Ramps 'n' Eggs Biscuit Sandwiches
Asparagus Toasts with Pistachios and Mint
Apple-Cheddar Scones with Sage
Menemen - Turkish Eggs with Tomatoes and Peppers
You must select a collection to display.

© 2016 Rivka Friedman. All Rights Reserved.