• Home
  • About
  • Recipe Index
  • Contact
Menu

Rivka Friedman

Street Address
City, State, Zip
Phone Number

Your Custom Text Here

Rivka Friedman

  • Home
  • About
  • Recipe Index
  • Contact

Raspberry Chocolate Hamentaschen

February 19, 2013 Rivka
1-DSC_0777
1-DSC_0777

The Jewish holiday of Purim was my favorite as a kid. It was the one day of the year when I got to skip the skirt in favor of sweat pants at school (clue: put on a whistle and, oh look, you're a coach). We got dismissed early, had a carnival for most of the day, and ate ourselves silly. Most of that eating was hamentaschen, which friends give each other on Purim.

The one major design flaw: my mom's hamentaschen were way better than everyone else's. In the weeks before Purim started, I'd watch my mom make enough hamentaschen to feed a small army - but by the end of Purim, we'd have only one small box left, and lots of slightly-less-delicious hamentaschen from friends. Call me biased, but every year, I became something of a hoarder, finding and saving my favorite (poppy!) cookies before they were gone for another year.

1-DSC_0748
1-DSC_0748

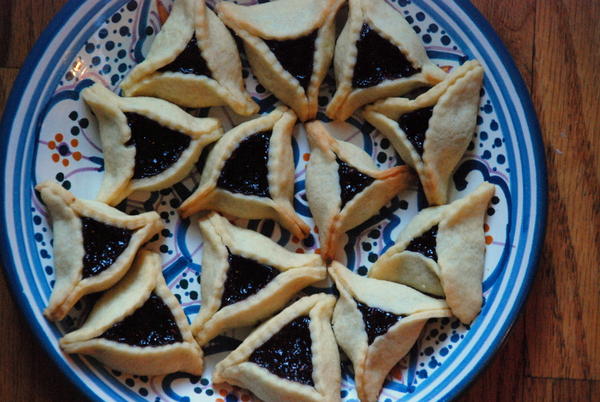
Why not make more? Because "these hamentaschen came together in a flash!" said no one, ever. But the fruits are worth the labor. And while I always make some poppy seed filling for myself and the three other people who enjoy it, this year, I've found a real crowd-pleaser: raspberry chocolate filling.

1-DSC_0675
1-DSC_0675

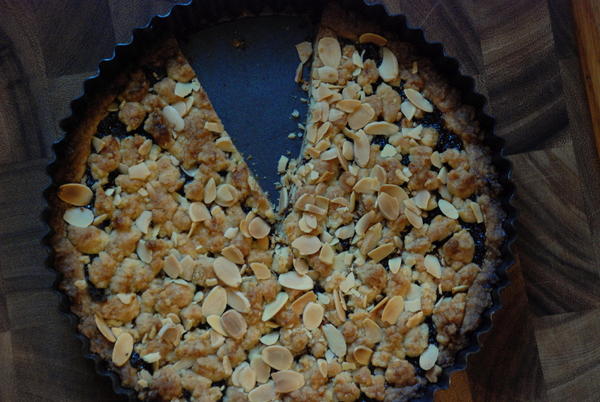
(For those of you who looked at this picture and balked, fret not! Shortcuts after the jump.)

1-DSC_0689
1-DSC_0689
1-DSC_0695
1-DSC_0695

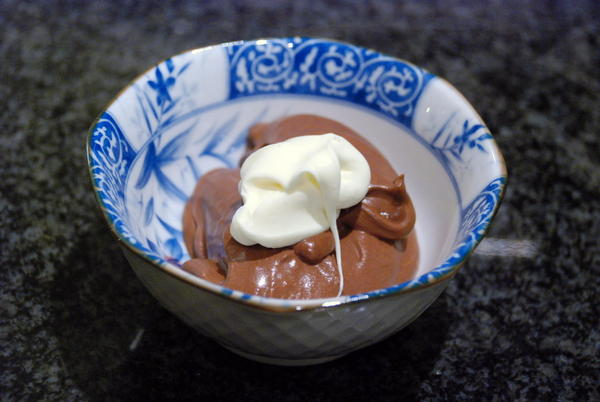
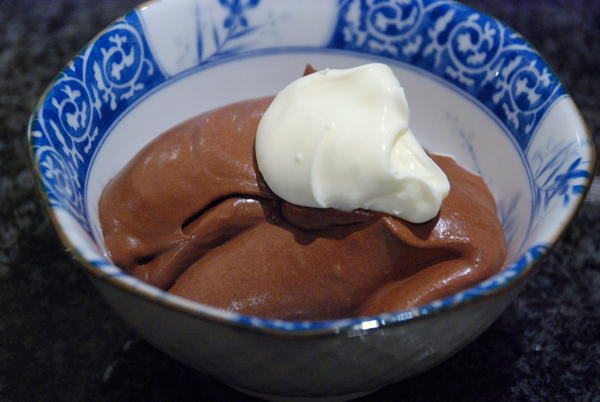
The filling isn't a sauce, but it isn't jam, either. Cathy, who shared a Christine Ferber recipe that I then adapted for this purpose, calls the mixture "chocolate raspberry whatever." It's a fitting name for an indescribable but very good thing. One batch will fill about 50 hamentaschen, but if you find yourself sneaking spoonfuls of the stuff straight, don't say I didn't warn you.

1-DSC_0763
1-DSC_0763

The easiest way to make chocolate raspberry whatever is to mix a jar of raspberry jam with the listed amount chocolate and a squeeze of lemon juice. If you're in the mood for some fussing, you won't regret making the riff on Cathy's recipe that I share below.

1-DSC_0774
1-DSC_0774
1-DSC_0789
1-DSC_0789

I'm planning to take a couple three-pointed cookies in to work this week, if only to elicit the legitimate questions, "whaaa?" and "why not just make sandwich cookies?" Because then it wouldn't be Purim. (Though, this recipe would make a damn good sandwich cookie. If you try that out, give a shout in the comments.)

1-DSC_0810
1-DSC_0810

GIVEAWAY RESULTS! Thanks to everyone who participated in last week's Shabby Apple giveaway. I picked a random number using the random number generator, and the result is below:

random number
random number

Of the 31 comments not including duplicates and mine, lucky #22 won - congratulations Laura! The lovely folks at Shabby Apple will get in touch with you shortly.

Onward: let's make some hamentaschen.

Raspberry Chocolate Hamentaschenadapted from my mom and Mrs. Wheelbarrow Makes 75 cookies

the dough: 10 1/2 tablespoons butter 1/2 cup sugar 1 large egg 1 teaspoon vanilla extract zest of 1 lemon 1 teaspoon baking powder 1/2 teaspoon salt 2 1/4 cups flour, plus another 1/2 cup for rolling out the dough

For the filling: 12 oz. frozen raspberries 1/2 cup sugar juice of half a lemon 3 oz. bittersweet chocolate

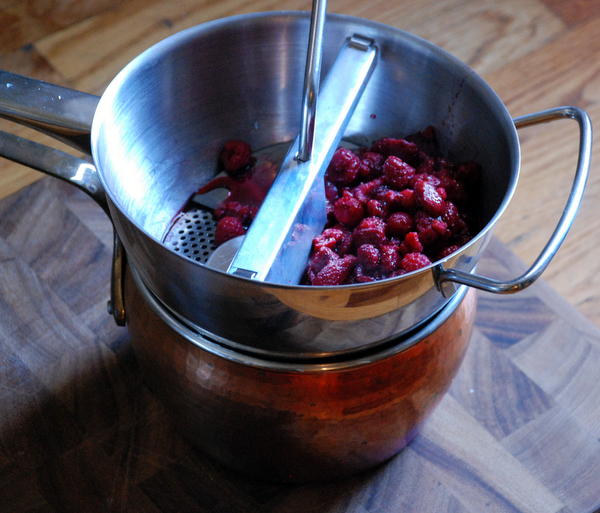
First, make the sauce: Put the raspberries in a microwave-safe bowl, and heat until raspberries have thawed and exuded their liquid, about 2 minutes. don't stir the berries at all. Just let them heat up and let out their liquid. Once raspberries have thawed, strain them and either discard the liquid, or save it for another purpose.

If you want an extra-smooth filling, pass the raspberries through a food mill. This is totally not necessary.

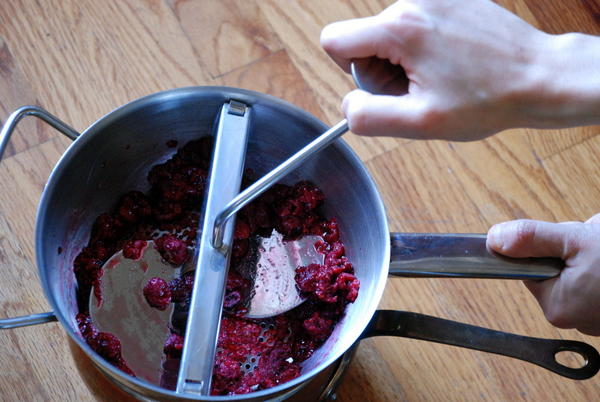
Put the raspberries, sugar, and lemon juice into a medium pot, and heat on medium heat for a few minutes, until the sugar dissolves. Remove from the heat, and, if you didn't pass the raspberries through a food mill earlier, use a fork to mash them up now.

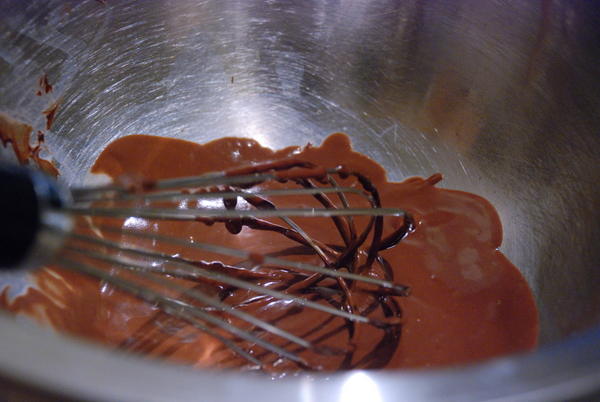
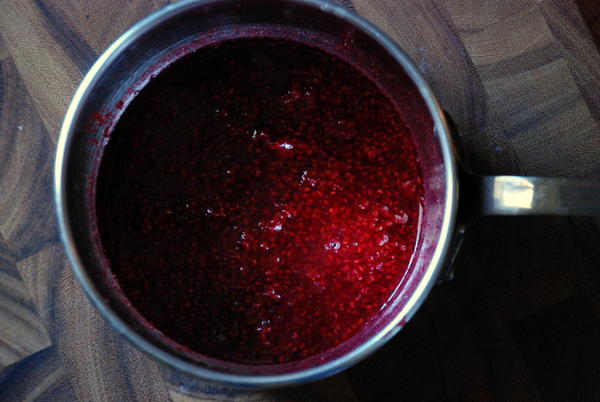
Add in the chocolate, return the pot to the heat, and bring just to a simmer, stirring frequently. Simmer for about 5 minutes, stirring frequently, until sauce has thickened slightly and is uniform in texture. Remove from the heat, transfer to a bowl, and either set over an ice water bath (which will cool the sauce in 10 minutes flat) or transfer to the fridge for 1 hour.

Make the dough: In the bowl of a stand mixer, cream butter and sugar for about 1 minute on medium speed. Add the egg and lemon zest, and mix 1 minute more, scraping down the bowl a couple times in between.

In a separate bowl, combine baking powder, salt, and flour. Add the dry ingredients to the butter mixture, and mix on low speed just to combine.

Gather the dough into plastic wrap or a plastic bag, compress into a solid disk, and refrigerate 30-45 minutes (much longer, and it’ll be tough to work with).

Preheat the oven to 375 degrees and line 2 large baking sheets with parchment paper or silpat.

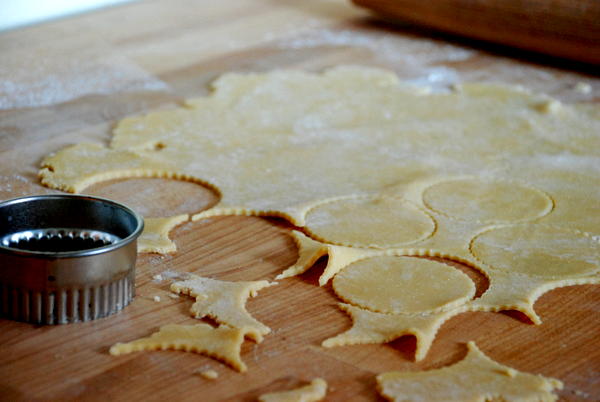
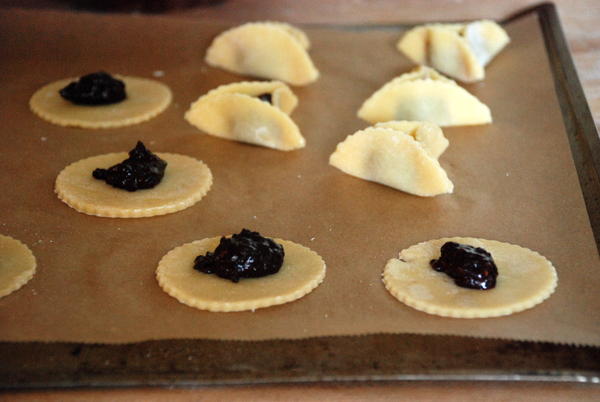
Sprinkle a work surface liberally with flour, and roll out the dough to 1/8-inch thick. Use a 2.5-inch cutter to cut disks of dough, and immediately plop the disks onto the lined baking sheet. When the work surface is floured, the disks will pop right out when you pull up the cutter. If not, don't worry - just use a bench scraper or metal spatula to lift the disks and put them onto the baking sheet. Don't worry about spacing the disks evenly; these hamentaschen don't need much breathing room, and folded hamentaschen take up much less space than the disks.

This dough has very little liquid, so it lends itself well to re-rolling scraps. I generally work with half the dough at a time, and refrigerate the bunched scraps from one round while I bake the next batch. My oven only fits one of my cookie sheets at a time, but if yours fits multiple, feel free to shape and bake these in fewer batches than I did.

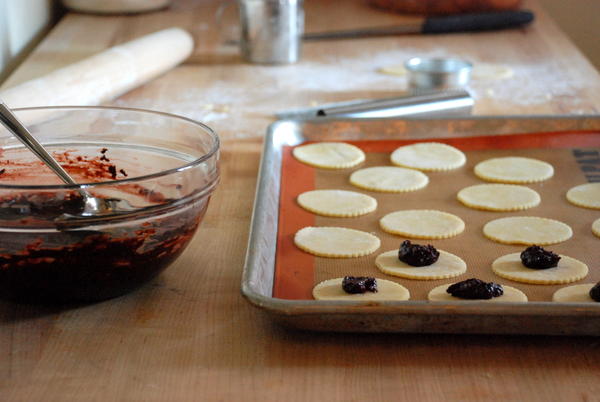
Once you've got a baking sheet full of disks, prepare your workstation: bring over your cooled filling and two small spoons, fill a small bowl with water, and get out a pastry brush.

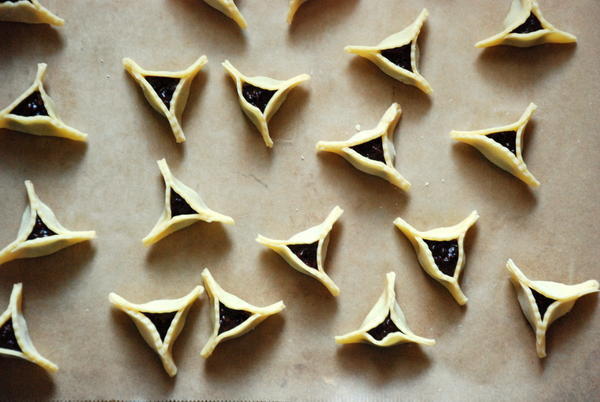
Put a scant teaspoon of filling into the center of each disk. Use the pastry brush to brush water along the edge of each disk, and then use your thumbs and pointers to fold each disk into a triangle shape (see here for pictures).

Bake cookies for 15 minutes, until tops are slightly golden. Remove from the oven and let cool for 10 minutes before transferring. Meanwhile, fill your second sheet with cookies. By the time round 2 is ready to bake, round 1 will be cool enough to transfer, and that baking sheet will be free for batch 3.

Hamentaschen will keep in an airtight container for at least a week, probably more. They also freeze very well.

In cookies and bars, events
14 Comments

Mushroom Tacos with Tomatillo-Chipotle Sauce

February 13, 2013 Rivka
DSC_0596
DSC_0596

I've been traveling a bunch for work, which has left our fridge less packed than usual. It's a bummer to open the fridge and so few bags of produce, but D gets positively gleeful about all the open space. O.C.D Organized people just love empty fridges, am I right?

With less time at home, I'm on the lookout for quick weeknight dinners that make use of whatever precious little food I've got in the fridge. Bonus points for dishes that aren't pasta, which is a fallback too often.

This week, I barely cooked at all. I only had one night in town when I wasn't working late, and our friend Abby was visiting from NY, so we met her at El Chucho, the new Mexican restaurant in Columbia Heights. It's got a dimly lit interior, tall tables and bar stools, and lots of bearded dudes in plaid shirts walking languidly around with plastic baskets in hand. Walk in, and you feel like you've walked into Brooklyn; Abby felt right at home. The food wasn't bad, the ambiance was fun, and margaritas were on tap. Of course. I bet we'll be back soon. Meanwhile, we're copying their dishes at home.

El Chucho had tacos de calabacitas on order, made with breaded fried squash. They were so addictive, we didn't miss the meat. When the weekend rolled around, I was hungry for more Mexican food but didn't have any squash on hand (it tends to be limp and sad in wintertime). I did have a bag of mushrooms that needed using, and a handful of tomatillos left over from the previous week's dinner party. I braced myself for a bit of fussing, figuring it was worth it - a craving is a craving, yes? But much to my surprise, dinner came together quite quickly. Corn tacos were heated. The mushrooms were tossed with a quick sauce of tomatillos and canned chipotles. Everything cooked through while I mashed up an avocado's worth of guacamole and opened a jar of the salsa I made this summer. We didn't have any queso at home, so I topped the tacos with a pinch of feta cheese, which in retrospect wasn't at all necessary. Done and done: dinner on the table in 20 minutes.

DSC_0576
DSC_0576

What I like most about these mushrooms is their versatility. I can see stuffing them into burritos or enchiladas, folding them into short vermicelli for a Mexican riff on fideos, or even adding some to a handful of melty cheese, piling the mixture into a flour tortilla, and making a mean quesadilla. They can go on pretty much anything. Come to think of it, they're the sort of thing I'd make a big bowl of, then tuck in the fridge for a busy day's dinner. Cooked mushrooms are smaller than raw ones; everyone's happy.

Mushroom Tacos with Chipotle Serves 4

For the mushrooms: 2 tablespoon olive oil, divided 2 cloves garlic, smashed and chopped 1/2 lb. tomatillos, husked, rinsed, dried, and roughly chopped 1 canned chipotle, chopped, plus 1 tablespoon of the canning sauce (start with half a chipotle if you're sensitive to heat) juice of half a lime 1 lb. cremini mushrooms, wiped clean and sliced salt

For serving: a big pile of small corn tacos guacamole and salsa (purchased is fine) queso fresco or feta cheese, optional

Put a large frying pan over medium heat and add 1 tablespoon olive oil. When oil shimmers, add garlic. Stir around to distribute, and cook for 1 minute. Then add tomatillos, stir into the garlic, and cook until they break down slightly, 2 minutes. Add chopped chipotle, stir through to incorporate, and cook until the mixture softens and becomes mostly smooth, about 2-4 more minutes. Spoon the sauce into a bowl, taste, and add salt or pepper as needed.

Give the pan a rinse and wipe it dry, then return it to medium-high heat and add the other tablespoon of olive oil. When oil shimmers, add mushrooms. Toss to distribute evenly, and then let them sit there for a few minutes, until the mushrooms on the bottom of the pan develop some color. Every couple of minutes, give the pan a shake to move mushrooms from top to bottom and vice versa. After 5 minutes or so, the mushrooms will have emitted enough water to shrink slightly, and the pan will be less crowded. When this happens, spoon in the tomatillo-chipotle sauce, stir it around to coat the mushrooms, and cook 1 or 2 more minutes, until mushrooms are coated and browned. Squeeze the half a lime into the pan, stir to incorporate, and turn off the heat. Scrape the mushrooms into the bowl that held the tomatillo-chipotle sauce. Wipe the pan out a bit, and return it to the heat.

Heat corn tortillas one at a time by leaving them in the hot pan just until warmed through (or, if you're crazy as I am, until the bottom of the tortilla is a bit brown and crispy), then stack them on a plate as they finish warming. When you've warmed enough tortillas for either one or two per person (depending on preference: I like two per taco, D prefers one), put the tortillas on plates, spoon some of the mushroom mixture onto the tortillas, and top with guacamole, salsa, and/or cheese. Serve immediately.

In gluten-free, main dishes, vegetarian, easy, healthy
1 Comment

Magic Chocolate Mousse, Some Other Ideas, and a Giveaway

February 11, 2013 Rivka
1-DSC_0592
1-DSC_0592

D and I aren't big on Valentine's Day. Forced romance and overpriced, heart-shaped dinners aren't our thing. However, I'll take pretty much any excuse to indulge in chocolate, so that, I'm on board with.

It's also my 30th birthday, which means I can do whatever I want. Right? Chocolate for all!

1-DSC_0581
1-DSC_0581

We celebrated with a couple close friends at a lovely, lovely dinner on Saturday night. This coming weekend, we're taking a ladies' trip to Spa World to celebrate three birthdays at once. But tonight, after a low-key dinner with the lady, I'll be spooning out a couple small bowls of this magic chocolate mousse, which requires only 2 ingredients (salt is optional) and tastes as decadent and as thoroughly chocolate as a good chocolate mousse should. 30 years of living and 2-plus years of marriage later, I've got more than a few gray hairs, and also a wee bit of combativeness about the wonder of chocolate. So I'm going to indulge; you only live once.

1-DSC_0587
1-DSC_0587

For the vegan and non-dairy inclined, this mousse can be made with chocolate and water. I prefer milk in my mouse, so I've used that here. Your choice. Either way, the process is dead simple: heat, then whip over ice water. That's really it.

And if you're feeling mighty adventurous, whip up a batch of caramelized white chocolate (which, incidentally, just got written up as a genius recipe by Kristen Miglore over at Food 52; it really is genius) and use that instead.

1-DSC_0595
1-DSC_0595

The recipe is below, and if you're curious to see a play-by-play, watch the bubbly and adorable Melissa Clark demonstrate the technique here.

I've got a couple other half-baked ideas percolating that don't yet merit a full post, but as a wise old woman of 30, I've decided to post them anyway. Food for thought.

1-DSC_0613
1-DSC_0613
  • Bake or Break has been in my Google Reader for years, but recently, I've gotten hooked on it all over again, and spent several afternoons digging through her archives. One recent recipe that I immediately flagged was her Italian Jam Crostada, a simple simple dessert made of shortbread, jam, and almonds. Last night, I finally got around to making it. I had about a tablespoon of orange marmalade left over from the croissant I'd had at Patika in Austin (sidebar: when pastries come with jam and you don't finish it, save it; you never know when it'll come in handy), so I folded that into the shortbread dough, and then used fig jam mixed with some lemon juice as my filling. The result was fantastic, and I'd urge you to make this with whatever jam you have lying around.
  • Tartine Bakery makes the best croissant I have ever eaten. The almond croissant I had in SF was so good that I got home, went right onto Amazon, and ordered their latest cookbook, Tartine Bread. I've got bread books from Peter Reinhart and Jim Lahey; I didn't exactly need another. I bought this book for the croissant recipe alone. Here's the irony: I still haven't made the croissants. What I have done is totally change the way I feed and use my sourdough starter. Tartine's method calls for less starter overall (which means less flour used on feeding each week) and a smaller portion of seed starter to make a loaf of bread. The smaller quantities suit my erstwhile approach to bread baking, and the new ratio produces a younger, milkier, less acidic-tasting loaf. I'm thrilled. And I haven't even made the croissants yet! More fun awaits.
  • Last but not least, I've become obsessed with chia pudding. Chia seeds look like a cross between poppy and flax seeds, they're high in fiber and omega-3, and best of all, they plump up in liquid. Add a few tablespoons to a cup of milk, and in about 10 minutes, you'll have something that resembles tapioca pudding. I've added them to my breakfast rotation, mixing a few tablespoons with a cup of either milk or yogurt, a bit of honey, and some chopped fruit. I pour the whole thing into a jar, and by the time I get to work, I've got pudding. It's great. You can get chia seeds at health food stores or online.

And hey, happy un-birthday to you!  The kind folks at Shabby Apple have created a giveaway just for NDP readers: they're offering 10% off of any Shabby Apple apparel for all readers using the coupon code notderbypie10off. Even better, one lucky reader will win a $100 giftcard to Shabby Apple. Check out all these adorable aprons! Personal favorite: blackberry pie.

Entering is really easy. All you have to do is "like" Not Derby Pie's facebook page, "like" Shabby Apple's page, and leave a comment below. I'll pick a winner at random next Monday, February 18th. Good luck!

Hervé This' Chocolate Mousse Serves 4

One note about using milk: if you use skim, you can disregard this. Skim has the same fat content as water. But if you use milk with some fat in it, you may need to add a few more drops than you would otherwise. a scale is very helpful in executing this recipe, but if you don't have one, I would start with what looks like a bit less than 3/4 of a cup, and only add if necessary. The melted liquid should have roughly the thickness and texture of whipping cream (go figure). If it thickens too quickly when you put it over ice, just remelt, add a few more teaspoons of liquid, and march on.

8 oz. high-quality chocolate 6 oz. water or milk (roughly 3/4 cup - see headnote) ice cubes whipped cream for topping, optional

Pour water into a small saucepan, add chocolate, and stir over medium heat until chocolate has melted and you have a homogenous sauce.

Put the saucepan into a bowl partly filled with ice cubes and a half-cup or so of water (or pour into another bowl over the ice -- it will chill faster), then whisk the chocolate sauce by hand (or, if you must, with an electric mixer) until a mousse forms.

No, seriously. That will happen.

Spoon immediately into ramekins or serving bowls, top with whipped cream if using, and either serve immediately, or let set in the fridge before serving. If you're feeling crazy, sprinkle a bit of flaky salt on top. Grand.

I made this once a couple years ago and it failed, but I've since made it three times (all this week) with success. Kristen says that three things can go wrong: if the mixture doesn't set, it probably doesn't have enough chocolate. Remelt, add more chocolate, and whisk again. The opposite can happen, too - a very stiff mouse would benefit from a bit more water. Remelt, add water, repeat. Lastly, if your mixture is too grainy, you overwhipped it. No problem: just remelt and whisk up again - no need to add anything.

Happy baking!

In dessert, events, easy
35 Comments

Yam Som-O: Thai Pomelo Salad

February 5, 2013 Rivka
DSC_0933-001
DSC_0933-001

I know, I know, I still haven't posted about our trip to Thailand. Sorry! I did just go through my pictures this weekend, and gosh - we really had a fantastic time. The food was amazing and loads of fun to relive. Lots of obsessing about everything Thai is coming your way - I can't wait to share it all with you.

The one thing you've already heard about (and heard about, and heard about) from our Thailand adventure is yam som-o, pomelo salad. Ever since I had it that first time, at an absurdly named but very tasty restaurant in Bangkok called The Foodie, I've wanted to recreate it at home. When yam som-o is done right, it's the perfect balance of spicy, sour, salty, sweet, crunchy, and juicy. It's downright addictive, and after falling hard for it that first day in Bangkok, I sought it out everywhere we went. The version at The Foodie was heavy on the crunch: I think the garlic and shallot were very, very lightly battered before they were fried. There were also a lot of fried herbs in it, which are hard to do in the US since kaffir lime leaves don't grow on trees down the street. And their dressing was heavy on the tamarind and heavy on the palm sugar, which feels a bit like cheating (sweet salad!) but made stuff even more impossible to stop eating than it would have been.

The few street establishments where I had yam som-o made a much different rendition, with more (and fresher) pomelo, less sugar, and more herbs, none of them fried. The dressing at these street spots had tamarind and some palm sugar, but it also had coconut milk and loads of lime juice, which made the salad taste more like salad. Pomelo wasn't in season when we were there; I can only imagine how much more of it I'd have eaten (and how much better?) if it were. So when I returned to DC to find that my local grocery had just gotten pomelo in, I pounced, splurged on three, and started testing.

DSC_0841-001
DSC_0841-001

If you've never worked with pomelo before, you're in for a treat. Pomelo is similar to grapefruit, but much firmer and more fragrant. It's got a super-thick rind and pith, so you'll be surprised to find that, despite its large size, the fruit inside resembles a grapefruit. For yam som-o, you'll be removing the membrane of each section, leaving naked segments of pomelo that can be broken into whatever size you like. This takes a bit of patience. Turn on some good music, get into a zone, and you'll be done in no time.

I'm told traditional yam som-o is made with large pieces of fruit, so I broke each segment into about three pieces, but if you want more of a shredded salad texture, you can do that easily.

The balance of both the salad ingredients and the dressing is key, and it changes from salad to salad. I don't know how sweet your pomelo is, or how sour your tamarind. To make this salad taste right, you'll need to really get in there, tasting and adjusting as you go.

DSC_0861-001
DSC_0861-001

You'll also come to find your preferred balance of fruit to herbs to nuts to crunchies. I've included my proportions below, but do feel at liberty to increase or decrease portions if, say, you really love toasted coconut or don't much care for cilantro. The balance is important, but it changes from salad to salad and from person to person. Go find yours.

DSC_0924-001
DSC_0924-001

Yam Som-O: Thai Pomelo SaladCobbled together from multiple sources and lots of trial and error Serves 2

For the salad: 1 pomelo, peeled, individual segments removed from their membranes and broken into a few pieces - about 3 cups of fruit total 6 tablespoons toasted coconut (toasted in a 350-degree oven for 8 minutes, until golden brown) 1/4 cup toasted peanuts, roughly chopped 1/4 cup mint, roughly chopped 1/3 cup cilantro, roughly chopped 3 shallots, peeled and thinly sliced (about 1/4 cup total) 3 cloves garlic, peeled and thinly sliced (about 2 tablespoons) 1/3 cup peanut oil or other oil with high smoking point (grapeseed, sunflower, and safflower all work)

For the dressing (you'll have extra):

4 tablespoons coconut milk 2 tablespoons fish sauce (can replace with 1 1/2 tablespoons soy sauce, but start slow! some brands of soy sauce are very salty and you don't want to overdo it) 2 tablespoons lime juice 3 tablespoons tamarind puree 1 tablespoon palm sugar (or substitute light brown sugar) 1 tablespoon roasted chile paste (nam prik pao if you can find it, any chile paste if you can't; make sure you add it slowly if you haven't used it before)

Heat the oil in a small saucepan over medium heat and set a paper towel onto a large plate. You want the oil hot, but not too hot. If it shimmers, turn down the heat a bit. Add shallots, and cook until light to medium brown, about 8 minutes. If shallots sizzle when you drop them into the pan, turn down the heat immediately to prevent shallots from burning. Toward the end of the cooking, watch carefully: shallots go from lightly toasted to burnt very quickly.

Use a slotted spoon to remove shallots from the oil and transfer them to the towel-lined plate. Repeat with garlic slices, which cook even more quickly. Set aside. (Any shallots and garlic that you don't use in this salad will keep in a sealed plastic container for about a week.)

Combine the dressing ingredients in a jar and shake vigorously until sugar dissolves. Taste and adjust, adding more lime, sugar, tamarind, soy/fish sauce, or chile as needed. Set aside.

Combine the salad ingredients in a large bowl, or apportion them onto individual plates. Top with some of the fried shallots and garlic. Drizzle dressing overtop, starting with about half of the dressing and adding more as needed.

Serve immediately.

In salad
4 Comments
← Newer Posts Older Posts →

Subscribe by email:

  • books (1)
  • crisps and crumbles (1)
  • frozen (1)
  • toys (2)
  • gifts (3)
  • egg whites (5)
  • fried (5)
  • how to use--- (6)
  • drinks (10)
  • menus (11)
  • travel (11)
  • fish (12)
  • kosher for passover (14)
  • thanksgiving (14)
  • vegan (20)
  • snacks (21)
  • techniques (21)
  • soup (26)
  • bread (28)
  • pies and tarts (28)
  • cake (33)
  • events (34)
  • condiments (36)
  • various and sundry (39)
  • uncategorized (42)
  • cookies and bars (46)
  • weekday lunch (47)
  • appetizers (48)
  • salad (51)
  • gluten-free (56)
  • comfort food (61)
  • breakfast and brunch (77)
  • sides (81)
  • dessert (90)
  • main dishes (100)
  • healthy (139)
  • easy (155)
  • vegetarian (180)

| LATEST |

Featured
Blue Chair Fruit's Black Raspberry Jam
Thai Grapefruit Salad
Mango Sticky Rice
Winter 2016: Odds and Ends
Povitica: The Best Babka Ever
Persimmon Walnut Bread
Sprout Chaat Salad + New Site!
Maple Walnut Squares
How to Give Thanks
Croissants (really, I made croissants) + other croissant-ish things

| hEALTHY |

Featured
Sprout Chaat Salad + New Site!
Fennel frond pesto + what to do with those pesky stalks
Asparagus Toasts with Pistachios and Mint
Eggplant-Walnut Pâté + Passover Ideas
1-DSC_0861-600x401.jpg
Lentils and Rice with Tamarind Sauce and Dukkah
Big Kale Salad with Pomegranate and Feta
Punchy Crunchy Ginger Salad

| BreakfAST |

Featured
Povitica: The Best Babka Ever
Croissants (really, I made croissants) + other croissant-ish things
Mushroom and Kale Breakfast Strata
Barley Porridge with Orange and Black Sesame
Ramps 'n' Eggs Biscuit Sandwiches
Asparagus Toasts with Pistachios and Mint
Apple-Cheddar Scones with Sage
Menemen - Turkish Eggs with Tomatoes and Peppers
You must select a collection to display.

© 2016 Rivka Friedman. All Rights Reserved.