We've been in our new place for over 2 months; it really is time I share at least one picture, eh?
There. That feels much better.
As you can see, our new home is....well, it's magical for us. We wake up every morning totally tickled at how fortunate we've been to find, acquire, and inhabit such a warm, open, beautiful space. The kitchen is totally open, allowing me to prepare food while hanging out with our company. The couch is big and brown and leather and cozy - just what D wanted. The lounging chair is structured and linen-colored and funky and whimsical - just what I wanted. Our ketubah is up, our bar is stocked, and the fridge is embarrassingly full. We're lucky ladies, the two of us.
As beautiful as our new kitchen is, cooking for the first time in a new home is challenging. At the very least, the appliances are unfamiliar, your cutting board is in a new spot, and everything feels somewhat off-kilter. At most, you're simply overcome by the spotlessness of it all, and you can't imagine spilling on the new counter anymore than you're looking forward to the first dent in your new car. It's all a little touch-and-go.
Having lived in 4 different apartments in two countries over the past 6 years, I've developed a bit of a routine for breaking in a new kitchen. You won't find me butchering whole ducks during week 1 in a new place; instead, I start with the basics. A simple pasta dinner, with good tomato sauce. Pure, undoctored, totally unrivaled chocolate chip cookies. And last but not least, a good loaf of bread. Why bread? Think about it: get out that bread recipe, and you'll find yourself measuring, mixing, kneading, preheating, baking, cutting, and eating - all essential firsts for a new kitchen. Back in November, I made a whole lot of no-knead bread as a sort of personal housewarming for our new apartment. Then, when the workbench was sufficiently familiar with my somewhat erratic movements and my fridge had more than a few shmears on the door handle, I got around to making these no-knead dinner rolls.
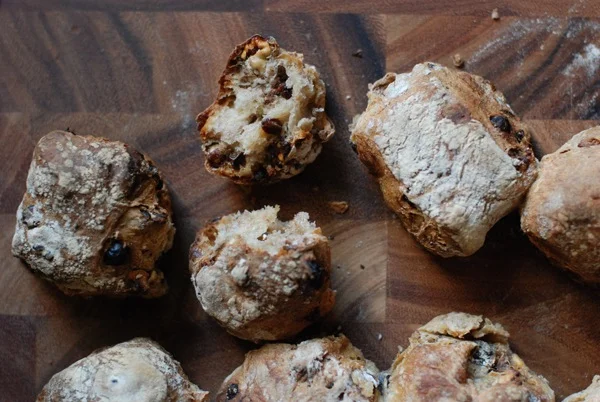
They sell rolls like these at Whole Foods, and I've been planning to duplicate them literally for years. We don't eat enough bread to make it worth baking two loaves in one week, but we had a couple slices of last week's plain loaf leftover, so I figured now was my chance to branch out. I'm glad I did - not least because I froze the extras, and now we have snacks tucked away in the freezer for another time.
For these rolls, I used some fresh rye flour, and I just love its distinctive flavor. If you don't have (or don't like) rye flour, feel free to swap in whole wheat or white whole wheat. The rest of the recipe is pretty straightforward. You can swap out walnuts for pecans, and use currants or cherries in place of raisins. Whichever way you make them, it doesn't get much better than crusty, raisin-studded bread on the last morning of a holiday weekend.
Raisin Walnut Rollsadapted from Jim Lahey's No-Knead Bread recipe
2 1/4 cups (300 grams) bread flour 3/4 cup (100 grams) rye flour 1 1/2 teaspoons table salt 1/2 teaspoon instant yeast 1/4 teaspoon cinnamon pinch freshly ground black pepper 1/2 cup raisins 1/2 cup chopped walnuts 1 1/2 cups (350 grams) cool water
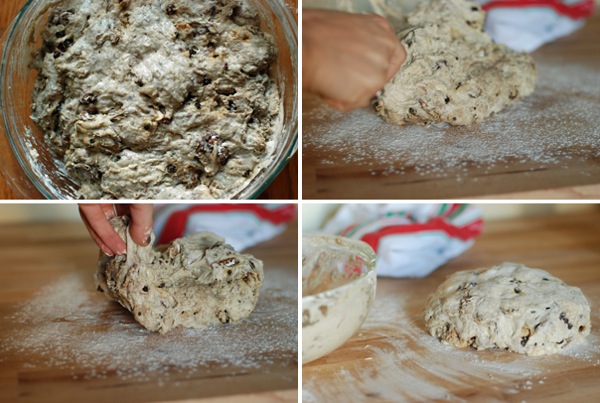
Stir together flours, yeast, salt, cinnamon, black pepper, walnuts, and raisins. Add water and use a fork to stir the dough together just until all dry ingredients are moistened; dough should look shaggy. Cover bowl with a dish towel or plastic wrap, and set aside to rise in the area of the kitchen that's closest to 70 degrees (but don't go crazy with a thermometer, people) for 12-18 hours, until bubbles dot the top of the dough.
Dust a workspace generously with flour, and use a spoon or spatula to turn dough out onto the workspace in one piece. Use your (flour-dusted) hands or a bench scraper to nudge the edges of the dough into the center, and do this on all four sides, then flip dough tuck the stray edges under until dough is round. Dust a tea towel with flour or bran, and set dough seam-side down onto towel. Loosely cover dough with towel sides, and set aside to rise for 1-2 hours, until dough has nearly doubled in size. Test dough's readiness by poking a finger in the side of the dough; it should hold the shape of your finger. This indicates that gluten has fully developed.
Preheat the oven to 450. For a baking surface, either stick a pizza stone in the oven to preheat, or simply oil a baking pan.
Use a bench scraper or large knife to slice dough into 4 equal strips, and cut each strip into 3 pieces. (Lahey says dough should make 20 80-gram rolls, but mine made 12 70-gram rolls, and that's the basis for my instructions - go figure. Aim for between 70-80 grams per roll, and you should be just fine.) If using a pizza stone, you'll want to load the rolls onto a heavily-floured peel, the better to slide the rolls right onto the pizza stone without having to remove it from the oven. If using a baking pan, even easier! Just plop the rolls onto the pan in neat rows. Don't worry about leaving lots of space between rolls; if they kiss in the oven, you can easily separate them once they're out.
Bake for 40 minutes on a baking pan, 35 on a stone, until browned on top. Eat slathered with good butter and jam.


